 by
by Crochet isn’t just about cozy blankets or cute hats — it’s also an incredible way to create fashionable and practical accessories, like a handmade crochet backpack! Whether you’re heading out for a casual day, a trip, or you want to make a thoughtful handmade gift, a crochet backpack is a versatile project that combines style, functionality, and creativity.
In this detailed guide, we’ll walk through how to crochet a backpack from start to finish — complete with materials, stitches, pattern instructions, and pro tips to help you craft a stunning and durable piece you’ll love to wear.
Let’s get started on your new favorite accessory! 🌸🧶
💖 Why You’ll Love This Project
- ✨ Trendy & functional: A handmade crochet backpack adds a unique touch to any outfit.
- 🎁 Perfect gift idea: Great for birthdays, holidays, or handmade surprises.
- 🧶 Customizable: Choose your favorite colors, yarn type, and size.
- 🪄 Beginner-friendly: You’ll only use basic stitches and simple shaping.
- 🌈 Durable & eco-friendly: Reusable, washable, and sustainable!
🧵 Materials You’ll Need
Before you begin, gather the following materials:
Yarn
- Medium-weight cotton or polyester cord yarn (4 or 5 ply)
- Cotton is sturdy and gives a neat, structured finish.
- Choose your favorite color — solid, gradient, or two-tone combinations work beautifully.
Hook
- 4 mm to 5 mm crochet hook (depending on yarn thickness).
Other Supplies
- ✂️ Scissors
- 🪡 Tapestry needle (for weaving in ends)
- 🧲 Optional: Magnetic clasp or button for closure
- 🧵 Optional: Lining fabric (if you want extra durability)
- 🎒 Two adjustable straps or crocheted cord straps
🌸 Crochet Stitches You’ll Use
This pattern uses only basic crochet stitches — easy to learn and remember:
- ch – Chain
- sl st – Slip Stitch
- sc – Single Crochet
- dc – Double Crochet
- inc – Increase (2 stitches in one stitch)
💡 If you’re new to crochet, practice these on a small swatch first. They form the foundation of most crochet projects!
🎒 Step-by-Step Crochet Backpack Tutorial
We’ll make this backpack in several parts:
- The base
- The body
- The drawstring top
- The straps and closure
🪄 Step 1: Crochet the Backpack Base
- Start with a Magic Ring (or chain 4 and join into a circle).
- Round 1: Chain 2 (counts as first dc), then make 11 dc into the ring. Join with a sl st (12 stitches).
- Round 2: Chain 2, 2 dc in each stitch around. Join (24 stitches).
- Round 3: Chain 2, (1 dc in next, 2 dc in next) repeat around (36 stitches).
- Round 4: (2 dc in next, 1 dc in next 2) repeat around (48 stitches).
Continue increasing evenly in each round until the base reaches your desired size — typically 8–10 inches (20–25 cm) in diameter for a medium backpack.
💡 Tip: If you want a flat and sturdy base, make sure your circle lies flat. If it starts to curl, try spacing out increases more.
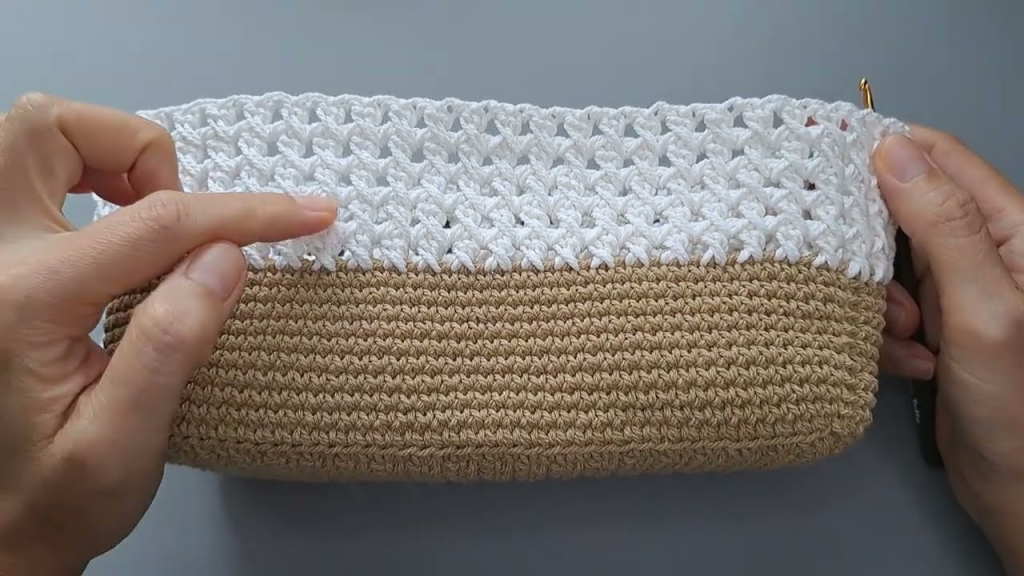
🧶 Step 2: Build the Sides (Body)
- Once your base is complete, stop increasing.
- Work 1 dc in each stitch around for every round.
- Continue crocheting in rounds until the bag measures about 10–12 inches (25–30 cm) tall.
This forms the cylindrical shape of your backpack.
💡 Optional: Alternate between dc and sc rows for texture, or use two colors for stripes or patterns.
🎨 Step 3: Add Texture (Optional Pattern)
Want your backpack to have a unique texture? Try this simple pattern repeat:
Pattern (4-row repeat):
- Row 1: 1 dc in each stitch around.
- Row 2: 1 fpdc (front post double crochet), 1 bpdc (back post double crochet) repeat around for a ribbed texture.
- Row 3: 1 sc in each stitch.
- Row 4: 1 dc in each stitch.
Repeat as desired for a beautiful, woven-like texture!
🧺 Step 4: Shape the Drawstring Top
- Once your body is complete, it’s time to create the holes for the drawstring.
- Round 1:Chain 1, (1 sc in next 2 stitches, chain 1, skip 1 stitch) — repeat this pattern all around.
- This creates small gaps where your drawstring will thread through.
- Round 2: Work 1 sc in each stitch (and each chain space) to strengthen the row.
Now your bag is ready for the drawstring closure. 🎀
🧶 Step 5: Make the Drawstring Cord
There are several ways to make your drawstring cord — choose whichever you prefer:
- Crocheted Chain Cord:
- Chain about 100–120 stitches, depending on your bag’s size.
- Slip stitch in each chain back across for a neat, thick cord.
- I-Cord (optional for sturdiness):
- Chain 3, insert hook in 2nd chain, yarn over, pull through one loop, repeat across and roll the yarn into a tight cord shape.
Thread your cord through the gaps made in the drawstring row.
Add tassels, beads, or wooden ends for decoration!
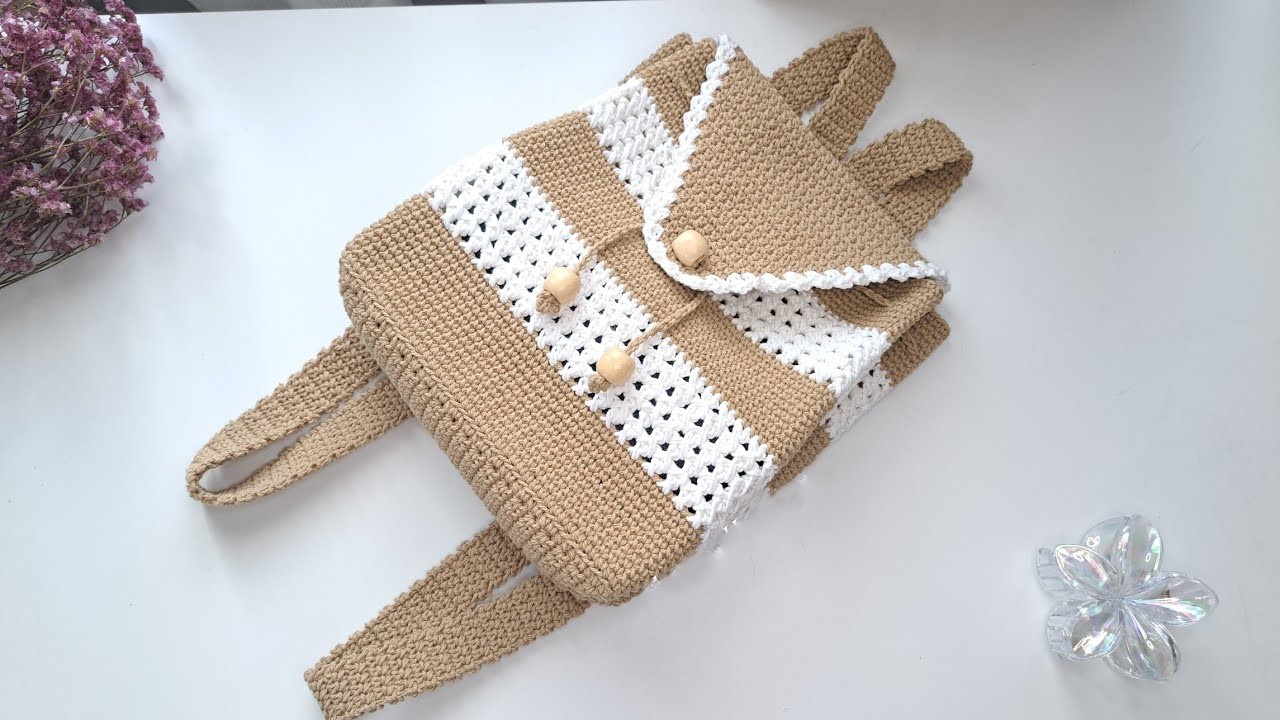
🌿 Step 6: Crochet the Backpack Flap
- Attach yarn to the back center of the top edge.
- Chain 2 and make 1 dc in each stitch across for the flap width (about half to three-quarters of the bag’s width).
- Turn, and continue working dc rows until the flap measures 4–5 inches (10–13 cm) long.
- You can taper the flap by decreasing a few stitches at each side near the end to give it a rounded or triangular shape.
To close the backpack, sew on a button or attach a magnetic clasp to the flap.
🎒 Step 7: Make & Attach the Straps
You can either crochet the straps or use ready-made adjustable straps.
Crocheted Straps Pattern:
- Chain 70–90 stitches (depending on desired length).
- Row 1: dc in each stitch across.
- Row 2: sc in each stitch for thickness.
- Fasten off and make two identical straps.
Attachment:
- Sew or crochet each strap securely at the bottom back corners.
- Attach the top ends just below the flap — ensure both straps are even.
💡 For a sturdier backpack, double up the straps or line them with fabric.
🪡 Step 8: (Optional) Add Lining Inside
For extra strength and to prevent stretching:
- Cut a piece of lining fabric slightly smaller than your bag.
- Sew the fabric edges and hand-stitch it inside the backpack.
- You can also add small inner pockets for keys or a phone.
✨ Finishing Touches
- Weave in all yarn ends neatly with a tapestry needle.
- Add decorative elements such as:
- Crochet flowers 🌸
- Pom-poms 🎀
- Wooden buttons 🪵
- Embroidered initials 💕
Spray lightly with fabric stiffener if you want a firmer shape.
🎁 Crochet Backpack Pattern Summary
| Part | Instructions |
|---|---|
| Base | Crochet in rounds, increasing evenly (8–10″ diameter) |
| Body | dc in each stitch, 10–12″ tall |
| Drawstring Row | (2 sc, ch 1, skip 1) repeat around |
| Drawstring Cord | Chain 100+, slip stitch back |
| Flap | dc rows, 4–5″ long |
| Straps | Chain 80, dc + sc rows |
| Closure | Button or magnetic clasp |
| Skill Level | Beginner to Intermediate |
| Project Time | 4–6 hours (depending on size) |
🌸 Pro Tips for Success
- Use strong yarn — cotton or nylon holds its shape best.
- Tight tension = sturdier bag. Avoid loose stitches.
- Check symmetry: Make sure both straps and the flap align perfectly.
- Customize: Play with stripes, color blocks, or granny squares for unique designs.
- Add safety: Sew lining and reinforce strap joins if you plan to carry heavy items.
🎀 Creative Design Variations
Once you’ve mastered the basic pattern, try these ideas:
- 🌈 Color Block Backpack: Use 3–4 complementary colors for a bold look.
- 🐚 Boho Fringe Style: Add fringe or tassels to the flap edge.
- 🌼 Granny Square Backpack: Join mini squares for a retro aesthetic.
- ✨ Sparkly Thread: Use metallic yarn for a glamorous twist.
- 🌿 Mini Backpack: Use fewer stitches and a smaller hook for a cute accessory version!
💕 Final Thoughts
Crocheting your own backpack is more than just making a bag — it’s a labor of love and creativity that you can carry everywhere! 🌸🧶
With this easy tutorial, even beginners can craft a sturdy, stylish, and customizable crochet backpack that’s perfect for daily use, travel, or as a heartfelt handmade gift.
So grab your yarn, choose your favorite colors, and start crocheting your own little piece of wearable art today! 🎒✨💖