by
by Absolutely! Here’s a detailed guide on how to crochet the Tulip Stitch and how to use it to make a beautiful crochet bag. The Tulip Stitch is known for its elegant, textured floral look, making it a great choice for stylish handbags, totes, or even clutches.
🧵 Materials Needed:
- Yarn: Worsted weight yarn (Category 4) or cotton yarn for a sturdy finish
- Hook: 4.0 mm or 4.5 mm crochet hook (check yarn label)
- Bag Accessories (optional): Lining fabric, zipper, buttons, or wooden handles
- Scissors
- Tapestry needle
- Stitch markers (optional)
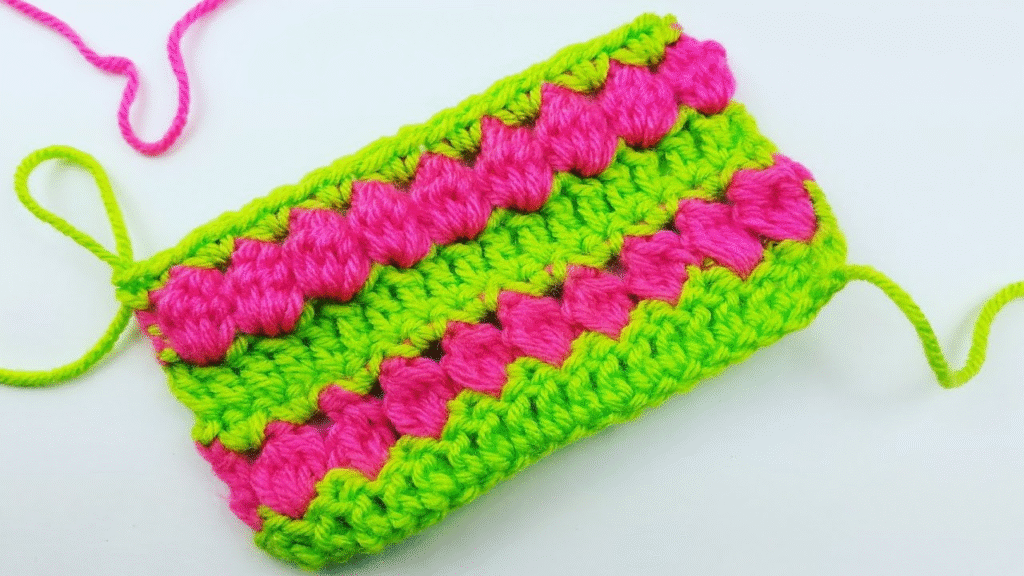
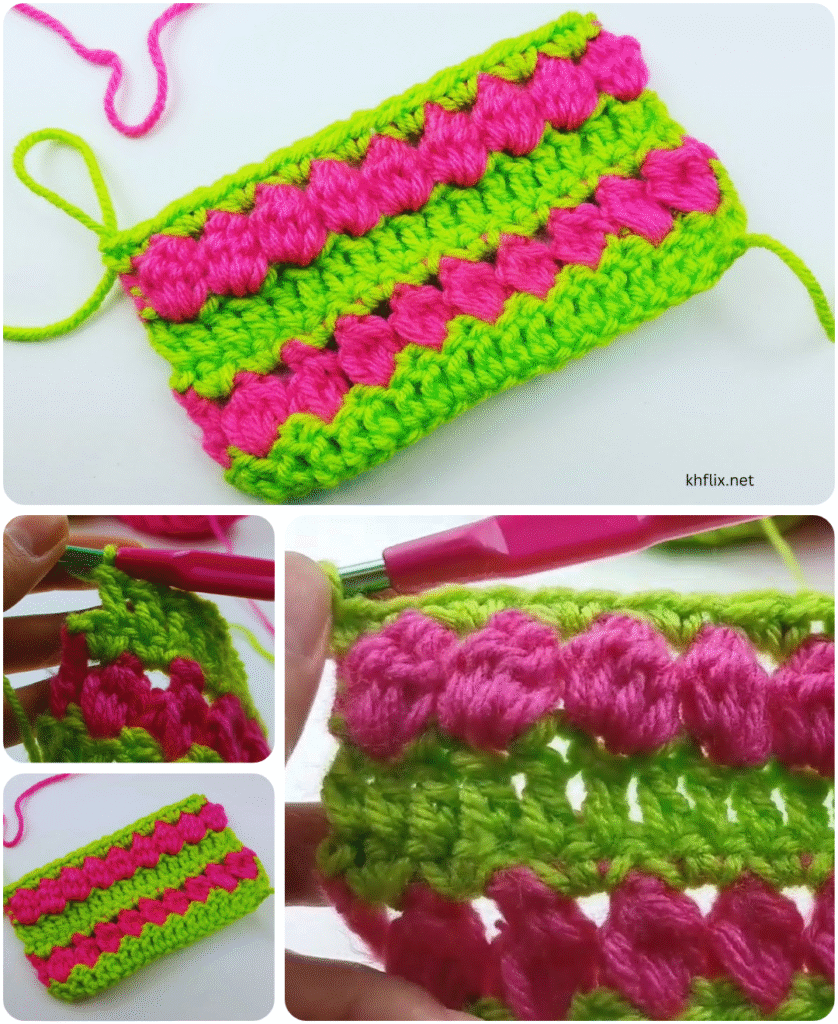
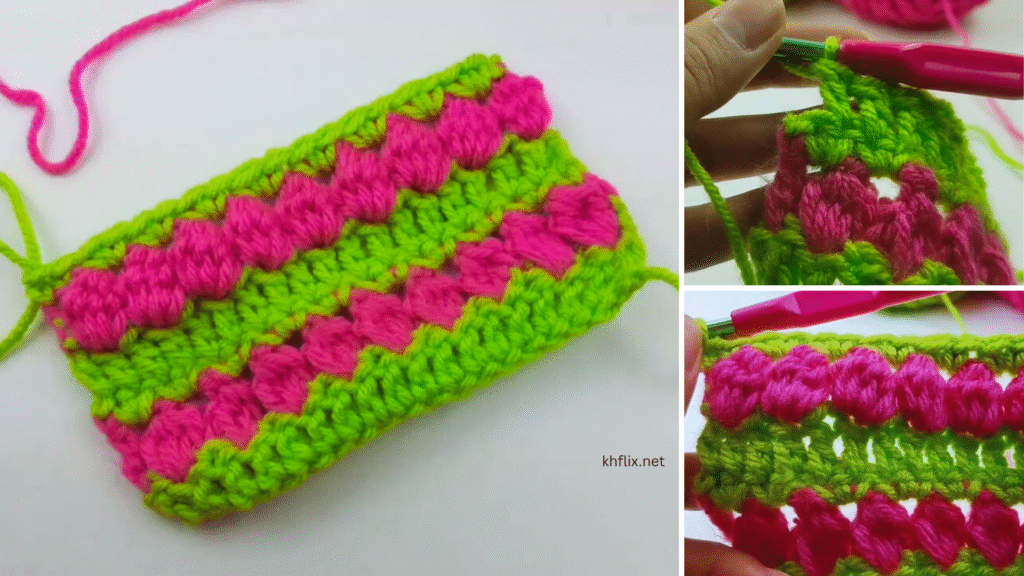
🌷 What is the Tulip Stitch?
The Tulip Stitch is a beautiful combination of double crochet (dc), chain stitches, and single crochet (sc) to form petal-like designs that resemble tulips growing from stems.
It creates a textured pattern that looks intricate but is actually made from simple stitches — ideal for bags!
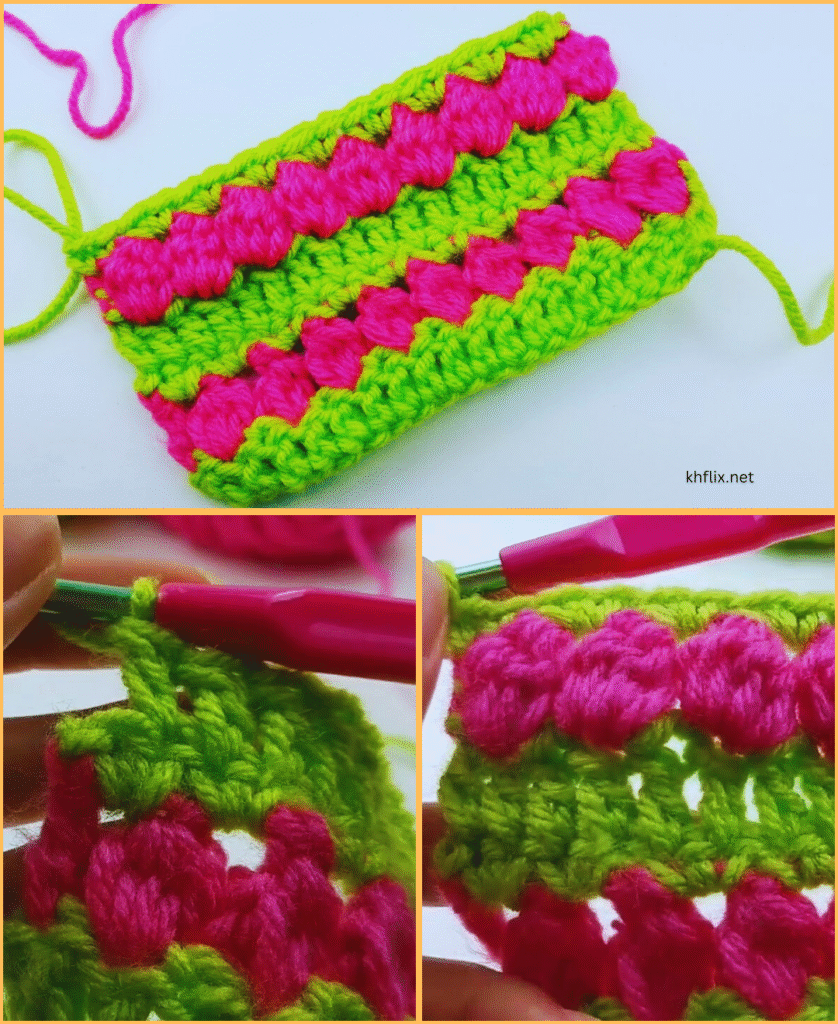
🔄 Stitch Pattern – Tulip Stitch Instructions
🧶 Stitch Abbreviations (US Terms):
- ch – chain
- sc – single crochet
- dc – double crochet
- sk – skip stitch
- sp – space
✅ Multiples:
The stitch is typically worked in multiples of 4 + 1.
🔸 Row-by-Row Tutorial:
Foundation Row:
Ch a multiple of 4 + 1 (e.g., 33, 37, 41… depending on how wide you want the bag).
Row 1 (Base Row):
Sc in 2nd ch from hook and in each ch across. Turn.
Row 2 (Stem Row):
Ch 1, sc in first st.
Ch 3, sk 3 sts, sc in next — repeat from * to end. Turn.
Row 3 (Tulip Petals):
Sl st into the first ch-3 space.
Ch 3 (counts as first dc), 2 dc in same ch-sp, ch 1, 3 dc in same ch-sp (this forms the “tulip” cluster).
Sl st into next ch-sp, ch 3, 2 dc, ch 1, 3 dc in same ch-sp — repeat across.
End with a sl st in last ch-sp. Turn.
Row 4 (Reset Row):
Ch 1, sc in top of first tulip, ch 3, sc in next tulip cluster — repeat across.
This sets you up for another tulip row.
Repeat Rows 3 and 4 for desired length.
👜 How to Make a Crochet Bag Using the Tulip Stitch
📏 Sizing:
Let’s make a simple rectangular flat bag, folded in half with sides sewn up.
✨ Step-by-Step:
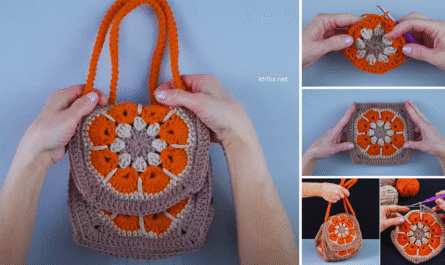
1. Create the Main Panels (Front & Back):
- Foundation: Ch 41 (for approx. 10″ width)
- Work Rows 1–4 and continue until piece measures 16–18″ (this gives you two 8–9″ panels when folded).
- Fasten off and weave in ends.
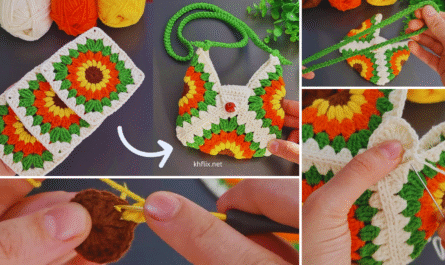
2. Fold and Sew:
- Fold piece in half (right sides facing).
- Sew or slip stitch along both sides using the same yarn or tapestry needle.
- Turn inside out.
3. Strap (Optional):
- Ch desired strap length (e.g., 80–100 chains).
- Sc in each ch back across.
- Attach to top corners of the bag.
4. Finishing Touches:
- Add Lining (Optional): Cut fabric to match the bag’s dimensions. Sew the lining inside using a needle and thread.
- Zipper or Button Closure: Attach at the top.
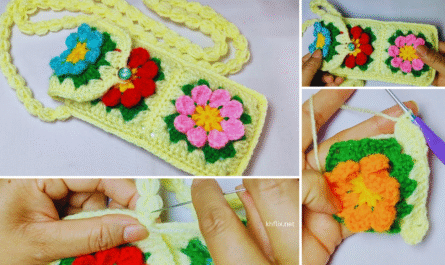
- Decorative Flower or Tassel: Make a small tulip flower or tassel and sew on the front.
🎀 Optional: Crochet Tulip Applique for Embellishment
Want more 3D tulips on the bag? Make small tulip appliques:
- Ch 4, sl st to form a ring.
- In ring: 3 dc, ch 1, 3 dc. Fasten off.
- Sew onto the bag for floral decoration.
💡 Tips:
- For a firmer bag, use cotton yarn or hold 2 strands together.
- For a modern look, use neutral yarns (like beige, mustard, or olive green).
- Block your work to help the tulip design pop.
Would you like a printable pattern PDF, a video tutorial link, or a diagram/chart for the Tulip Stitch? I can also help you write a complete bag pattern if you have dimensions or style in mind (e.g., tote, crossbody, clutch).