 by
by Crocheting a bag is one of the most satisfying projects for beginners. It’s practical, stylish, and forgiving—meaning small mistakes usually won’t ruin the final result. Whether you want a simple tote, a market bag, or a cute everyday purse, learning how to crochet a basic bag will open the door to endless designs and creativity.
This step-by-step tutorial is designed especially for absolute beginners, with clear explanations, simple stitches, and helpful tips to guide you from start to finish.
Why Crochet a Bag?
Crochet bags are popular for many reasons:
- They are easy to customize in size, color, and style
- They require basic stitches only
- They are durable and reusable
- They make great gifts or personal accessories
- You can finish one relatively quickly compared to clothing items
If you can crochet a chain and single crochet, you’re already halfway there!
Materials You Will Need
Before starting, gather the following supplies:
Yarn
For beginners, choose:
- Cotton yarn (best for bags – strong and non-stretchy)
- Medium weight yarn (Worsted / Category 4)
Avoid very fuzzy or slippery yarns at first.
Crochet Hook
- Size 4.5 mm – 5.5 mm (US G–I)
Check the yarn label for the recommended hook size.
Other Tools
- Scissors
- Yarn needle (for weaving in ends)
- Stitch markers (optional but helpful)
- Measuring tape
Basic Crochet Stitches Used
This beginner bag pattern uses very simple stitches:
- Chain (ch) – the foundation of your project
- Single Crochet (sc) – tight and sturdy, perfect for bags
- Slip Stitch (sl st) – for joining rounds or finishing
If you’re new, practice these stitches for a few minutes before starting the bag.
Easy Crochet Bag Pattern Overview
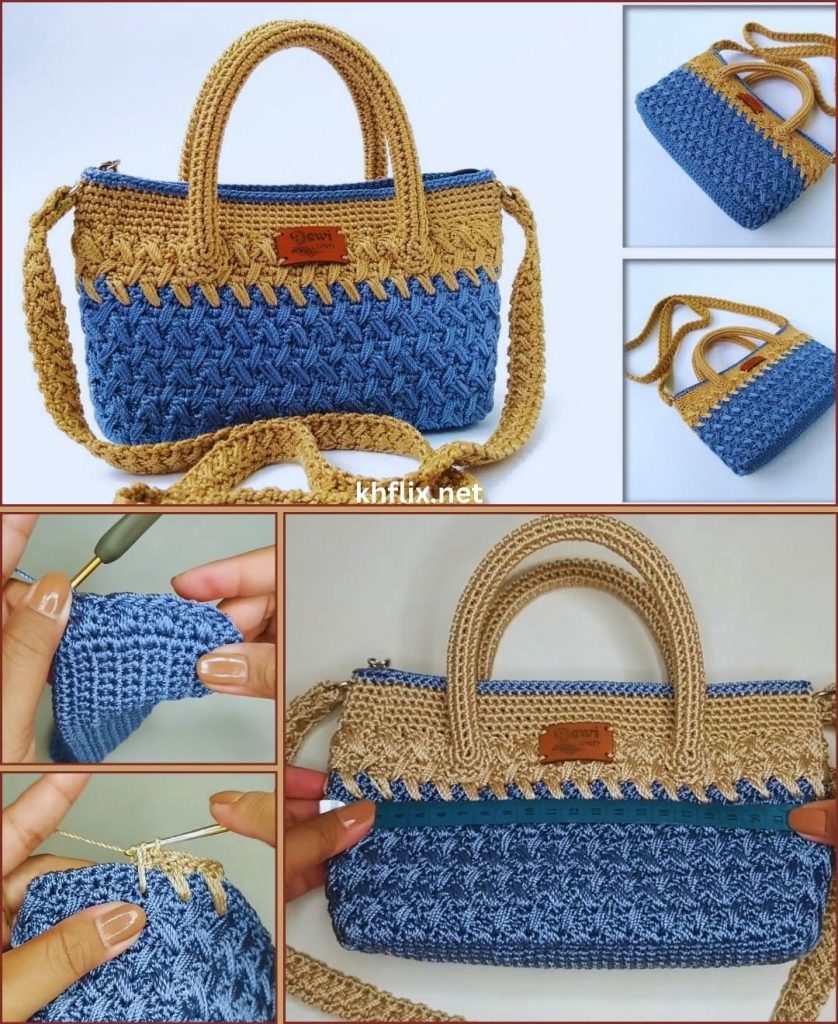
This tutorial explains how to make a simple rectangular tote bag worked from the bottom up.
Bag Style: Simple tote
Skill Level: Beginner
Construction: Bottom base + body + handles
Step 1: Crochet the Bag Base
The base gives shape and strength to the bag.
- Chain 31 (this determines the width of your bag)
- Single crochet in the second chain from the hook
- Continue single crochet across (30 sc)
- Chain 1, turn
- Repeat single crochet rows until the base measures about 20 cm (8 inches) long
👉 Tip: The tighter your stitches, the stronger your bag will be.
Step 2: Start Crocheting the Bag Body
Now we build the sides upward.
- Do not turn your work
- Single crochet evenly around the entire base
- Place 2 single crochets in each corner to prevent curling
- Join with a slip stitch to the first stitch
From here on, you will work in continuous rounds or joined rounds.
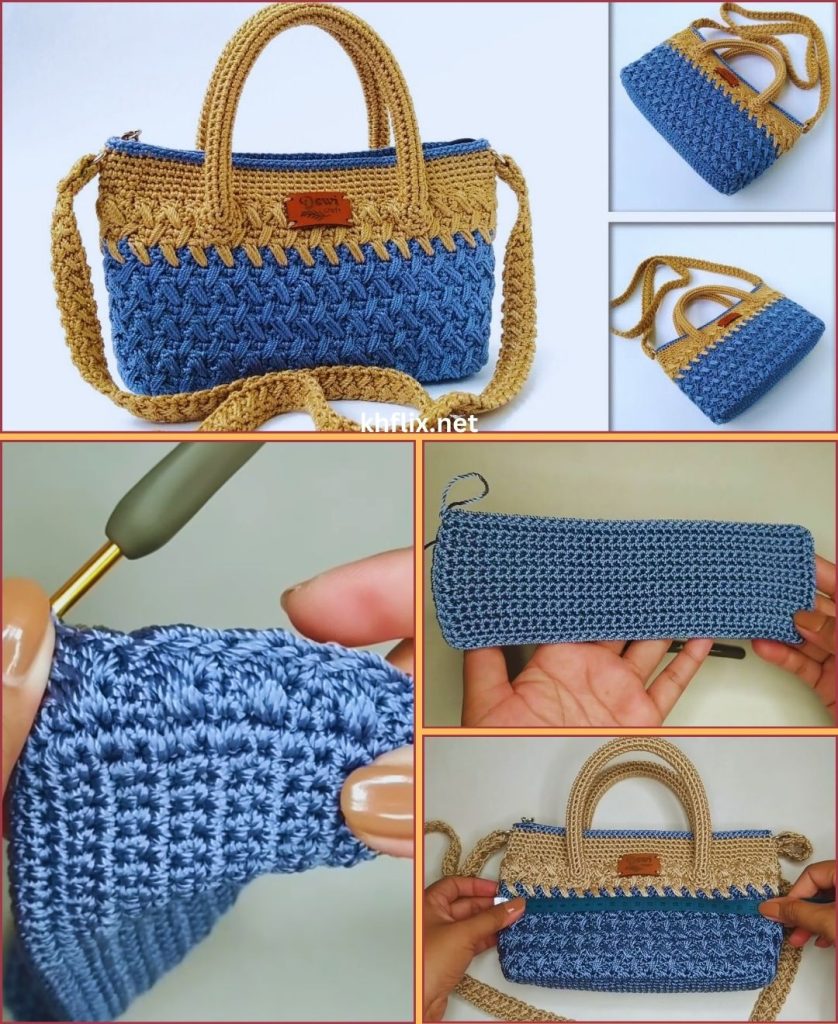
Step 3: Crochet the Bag Height
- Chain 1
- Single crochet in each stitch around
- Join with a slip stitch
- Repeat these rounds until the bag reaches your desired height
(Usually 25–30 cm / 10–12 inches)
👉 Optional:
You can add texture by alternating rows of:
- Single crochet
- Half double crochet
- Simple stitch patterns like sc + ch 1
Step 4: Create the Bag Handles
Handles are made by skipping stitches and chaining.
- Crochet across the top until you reach where you want the handle
- Chain 10–15 (depending on handle length)
- Skip the same number of stitches
- Continue single crochet
- Repeat for the second handle on the opposite side
- Complete the round and join
Next round:
- Single crochet into each stitch and each chain
- This strengthens the handles
Repeat one more round if needed.
Step 5: Finish the Bag
- Slip stitch to close
- Cut yarn, leaving a tail
- Pull through and tighten
- Use a yarn needle to weave in all loose ends
Your crochet bag is now complete! 🎉
Beginner Tips for a Perfect Crochet Bag
- Use tight stitches for durability
- Count stitches to keep sides even
- Use stitch markers at the start of rounds
- Don’t rush—consistency matters more than speed
- If edges curl, add more stitches at corners
Easy Bag Customization Ideas
Once you’re comfortable, try these ideas:
- Change colors every few rows
- Add a fabric lining inside
- Sew on buttons or labels
- Use thicker yarn for a sturdier bag
- Add a zipper or magnetic clasp
- Create longer straps for a shoulder bag
Common Beginner Mistakes (and How to Fix Them)
- Bag flares out: Too many stitches – reduce increases
- Bag curls inward: Too few stitches – add increases
- Uneven sides: Missed stitches – count every round
- Stretchy bag: Switch to cotton yarn or smaller hook
Mistakes are part of learning—don’t worry!
Final Thoughts
Crocheting a bag is one of the best beginner projects because it’s practical, forgiving, and incredibly rewarding. With just basic stitches and a little patience, you can create a beautiful handmade accessory you’ll be proud to use or gift.
Once you master this easy crochet bag pattern, you’ll find it much easier to explore more advanced designs and styles. Keep practicing, enjoy the process, and most importantly—have fun with your yarn! 🧵💕
If you’d like, I can also:
- Simplify this into a step-by-step pattern
- Write it for a blog or SEO article
- Create a video tutorial script
- Design a different bag model (round, granny square, market bag)
Just tell me! 😊