 by
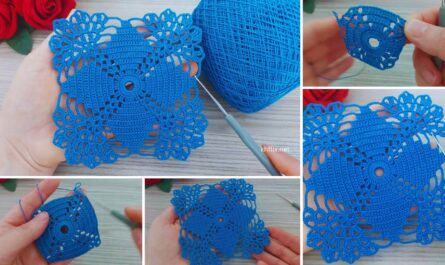
by Okay, let’s learn how to crochet a beautiful Flower Granny Square! This combines the charm of a central flower with the classic granny square structure, making it a popular and versatile motif. It’s a fantastic project for beginners as it practices core stitches and working in the round.
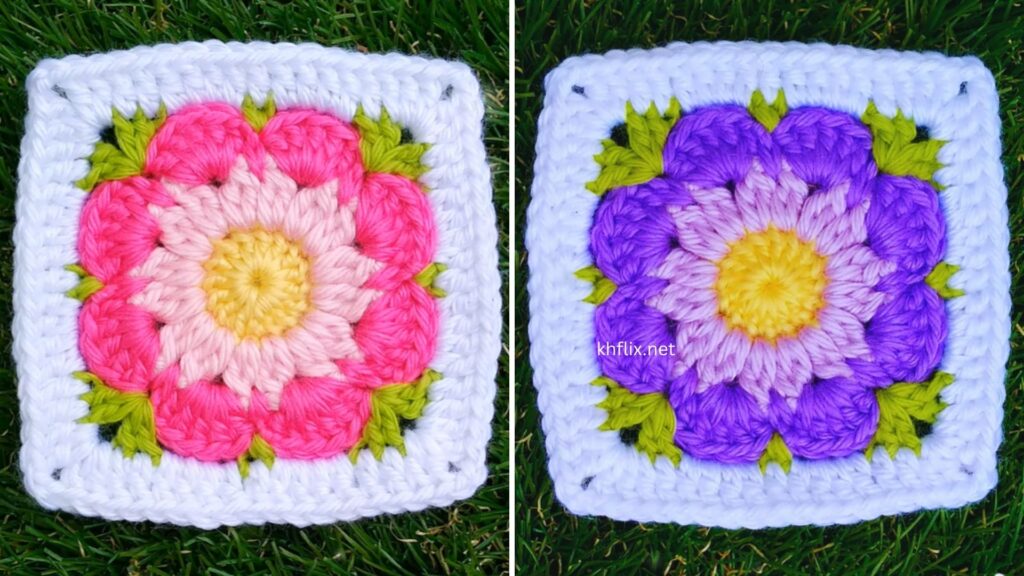
Pattern: How To Crochet A Flower Granny Square For Beginners
This tutorial will guide you through creating a classic Flower Granny Square. We’ll start with the central flower and then “square it off” with subsequent rounds.
Goal: To create a square motif featuring a central flower, using basic crochet stitches, suitable for beginners.
Materials You’ll Need:
- Yarn:
- Worsted Weight (Medium #4) Cotton or Acrylic Yarn is highly recommended for beginners. It’s easy to see your stitches and good for practicing.
- You’ll typically want 2-3 different colors for a classic flower granny square:
- Color A: For the flower center.
- Color B: For the petals.
- Color C (or A/B again): For squaring off the flower and subsequent rounds.
- Crochet Hook:
- Size H/5.0mm is a good starting point for worsted weight yarn.
- Tip: Always check your yarn label for the recommended hook size, but don’t hesitate to adjust if your stitches feel too tight or too loose.
- Yarn Needle (Tapestry Needle): For weaving in ends.
- Scissors: For cutting yarn.
Abbreviations Used:
- ch: chain
- sl st: slip stitch
- sc: single crochet
- hdc: half double crochet
- dc: double crochet
- tr: treble crochet (sometimes called triple crochet)
- st(s): stitch(es)
- sp: space
- ch-sp: chain space
- MR: magic ring (or magic circle) – an alternative beginner-friendly starting method will also be provided.
- FO: fasten off
- Cluster (CL): A group of stitches worked together, usually into the same space or stitch. In this pattern, it will refer to a group of double crochets.
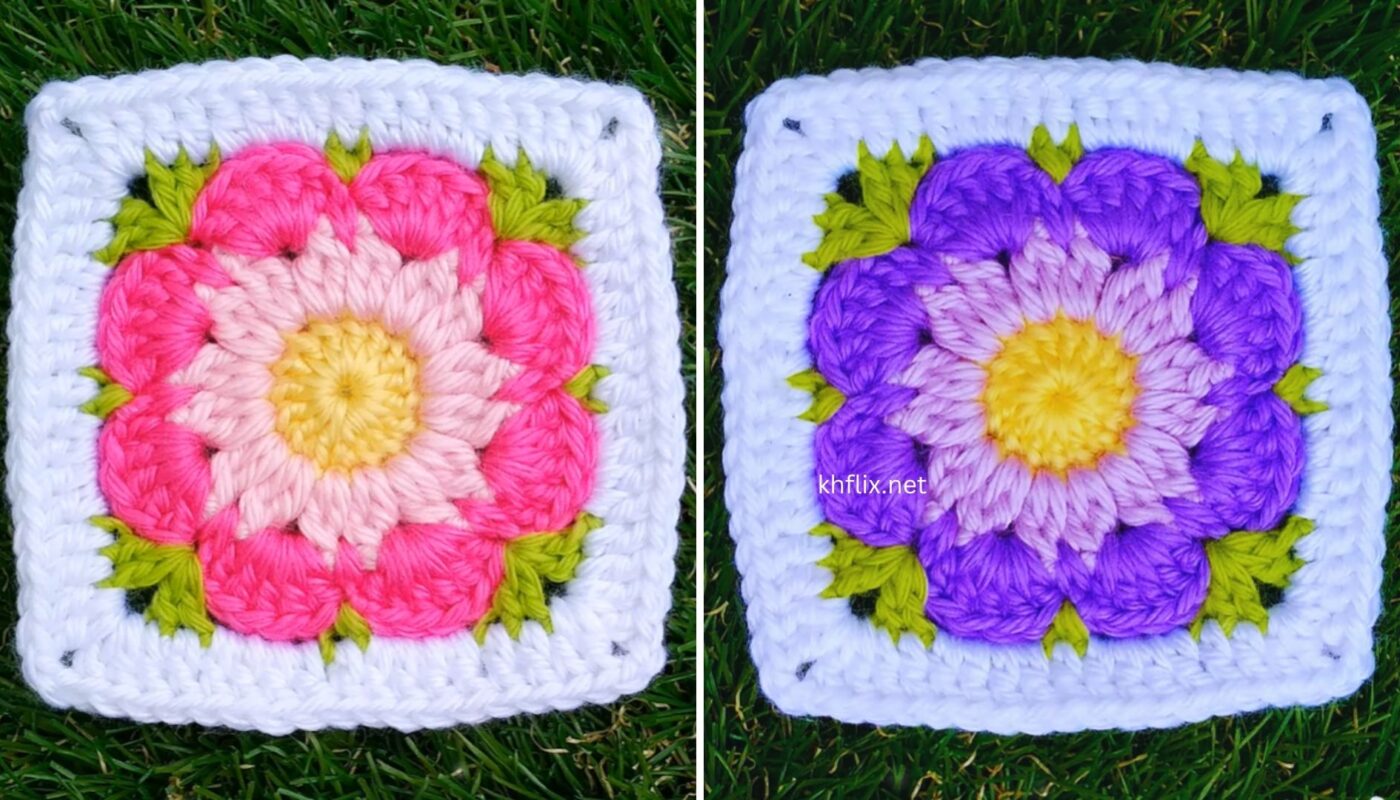
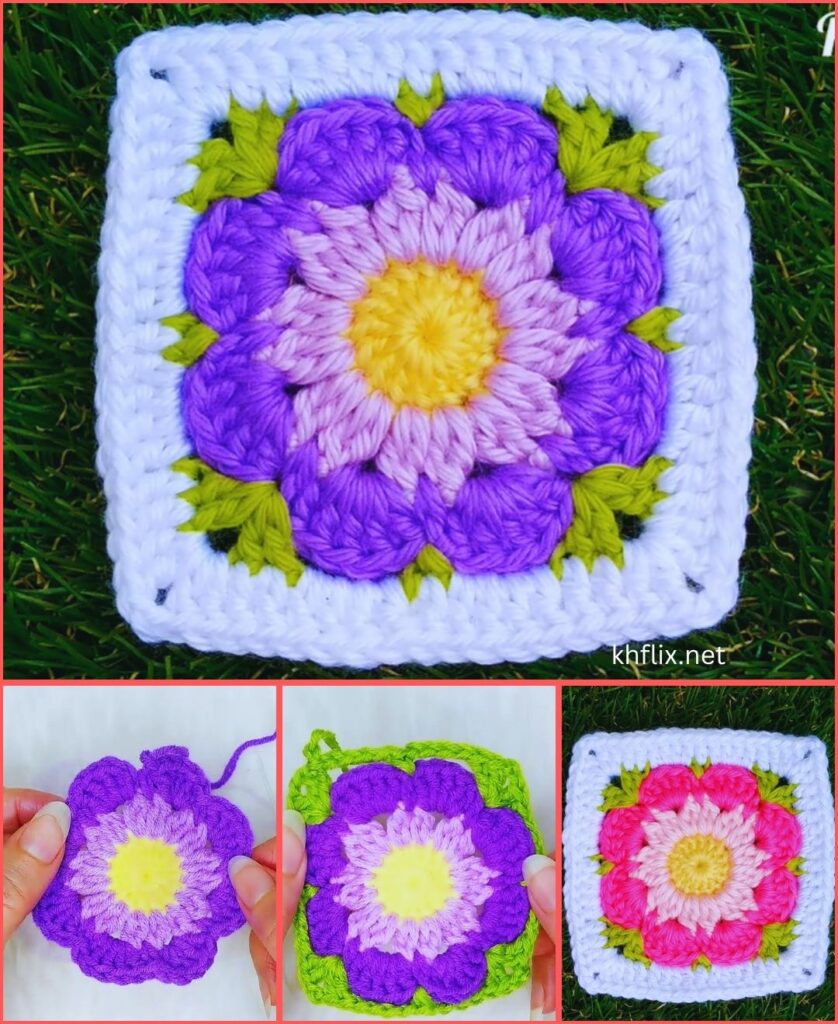
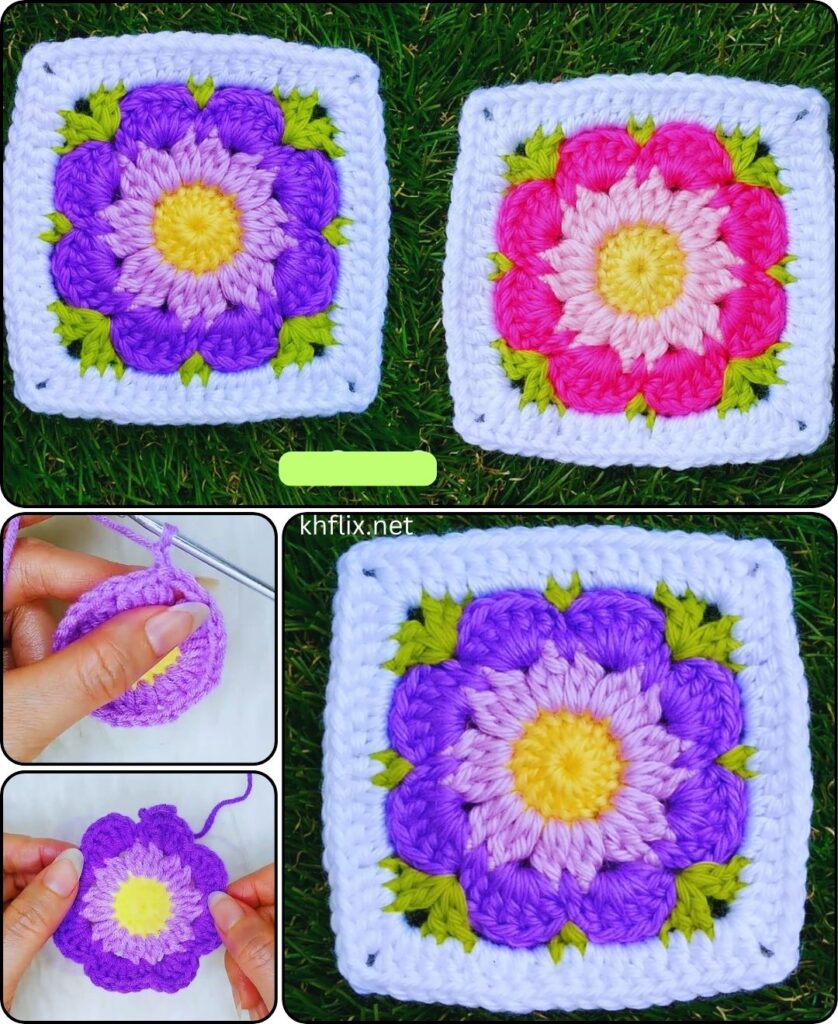
Understanding the Flower Granny Square Structure
This motif is built in distinct stages:
- Round 1 (Flower Center): Create a small ring and work a few stitches to form the very center of the flower.
- Round 2 (Petals): Create the actual petals around the center.
- Round 3 (Squaring Off – Part 1): Change color and start turning the circular flower into a square by creating stitch groups that will form the sides and corners.
- Round 4 (Squaring Off – Part 2 / Granny Square Pattern): Continue the traditional granny square pattern, building on the corners and sides created in the previous round.
- Subsequent Rounds (Optional): Add more rounds to make your square larger, following the basic granny square pattern.
Let’s Start Crocheting!
Part 1: The Flower Center (Color A)
You have two options for starting the center. The Magic Ring (MR) creates a very tight center, while the Chain Ring is easier for beginners.
Option A: Chain Ring (Recommended for Absolute Beginners)
- With Color A, ch 4.
- Sl st (slip stitch) into the first chain you made to form a ring.
Option B: Magic Ring (MR / Magic Circle – for a tighter center)
- With Color A, create a Magic Ring.
- Ch 1 (does NOT count as a stitch, just secures the ring).
Round 1 (Flower Center – continued with Color A):
- Into the center ring (formed by either Option A or B), ch 2 (counts as first dc).
- Work 11 dc (double crochet) into the same center ring. (Total 12 dc, including the beginning ch 2).
- Sl st into the top of the beginning ch 2 to join the round.
- FO (Fasten Off) Color A, leaving a tail to weave in later. If using Magic Ring, pull the tail tight to close the center hole.
- You should now have a small circle of 12 double crochet stitches.
Part 2: The Petals (Color B)
Now we’ll add the petals, making them stand out.
- Join Color B with a sl st into any dc stitch from Round 1.
- Round 2 (Petals):
- Ch 2 (counts as first hdc).
- Work 1 hdc into the same stitch where you joined.
- Ch 2.
- Sl st into the next dc stitch from Round 1.
- (This completes your first petal! It’s a tiny “bump” over two dc stitches).
- Repeat the following 5 more times:
- Sl st into the next dc stitch (this repositions you for the next petal).
- Ch 2.
- Work 2 hdc into the same stitch you just slip stitched into.
- Ch 2.
- Sl st into the next dc stitch.
- After your 6th petal, sl st into the first sl st you made at the very beginning of the round (the one you used to join Color B).
- FO Color B, leaving a tail to weave in.
- You should now have a circle with 6 distinct petals around the center. Each petal is a [ch 2, 2 hdc, ch 2] group. Note that the “sl st into next dc” at the start of each petal is crucial for spacing.
Part 3: Squaring Off – Part 1 (Color C or Rejoin A/B)
This is where the magic happens! We’ll start creating the square shape.
- Join Color C (or your chosen color for the square) with a sl st into any ch-2 space (the top of a petal) from Round 2.
- Round 3 (Creating Corners):
- Ch 3 (counts as first dc).
- Work 2 dc into the same ch-2 space you joined into.
- Ch 1. (This forms part of your first side).
- Work 3 tr (treble crochet) into the next ch-2 space (the top of the next petal).
- Ch 2. (This forms a corner space).
- Work 3 tr into the same ch-2 space.
- (This completes your first corner group: [3 tr, ch 2, 3 tr] in one petal top.)
- Ch 1.
- Work 3 dc into the next ch-2 space.
- Ch 1.
- Repeat the following 2 more times (starting from the [3 tr, ch 2, 3 tr] group):
- Work [3 tr, ch 2, 3 tr] into the next ch-2 space (another corner).
- Ch 1.
- Work 3 dc into the next ch-2 space.
- Ch 1.
- After the last [3 dc, ch 1] group, sl st into the top of the beginning ch 3 to join the round.
- FO Color C, leaving a tail to weave in.
- You should now see a square shape emerging! You have 4 “sides” of 3 dc groups and 4 “corners” of [3 tr, ch 2, 3 tr] groups. You’ll notice that your very first cluster was only 3 dc and a ch 1, that’s because we will complete that corner in the next step to join the round nicely.
Part 4: Continuing the Granny Square (Round 4 – Color C or New Color)
Now we’ll work the traditional granny square pattern, building on the framework you’ve created.
- Join Color C (or a new color) with a sl st into any ch-2 corner space from Round 3.
- Round 4:
- Ch 3 (counts as first dc).
- Work 2 dc into the same ch-2 corner space.
- Ch 2.
- Work 3 dc into the same ch-2 corner space.
- (This completes your first corner: [3 dc, ch 2, 3 dc] in the corner space).
- Ch 1.
- Work 3 dc into the next ch-1 space (this is a side space).
- Ch 1.
- Work 3 dc into the next ch-1 space (this is another side space).
- Ch 1.
- Repeat the following 3 more times (starting from the corner group):
- Work [3 dc, ch 2, 3 dc] into the next ch-2 corner space.
- Ch 1.
- Work 3 dc into the next ch-1 space.
- Ch 1.
- Work 3 dc into the next ch-1 space.
- Ch 1.
- After the last [3 dc, ch 1] group, sl st into the top of the beginning ch 3 to join the round.
- FO, leaving a tail to weave in.
- Your square is now clearly defined! Each corner has a [3 dc, ch 2, 3 dc] group, and each side has groups of 3 dc separated by ch 1 spaces.
Part 5: Adding More Rounds (Optional – To Make a Larger Square)
You can make your Flower Granny Square as large as you like by simply repeating the granny square pattern.
- Join your chosen color (same or new) with a sl st into any ch-2 corner space.
- Subsequent Rounds:
- Ch 3 (counts as first dc).
- Work 2 dc into the same ch-2 corner space.
- Ch 2.
- Work 3 dc into the same ch-2 corner space.
- (This is always your corner: [3 dc, ch 2, 3 dc] in each corner space).
- Ch 1.
- Work 3 dc into each subsequent ch-1 space along the side until you reach the next corner.
- Ch 1 after each 3 dc group on the side.
- Repeat this pattern around the square.
- Sl st into the top of the beginning ch 3 to join the round.
- FO (if changing colors) or continue to the next round.
Finishing Your Flower Granny Square
- Weave in All Ends: This is crucial for a neat and durable square.
- Thread each yarn tail onto your yarn needle.
- Carefully weave the tail through several stitches on the back of your square, making sure not to pull too tightly.
- Weave in a few different directions to secure the tail firmly.
- Trim any excess yarn close to the fabric.
Tips for Beginners:
- Practice Stitches: If you’re new to dc, hdc, or tr, practice them separately before starting the square.
- Keep Tension Even: Consistent tension will make your stitches look neater and your square lie flat.
- Count Your Stitches/Spaces: This is very important, especially in the squaring-off rounds, to ensure you maintain the correct shape.
- Use Stitch Markers: If you’re having trouble identifying the first stitch of a round or the corner spaces, use stitch markers.
- Don’t Be Afraid to Undo: If you make a mistake, simply unravel (frog) your work back to the error and try again.
- Watch Video Tutorials: Search for “flower granny square tutorial” on YouTube. Visual aids can be incredibly helpful for understanding stitch placement and round progression.
- Experiment with Colors: Half the fun of granny squares is playing with color combinations!
Ideas for Using Your Flower Granny Squares:
- Afghan/Blanket: Crochet many squares and join them together.
- Pillow Covers: Join a few squares for a colorful pillow.
- Tote Bags: Combine squares to create unique bags.
- Coasters/Hot Pads: A single square makes a great coaster or a small hot pad (use cotton yarn for hot items).
- Garlands/Bunting: String several squares together for charming decor.
- Appliqué: Sew a single square onto a plain item for an added pop of color and texture.
- Clothing: Incorporate them into cardigans, vests, or scarves.
Enjoy crocheting your beautiful Flower Granny Squares!