 by
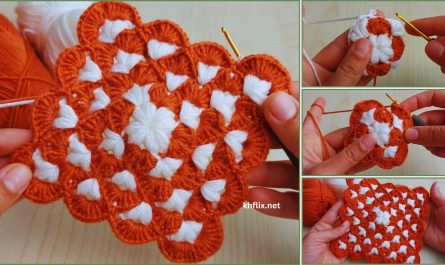
by Let’s create a timeless and beautiful granny square baby blanket! This is a fantastic project for beginners and a meditative one for experienced crocheters. You’ll learn how to make individual granny squares and then join them together to form a cozy, charming blanket perfect for a little one.

How to Crochet a Granny Square Baby Blanket
This tutorial will guide you through making classic solid granny squares and then assembling them into a beautiful blanket.
Skill Level: Easy
You’ll need to be comfortable with:
- Basic crochet stitches: chain (ch), slip stitch (sl st), double crochet (dc).
- Working in joined rounds.
- Creating a Magic Ring (optional, but recommended).
Finished Blanket Dimensions (Approximate):
- This will depend on the size of your individual granny squares and how many you make. A common baby blanket size is around 30×36 inches (76×91.5 cm).
- For example, if each square is 6×6 inches, you’d need 5 squares by 6 squares (30 squares total) for a 30×36 inch blanket.
Materials You’ll Need:
- Yarn: Approximately 1200-1500 yards (1100-1370 meters) of Worsted Weight (Medium #4) Yarn. Soft acrylic, cotton, or a blend are excellent choices for baby blankets due to their softness, warmth, and machine-washability.
- Colors: You can use one solid color, or multiple colors for a striped or multi-colored effect. Using up yarn scraps is a great idea for granny squares!
- Crochet Hook: Size H/5.0mm. Or the hook size that gives you a soft, pliable fabric with good drape, not too stiff.
- Yarn Needle (Tapestry Needle): Essential for weaving in ends and seaming squares together.
- Scissors
- Stitch Markers (Optional but helpful): To mark corners of squares, especially for beginners.
Gauge:
While not as critical as for garments, a consistent gauge will ensure your squares are roughly the same size, making joining easier.
- One finished granny square (after 4 rounds) should measure approximately 5×5 inches (12.5×12.5 cm). Adjust your hook size if needed.
Abbreviations Used:
- ch: chain
- sl st: slip stitch
- dc: double crochet
- st(s): stitch(es)
- sp: space
- ch-sp: chain space
- MR: Magic Ring (or Magic Circle/Adjustable Ring)
- FO: fasten off
- (): repeat instructions within parentheses a specified number of times.
Part 1: Crocheting Individual Granny Squares
You’ll make multiple identical (or varying) squares. Let’s start with a classic 4-round granny square.
- Start (Using Color 1):
- Method A (Magic Ring – Recommended): Make a Magic Ring (MR).
- Method B (Ch 4): Ch 4, then sl st into the first chain to form a ring.
- Round 1:
- Ch 3 (counts as first dc). Work 2 dc into the ring. (Ch 2, 3 dc into the ring) 3 times. Ch 2. Sl st to the top of the beginning ch-3 to join. [4 ‘3-dc clusters’ and 4 ch-2 spaces]
- If changing colors for each round: FO now, leaving a 4-6 inch tail.
- Round 2 (Using Color 2, or same color):
- If you fastened off, join new yarn with a sl st into any ch-2 corner space.
- Ch 3 (counts as first dc). Work (2 dc, ch 2, 3 dc) into the same ch-2 corner space. This forms your first corner.
- (Ch 1, 3 dc, ch 2, 3 dc) into the next ch-2 corner space. Repeat from * to * 2 more times.
- Ch 1. Sl st to the top of the beginning ch-3 to join. [8 ‘3-dc clusters’ and 4 ch-1 spaces (sides) and 4 ch-2 spaces (corners)]
- If changing colors for each round: FO now, leaving a 4-6 inch tail.
- Round 3 (Using Color 3, or next color):
- If you fastened off, join new yarn with a sl st into any ch-2 corner space.
- Ch 3. Work (2 dc, ch 2, 3 dc) into the same ch-2 corner space.
- Ch 1. 3 dc into the next ch-1 space (this is a side space).
- (Ch 1, 3 dc, ch 2, 3 dc) into the next ch-2 corner space. Ch 1. 3 dc into the next ch-1 space. Repeat from * to * 2 more times.
- Ch 1. Sl st to the top of the beginning ch-3 to join. [12 ‘3-dc clusters’ and 8 ch-1 spaces (sides) and 4 ch-2 spaces (corners)]
- If changing colors for each round: FO now, leaving a 4-6 inch tail.
- Round 4 (Using Color 4, or next color):
- If you fastened off, join new yarn with a sl st into any ch-2 corner space.
- Ch 3. Work (2 dc, ch 2, 3 dc) into the same ch-2 corner space.
- Ch 1. 3 dc into the next ch-1 space. Ch 1. 3 dc into the next ch-1 space.
- (Ch 1, 3 dc, ch 2, 3 dc) into the next ch-2 corner space. Ch 1. 3 dc into the next ch-1 space. Ch 1. 3 dc into the next ch-1 space. Repeat from * to * 2 more times.
- Ch 1. Sl st to the top of the beginning ch-3 to join. [16 ‘3-dc clusters’ and 12 ch-1 spaces (sides) and 4 ch-2 spaces (corners)]
- FO, leaving a 6-inch tail.
Repeat these steps to make as many granny squares as you need for your desired blanket size. For a 30×36 inch blanket with 5-inch squares, you’ll need around 30 squares.
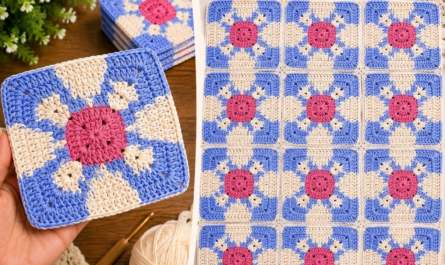
Part 2: Arranging Your Squares
Before joining, lay out all your finished squares on a flat surface. Experiment with different arrangements, especially if you’re using multiple colors, to find a pattern you love. Take a photo of your favorite arrangement so you can refer back to it.
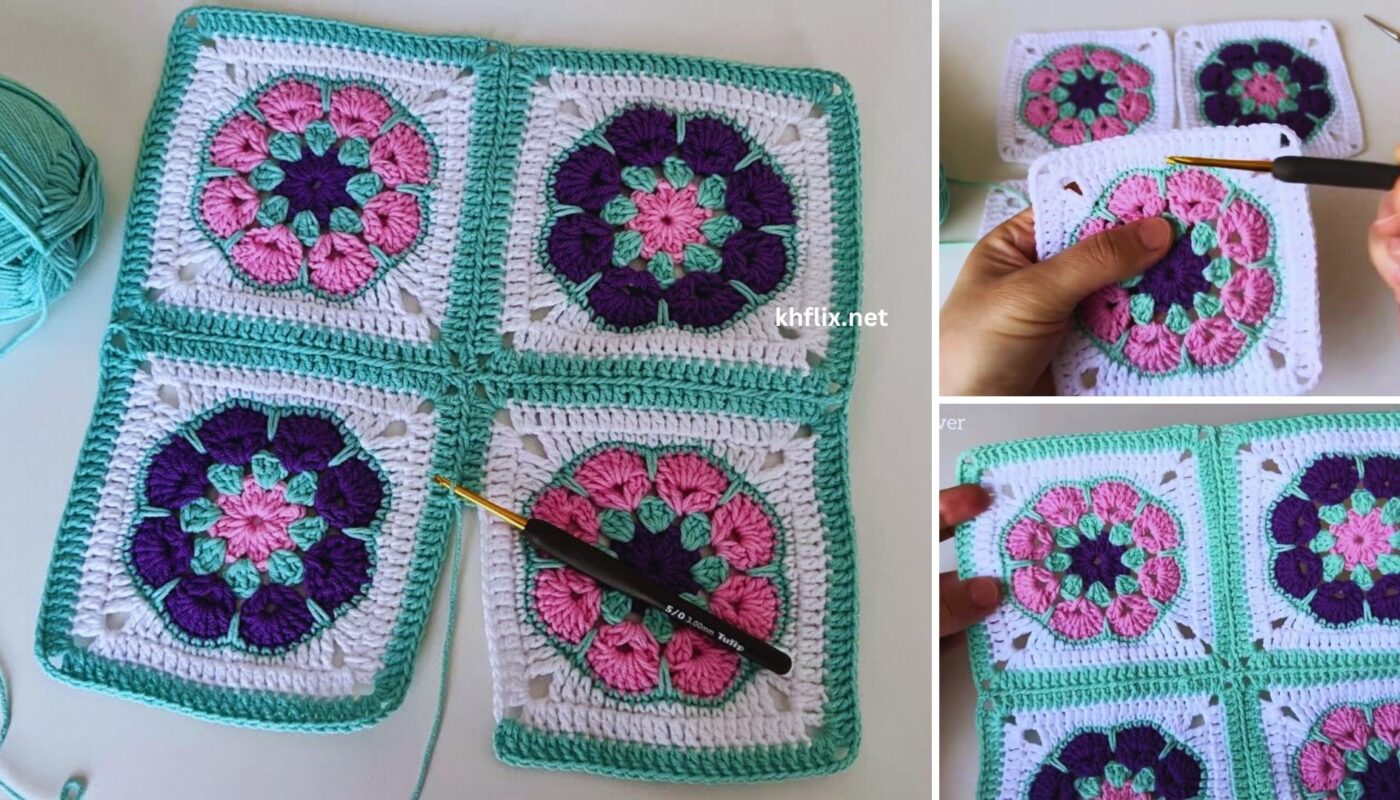
Part 3: Joining Your Granny Squares
There are many methods to join granny squares. Here are two popular, relatively easy ones:
Method A: Slip Stitch Join (Creates a subtle ridge)
- Place two squares together with their wrong sides facing each other (so the right sides are facing out).
- Insert your hook through both loops of the corresponding stitch on both squares.
- Join new yarn with a sl st.
- Sl st into each corresponding stitch across the edge you are joining.
- When you reach a corner space, work (sl st, ch 1, sl st) or simply (sl st, sl st) into the corner.
- Work your way across one seam, then fasten off. Rejoin yarn for each new seam.

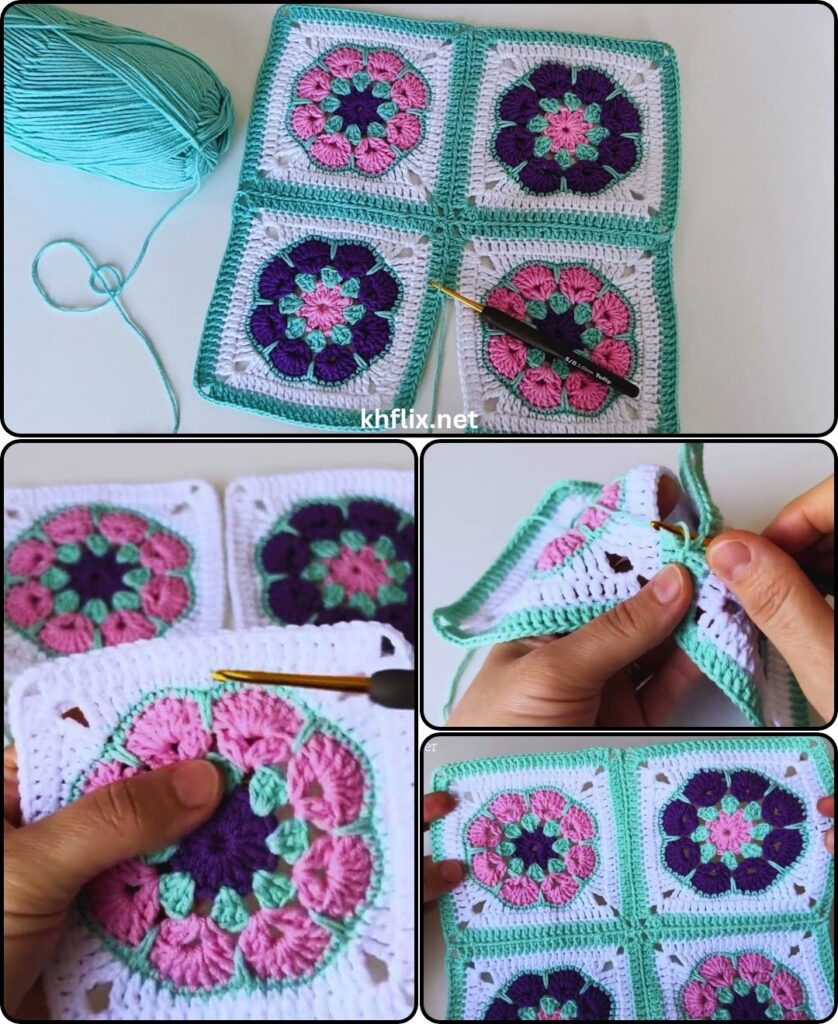
Method B: Single Crochet Join (Creates a more defined ridge)
- Place two squares together with their wrong sides facing each other (so the right sides are facing out).
- Insert your hook through both loops of the corresponding stitch on both squares.
- Join new yarn with a sc.
- Sc into each corresponding stitch across the edge you are joining.
- When you reach a corner space, work (sc, ch 1, sc) into the corner.
- Work your way across one seam, then fasten off. Rejoin yarn for each new seam.
Joining Strategy:
- Option 1 (Strips first): Join all your squares into long strips (e.g., 5 squares per strip for a 30-inch blanket). Then, join those strips together. This can be less fiddly than joining individual squares.
- Option 2 (Square by Square): Join squares one by one, working both horizontally and vertically until your blanket is complete.
Part 4: Adding a Border (Optional but Recommended)
A border gives your blanket a neat, finished look and can help square up any slight imperfections in your joining. You can use one solid color or alternate colors for a striped border.
- Border Round 1 (Joining Round): Join yarn (e.g., Color A or a new border color) with a sl st to any stitch along the edge of your assembled blanket. Ch 1 (does NOT count as a stitch). Work single crochet (sc) evenly around the entire blanket.
- Work 1 sc into the top of each dc along the edges of the granny squares.
- Work 1 sc into each ch-1 space.
- Work (sc, ch 1, sc) into each corner ch-2 space.
- When you reach the seams where squares are joined, try to work 1 sc into the center of the seam to close any gaps.
- Sl st to the first sc to join.
- Border Round 2 (Hdc Border): Ch 2 (counts as first hdc). Hdc in each sc around. Work (hdc, ch 1, hdc) into each corner ch-1 space. Sl st to the top of the beginning ch-2 to join.
- Border Round 3 (Repeat Hdc or change stitch): Ch 2. Hdc in each hdc around. Work (hdc, ch 1, hdc) into each corner ch-1 space. Sl st to the top of the beginning ch-2 to join.
- You can continue adding rounds of hdc or sc until your border is the desired width.
Part 5: Finishing Your Blanket
- Fasten Off: After completing your final border round, cut your yarn, leaving a 6-inch tail. Yarn over and pull the tail completely through the loop on your hook to secure the last stitch.
- Weave in All Ends: This is the most time-consuming but crucial step! Thread each yarn tail onto your yarn needle. Carefully weave them through several stitches of the same color on the wrong side of your blanket, making them secure and invisible. Take your time with this to ensure your blanket holds up well to washes and cuddles.
- Optional: Blocking: For a truly professional finish and to help your squares relax and the blanket lay flat, consider blocking your blanket. Gently wet the blanket, carefully squeeze out any excess water (don’t wring!), and then lay it flat on a clean surface or blocking mat, shaping it to the desired dimensions. Pin it in place if needed. Allow it to air dry completely.
You’ve now created a beautiful and timeless Crochet Granny Square Baby Blanket! It’s a wonderful handmade item full of love and sure to be treasured. What color combinations are you excited to try for your granny squares?