 by
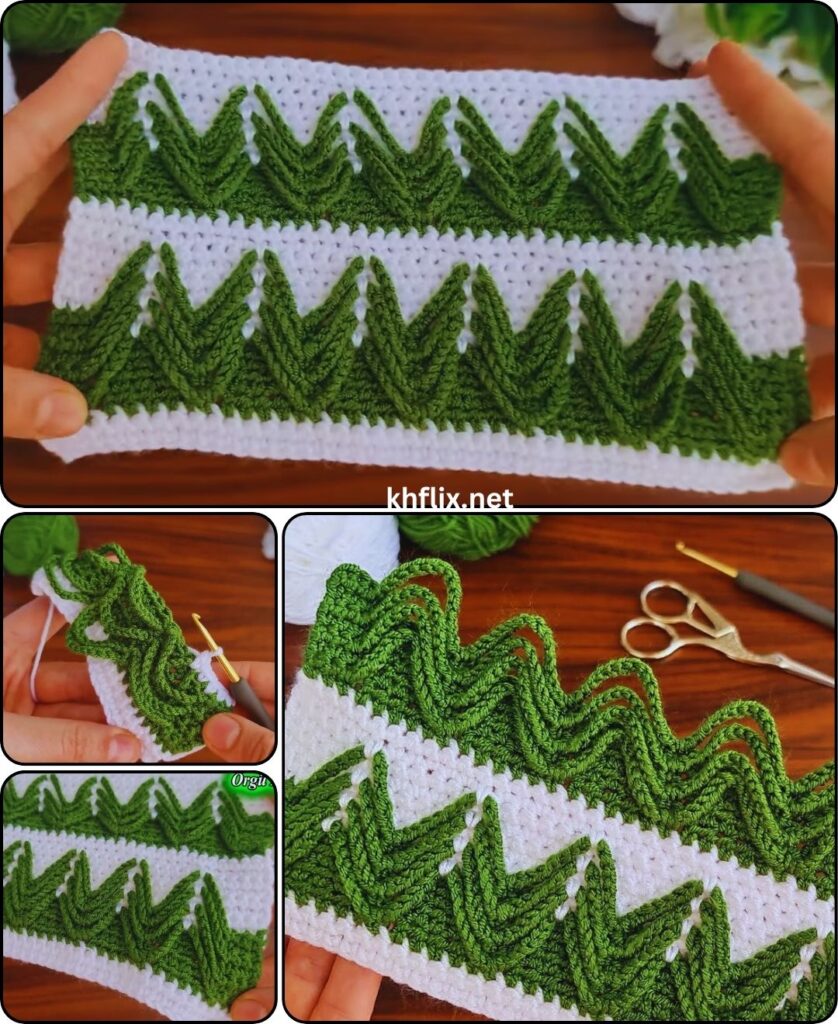
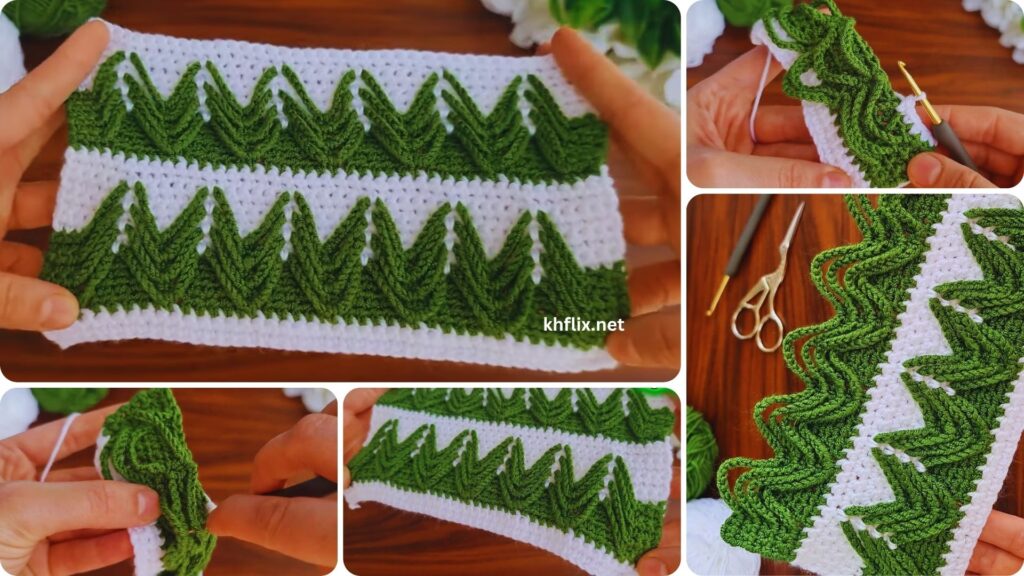
by Let’s create a beautiful and cozy striped crochet baby blanket! This project is wonderfully satisfying and perfect for crocheters of all skill levels, even beginners. You’ll love playing with colors to make a unique and heartfelt gift that’s soft, comforting, and machine-washable for easy care.
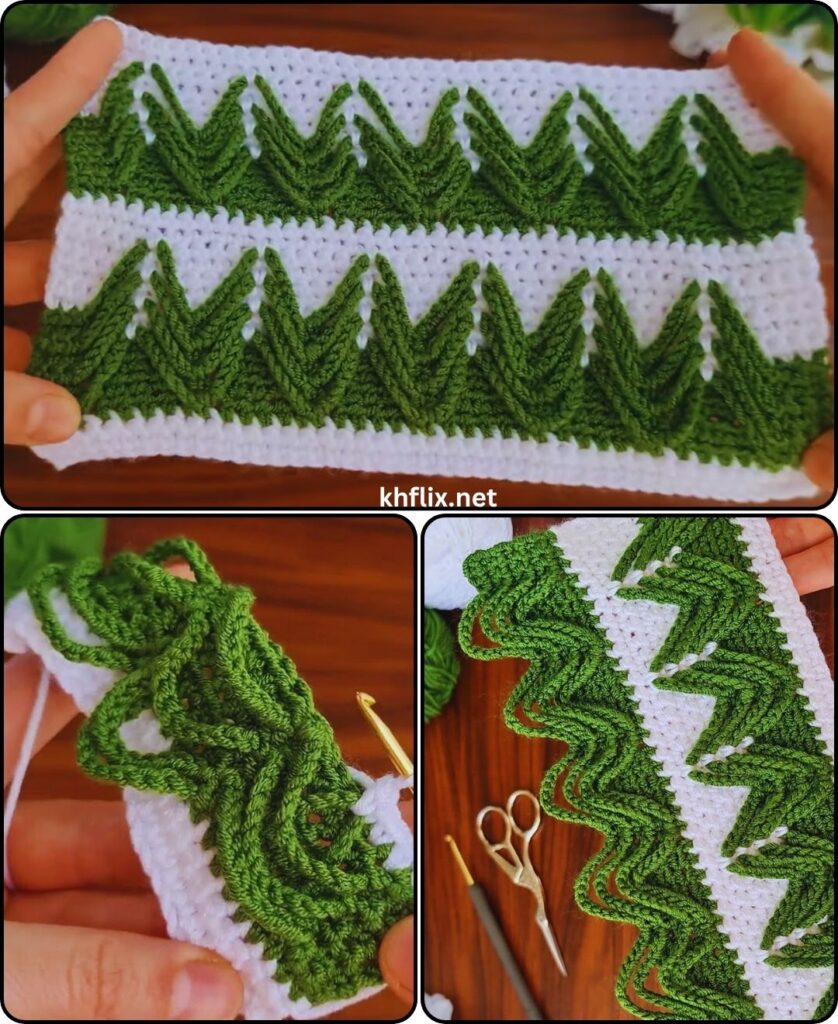
How to Crochet a Striped Baby Blanket: Step-by-Step Guide
This pattern will guide you through making a classic rectangular baby blanket, an ideal size for snuggles, tummy time, or stroller rides.
Skill Level: Easy
You’ll need to know:
- Basic crochet stitches: chain (ch), single crochet (sc), double crochet (dc).
- Working in rows.
- How to make clean color changes.
Finished Blanket Dimensions (Approximate):
- Width: 30 inches (76 cm)
- Length: 36 inches (91.5 cm)
Materials You’ll Need:
- Yarn: About 1200-1500 yards (1100-1370 meters) of Worsted Weight (Medium #4) Yarn. Soft acrylic, cotton, or a blend are excellent choices for baby blankets because they’re typically machine washable and gentle on delicate skin.
- Colors: Choose 3-5 contrasting or complementary colors for your stripes.
- Color A (Main/Starting Color): Approx. 400-500 yards.
- Color B, C, D, etc. (Accent Colors): Approx. 200-300 yards each.
- Colors: Choose 3-5 contrasting or complementary colors for your stripes.
- Crochet Hook: Size I/5.5mm. Or the hook size that gives you a soft, pliable fabric with good drape, not too stiff.
- Yarn Needle (Tapestry Needle): Essential for seamlessly weaving in all your loose ends.
- Scissors
Gauge (Important for Size!):
Getting your gauge right helps ensure your blanket turns out the intended size.
- In double crochet: 13 dc and 8 rows = 4 inches (10 cm).
- To check your gauge: chain 15. Then, dc in the 4th chain from the hook and in each chain across (you’ll have 13 dc). Work for 8 rows. Measure your swatch. If it’s too small, go up a hook size; if it’s too big, go down a hook size.
Abbreviations Used:
- ch: chain
- sc: single crochet
- dc: double crochet
- st(s): stitch(es)
- FO: fasten off
- (): repeat instructions within parentheses a specified number of times.
How to Make a Clean Color Change in Rows:
This method creates a neat, almost invisible transition between your stripes.
- Work the last stitch of the current row with the current color as usual, but stop when you have two loops left on your hook.
- Drop the current color.
- Pick up your new color, yarn over with the new color, and pull it through the remaining two loops on your hook to complete the stitch.
- Chain the turning chain (ch 1 or ch 2) with the new color.
- Always cut the old color yarn, leaving a 4-6 inch tail. These tails will be neatly woven in later to secure the change.
Let’s Start Crocheting Your Striped Baby Blanket!
Part 1: Starting the Blanket (Using Color A)
- With Color A, chain 100.
- This chain length should give you approximately 30 inches in width. If you want a wider or narrower blanket, adjust this number. Just make sure you start with an even number of chains.
- Row 1: Dc in the 4th chain from your hook (the skipped 3 chains count as your first dc). Dc in each chain across. Ch 1, turn.[98 dc]
- You should have 98 double crochet stitches, including that starting chain-3.
Part 2: The Striped Body of the Blanket
We’ll use a simple yet effective stitch pattern that alternates single crochet and double crochet rows to create a lovely texture. We’ll change colors every two rows to form your stripes.
Let’s use a pattern of 2 rows per color change. You can adjust this to 3 or 4 rows per color for wider stripes if you prefer!
- Row 2 (Color A): Sc in the first st. (Dc in next st, sc in next st) across to the last stitch. Dc in the last st. Ch 2, turn.[98 stitches]
- At the end of Row 2, perform a clean color change to Color B. Cut Color A, leaving a 6-inch tail.
- Row 3 (Color B): Dc in the first st. (Sc in next st, dc in next st) across to the last stitch. Sc in the last st. Ch 1, turn. [98 stitches]
- Row 4 (Color B): Sc in the first st. (Dc in next st, sc in next st) across to the last stitch. Dc in the last st. Ch 2, turn.[98 stitches]
- At the end of Row 4, perform a clean color change to Color C. Cut Color B, leaving a 6-inch tail.
- Row 5 (Color C): Dc in the first st. (Sc in next st, dc in next st) across to the last stitch. Sc in the last st. Ch 1, turn. [98 stitches]
- Row 6 (Color C): Sc in the first st. (Dc in next st, sc in next st) across to the last stitch. Dc in the last st. Ch 2, turn.[98 stitches]
- At the end of Row 6, perform a clean color change to Color A (or your next chosen color in your sequence). Cut Color C, leaving a 6-inch tail.
Continue Repeating the Pattern:
- Repeat Rows 3-6 (or your chosen 2-row stripe pattern) until your blanket reaches approximately 35.5 inches (90 cm) in length.
- Try to end with two rows of Color A (or your preferred main color) to match your starting row.
- Your last row should be a double crochet row (like Row 3 or 5).
- Do NOT cut your yarn after the final row if you plan to add a border.
Part 3: Border (Optional)
A simple border gives your blanket a neat, professional, and complete look. Use Color A or a contrasting color.
- Border Round 1: With your chosen border color, Ch 1 (does NOT count as a stitch). Work single crochet (sc) evenly around all four sides of the blanket.
- Work 1 sc in each dc stitch along the top and bottom edges.
- Work 1 sc per row along the side edges (try to get an even number for a smooth edge).
- Work 3 sc in each of the four corners to make them turn neatly without pulling.
- When you reach the starting point, sl st to the first sc to join.
- Border Round 2: Ch 1. Sc in each sc around, making sure to work 3 sc into the middle sc of each corner (this continues the neat corner turn). Sl st to the first sc to join.
- You can add more rounds of sc for a wider border, or experiment with other stitches like half double crochet (hdc) or double crochet (dc) for a different look.
Part 4: Finishing Your Blanket
- Fasten Off: After completing your final border round (or the last body row if you’re skipping the border), cut your yarn, leaving a 6-inch tail. Yarn over and pull the tail completely through the loop on your hook to secure the last stitch.
- Weave in All Ends: This is a crucial step for a neat, professional, and durable finish, especially with all those color changes! Thread each yarn tail onto your yarn needle. Carefully weave them through several stitches of the same color on the wrong side of your blanket, making them secure and invisible. Take your time with this to ensure your blanket holds up well to washes and cuddles.
- Optional: Blocking: For a truly professional finish and to help your stitches relax and the blanket lay flat, consider blocking your blanket. Gently wet the blanket, carefully squeeze out any excess water (don’t wring!), and then lay it flat on a clean surface or blocking mat, shaping it to the desired dimensions. Pin it in place if needed. Allow it to air dry completely.
Your beautiful and soft Striped Crochet Baby Blanket is now complete! What a wonderful handmade gift filled with love.