 by
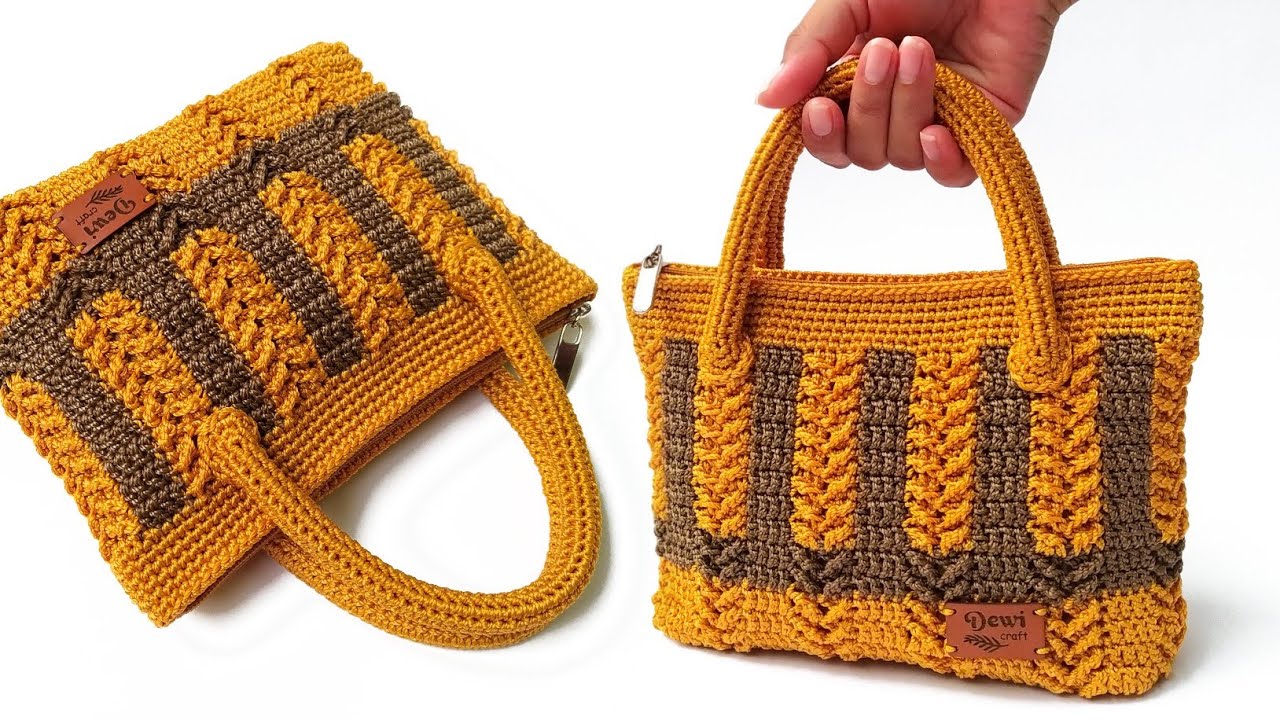
by Crocheting your own bag is an exciting and rewarding project, especially when you are just starting your crochet journey. A crochet bag is practical, stylish, and forgiving, which makes it one of the best beginner projects. Using a two-line striped color pattern makes the bag even easier and more attractive. The stripes give a clean, modern look while keeping the pattern simple and repetitive.
This detailed article will guide you step by step on how to crochet an easy beginner bag with two-line stripes, from choosing materials to finishing the handles neatly.
Why Choose a Two-Line Striped Crochet Bag?
A two-line stripe means working two rows or two rounds in one color, then switching to another color. This technique is perfect for beginners because:
- It uses basic crochet stitches only
- Color changes are easy and predictable
- Mistakes are less noticeable in stripes
- The design looks neat and professional
- It helps beginners practice color changes
- The pattern is repetitive and relaxing
Even with simple stitches, the striped design makes the bag look stylish and well-made.
Materials You Will Need
Yarn Selection
For crochet bags, strength and durability are important.
Best yarn for beginners:
- 100% cotton yarn (strong and long-lasting)
- Cotton-blend yarn
- Medium-weight (worsted) yarn
Color choices for two-line stripes:
- White and navy
- Beige and brown
- Black and cream
- Pastel pink and gray
- Green and off-white
Choose colors that contrast clearly so the stripes stand out.
Crochet Hook
- Use a 4.5 mm or 5.0 mm crochet hook
- A medium hook size helps create firm stitches for a sturdy bag
Other Supplies
- Scissors
- Yarn needle for weaving in ends
- Stitch marker (optional but helpful)
Basic Crochet Skills Needed
This bag is designed for beginners and uses only simple stitches:
- Chain stitch (ch)
- Slip stitch (sl st)
- Single crochet (sc)
- Half double crochet (hdc)
- Working in rows and rounds
- Simple color changing
If you know these basics, you are ready to start.
Overview of the Bag Construction
The bag is made in three easy parts:
- The base
- The body with two-line striped colors
- The handles
The bag is worked from the bottom up, which makes it easy to control the size.
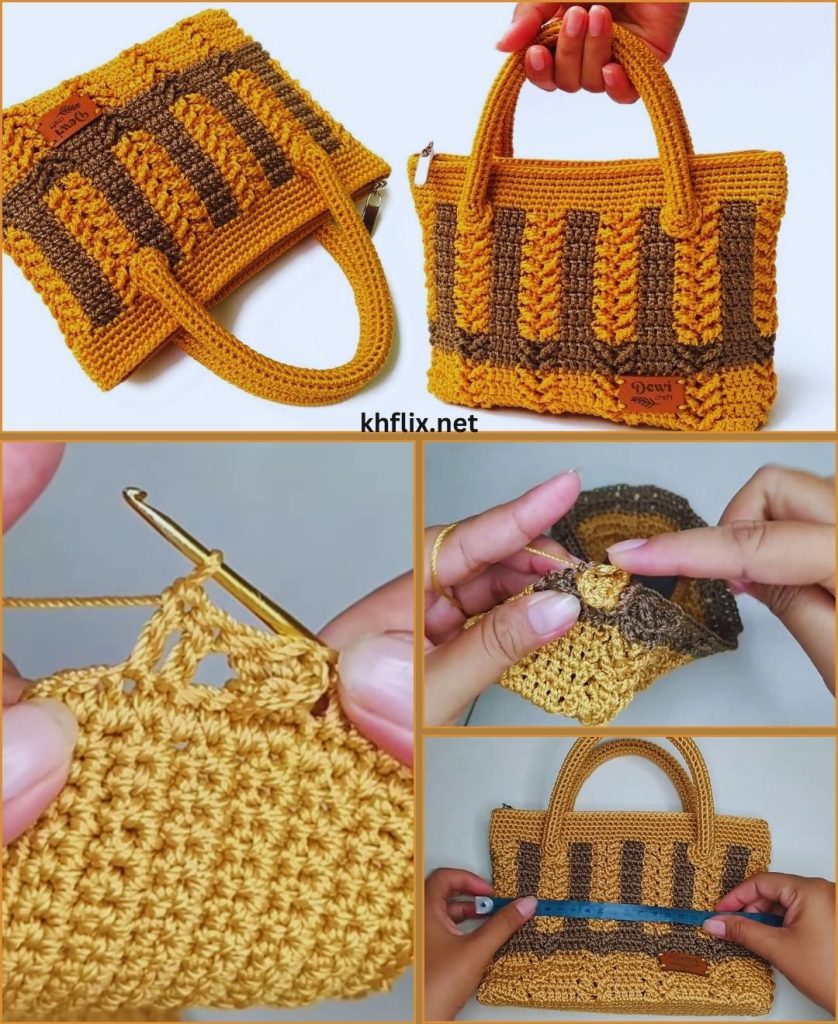
STEP-BY-STEP INSTRUCTIONS
STEP 1: Crochet the Bag Base
- Start with Color A.
- Chain 26–30 stitches, depending on how wide you want the bag.
- Single crochet into the second chain from the hook.
- Continue single crochet across the chain.
- Chain 1 and turn.
- Repeat single crochet rows until the base forms a rectangle (about 8–10 rows).
This rectangle will be the bottom of your bag.
STEP 2: Crochet Around the Base
- Do not fasten off.
- Single crochet evenly around the entire rectangle.
- Place 3 single crochets in each corner to turn smoothly.
- Join with a slip stitch.
Now the bag starts to take shape, and you will begin working in the round.
STEP 3: Start the Bag Body
First Round
- Chain 1.
- Work half double crochet into each stitch around.
- Join with a slip stitch.
Half double crochet is ideal for beginner bags because it is easy, strong, and works up quickly.
STEP 4: Create the Two-Line Striped Color Pattern
This is the main design feature of the bag.
Stripe Pattern Rule
- Crochet 2 rounds in Color A
- Switch to Color B for 2 rounds
- Continue repeating this pattern
How to Change Colors Neatly
- On the last stitch of the second round, pull through the new color.
- Drop the old color inside the bag.
- Continue crocheting with the new color.
Always change colors at the end of a round to keep the stripes clean and even.
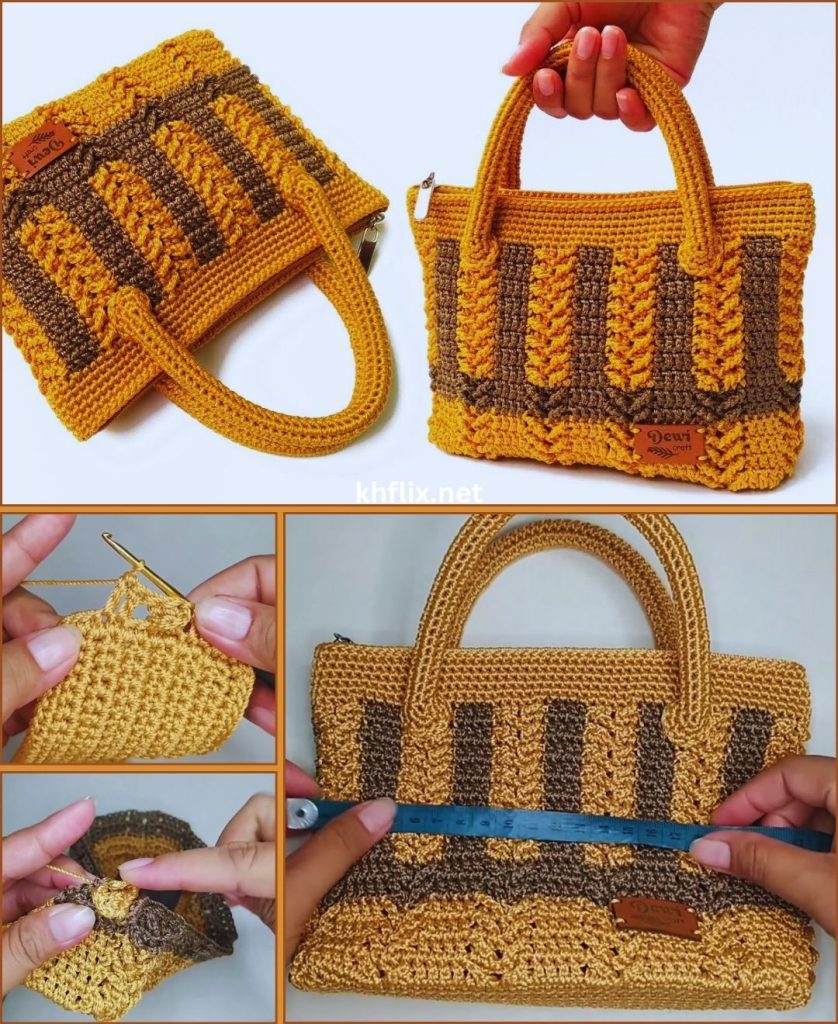
STEP 5: Continue Crocheting the Bag Body
- Keep working half double crochet rounds
- Alternate colors every two rounds
- Use a stitch marker to mark the beginning of each round
- Make sure the sides stay straight without increasing or decreasing
Most beginner bags look great when they reach 10–12 inches in height.
STEP 6: Make the Handles
Once the bag is tall enough, it’s time to create the handles.
- Crochet to the point where you want the first handle.
- Chain 12–16 stitches (depending on how wide you want the handle).
- Skip the same number of stitches on the bag body.
- Continue half double crochet to the second handle position.
- Chain again and skip stitches.
- Finish the round.
This creates two handle openings.

Strengthening the Handles
- In the next round, work single crochet into each stitch and chain.
- Add 2–3 rounds of single crochet around the top of the bag.
This makes the handles strong and comfortable for carrying weight.
STEP 7: Finishing the Bag
- Slip stitch to close the final round.
- Fasten off the yarn.
- Weave in all loose ends neatly with a yarn needle.
Optional: Add a final slip stitch round for a clean, polished edge.
Customization Ideas for Beginners
You can personalize your bag in many easy ways:
- Make wider or thinner stripes
- Add a fabric lining for extra durability
- Attach a button or magnetic snap
- Add tassels using leftover yarn
- Sew on a simple crochet flower or label
Helpful Beginner Tips
- Keep your tension relaxed but consistent
- Count stitches occasionally to stay even
- Choose light or medium colors to see stitches clearly
- Practice color changes on a small swatch first
- Don’t worry about small mistakes—stripes hide them well
Common Beginner Issues and Solutions
- Bag curling: Use a slightly larger hook
- Uneven stripes: Always change colors at round ends
- Loose handles: Add more single crochet rounds
- Bag stretching: Use cotton yarn and firm stitches
Why Beginners Love This Bag Design
- Simple stitches and easy construction
- Stylish look with minimal effort
- Great way to learn color changes
- Creates a useful, everyday item
- Builds confidence for future projects
This two-line striped crochet bag is often one of the first bags beginners successfully complete.
Final Thoughts
Learning how to crochet a bag – easy for beginners using two-line striped color is a wonderful way to practice basic crochet skills while making something both beautiful and practical. The simple construction, clear stripes, and forgiving pattern make this project perfect for beginners who want impressive results without complicated techniques.
Take your time, enjoy choosing your colors, and relax into the rhythm of your stitches. By the end of this project, you’ll have a handmade crochet bag—and the confidence to take on even more creative crochet designs.
Happy crocheting! 🧶✨