 by
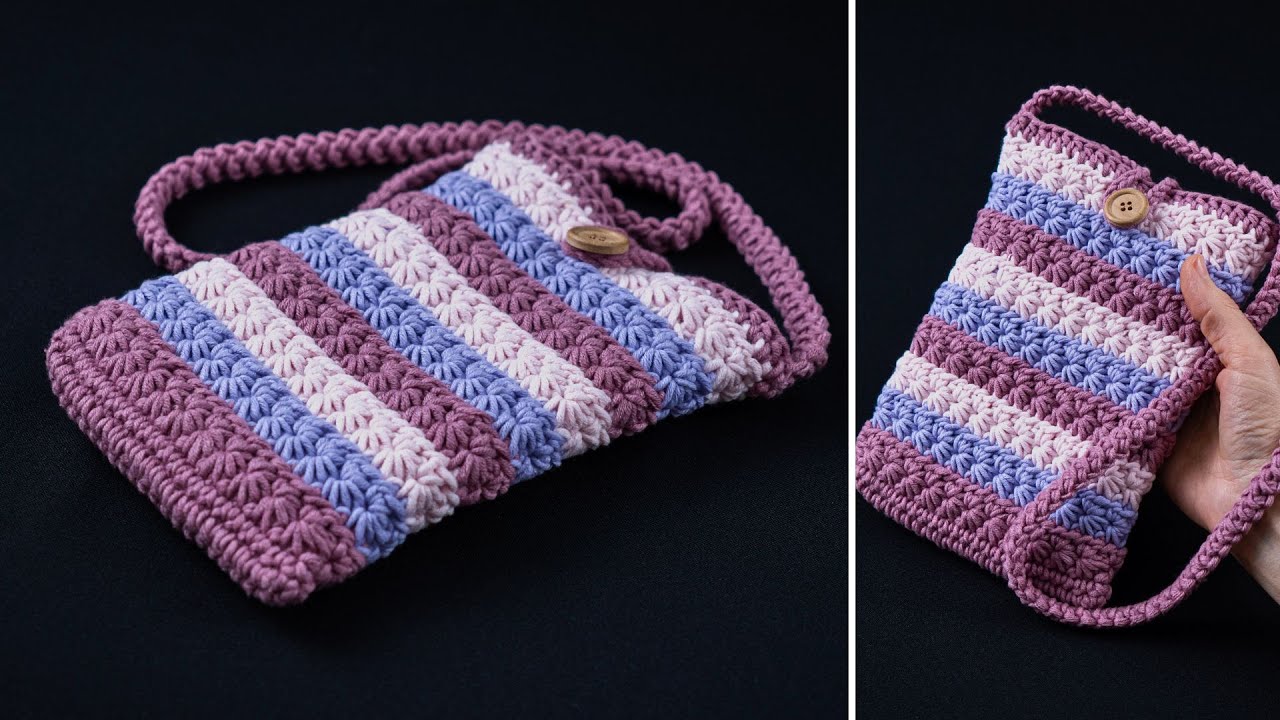
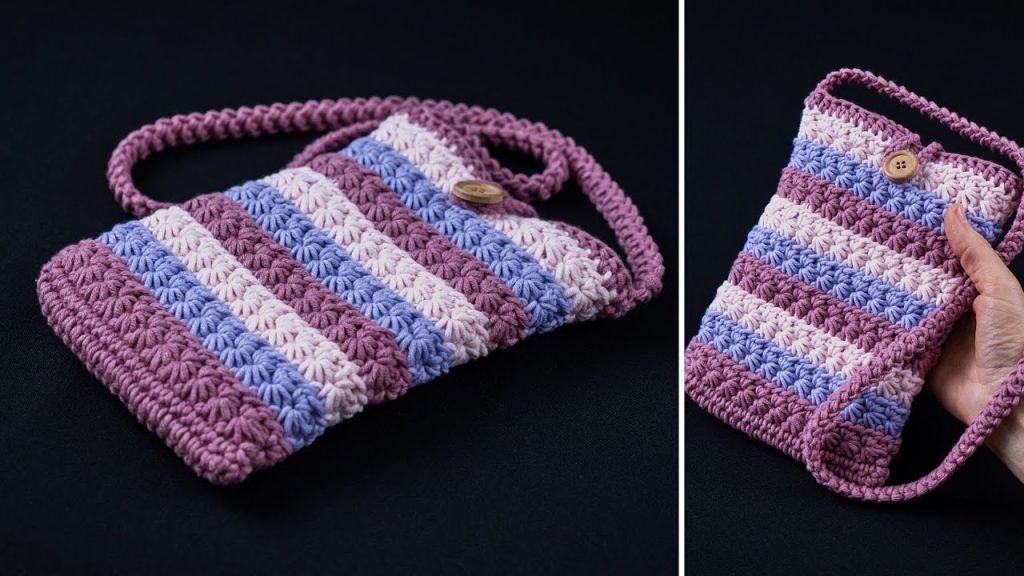
by Are you a beginner crocheter ready to move beyond basic stitches and create something truly eye-catching? Welcome to the perfect “next-level” project! This tutorial will guide you, step-by-step, through crocheting a gorgeous crossbody bag featuring the incredible Star Stitch.
The Star Stitch might look intricate and complex—like something you’d find in a high-end boutique—but it’s actually a simple, repetitive pattern that you can absolutely master. We’ve broken down the entire process, from learning the stitch itself to assembling the final bag, into easy-to-follow steps. By the end, you’ll not only have a beautiful, functional accessory but also a brand-new skill to be proud of.
Why This is a Great “Next Step” Beginner Project
- Visually Stunning: The Star Stitch creates a dense, woven-like texture that is incredibly beautiful and looks far more complicated than it is.
- Skill-Building: You’ll learn a new “fancy” stitch in a very manageable way. Since the bag is made as a simple flat panel, you can focus on mastering the stitch without worrying about complex shaping.
- Practical & Stylish: You’ll create a durable, useful bag that’s perfect for carrying your essentials like a phone, wallet, and keys.
Before You Begin: The Essentials
Preparation is key for a successful project. Let’s gather your materials.
Materials & Tools
- Yarn: Approximately 250-300 yards of Worsted Weight (Category 4) cotton or a cotton-blend yarn.
- Why Cotton? Cotton is highly recommended for bags. It’s strong, sturdy, and has excellent stitch definition, which will make your Star Stitches pop! It also has minimal stretch, ensuring your bag holds its shape.
- Crochet Hook: A 5.0mm (H-8) hook, or the size recommended for your yarn.
- Tapestry Needle: Essential for seaming the bag and weaving in ends.
- Scissors: A sharp pair for cutting yarn.
- Measuring Tape: To ensure your bag is the size you want.
- (Optional) Button or Magnetic Snap: For a secure closure.
- (Optional) Stitch Markers: Can be helpful for marking the first and last stitches of a row.
Gauge
Gauge isn’t critically important for the final size of a bag, but consistency is!
- Sample Gauge: A 4×4 inch (10×10 cm) square of the Star Stitch pattern should be roughly 4 stars wide and 7 rows high (or 3.5 full star stitch repeats).
- Don’t worry about matching this exactly. Just focus on keeping your tension even for a uniform fabric.
Abbreviations & Stitches (US Crochet Terms)
- ch: chain
- st(s): stitch(es)
- sc: single crochet
- hdc: half double crochet
- sl st: slip stitch
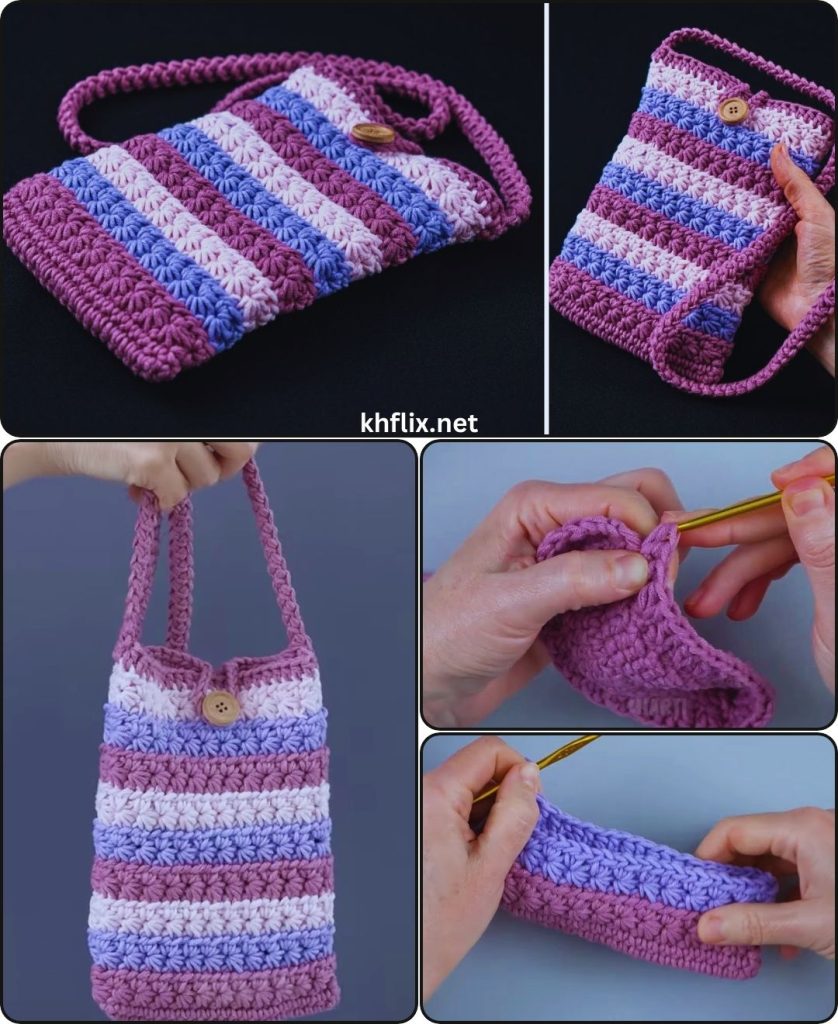
Mastering the Star Stitch: A Mini-Tutorial
Before we start the bag, let’s learn the stitch. The Star Stitch is a two-row repeat. Take your time with this section, practice on a small swatch, and you’ll be a pro in no time.
Row 1: Creating the Stars
This row is where you form the body of the stars. It’s all about pulling up loops.
- Setup: Insert your hook into the 2nd ch from the hook, yarn over and pull up a loop. You have 2 loops on your hook.
- Insert hook into the 3rd ch, yarn over, pull up a loop (3 loops on hook).
- Insert hook into the 4th ch, yarn over, pull up a loop (4 loops on hook).
- Insert hook into the 5th ch, yarn over, pull up a loop (5 loops on hook).
- Insert hook into the 6th ch, yarn over, pull up a loop (6 loops on hook).
- Finish the Star: Yarn over and pull through all 6 loops on your hook.
- Create the “Eye”: Ch 1 to close the star. This small ch-1 space is called the “eye” of the star, and it’s very important for the next row.
You’ve made your first star! Now let’s make the next one.
- Start the Next Star:
- Insert your hook directly into the eye of the star you just made, yarn over, pull up a loop (2 loops on hook).
- Insert your hook into the space between the last two “spikes” of the previous star, yarn over, pull up a loop (3 loops on hook).
- Insert your hook into the same chain where the last loop of the previous star was made, yarn over, pull up a loop (4 loops on hook).
- Insert hook into the next empty chain, yarn over, pull up a loop (5 loops on hook).
- Insert hook into the next empty chain, yarn over, pull up a loop (6 loops on hook).
- Yarn over, pull through all 6 loops. Ch 1 to create the eye.
Repeat Step 8 and 9 all the way across your row. To finish the row, work 1 hdc in the very last stitch (the same stitch where you pulled up the last loop of your final star).
Row 2: The “Eye” Row
This row is simple and quick. It finishes the look of the stars and prepares you for the next Star Stitch row.
- Ch 1 and turn your work.
- Work 2 hdc into the eye (the ch-1 space) of the first star of the row below.
- Continue by working 2 hdc into the eye of every star all the way across the row.
- To finish, work 1 hdc in the very last stitch of the row.
That’s it! The entire pattern is just a repeat of these two rows.
The Crossbody Bag Pattern: Step-by-Step
We will create one long rectangular panel, which we will then fold and seam to form the bag.
Part 1: The Main Body Panel
Foundation Chain: Ch 35. (The Star Stitch requires an odd number of starting chains).
Row 1 (Star Stitch Row): Following the mini-tutorial above, work your first row of Star Stitches. You should have 16 stars across. Work 1 hdc in the last stitch. (16 stars)
Row 2 (HDC Row): Ch 1, turn. Work 2 hdc in the eye of each star across. Work 1 hdc in the last stitch.
Row 3 (Star Stitch Row): Ch 2, turn.
- Insert hook into the 2nd ch from hook, pull up a loop (2 loops on hook).
- Insert hook into the base of that same ch-2, pull up a loop (3 loops on hook).
- Insert hook into the next 3 sts, pulling up a loop from each (6 loops on hook).
- Yarn over, pull through all 6 loops, ch 1. Your first star is made.
- Continue making stars across the row as you learned in the mini-tutorial. Work 1 hdc in the last stitch. (16 stars)
Row 4 and Onwards: Continue repeating Row 2 and Row 3 until your panel is approximately 22-24 inches (56-61 cm) long. This will create a bag that is about 11-12 inches tall when folded. You can make your panel longer for a deeper bag or shorter for a smaller purse.
Final Row: After you finish your last Star Stitch row (an odd-numbered row), do one final row of single crochet. Ch 1, turn. Work 1 sc in each stitch across. This creates a clean, straight edge for the opening of your bag. Fasten off, leaving a long tail (about 20 inches) for seaming.
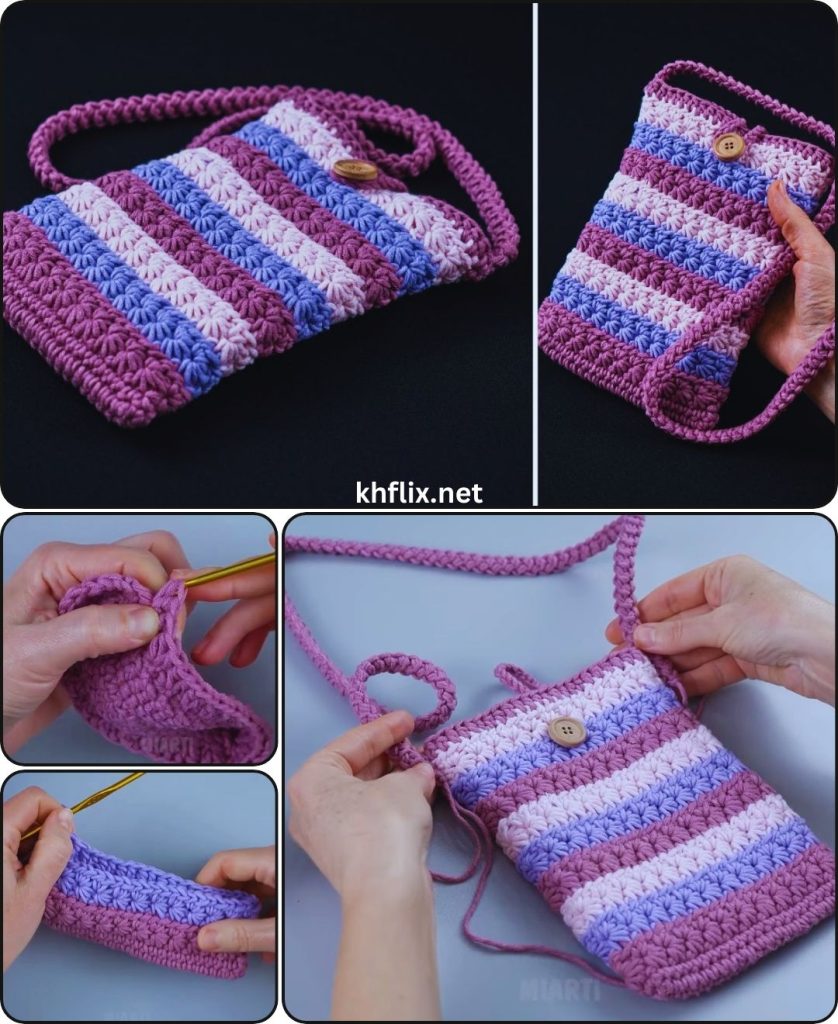
Part 2: Assembling the Bag
- Lay your beautiful panel flat with the right side (the side with the more defined stars) facing up.
- Fold the bottom edge (the starting chain edge) up, leaving about 8 inches for the top flap. The folded portion will be the main body of the bag.
- Using the long tail and your tapestry needle, whip stitch one of the sides closed. Stitch through both layers of the fabric for a secure seam.
- When you reach the top of the bag body, secure the yarn with a knot and weave in the end.
- Attach a new piece of yarn to the other bottom corner and repeat the process to seam the second side closed.
Part 3: The Strap
A simple, sturdy single crochet strap is perfect for this bag.
- Foundation Chain: Ch 7.
- Row 1: Sc in the 2nd ch from the hook and in each ch across. (6 sc)
- Row 2: Ch 1, turn. Sc in each st across. (6 sc)
- Repeat Row 2 until your strap is your desired length. A standard crossbody length is 40-50 inches (100-127 cm), but you can easily customize it by draping it over your shoulder as you work to check the length.
- Fasten off, leaving a long tail for sewing.
- Using your tapestry needle, securely sew each end of the strap to the side seams of your bag.
Finishing Touches & Customization
- Weave in All Ends: This is the final step to a professional-looking project. Weave in any remaining yarn tails securely.
- Add a Closure: Sew a simple button onto the front of the bag, centered under the flap. To create a closure loop, attach yarn to the center edge of the flap, chain a length that will fit snugly around your button, and sl st back into the flap to secure it.
- Add a Lining: For extra durability, you can hand-sew a simple cotton fabric lining into your bag.
You have now created a stunning, handmade crossbody bag! You’ve tackled a new stitch, practiced your skills, and made a beautiful accessory that is sure to get compliments. Enjoy your gorgeous new bag!