 by
by A Complete Detailed Guide for Beginners and Beyond
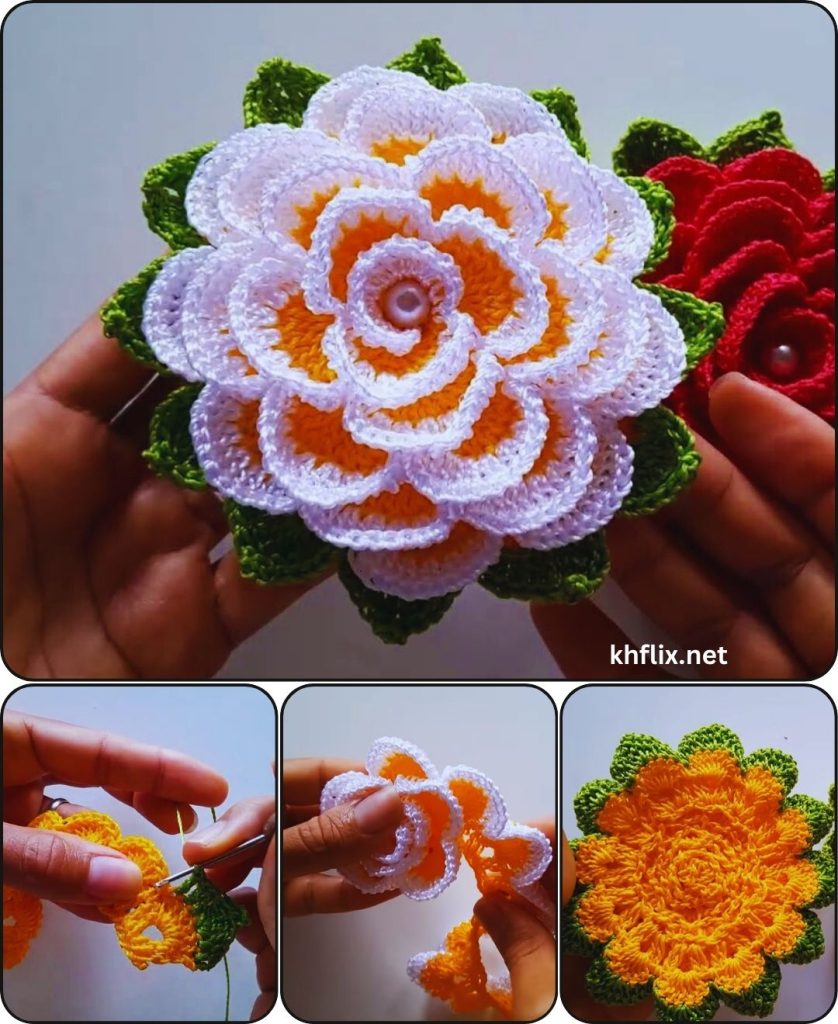
Crochet roses are one of the most beautiful and versatile handmade embellishments you can create. Whether you want to decorate a hat, bag, blanket, hair clip, brooch, or even create a full bouquet, learning how to crochet a rose step by step is a skill every crochet lover should have.
The best part? Crochet roses look intricate and elegant — but they are surprisingly easy to make.
In this long, detailed tutorial, you’ll learn:
- Materials needed
- Basic stitches required
- Step-by-step rose pattern
- How to shape realistic petals
- How to add leaves and stems
- Tips for making your rose look professional
Let’s begin! 🌸
Why Crochet Roses?
Crochet roses are:
- Beginner-friendly
- Quick to make (20–40 minutes)
- Great for scrap yarn
- Perfect for gifts
- Ideal for embellishing projects
- Beautiful for home décor
They can be flat, 3D, large, small, layered, or realistic depending on your technique.
Materials You Will Need
Keep it simple and comfortable.
🧶 Yarn
- Light or medium weight yarn (DK or worsted)
- Cotton for structure
- Acrylic for softness
- Red, pink, white, or any rose-inspired color
- Green yarn for leaves (optional)
🪡 Crochet Hook
- 3.5mm – 5mm hook
- Choose size recommended on yarn label
✂️ Other Tools
- Yarn needle
- Scissors
- Stitch marker (optional)
- Hot glue (optional for crafts)
Basic Stitches You Should Know
This step-by-step crochet rose uses simple stitches:
- Chain (ch)
- Slip Stitch (sl st)
- Single Crochet (sc)
- Half Double Crochet (hdc)
- Double Crochet (dc)
If you know these stitches, you can easily make this rose.
Overview of the Rose Method
We will create:
- A long foundation chain
- Petal stitches along the chain
- Roll the strip into a spiral
- Secure and shape
- Add optional leaves
This is one of the easiest and most popular crochet rose methods.
STEP 1: Create the Foundation Chain
- Make a slip knot.
- Chain 51 stitches.
💡 Want a bigger rose? Chain 61–71.
💡 Want a smaller rose? Chain 31–41.
The longer the chain, the fuller the rose.
STEP 2: Create the Petal Base Row
Row 1:
- Insert hook into 2nd chain from hook.
- Single crochet.
- Continue single crochet across entire row.
- Chain 1 and turn.
This creates a stable base for petals.
STEP 3: Create the Petal Pattern
Now comes the magic part — forming petals.
In the first stitch:
- (1 single crochet
- 1 half double crochet
- 3 double crochets
- 1 half double crochet
- 1 single crochet)
All in the SAME stitch.
Skip 1 stitch.
Repeat the petal pattern in every second stitch:
(sc, hdc, 3dc, hdc, sc)
Continue across entire row.
You’ll notice ruffled edges forming — these are your rose petals!
STEP 4: Fasten Off
After finishing the last petal:
- Cut yarn leaving a long tail (about 12 inches).
- Pull through and tighten.
Now you have a curly petal strip.
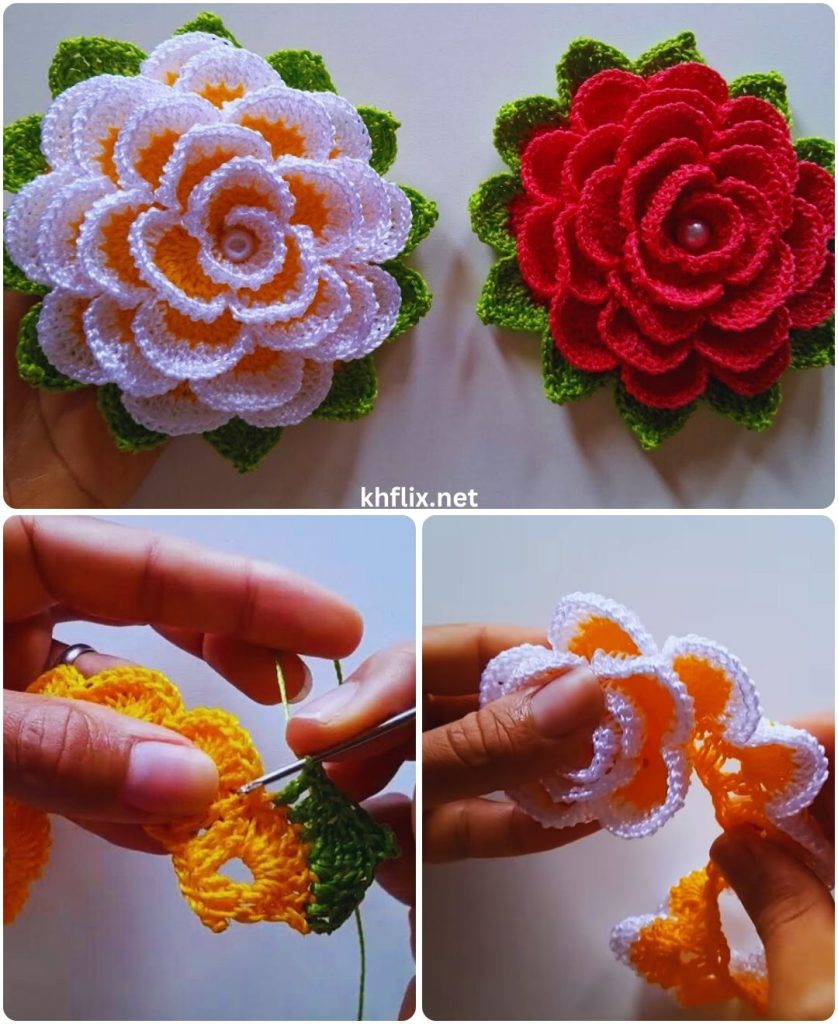
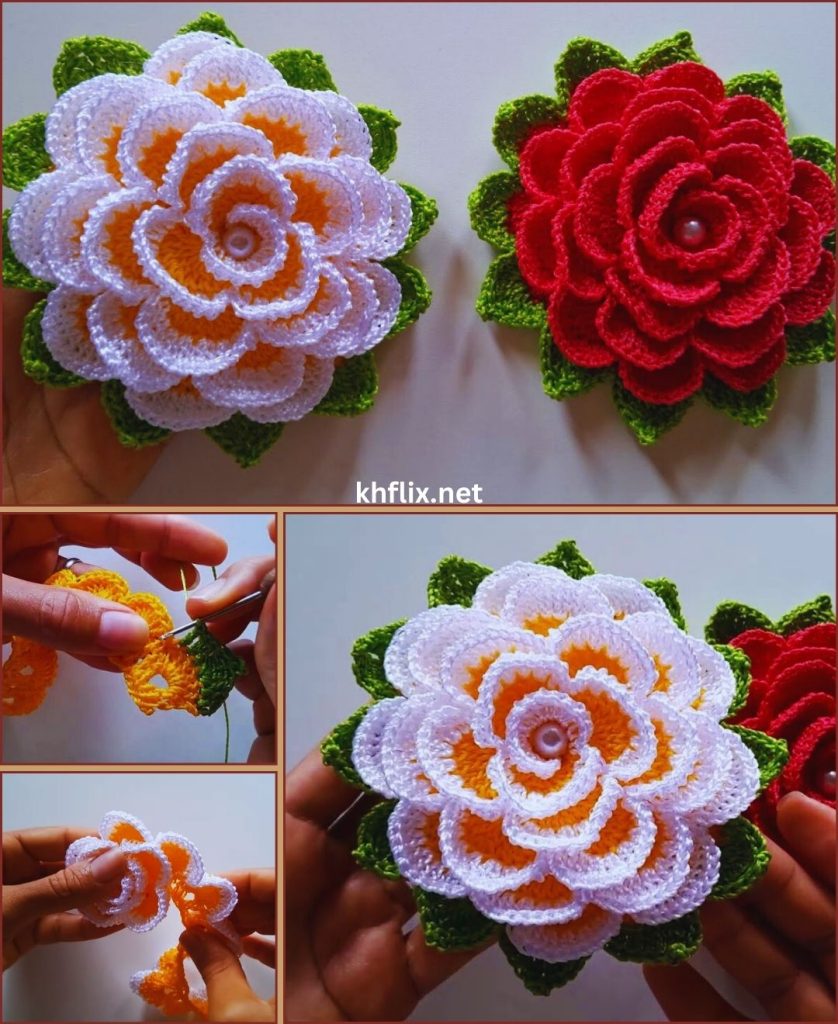
STEP 5: Roll the Rose 🌸
This step transforms your strip into a beautiful rose.
- Start from the beginning edge.
- Roll tightly for the center bud.
- Gradually roll more loosely as you move outward.
- Adjust petals as you roll.
The tighter center + looser outer petals create a realistic rose look.
STEP 6: Secure the Rose
Using your yarn needle:
- Thread the long yarn tail.
- Stitch through the bottom layers.
- Sew securely through several layers.
- Knot firmly at the back.
- Weave in ends.
Your rose shape is now locked in place.
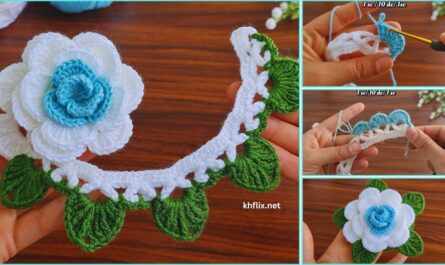
Optional: Add Leaves 🍃
To make your crochet rose more realistic:
Leaf Pattern
Using green yarn:
- Chain 8.
- Slip stitch into 2nd chain from hook.
- Single crochet in next stitch.
- Half double crochet in next.
- Double crochet in next 2 stitches.
- Half double crochet.
- Single crochet.
- Slip stitch into base.
Fasten off and sew to back of rose.
Make 1–3 leaves depending on your style.
Optional: Add a Stem
For bouquets:
- Insert floral wire through base.
- Wrap green yarn tightly around wire.
- Secure with glue or tight stitches.
Now you have a crochet rose stem!
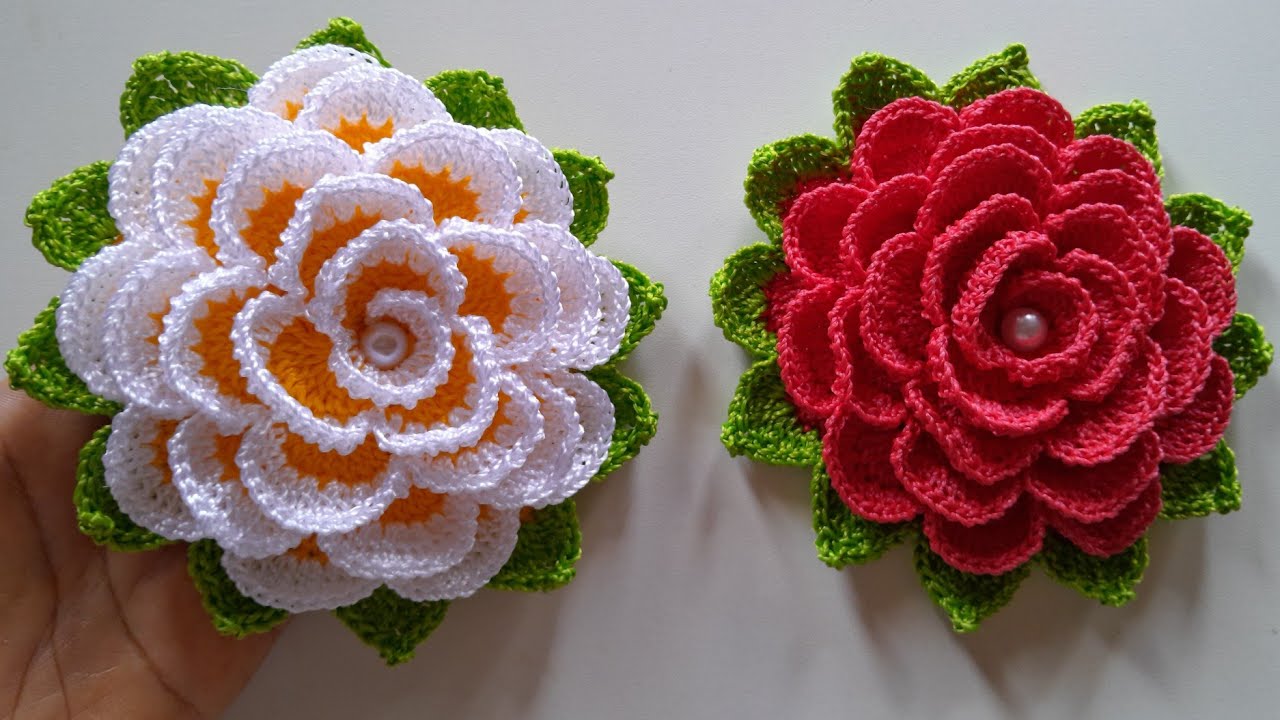
How to Make a Fuller 3D Rose
If you want a more layered look:
- Increase double crochets to 5 in each petal.
- Use a longer chain (70+ stitches).
- Make two strips and layer them.
This creates a lush, realistic rose.
Tips for a Professional Look
✔ Keep tension consistent
✔ Don’t roll too loosely at center
✔ Shape petals with fingers
✔ Use cotton yarn for structure
✔ Block lightly if needed
✔ Sew securely through multiple layers
Common Beginner Mistakes
Rose Looks Flat
Fix: Roll tighter in center and looser outside.
Petals Too Tight
Fix: Use larger hook or looser tension.
Rose Falling Apart
Fix: Sew through base multiple times.
Color Ideas for Different Styles
🌹 Classic Red Rose
🌸 Soft Pink Rose
🤍 White Wedding Rose
💜 Lavender Decorative Rose
🌈 Ombre Yarn Rose
🖤 Black Gothic Rose
You can even mix two shades in one strip for a gradient effect.
Ways to Use Crochet Roses
Attach them to:
- Hats
- Bags
- Blankets
- Baby headbands
- Cardigans
- Gift wrapping
- Brooch pins
- Hair clips
- Cushion covers
- Wall décor
They instantly elevate handmade projects.
How Long Does It Take?
- Beginner: 30–45 minutes
- Experienced crocheter: 15–20 minutes
It’s a quick and satisfying project!
Why This Method Is Perfect for Beginners
Because:
- No complicated shaping
- No advanced stitches
- No sewing separate petals
- Simple rolling technique
- Adjustable size
- Works with scrap yarn
It looks advanced — but it’s truly beginner-friendly.
Final Thoughts 🌸
Learning how to crochet a rose step by step opens up endless creative possibilities. From small decorative flowers to full bouquets, this simple technique allows you to create something elegant, romantic, and timeless.
Start with one rose.
Experiment with size.
Try different yarn textures.
Add leaves and stems.
Create a bouquet.
Soon, you’ll have a beautiful collection of handmade crochet roses that look stunning and professional.
If you’d like, I can also provide:
- A printable PDF pattern
- A video tutorial script
- A pattern diagram
- Advanced layered rose pattern
- Mini crochet rose version
- Large bouquet pattern
Happy crocheting! 🧶🌸