 by
by A Complete Step-by-Step Crochet Guide for Beginners and Beyond
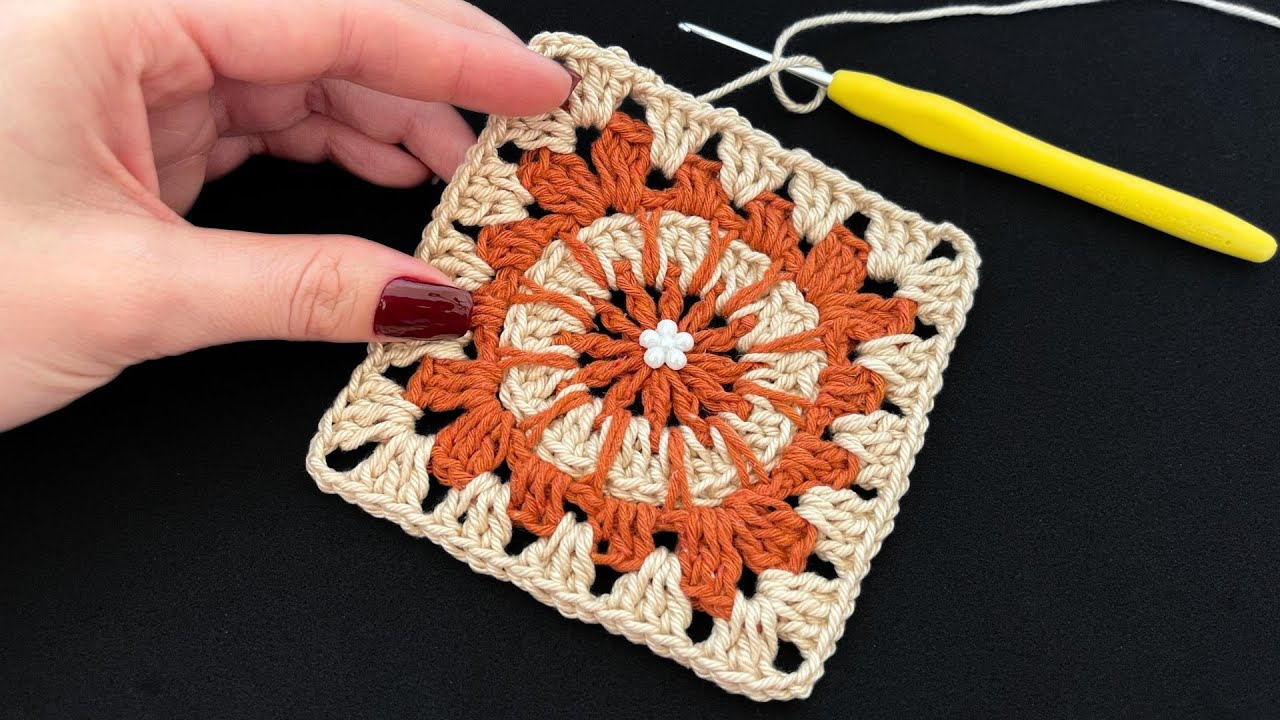
Granny squares are timeless, but if you’re looking for something that feels a little more delicate, elegant, and textured, the Grandma Lucia Square is a perfect choice. It combines classic granny style with open lace details and soft shaping, creating a square that looks intricate yet is surprisingly easy to make.
In this detailed tutorial, you’ll learn:
- Materials needed
- Stitches required
- Step-by-step instructions (round by round)
- How to change colors
- How to keep your square flat
- How to join multiple squares
- Creative project ideas
Let’s begin!
What Is a Grandma Lucia Square?
The Grandma Lucia Square is a decorative crochet square featuring:
- A floral-style center
- Open lace chain spaces
- Cluster stitches
- A defined square border
It’s perfect for blankets, cushions, bags, shawls, and even garments.
Despite its elegant look, it uses beginner-friendly stitches and simple repetition.
Why You’ll Love This Square
- Easy to memorize pattern
- Beautiful lacy texture
- Great for color combinations
- Beginner-friendly with basic stitches
- Works up quickly
- Perfect stash-busting project
Materials You Will Need
🧶 Yarn
- DK or worsted weight yarn
- Cotton for crisp stitch definition
- Acrylic for softness
- 2–3 colors recommended
🪡 Crochet Hook
- 4.0mm – 5.0mm hook
(Check yarn label for recommendation.)
✂️ Other Tools
- Yarn needle
- Scissors
- Stitch markers (optional)
- Measuring tape
Basic Stitches You Should Know
This square uses simple stitches:
- Chain (ch)
- Slip Stitch (sl st)
- Single Crochet (sc)
- Double Crochet (dc)
- Treble Crochet (tr) (optional variation)
If you know how to double crochet, you can easily make this square.
Finished Size
Approximately:
- 6–8 inches (depending on yarn and tension)
You can easily adjust size by adding extra rounds.
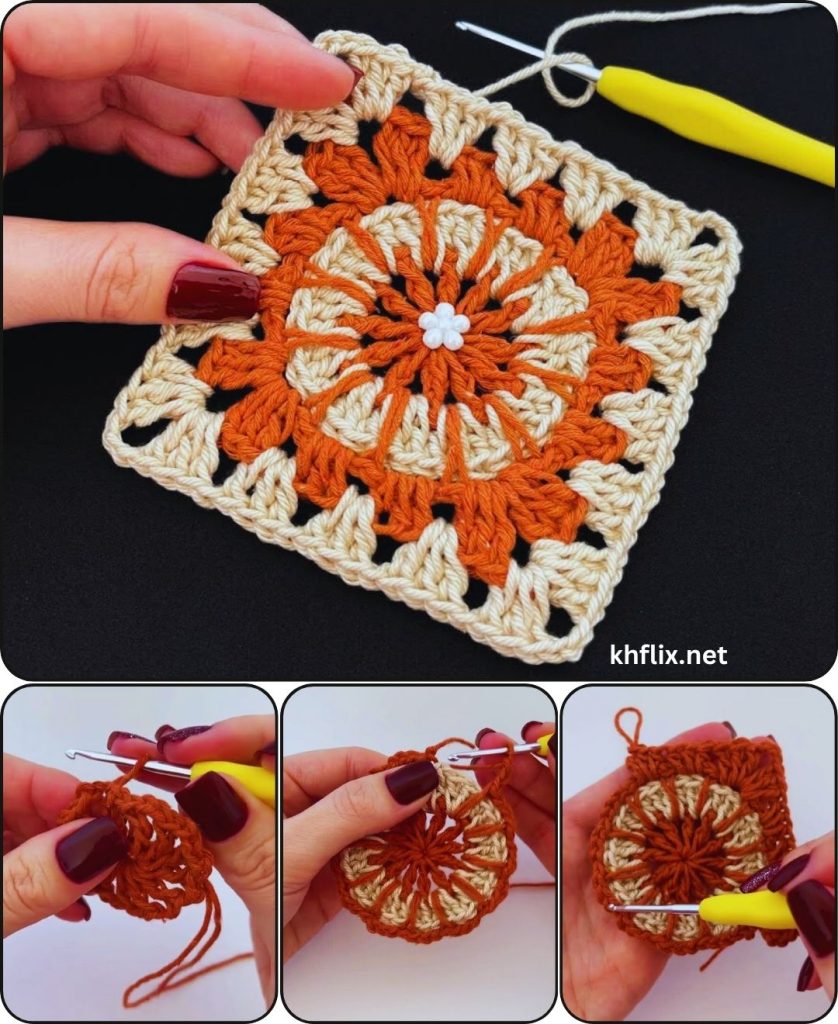
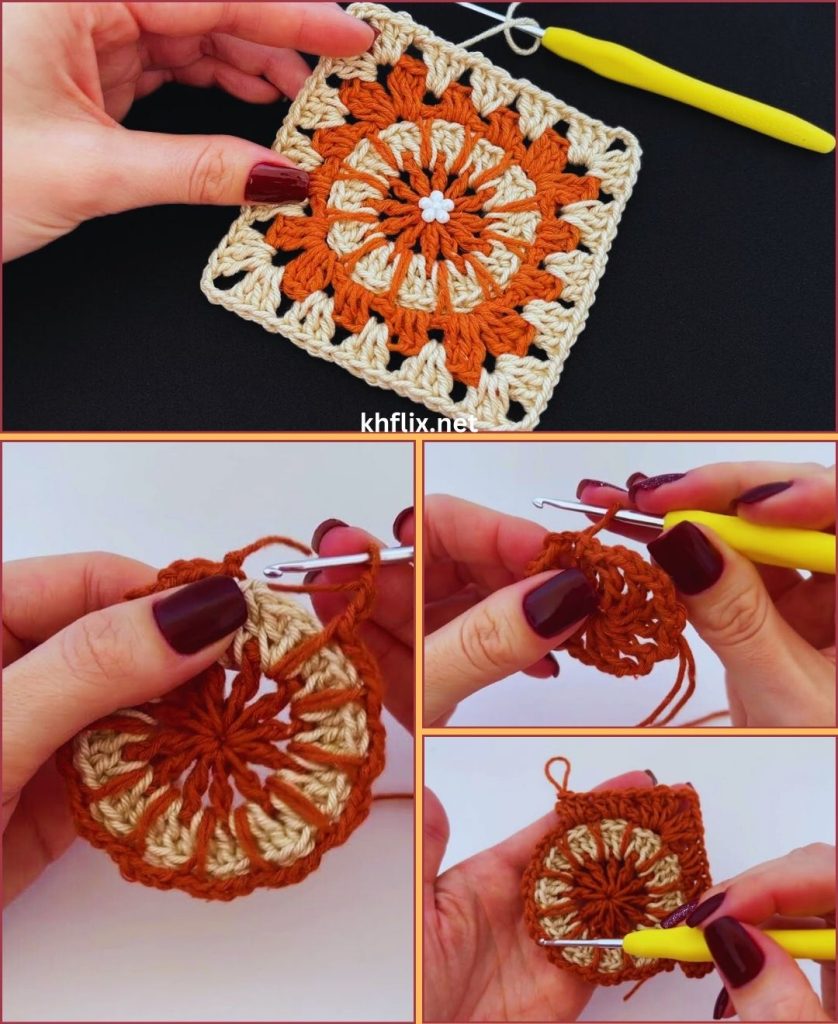
Step-by-Step: Beautiful and Easy Grandma Lucia Square
ROUND 1 – The Center Circle
- Make a magic ring (or chain 4 and join to form a ring).
- Chain 3 (counts as first double crochet).
- Work 15 double crochets into the ring.
- Slip stitch to top of chain 3.
You should have 16 double crochets total.
Pull the magic ring tight and fasten securely.
💡 This forms the floral center.
ROUND 2 – Create Texture
- Chain 3.
- Double crochet in same stitch.
- Chain 1.
- Work 2 double crochets in next stitch.
- Chain 1.
Repeat around:
(2 dc, ch 1 in next stitch)
Slip stitch to join.
You now have small V-shaped clusters forming around the circle.
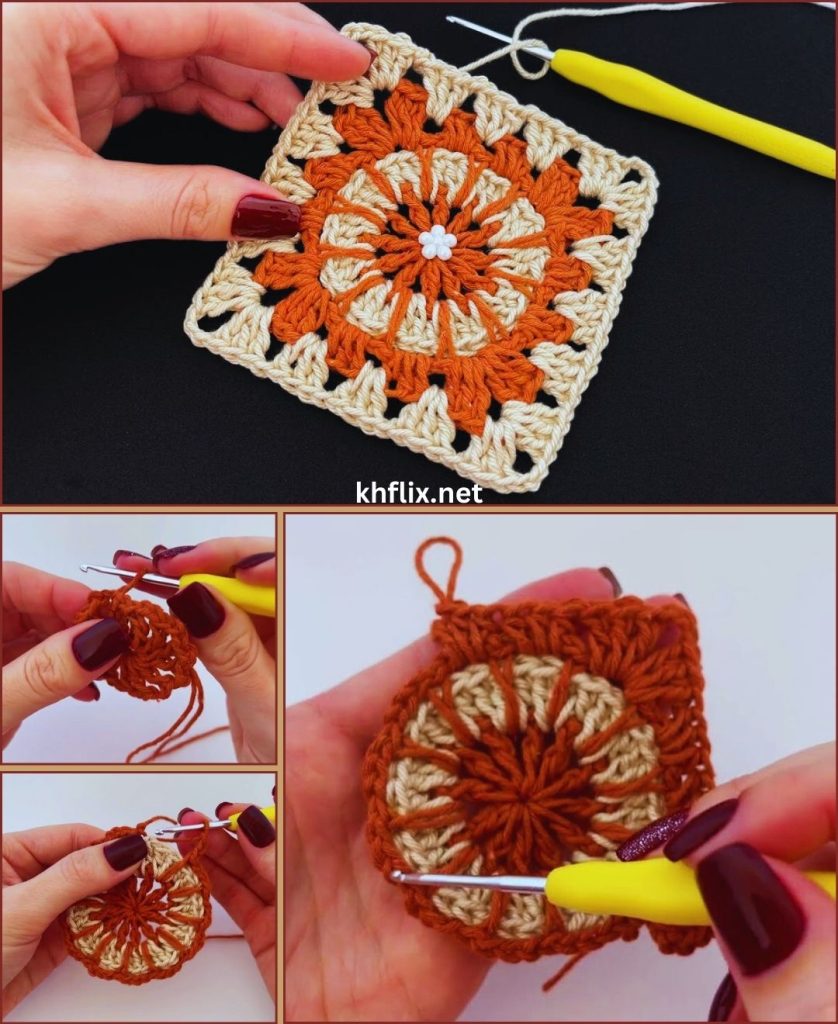
ROUND 3 – Forming Petal Spaces
Slip stitch into next chain space.
- Chain 3.
- Work 2 double crochets in same space.
- Chain 2.
- Work 3 double crochets in same space.
- Chain 1.
Move to next chain space and repeat:
(3 dc, ch 2, 3 dc, ch 1)
Continue around and slip stitch to join.
Now you’ll see the square beginning to form with corner spaces.
ROUND 4 – Shaping the Square
Slip stitch into the next chain-2 corner space.
Corner Pattern:
- Chain 3
- 2 double crochet
- Chain 2
- 3 double crochet
Side Pattern:
In each chain-1 space:
- 3 double crochet
- Chain 1
Repeat around entire square.
Slip stitch to join.
Now you have a defined square!
ROUND 5 – Expanding the Square
To enlarge your Grandma Lucia Square:
Corner:
- (3 dc, ch 2, 3 dc)
Sides:
- 3 dc in each space
- Chain 1 between clusters
Repeat until desired size.
Fasten off and weave in ends.
How to Change Colors Beautifully
For a stunning effect:
- Change color after Round 1 for bold center
- Use a different color for borders
- Use gradient yarn for smooth transitions
- Try pastel center + white border
To change color:
- Complete final stitch of round until last yarn-over.
- Pull new color through.
- Continue with new yarn.
Tips to Keep Your Square Flat
✔ Don’t skip chain spaces
✔ Keep consistent tension
✔ Block after finishing
✔ Make sure corners always have chain-2 space
✔ Avoid tightening slip stitches too much
If edges curl:
- Use slightly larger hook
- Block with light steam
Blocking Your Square (Highly Recommended)
Blocking makes your square look professional.
Method:
- Lightly spray with water.
- Pin to square shape.
- Let dry completely.
This enhances stitch definition and flattens corners.
Joining Multiple Grandma Lucia Squares
You can join squares using:
1. Slip Stitch Join
Simple and flat.
2. Single Crochet Join
Adds decorative ridge.
3. Invisible Mattress Stitch
Clean and seamless look.
Join as you go (JAYG) is also possible during the final round.
Project Ideas Using Grandma Lucia Square
This square works beautifully for:
- Crochet blankets
- Cushion covers
- Tote bags
- Cardigans
- Shawls
- Baby blankets
- Table runners
- Wall hangings
You can make a full blanket by joining multiple squares together.
Color Combination Ideas
🌸 Pink center + cream border
🌿 Sage green + ivory
🌈 Rainbow multi-color squares
🤍 Monochrome beige tones
💜 Lavender + white
🌻 Mustard + gray
Choosing harmonious colors elevates the elegance of this pattern.
Common Beginner Mistakes
Square Turning Into Circle
Cause: Missing corner increases
Fix: Always add (3 dc, ch 2, 3 dc) in corners.
Wavy Edges
Cause: Too many stitches
Fix: Double-check cluster count.
Tight Center
Cause: Over-tightening magic ring
Fix: Keep tension relaxed.
How Long Does It Take?
- Beginner: 45–60 minutes per square
- Experienced crocheter: 20–30 minutes
It’s relaxing and rhythmic once memorized.
Why This Square Looks So Beautiful
Because it combines:
- A floral-style center
- Balanced cluster symmetry
- Open lace detailing
- Structured square border
It looks complex but follows a simple repeating pattern.
Final Thoughts
The Beautiful and Easy Grandma Lucia Square is a perfect blend of elegance and simplicity. Whether you’re new to crochet or experienced, this square offers creative flexibility and stunning results.
Start with one square.
Experiment with colors.
Join multiple squares.
Create something meaningful and handmade.
Once you master it, you’ll find yourself making it again and again for blankets, gifts, and decorative pieces.
If you’d like, I can also provide:
- A printable PDF pattern
- A chart/diagram version
- A video tutorial script
- A blanket-size calculation guide
- An advanced textured variation
Happy crocheting! 🧶✨