
 by
by A Detailed Step-by-Step Guide for Beginners and Creative Makers
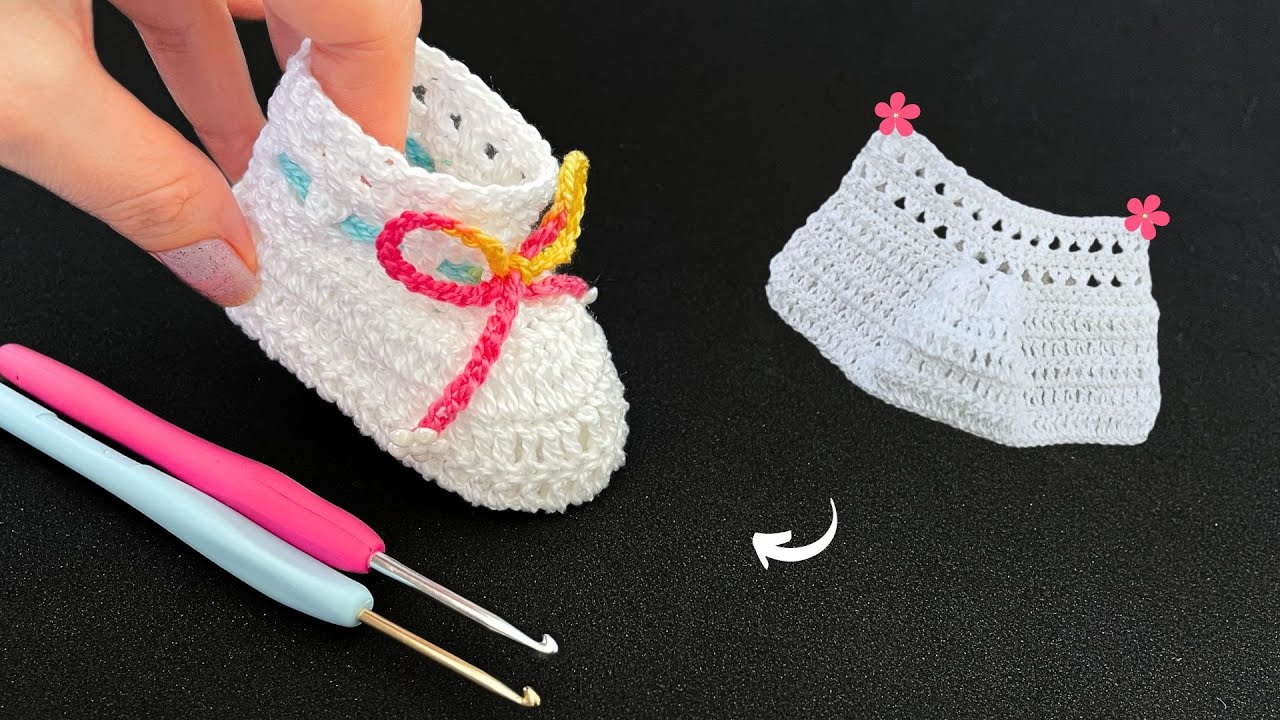
Crochet baby shoes are one of the sweetest handmade items you can create. They are tiny, soft, and full of love. When designed with delicate details and simple techniques, they become even more special.
In this detailed guide, you will learn how to make delicate and easy crochet baby shoes that look beautiful, elegant, and professionally finished — even if you are a beginner.
👶 Why Choose a Delicate Design?
Delicate baby shoes are:
- 🌸 Soft and gentle on baby skin
- 🎀 Elegant and beautiful for special occasions
- 🎁 Perfect for baby showers and gifts
- 📸 Wonderful for newborn photography
- 💝 Meaningful handmade keepsakes
The goal is to keep the pattern simple but make the result look refined and graceful.

🧵 Materials You Will Need
You don’t need complicated supplies. Keep it soft and simple.
Yarn
- Soft baby yarn (DK or light worsted weight)
- Choose pastel or neutral shades for a delicate look:
- Cream
- Blush pink
- Baby blue
- Soft gray
- Mint
- Lavender
Make sure the yarn is:
- Hypoallergenic
- Washable
- Smooth (not scratchy)
Crochet Hook
- 3.0 mm – 3.5 mm (recommended for newborn size)
Other Tools
- Yarn needle
- Scissors
- Stitch marker
- Small pearl-style button (optional)
- Satin ribbon (optional)
📏 Size Guide (0–6 Months)
Standard sole measurement:
- 3.5–4 inches (9–10 cm)
Starting chain:
- Usually 10 or 11 chains for newborn size
You can adjust size later by increasing or decreasing the starting chain.
🪡 Stitches Used (Very Beginner-Friendly)
This pattern uses simple stitches:
- Chain (ch)
- Slip stitch (sl st)
- Single crochet (sc)
- Half double crochet (hdc)
- Double crochet (dc)
No complicated shaping required.
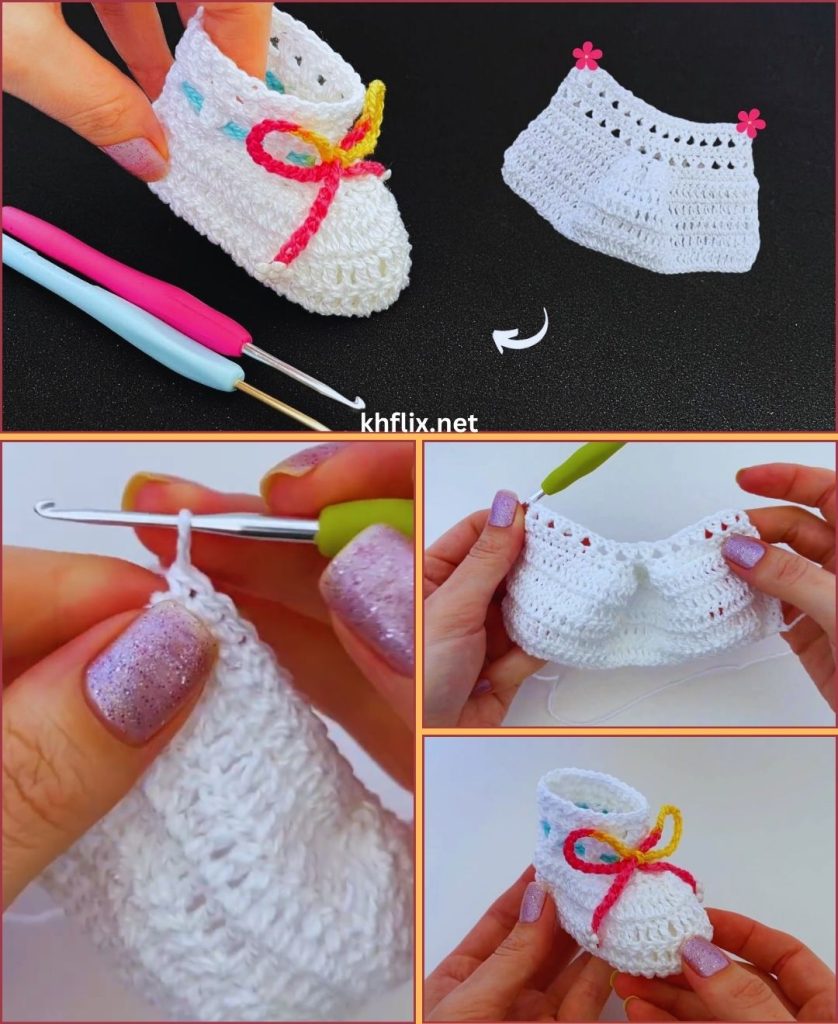
👣 Step 1: Create the Sole
We begin from the bottom.
Round 1:
- Chain 11.
- In the second chain from hook, work 2 hdc.
- 1 hdc in next 8 stitches.
- 5 hdc in last stitch (forms toe curve).
- Work along the opposite side:
- 1 hdc in next 8 stitches
- 3 hdc in last stitch
- Join with slip stitch.
You now have an oval sole.
👣 Step 2: Increase for Perfect Shape
Round 2:
- Chain 1.
- 2 hdc in first stitch.
- 1 hdc in each stitch until you reach the curved toe.
- Increase evenly (2 hdc in each curved stitch).
- Continue around.
- Join.
Round 3:
- Add small increases at toe and heel.
- Join.
Your sole should now measure about 3.5–4 inches.
💡 Keep stitches even — this ensures a delicate, smooth shape.
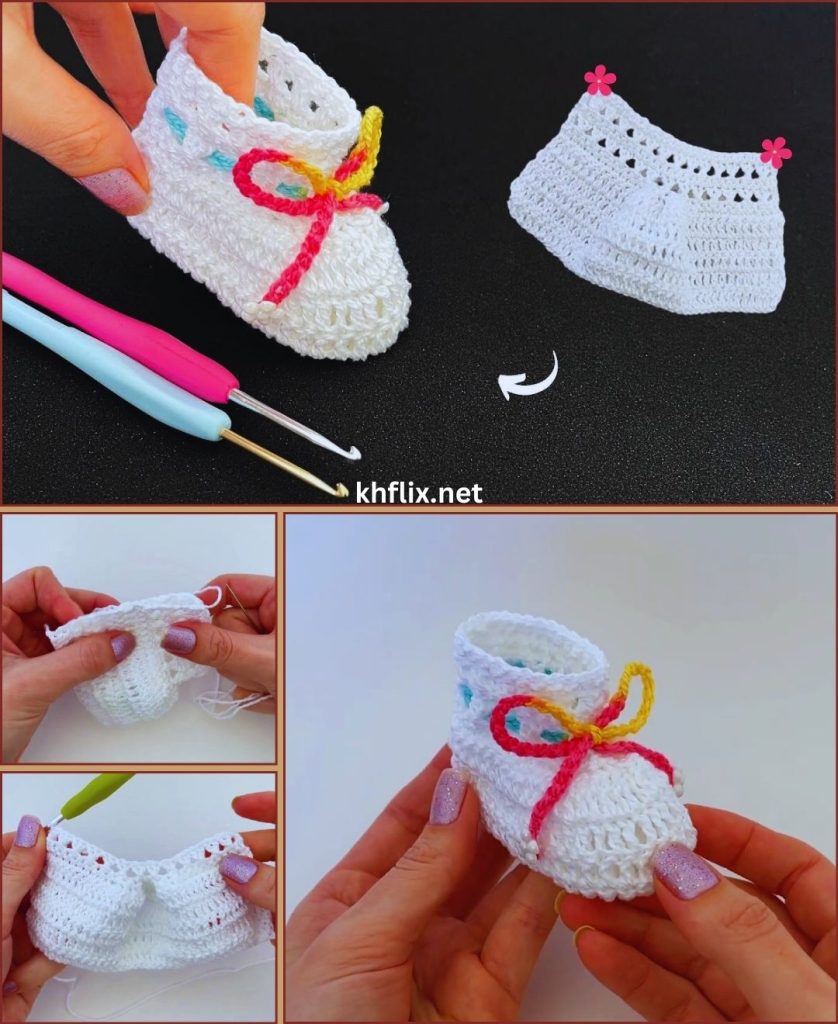
👟 Step 3: Build the Shoe Wall
Now we create height.
Round 4:
- Work in back loops only.
- 1 hdc in each stitch around.
- Join.
This creates a clean edge between sole and shoe body.
Round 5:
- 1 hdc in each stitch around.
- Join.
The shoe now stands up naturally.
🌸 Step 4: Shape the Toe Gently
To keep the look soft and delicate:
Round 6:
- Work hdc until you reach the center front (about 8–10 stitches).
- Work hdc2tog (decrease) across the toe.
- Continue hdc on sides.
- Join.
Round 7:
- Repeat gentle decreases across the toe.
- Join.
Now the front is softly rounded — perfect for a baby.
🎀 Step 5: Add a Delicate Edge
This is where beauty appears.
Instead of a plain finish, try one of these:
Option 1: Shell Edge
- Skip one stitch.
- Work 5 dc in next stitch.
- Skip one stitch.
- Slip stitch.
- Repeat around.
Creates a soft scalloped border.
Option 2: Picot Edge
- 1 sc.
- Chain 3.
- Slip stitch in first chain.
- Skip one stitch.
- Repeat.
Adds tiny decorative points.
Option 3: Simple Elegant Edge
- Work single crochet around.
- Keep tension even.
- Fasten off neatly.
🌷 Optional Additions for Extra Delicacy
1️⃣ Add a Small Flower
- Chain 5, join.
- Work 5 petals (dc clusters).
- Sew gently onto toe.
2️⃣ Add a Strap (Mary Jane Style)
- Attach yarn to side.
- Chain 10–12.
- Attach to opposite side.
- Sew small decorative button.
3️⃣ Add Ribbon Tie
- Weave thin satin ribbon through top stitches.
- Tie softly at front.
Always secure everything tightly for baby safety.
✨ How to Make Them Look Professional
Delicate crochet shoes look amazing when:
- Stitches are consistent
- Color choice is soft and balanced
- Yarn ends are invisible
- Decreases are smooth
- Both shoes match perfectly
Take time with finishing — neat work makes a big difference.
🎨 Best Color Combinations for Delicate Look
Try:
- Cream + blush
- White + lavender
- Soft gray + pink
- Mint + white
- Beige + baby blue
Soft shades create elegance.
🧼 Baby Safety Tips
✔ Avoid loose beads
✔ Secure buttons tightly
✔ Use soft yarn only
✔ Keep inside smooth
✔ Ensure comfortable fit
Safety always comes first.
⏱ Time Required
- Beginner: 1–2 hours per pair
- With practice: 45–60 minutes
Small projects give quick satisfaction.
💡 Why Simple Designs Look Most Delicate
Over-decorating can make shoes look heavy.
True delicate beauty comes from:
- Clean shape
- Soft yarn
- Balanced design
- Minimal decoration
- Careful finishing
Less is often more.
💝 Perfect Occasions for Delicate Crochet Baby Shoes
These beautiful handmade shoes are perfect for:
- Newborn gifts
- Baby showers
- Christening ceremonies
- Birthday photography
- Handmade keepsakes
They are small but full of meaning.
🌟 Final Thoughts
Making delicate and easy crochet baby shoes does not require complex techniques.
It requires:
- Patience
- Soft materials
- Even stitching
- Thoughtful design
- Love in every step
With just basic stitches and a gentle touch, you can create baby shoes that look elegant, soft, and unforgettable.
Start with one simple pair.
Practice carefully.
Add your creative touch.
Soon, you will be making delicate crochet baby shoes that look like they came from a boutique — but are made by your own hands. 🧶👶🌸✨
If you’d like, I can also provide:
- A printable pattern format
- A luxury lace-style baby shoe pattern
- A step-by-step photo-style explanation
- A crochet baby sandal version
- A winter baby bootie version
Just tell me which style you’d love to make next!
