 by
by Crocheting a flower for a dishtowel holder is a creative and useful craft project that combines decoration with practicality. A crochet flower dishtowel holder helps keep kitchen towels neatly in place while adding a charming handmade touch to your kitchen décor. This type of holder usually consists of a crocheted flower attached to a ring or loop that allows a dishtowel to hang conveniently on hooks, cabinets, or oven handles.
This project is suitable for both beginners and experienced crocheters because it uses simple crochet stitches and basic construction techniques. In this detailed guide, you will learn how to crochet a flower for a dishtowel holder and how to attach it properly to create a durable and attractive kitchen accessory.
1. Understanding the Crochet Flower Dishtowel Holder
A crochet flower dishtowel holder is a decorative piece used to hold kitchen towels in place. It typically includes three main components:
- Crocheted flower – the decorative top piece
- Ring or loop – the structure that holds the towel
- Closure or button – keeps the towel secured
The flower is placed at the top and acts as the main design element. Below the flower, the towel is attached and folded through a ring or crochet loop so it stays securely in place.
This project is popular because it:
- Keeps kitchen towels organized
- Adds handmade decoration to the kitchen
- Uses small amounts of yarn
- Makes a great handmade gift
2. Materials and Tools Needed
Before beginning the project, gather all necessary materials.
Yarn
Choose medium-weight cotton yarn, which is ideal for kitchen items because it is durable and washable.
Recommended yarn types:
- Cotton yarn
- Cotton-blend yarn
- Dishcloth yarn
Cotton is best because it absorbs moisture and withstands frequent washing.
Crochet Hook
Common hook sizes:
- 3.5 mm
- 4.0 mm
- 4.5 mm
Choose a hook size suitable for your yarn.
Additional Materials
You will also need:
- Yarn needle
- Scissors
- Stitch marker (optional)
- Plastic ring, metal ring, or hair tie
- Button (optional)
- Kitchen dishtowel
Optional Decorative Materials
- Beads
- Embroidery thread
- Decorative buttons
- Ribbon
3. Basic Crochet Stitches Used
To crochet the flower and holder, you should know the following basic stitches.
Slip Knot
The slip knot is the starting point for crochet.
Steps:
- Make a loop with yarn.
- Pull yarn through the loop.
- Tighten it onto the hook.
Chain Stitch (ch)
Chain stitches create the base of crochet projects.
Steps:
- Yarn over.
- Pull through the loop on the hook.
Repeat to form a chain.
Slip Stitch (sl st)
Slip stitches are used to join rounds or move across stitches.
Single Crochet (sc)
Single crochet produces tight stitches.
Steps:
- Insert hook into stitch.
- Yarn over.
- Pull through.
- Yarn over and pull through both loops.
Double Crochet (dc)
Double crochet creates taller stitches used in flower petals.
Steps:
- Yarn over.
- Insert hook into stitch.
- Yarn over and pull through.
- Yarn over, pull through two loops.
- Yarn over, pull through two loops.
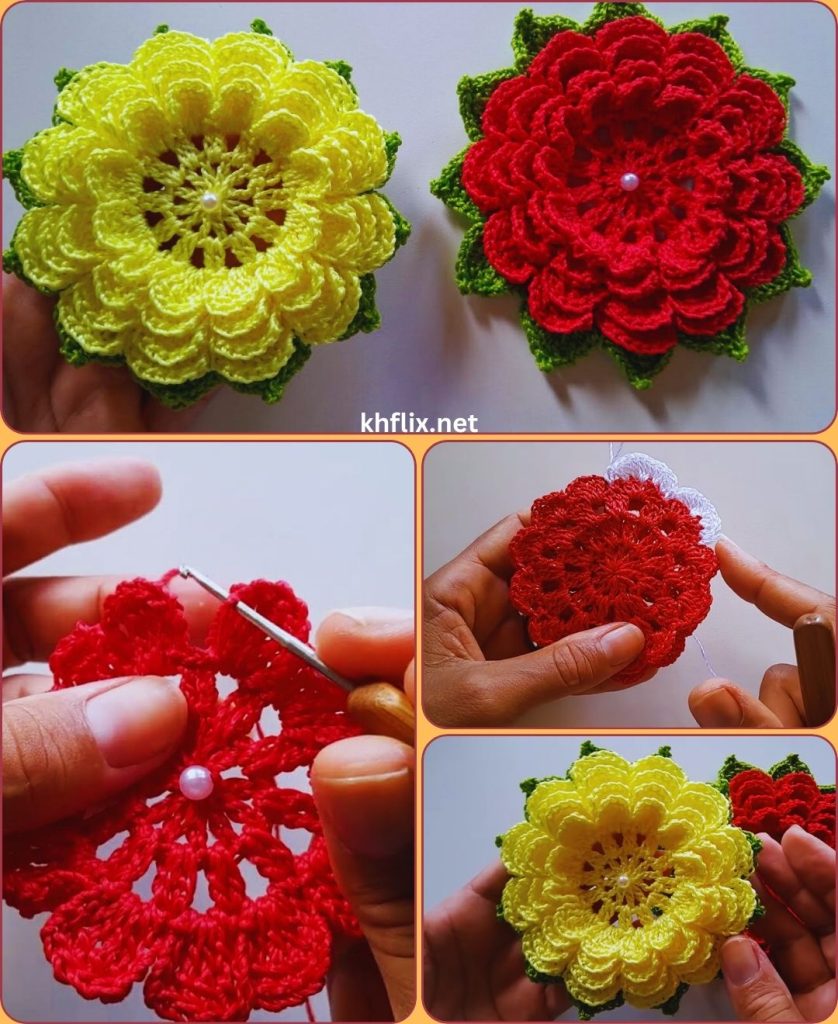
4. Step 1: Create the Flower Center
Start crocheting the center of the flower.
Steps:
- Make a slip knot.
- Chain 4 stitches.
- Join with a slip stitch to form a small ring.
This ring will become the center of the flower.
Alternatively, you can use a magic ring for a tighter center.
5. Step 2: Crochet the Flower Base
Now crochet stitches into the ring to create the flower base.
Steps:
- Chain 1 stitch.
- Make 10 single crochet stitches into the ring.
- Join with a slip stitch to the first stitch.
This forms a small circular base.
The base will support the flower petals.
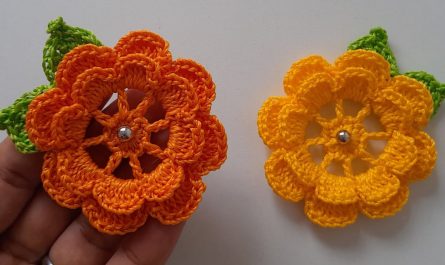
6. Step 3: Create the Flower Petals
Next, crochet petals around the circle.
Petal pattern example:
- Chain 2 stitches.
- Make 3 double crochet stitches in the same stitch.
- Chain 2 stitches.
- Slip stitch into the next stitch.
This creates one petal.
Repeat the process around the circle.
You should have 5–6 petals, depending on your base stitches.
Each petal forms a rounded flower shape.
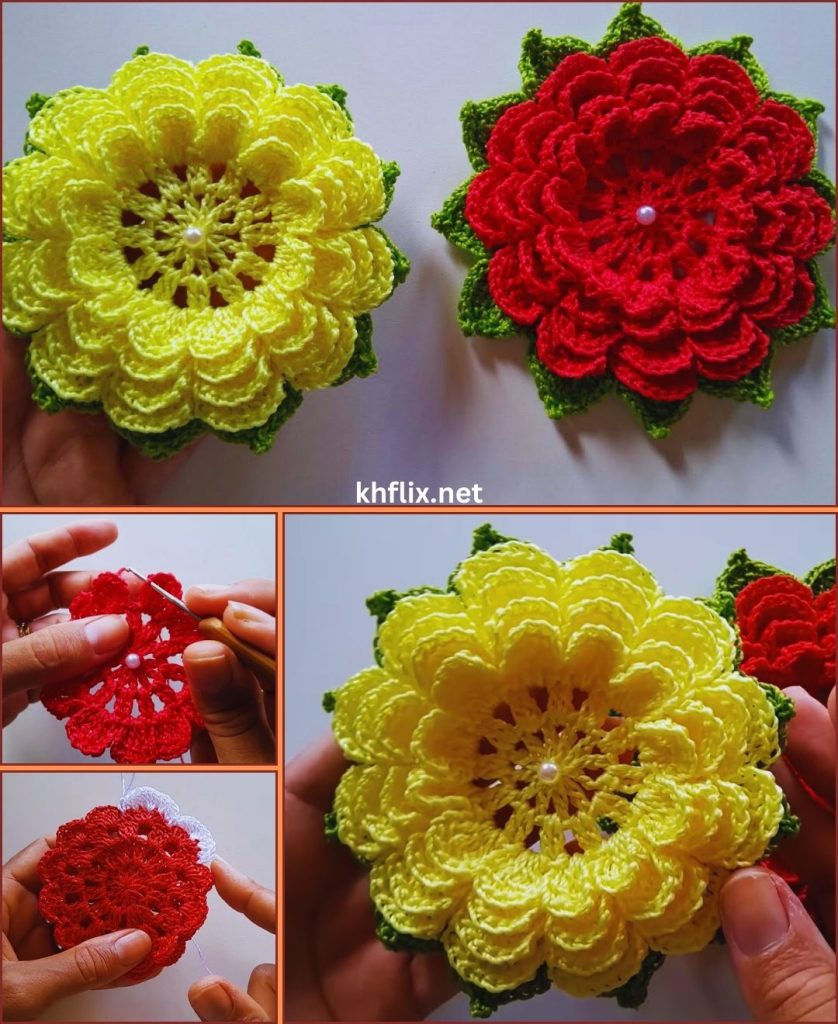
7. Step 4: Strengthen the Flower Shape
To make the flower more durable and defined:
- Crochet another round around the petals.
- Use single crochet stitches along each petal edge.
- This helps stabilize the flower and improve its appearance.
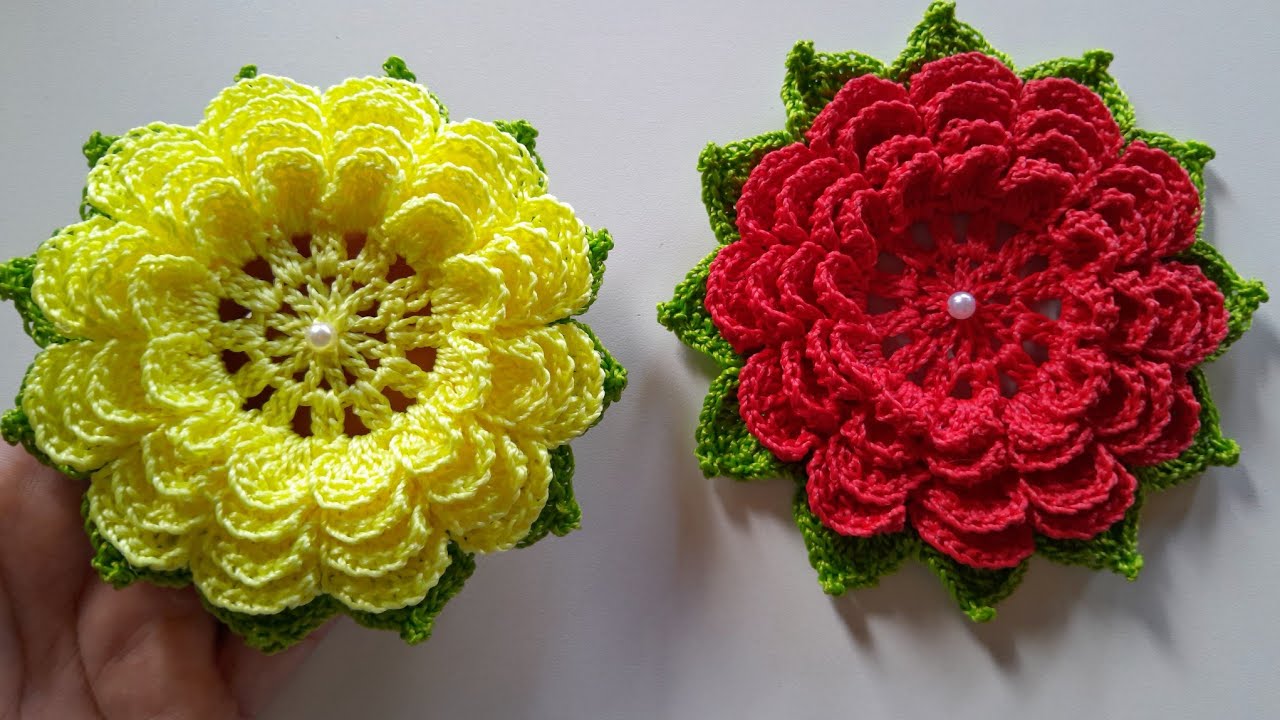
You can also change yarn color for a two-tone flower design.
8. Step 5: Create the Holder Strap
After finishing the flower, you will crochet a strap that connects the flower to the towel.
Steps:
- Attach yarn to the back of the flower.
- Chain 25–30 stitches.
This chain will form the strap.
Turn and single crochet back across the chain to strengthen it.
9. Step 6: Attach the Ring
The ring holds the dishtowel.
You can use:
- Plastic rings
- Metal rings
- Wooden rings
- Hair elastics
Steps:
- Place the ring at the end of the crochet strap.
- Crochet single stitches around the ring until fully covered.
- Continue until the ring is tightly wrapped with yarn.
This creates a secure attachment.
10. Step 7: Prepare the Dishtowel
Before attaching the towel:
- Fold the dishtowel in half.
- Gather the center section.
The folded towel will pass through the ring.
11. Step 8: Attach the Towel to the Holder
Now attach the towel to the crochet holder.
Steps:
- Pull the folded towel through the crochet ring.
- Pull the loose ends through the folded loop.
- Tighten the knot.
This method secures the towel while allowing it to be removed easily for washing.
12. Step 9: Add a Hanging Loop
To hang the dishtowel holder:
- Attach yarn to the top of the flower.
- Chain 15–20 stitches.
- Slip stitch back into the flower.
This forms a hanging loop.
You can hang the holder on:
- Cabinet knobs
- Kitchen hooks
- Oven handles
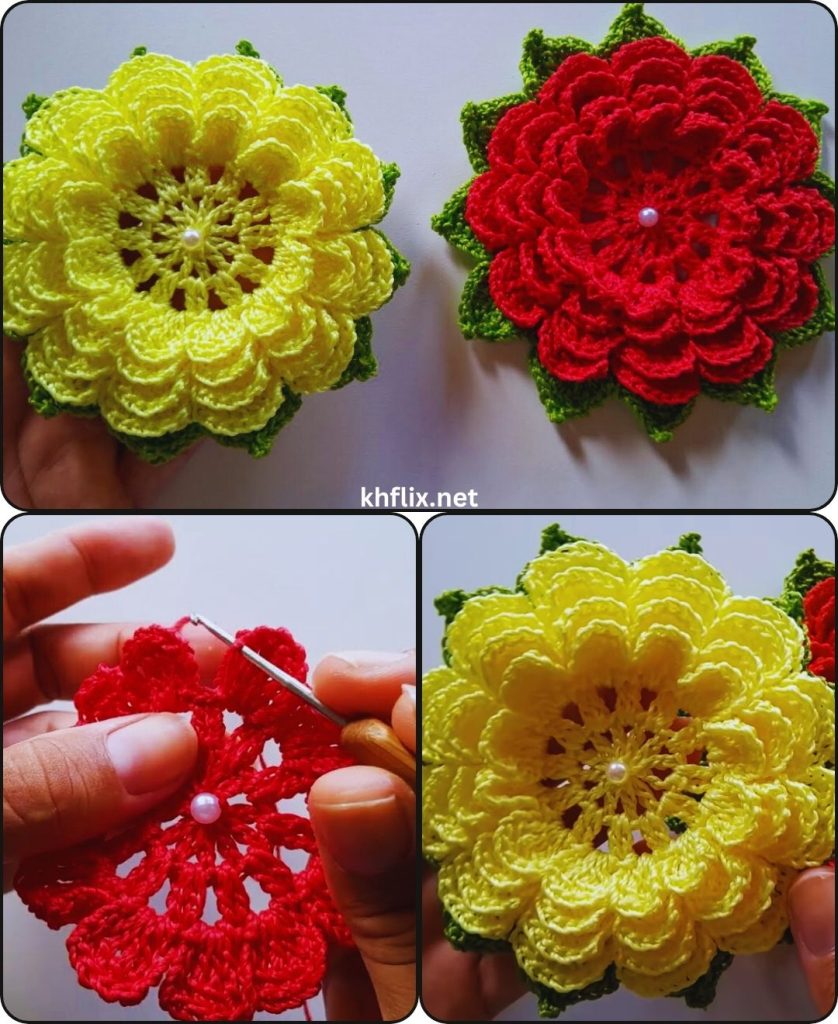
13. Step 10: Decorative Finishing Touches
To enhance the appearance of your crochet flower holder, you can add decorations.
Button Center
Sew a decorative button into the center of the flower.
Beads
Attach small beads to the petals.
Embroidery
Add embroidered details on the flower.
Multi-Color Yarn
Use different yarn colors for petals and center.
These details make the holder unique and personalized.
14. Care and Maintenance
Crochet dishtowel holders should be easy to maintain.
Tips:
- Use machine-washable cotton yarn
- Remove towel before washing holder
- Air dry to maintain shape
Regular washing keeps the kitchen item clean and hygienic.
15. Creative Design Variations
After mastering the basic design, you can try creative variations.
Sunflower Dishtowel Holder
Use yellow petals and a brown center.
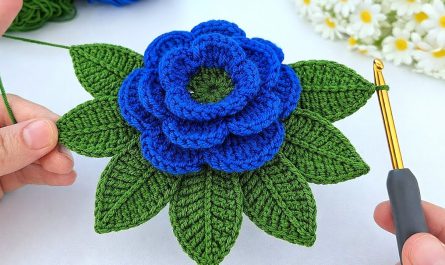
Rose Crochet Holder
Crochet layered petals for a rose appearance.
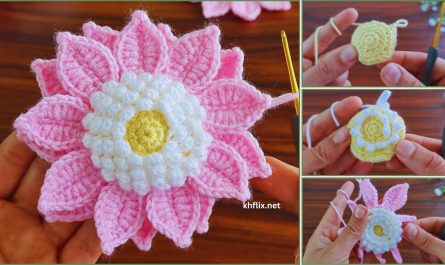
Daisy Holder
White petals with a yellow center.
Multi-Layer Flower
Create two layers of petals for a fuller flower.
These variations allow you to experiment with creativity.
16. Benefits of Crochet Flower Dishtowel Holders
Crocheting dishtowel holders offers many advantages.
- Functional kitchen accessory
- Decorative handmade item
- Beginner-friendly crochet project
- Excellent handmade gift
- Uses leftover yarn
- Customizable designs
These holders are especially popular at craft fairs and handmade markets.
Conclusion
Making a crochet flower dishtowel holder is a rewarding and practical crochet project that adds beauty and functionality to your kitchen. By learning basic crochet stitches and following step-by-step instructions—creating the flower center, crocheting petals, making the holder strap, attaching the ring, and securing the dishtowel—you can produce a charming handmade accessory.
With creativity and practice, you can experiment with different flower styles, colors, and decorations to create unique kitchen holders that reflect your personal style. Whether used in your own kitchen or given as a thoughtful handmade gift, crochet flower dishtowel holders are both useful and delightful craft creations.