by
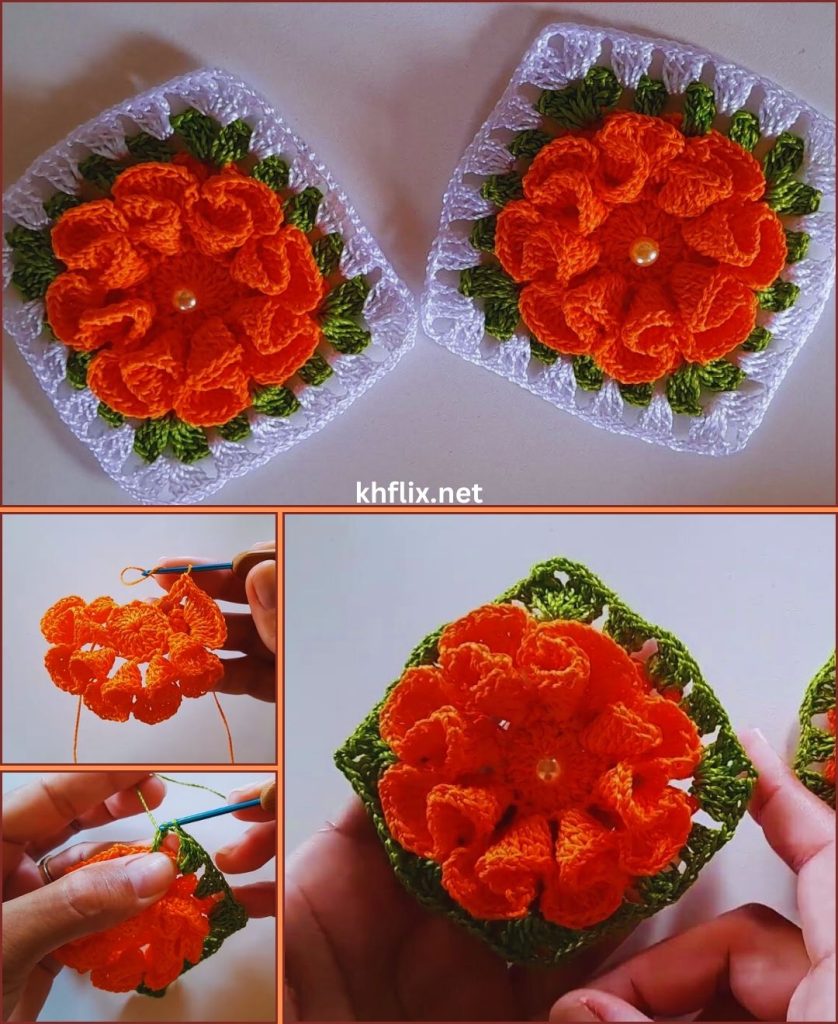
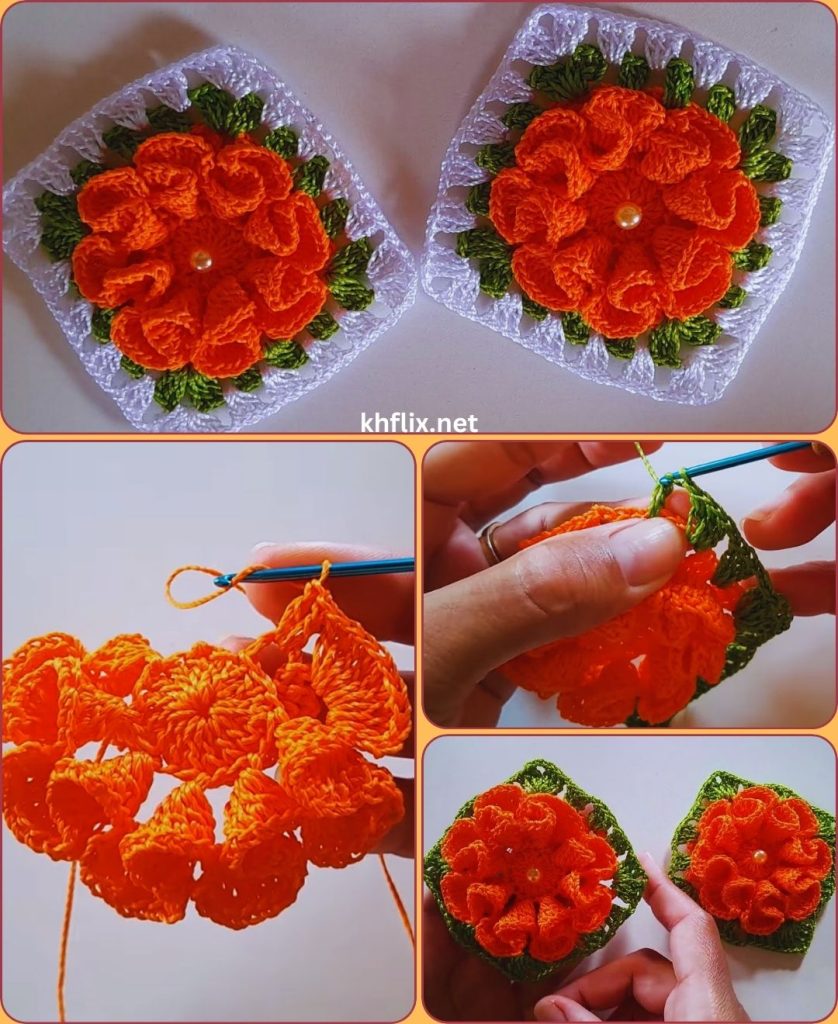
by Crocheting a camellia flower in a square motif using polypropylene threads is a beautiful and durable crochet project that combines decorative floral design with a practical crochet structure. This type of motif is often used to create items such as table mats, cushion covers, bags, blankets, and wall decorations. The square shape makes it easy to join multiple motifs together, while the camellia flower in the center adds elegance and texture.
Polypropylene thread is a strong, lightweight, and water-resistant material that works well for household items, especially items that may be used frequently or exposed to moisture. Because of its durability and color variety, it is widely used in crochet projects such as placemats, rugs, baskets, and decorative motifs.
This detailed tutorial explains how to crochet a camellia flower inside a square motif using polypropylene threads. It includes the required materials, crochet stitches, and step-by-step instructions to help beginners and intermediate crocheters successfully complete the project.
1. Understanding the Camellia Flower Square Motif
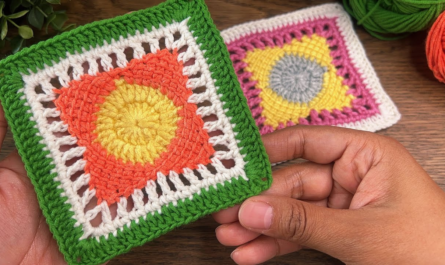
A camellia flower square is a crochet motif where a flower is crocheted at the center and then expanded outward into a square frame. The flower represents the focal point, while the surrounding square provides structure so the motif can easily be connected with other squares.
The design typically consists of three main parts:
- Flower center – the core of the camellia
- Petals – layered stitches forming the flower shape
- Square frame – the outer crochet rows shaping the motif into a square
Once finished, several squares can be joined together to form larger crochet items.
2. Materials and Tools Needed
Before beginning the project, gather all necessary materials.
Polypropylene Threads
Polypropylene thread is recommended for this project because it offers several benefits:
- Strong and durable
- Resistant to moisture
- Lightweight
- Easy to clean
- Holds shape well
Choose two or three colors, for example:
- Pink or red for the flower petals
- Yellow or white for the center
- Green or neutral color for the square border
Crochet Hook
Polypropylene threads usually require a slightly smaller hook to keep stitches firm.
Recommended hook sizes:
- 2.5 mm
- 3.0 mm
- 3.5 mm
Choose a hook that matches the thickness of your thread.
Additional Tools
You will also need:
- Yarn needle
- Scissors
- Stitch markers (optional)
- Measuring tape
These tools help with finishing and shaping the crochet motif.
3. Basic Crochet Stitches Used
This project uses several basic crochet stitches.
Slip Knot
The slip knot is used to begin the crochet work.
Steps:
- Form a loop with the thread.
- Pull the thread through the loop.
- Place the loop on the hook and tighten gently.
Chain Stitch (ch)
The chain stitch creates the foundation for many crochet patterns.
Steps:
- Yarn over.
- Pull the yarn through the loop on the hook.
Repeat to create chains.
Slip Stitch (sl st)
Slip stitches connect rounds or move the hook to another position.
Single Crochet (sc)
Single crochet produces tight stitches and provides stability.
Steps:
- Insert the hook into a stitch.
- Yarn over and pull through.
- Yarn over and pull through both loops.
Half Double Crochet (hdc)
Half double crochet creates medium-height stitches.
Steps:
- Yarn over.
- Insert hook into stitch.
- Yarn over and pull through.
- Yarn over and pull through all three loops.
Double Crochet (dc)
Double crochet creates taller stitches commonly used in motifs.
Steps:
- Yarn over.
- Insert hook into stitch.
- Yarn over and pull through.
- Yarn over and pull through two loops.
- Yarn over and pull through remaining two loops.
4. Step 1: Create the Flower Center
Begin by crocheting the center of the camellia flower.
Steps:
- Make a magic ring.
- Chain 2 stitches.
- Crochet 12 double crochet stitches into the ring.
- Pull the yarn tail to tighten the ring.
- Join the round with a slip stitch.
This forms the round center of the flower.
5. Step 2: Crochet the First Layer of Petals
Next, create the first layer of camellia petals.
Steps:
- Chain 2 stitches.
- In the same stitch, crochet 2 double crochet stitches.
- Chain 1 stitch.
- Slip stitch into the next stitch.
Repeat this pattern around the circle.
Each repetition forms a petal.
You should create 6–8 petals depending on the stitch count.
6. Step 3: Crochet the Second Petal Layer
Camellia flowers have layered petals, so a second layer adds fullness.
Steps:
- Work behind the first layer of petals.
- Insert hook between stitches of the first round.
- Chain 3 stitches.
- Make 3 double crochet stitches in the same space.
- Chain 2 stitches.
- Slip stitch into the next space.
Repeat this pattern around the flower.
The second layer should appear slightly larger than the first.
7. Step 4: Prepare for the Square Frame
After finishing the flower, you will start forming the square shape.
Steps:
- Change yarn color if desired.
- Attach the yarn between two petals.
- Chain 3 stitches.
This chain counts as the first double crochet of the square round.
8. Step 5: Form the Square Corners
To transform the round flower into a square, create corners.
Corner pattern:
- Crochet 3 double crochet stitches
- Chain 2 stitches
- Crochet 3 double crochet stitches
This forms one square corner.
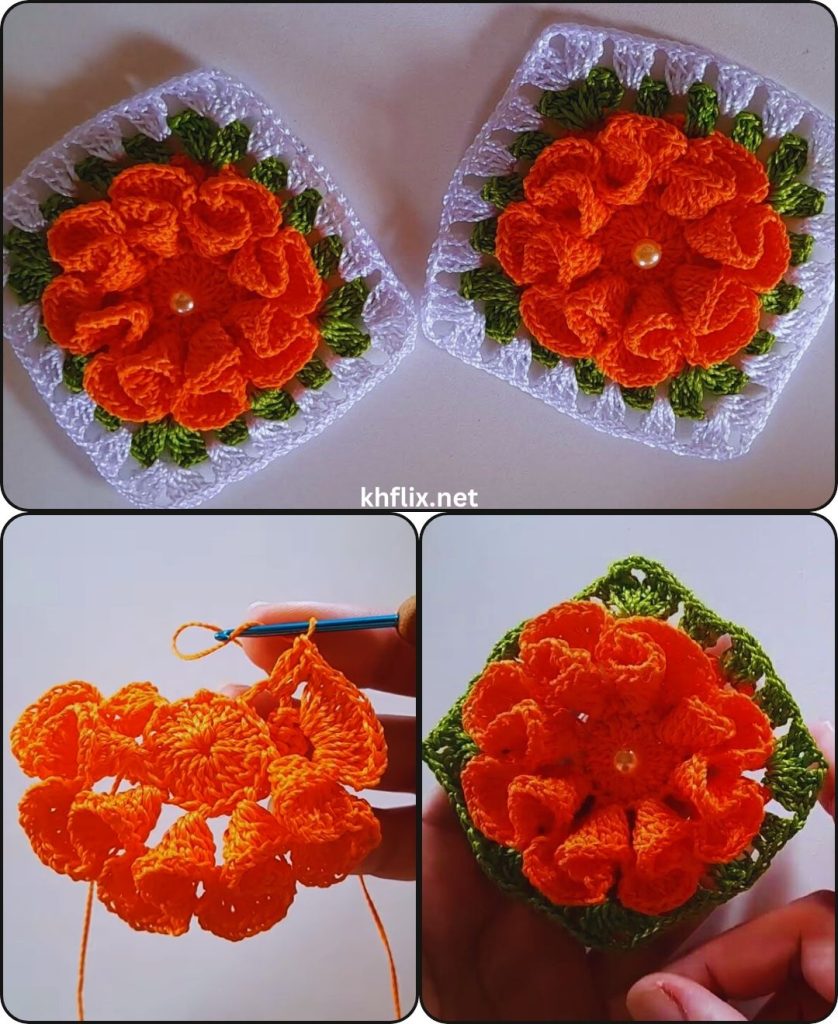
9. Step 6: Crochet the Square Sides
Between corners, crochet side stitches.
Side pattern:
- Crochet 3 double crochet stitches in each space between petals.
Repeat the pattern around the flower.
You will have four corners and four sides, forming a square.
10. Step 7: Expand the Square
To make the square larger, crochet additional rounds.
Round pattern:
Side sections:
- Crochet 1 double crochet in each stitch
Corner sections:
- 3 double crochet
- Chain 2
- 3 double crochet
Continue expanding until the square reaches the desired size.
11. Step 8: Secure and Finish the Motif
Once the square is complete:
- Cut the thread leaving a tail.
- Pull the yarn through the last loop.
- Use a yarn needle to weave in the loose ends.
This secures the motif.
12. Step 9: Blocking the Square
Blocking helps the motif keep its shape.
Steps:
- Lightly dampen the square.
- Stretch it gently into shape.
- Pin the corners if necessary.
- Allow it to dry completely.
Blocking ensures the square lies flat.
13. Joining Multiple Squares
Once you have several camellia squares, they can be joined.
Common joining methods include:
- Slip stitch join
- Single crochet join
- Invisible seam join
- Join-as-you-go technique
These methods allow you to create larger crochet items.
14. Project Ideas Using Camellia Squares
Camellia square motifs can be used to create many crochet items.
Home Decor
- Table runners
- Cushion covers
- Bedspreads
- Wall hangings
Kitchen Accessories
- Placemats
- Coasters
- Pot holders
Fashion Accessories
- Crochet bags
- Shawls
- Scarves
Decorative Blankets
Joining many squares together creates beautiful crochet blankets.
15. Tips for Working with Polypropylene Thread
Polypropylene threads behave slightly differently from cotton or wool.
Helpful tips include:
- Use a smaller crochet hook for tighter stitches
- Keep even tension while crocheting
- Avoid excessive stretching
- Use sharp scissors for clean cuts
These tips will help produce neat and durable crochet motifs.
16. Benefits of Using Polypropylene for Crochet Motifs
Polypropylene threads offer several advantages.
- Strong and long-lasting
- Water-resistant
- Lightweight
- Easy to clean
- Suitable for household items
These qualities make them perfect for decorative and practical crochet projects.
Conclusion
Crocheting a camellia flower in a square motif using polypropylene threads is a beautiful and versatile crochet technique. By creating the flower center, layering petals, and gradually forming a square frame around the flower, you can produce elegant crochet motifs that are both decorative and durable.
With practice, these camellia squares can be combined to create stunning crochet projects such as blankets, table mats, bags, and home décor accessories. The use of polypropylene threads adds strength and longevity, making the finished items practical for everyday use.
This project is an enjoyable way to develop crochet skills while creating delicate floral patterns that enhance many handmade designs.