 by
by Crocheting a rose is one of the most beautiful and satisfying projects in the world of crochet. A crocheted rose can be used in many creative ways, such as decorating clothing, embellishing hats and scarves, creating hair accessories, decorating gift packages, making brooches, or even forming part of larger crochet projects like blankets and bouquets.
The best part about crocheting roses is that they can be made quickly and with only basic crochet skills. Even beginners can learn how to crochet a simple rose using basic stitches and a few easy techniques. This tutorial explains in detail how to create a crocheted rose step by step, from selecting materials to finishing the final flower.
By following this guide, you will learn how to crochet a rose that looks elegant, soft, and natural.
1. Understanding the Crochet Rose
A crochet rose is typically made using a long strip of crocheted fabric that is rolled and sewn together to form petals. This method is simple and quick, making it one of the most popular ways to create crochet flowers.
The rose usually has three main parts:
- Petal strip – the crocheted base that forms the petals
- Rolled flower shape – created by wrapping the strip
- Stitched base – holds the rose together
Because the petals are formed by curling the strip, the rose looks full and realistic without requiring complicated stitches.
2. Materials and Tools Needed
Before starting your crochet rose project, gather the necessary materials.
Yarn
Choose yarn depending on the size and texture you want for your rose.
Recommended yarn types include:
- Cotton yarn
- Acrylic yarn
- Bamboo yarn
- Soft wool yarn
Cotton yarn is often preferred because it holds shape well and produces clean, defined petals.
For a classic rose look, choose colors such as:
- Red
- Pink
- White
- Yellow
- Peach
Green yarn can also be used to crochet leaves.
Crochet Hook
Choose a crochet hook that matches your yarn.
Common hook sizes include:
- 3.5 mm
- 4.0 mm
- 4.5 mm
- 5.0 mm
A slightly smaller hook can create tighter stitches that hold the rose shape better.
Additional Tools
You will also need:
- Yarn needle
- Scissors
- Stitch marker (optional)
- Fabric glue (optional)
These tools help with assembling and finishing the rose.
3. Basic Crochet Stitches Used
This project uses only a few basic crochet stitches.
Slip Knot
The slip knot is the starting point for crochet projects.
Steps:
- Create a loop with the yarn.
- Pull the working yarn through the loop.
- Tighten the loop on the crochet hook.
Chain Stitch (ch)
The chain stitch forms the base of the crochet rose.
Steps:
- Yarn over the hook.
- Pull the yarn through the loop on the hook.
Repeat to create a chain.
Single Crochet (sc)
Single crochet produces compact stitches.
Steps:
- Insert hook into the stitch.
- Yarn over and pull through.
- Yarn over again and pull through both loops.
Double Crochet (dc)
Double crochet stitches create the height needed for rose petals.
Steps:
- Yarn over.
- Insert hook into the stitch.
- Yarn over and pull through.
- Yarn over and pull through two loops.
- Yarn over and pull through the remaining two loops.
Slip Stitch (sl st)
Slip stitches are used to finish rows or connect stitches.
4. Step 1: Create the Foundation Chain
Start your crochet rose by making a long foundation chain.
Steps:
- Make a slip knot.
- Chain 40–50 stitches.
The length of the chain determines the size of the rose.
Shorter chains produce smaller roses, while longer chains produce fuller flowers.
5. Step 2: Create Spaces for Petals
The next step forms the base that holds the petals.
Steps:
- Skip one chain stitch.
- Single crochet into the next stitch.
- Chain 2 stitches.
- Skip one stitch.
- Single crochet into the next stitch.
Repeat this pattern across the chain.
This creates small spaces that will later hold the petal stitches.
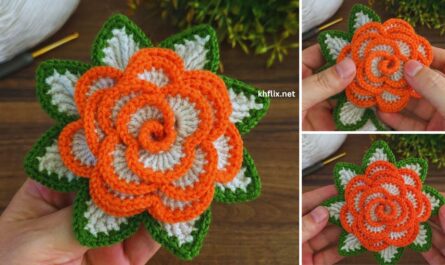
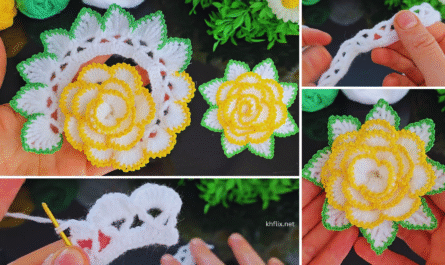
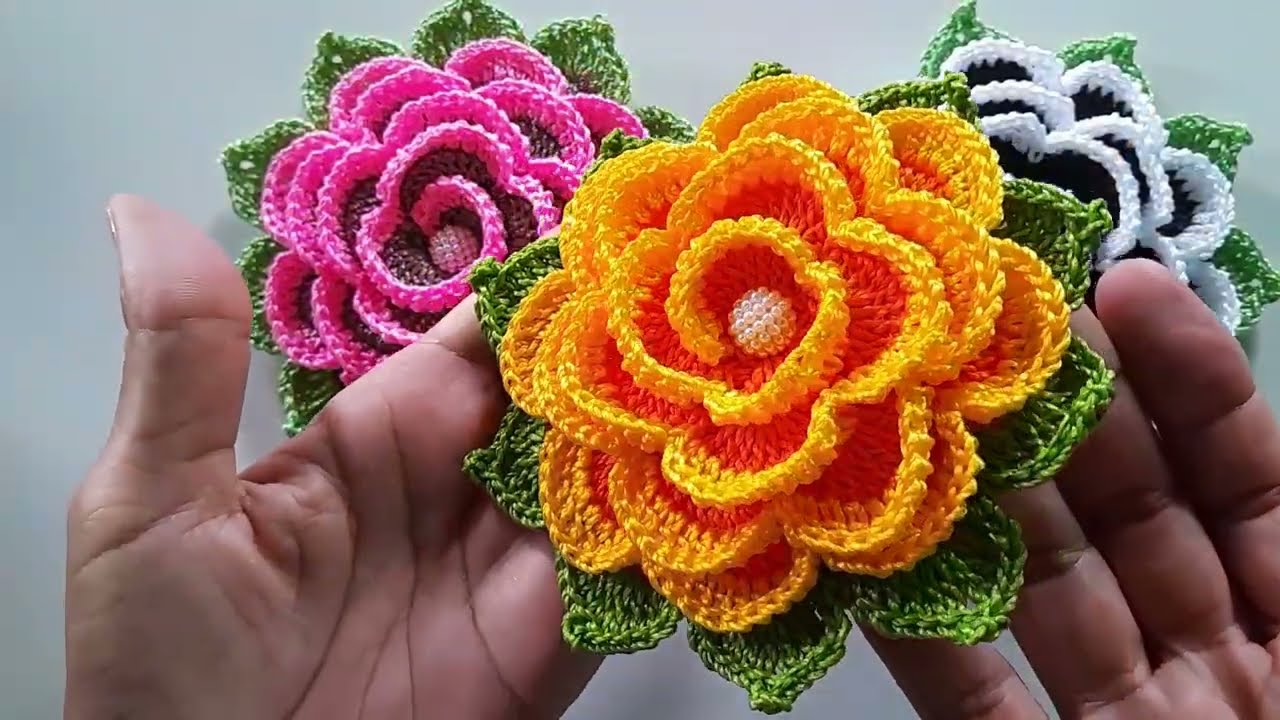
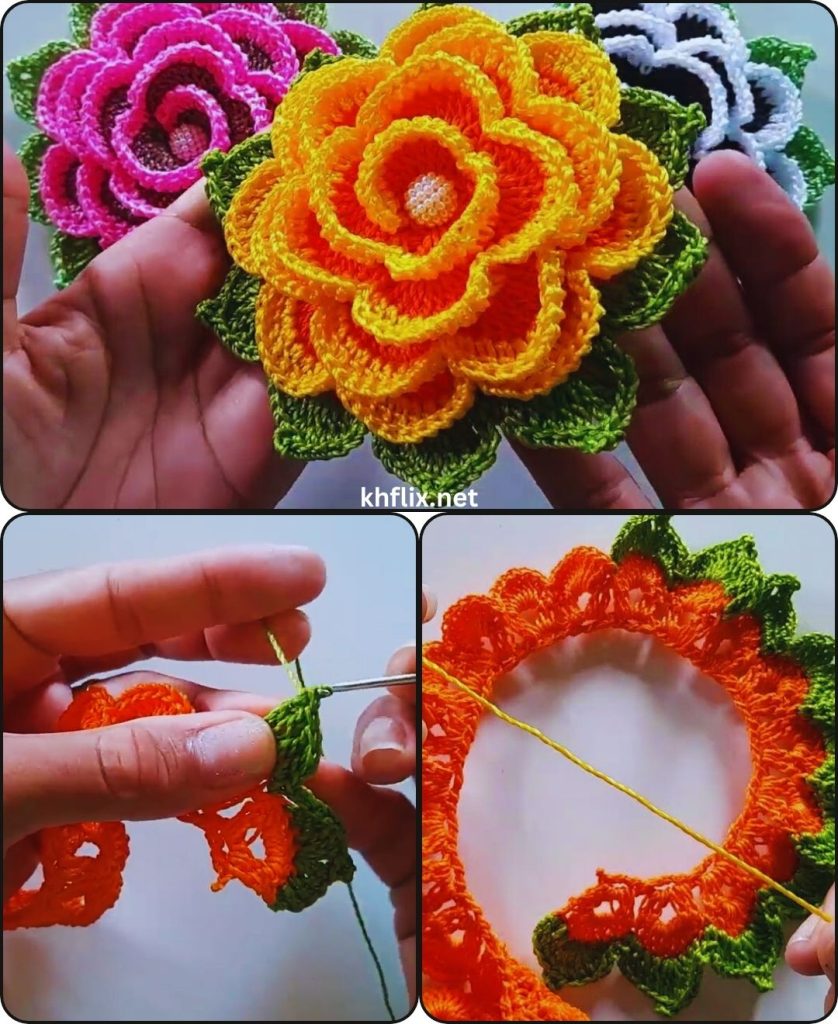
6. Step 3: Crochet the Rose Petals
Now you will crochet the petals inside the chain spaces.
In each chain-space:
- Make 1 single crochet
- Make 3 double crochet stitches
- Make 1 single crochet
This combination creates a rounded petal shape.
Repeat this pattern in every chain space across the row.
As you continue crocheting, you will notice the strip naturally begins to curl slightly, which helps form the rose shape.
7. Step 4: Finish the Crochet Strip
Once you have completed all the petals:
- Cut the yarn leaving a long tail.
- Pull the yarn through the final loop.
- Tighten gently.
The long yarn tail will be used to assemble the rose.
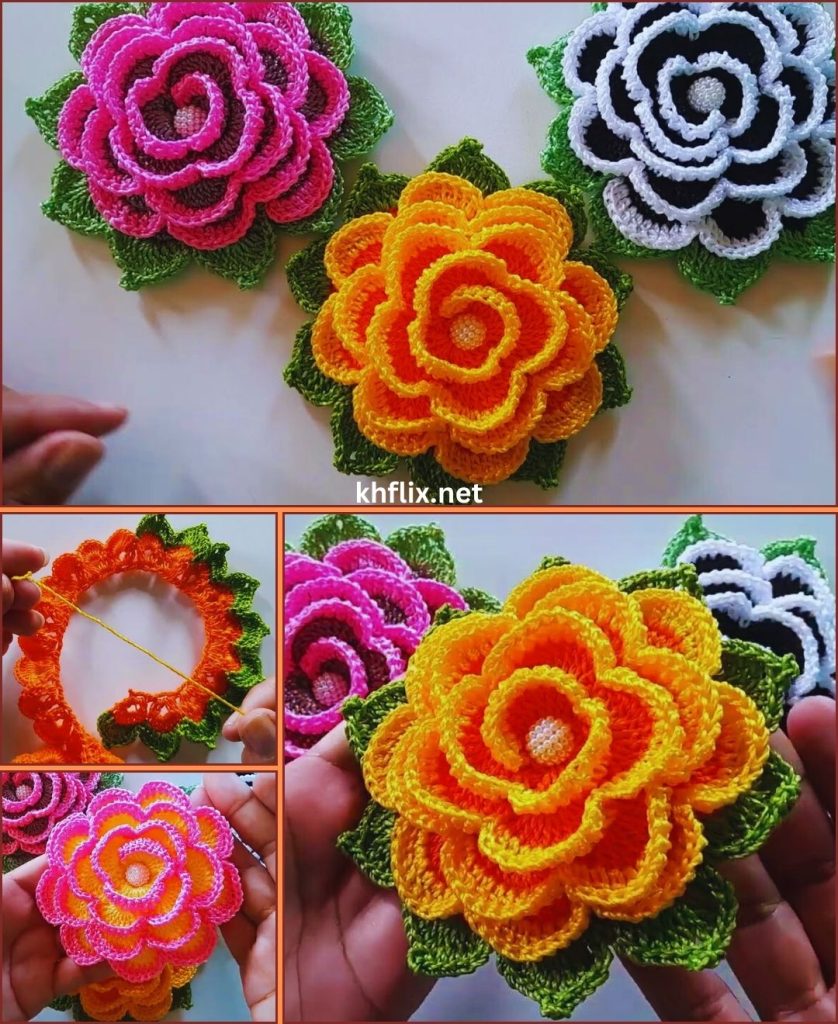
8. Step 5: Roll the Rose
Now transform the crochet strip into a rose.
Steps:
- Start at one end of the strip.
- Roll the strip inward tightly to form the center of the rose.
- Continue wrapping the strip around the center.
- Allow the petals to spread slightly as you roll.
The curling petals will naturally create a rose shape.
9. Step 6: Sew the Base of the Rose
To secure the rose shape:
- Thread the yarn tail into a yarn needle.
- Stitch through the base layers of the rose.
- Wrap the yarn around the bottom several times.
- Pull tight and secure with knots.
This stitching keeps the flower firmly together.
10. Step 7: Adjust the Petals
After sewing the base:
- Gently spread the petals outward
- Adjust layers to create a natural flower shape
You can make the rose look fuller by loosening some petals.
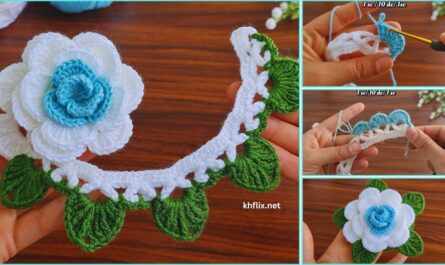
11. Step 8: Add Crochet Leaves (Optional)
Leaves enhance the appearance of the rose.
To crochet a simple leaf:
- Chain 10 stitches
- Single crochet in the second chain
- Half double crochet in next stitches
- Double crochet in the center
- Mirror the stitches on the other side
Attach the leaf to the back of the rose using yarn or sewing.
12. Creative Ways to Use Crochet Roses
Crochet roses are extremely versatile and can be used in many projects.
Clothing Decoration
Attach roses to:
- Hats
- Sweaters
- Scarves
- Jackets
Accessories
Use crochet roses to make:
- Hair clips
- Brooches
- Headbands
- Bracelets
Home Decoration
Crochet roses can decorate:
- Pillow covers
- Blankets
- Table runners
- Wall art
Gift Decorations
Attach roses to:
- Gift boxes
- Handmade cards
- Bags
Crochet Bouquets
Combine several roses to create a beautiful crochet flower bouquet.
13. Tips for Making Beautiful Crochet Roses
Here are helpful tips to improve your crochet roses.
Use Tight Stitches
Tight stitches help petals hold their shape.
Experiment with Yarn
Different yarn textures produce different rose styles.
Adjust Chain Length
Longer chains produce fuller flowers.
Use Color Gradients
Variegated yarn can create realistic rose color variations.
Practice Rolling
Rolling the strip correctly creates the most natural rose shape.
14. Beginner Mistakes to Avoid
Beginners sometimes encounter these issues.
Chain Too Tight
This makes the strip difficult to crochet.
Uneven Petals
Ensure consistent stitch counts in each petal.
Loose Rolling
If rolled too loosely, the rose may lose shape.
Weak Stitching
Secure the base well so the rose remains stable.
15. Benefits of Crocheting Roses
Crochet roses offer many advantages.
- Quick and easy project
- Beginner-friendly technique
- Uses small amounts of yarn
- Beautiful decorative results
- Great handmade gifts
- Relaxing and enjoyable craft
Many crafters also sell crochet roses as handmade items.
Conclusion
Crocheting a rose is a simple yet beautiful project that allows you to create elegant handmade flowers using basic crochet techniques. By making a foundation chain, crocheting petal stitches, rolling the strip, and securing the base, you can easily transform yarn into a delicate rose.
With practice, you can experiment with different yarn colors, sizes, and petal styles to create a wide variety of crochet roses. Whether used for decorating clothing, making accessories, enhancing home décor, or creating handmade gifts, crochet roses are a versatile and rewarding craft project.
Once you master this easy and quick technique, you can produce stunning crochet roses in just a short time and add a lovely handmade touch to many creative projects. 🌹