 by
by Crocheting striped baby shoes is one of the most fun and beginner-friendly projects in crochet. Not only are they adorable and colorful, but they also make perfect gifts for newborns, baby showers, or your own little one. By adding stripes, even the simplest baby shoe looks playful and vibrant.
This comprehensive guide will teach you how to crochet the easiest striped baby shoes step by step, including materials, stitches, sizing, color-changing techniques, construction, and creative variations.

1. Why Striped Baby Shoes?
Striped baby shoes are:
- Visually appealing – stripes add a fun pattern without extra complexity
- Beginner-friendly – simple shapes with straight rows or rounds
- Customizable – choose any number of colors or stripe widths
- Quick to make – perfect for gifts or last-minute projects
The easiest striped baby shoes are usually slip-on booties, meaning no straps or buttons, making them simple for beginners.
2. Materials Needed
Yarn
- Soft cotton yarn – breathable and gentle on baby skin
- Acrylic yarn – washable, durable, and soft
- Bamboo yarn – silky and eco-friendly
Weight: DK/light worsted yarn is ideal.
Colors: Choose at least two contrasting colors for stripes. Pastels, bright colors, or multicolor yarns all work well.
Crochet Hook
- Size 3.0 mm – 4.0 mm, depending on yarn thickness
- Smaller hooks produce tighter stitches that maintain the shoe’s shape
- Larger hooks create a softer, looser shoe
Additional Tools
- Yarn needle – for weaving in ends
- Scissors
- Stitch markers – optional
- Small decorative items – optional (bows, flowers, buttons)
3. Basic Crochet Stitches Required
Even beginners can make striped baby shoes using just a few basic stitches:
- Slip knot – to start the project
- Chain (ch) – foundation stitch
- Single crochet (sc) – firm stitches for the sole and upper
- Half double crochet (hdc) – optional for slightly taller stitches
- Slip stitch (sl st) – joining rounds or rows
- Increase (inc) – two stitches in one for widening the sole
- Decrease (dec) – two stitches combined to shape the toe (optional)
4. Step 1: Measure the Baby’s Foot
Even for simple shoes, size matters. Use standard sizing:
| Age | Foot Length (approx.) |
|---|---|
| Newborn | 3.5 inches (9 cm) |
| 0–3 months | 3.75 inches (9.5 cm) |
| 3–6 months | 4 inches (10 cm) |
| 6–12 months | 4.5 inches (11.5 cm) |
- Adjust the foundation chain to match the desired foot length.
- Slightly larger soles are fine for comfort.
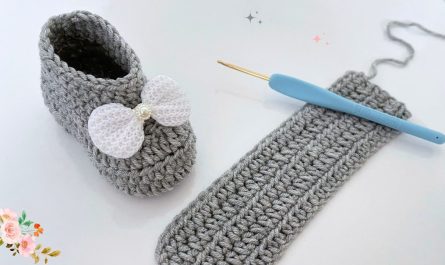
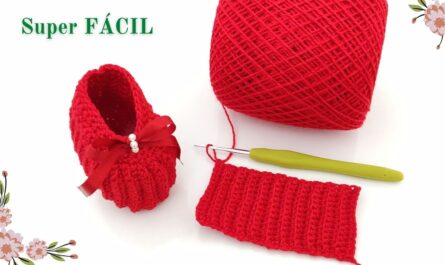
5. Step 2: Crochet the Sole
- Make a slip knot.
- Chain 12–15 stitches for a newborn size (adjust as needed).
- Work single crochet stitches along the chain.
- At the end of the chain, work 3 sc in the last chain to round the toe.
- Continue along the other side, working 3 sc at the starting end for the heel.
- Join with a slip stitch to complete an oval-shaped sole.
Tip: Keep stitches tight so the sole maintains shape and doesn’t stretch.
6. Step 3: Start the First Stripe
- Attach your first color at the back of the sole.
- Chain 1 for sc (or 2 for hdc).
- Work single crochet stitches evenly around the top edge of the sole.
- This row forms the base of the upper part of the shoe.
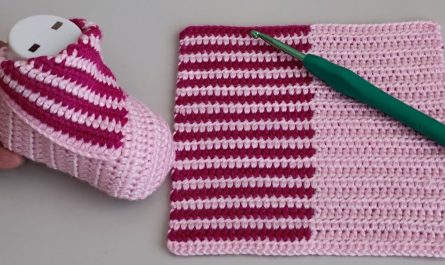
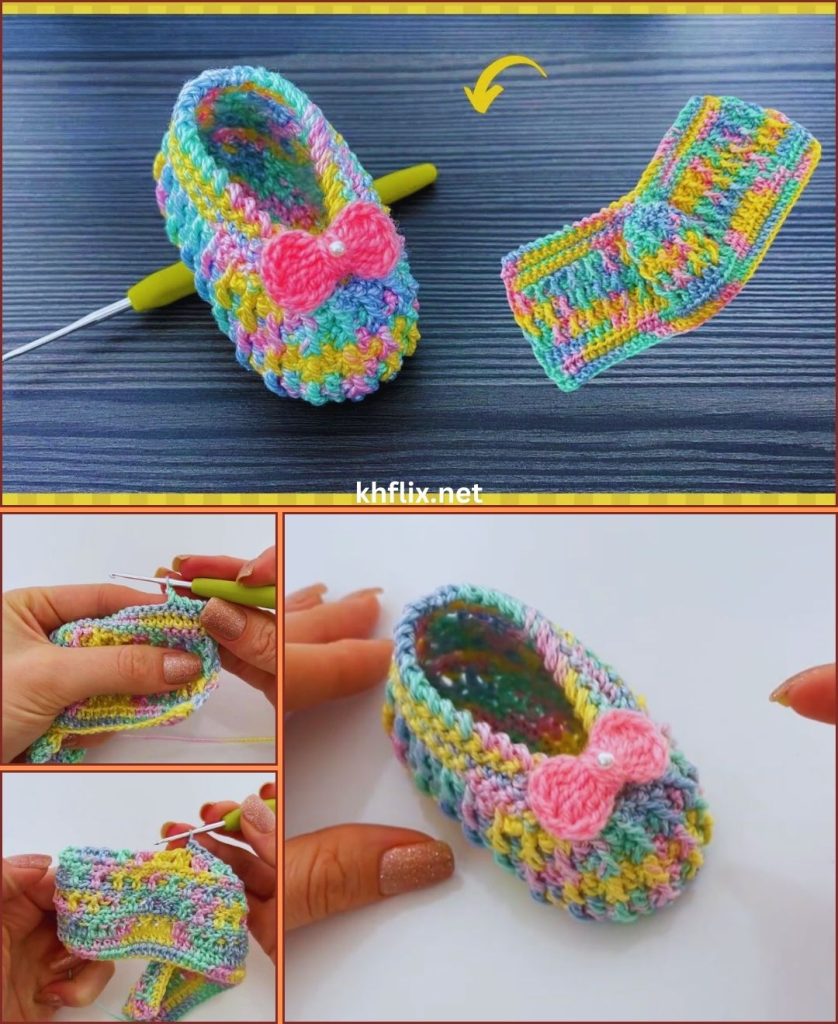
7. Step 4: Change Color for Stripes
Adding stripes is simple:
- At the end of a row, cut the first yarn, leaving a small tail.
- Attach the second color with a slip knot or pull-through.
- Continue working single crochet stitches for the next row.
- Repeat for each stripe, alternating colors every row or every two rows depending on the design.
Tip: Change colors at the start of a new row for cleaner stripes. Weave in the ends as you go to reduce finishing work.
8. Step 5: Shape the Upper
- Stop stitches at the toe area to create a foot opening.
- Optional: Increase 1 stitch at the center of the toe to round the front.
- Continue around the heel and back to form a simple upper.
This simple upper allows for easy slip-on shoes with no straps needed.
9. Step 6: Add Optional Cuff
For a snug fit or taller shoe:
- Continue crocheting single crochet rows upward from the ankle edge.
- Work 3–5 rows depending on cuff height.
- Keep the stripe pattern consistent if desired.
This cuff ensures the shoes stay on little feet without complicated fastenings.
10. Step 7: Finish the Shoe
- Cut the yarn and pull through the last loop.
- Use a yarn needle to weave in all ends, including color change tails.
- Shape the shoe gently with your fingers.
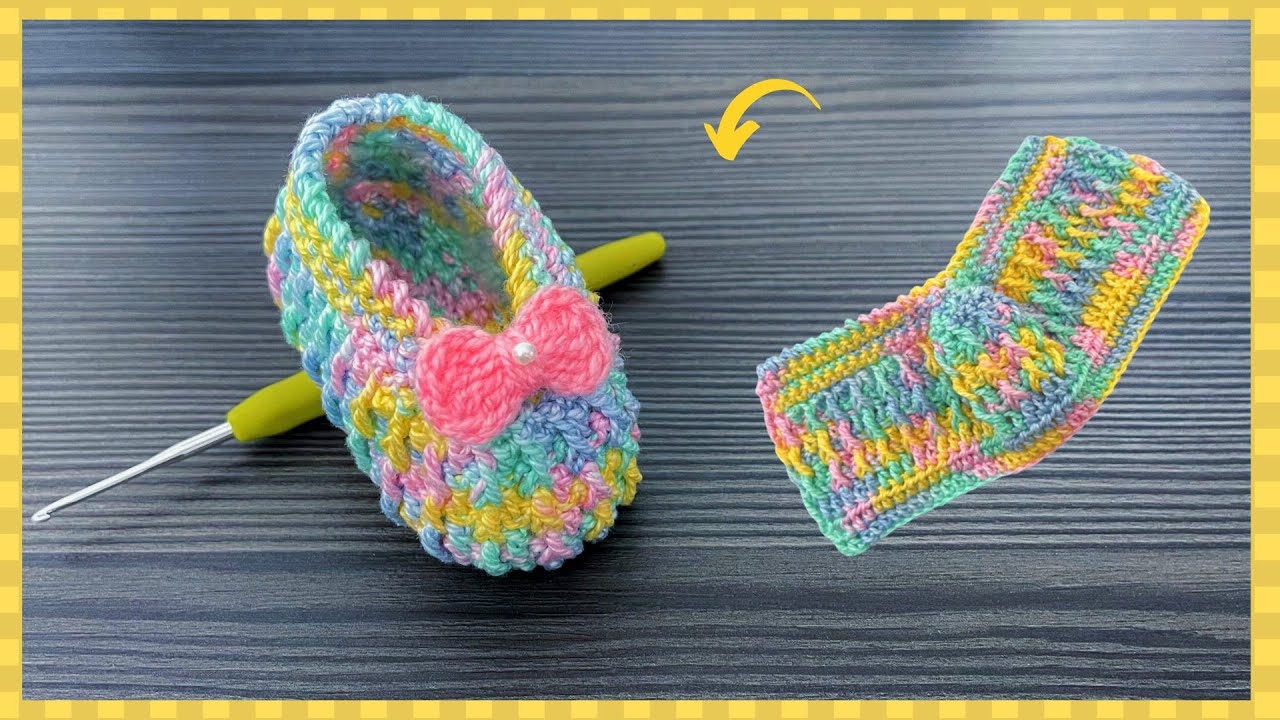
- Optional: Add a small bow, crochet flower, or button on the top for decoration.

11. Step 8: Make the Second Shoe
- Repeat all steps to create the second shoe.
- Ensure it mirrors the first shoe for a matching pair.
- Keep stripe sequences identical for consistency.
12. Stripe Design Variations
- Thin stripes – alternate colors every row.
- Thick stripes – alternate every 2–3 rows.
- Ombre stripes – gradually transition shades from light to dark.
- Contrast sole – a different color for the sole, then striped upper.
- Decorative top stripes – add a single bright stripe across the top for style.
Even the simplest slip-on shoe can look stylish with well-placed stripes.
13. Tips for Making Perfect Striped Baby Shoes
- Use soft yarn for delicate baby skin.
- Keep tight stitches on the sole to maintain structure.
- Check shoe size as you crochet.
- Change colors cleanly at the start of each row.
- Shape shoes gently after finishing for smooth edges.
14. Benefits of Striped Baby Shoes
- Quick and beginner-friendly project
- Soft and safe for babies
- Colorful and visually appealing
- Customizable with stripes, cuff height, or decorations
- Ideal for gifts, baby showers, or personal use
15. Care Instructions
- Hand wash or machine wash gently in cold water.
- Air dry to maintain shape.
- Avoid harsh detergents or bleach.
- Reshape gently after washing to preserve form.
16. Conclusion
Crocheting striped baby shoes is the easiest way to create a colorful, adorable, and functional gift. Using just a few basic stitches, you can make soft, slip-on shoes that are comfortable for newborns and infants.
With optional stripes, cuffs, and small decorations, each pair can be unique and personalized, making it perfect for baby showers, gifts, or your own little one. Even beginners can achieve beautiful, wearable results in a short time. 👶🧶
I can also create a step-by-step visual diagram showing each stage of making these easiest striped baby shoes—from sole to upper to stripes—which makes it much easier for beginners to follow.
Do you want me to make that visual guide?