 by
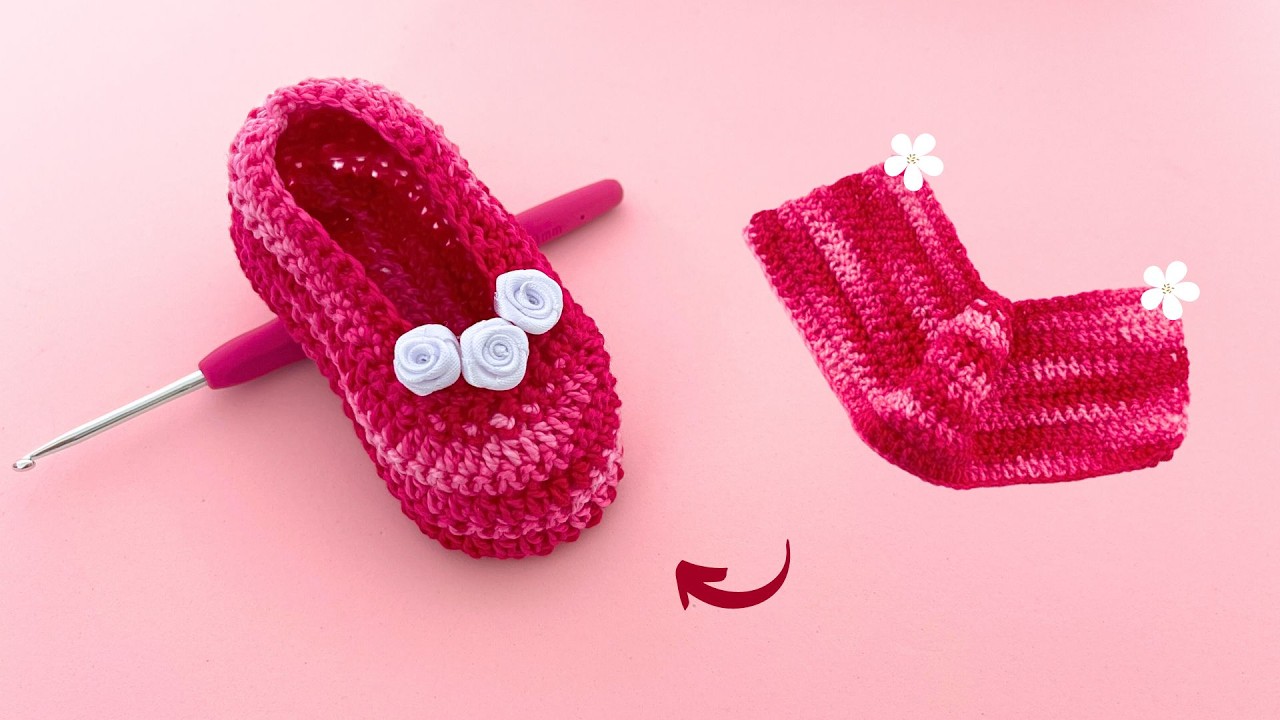
by Crochet baby shoes are one of the most beautiful and practical handmade items you can create. They are soft, lightweight, and perfect for keeping a baby’s feet warm while adding a stylish handmade touch. In this guide, you will learn how to make easy step-by-step baby shoes in red color, designed especially for beginners who want a simple but stunning result.
The red color gives these baby shoes a bright, elegant, and eye-catching look, making them perfect for gifts, photoshoots, baby showers, or special occasions.
❤️ Why Choose Red Crochet Baby Shoes?
Red baby shoes are very popular because they symbolize:
- ❤️ Love and warmth
- 🎁 Special handmade gift style
- 📸 Perfect for baby photos
- 👶 Cute and stylish look for both boys and girls
Red also stands out beautifully in crochet texture, making even a simple design look premium.
🧶 Materials You Will Need
Before starting, prepare your materials:
Yarn
- Soft baby yarn (acrylic or cotton)
- Main color: Red yarn ❤️
- Optional: white or gold yarn for decoration
Hook
- 3.0 mm to 4.0 mm crochet hook
Other tools
- Yarn needle
- Scissors
- Stitch marker (optional)
- Small button (optional for strap)
🧠 Basic Stitches You Need
This pattern uses only simple stitches:
- Chain (ch)
- Slip stitch (sl st)
- Single crochet (sc)
- Half double crochet (hdc)
- Single crochet decrease (sc2tog)
👉 Perfect for beginners!
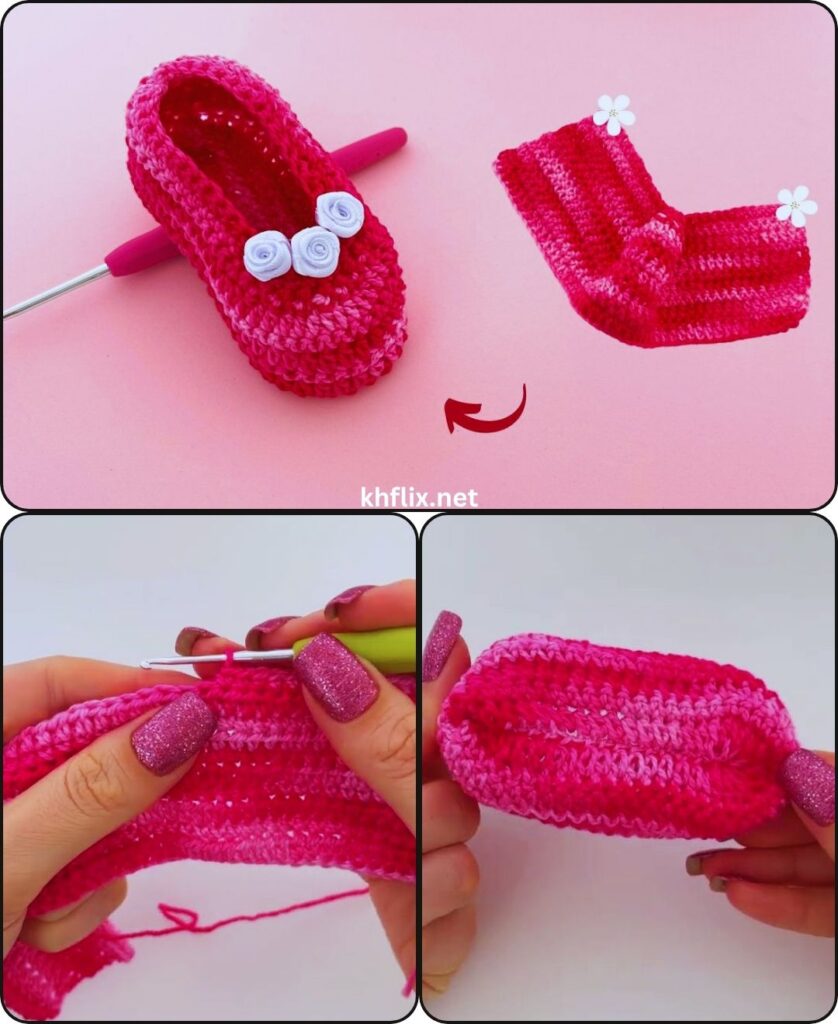
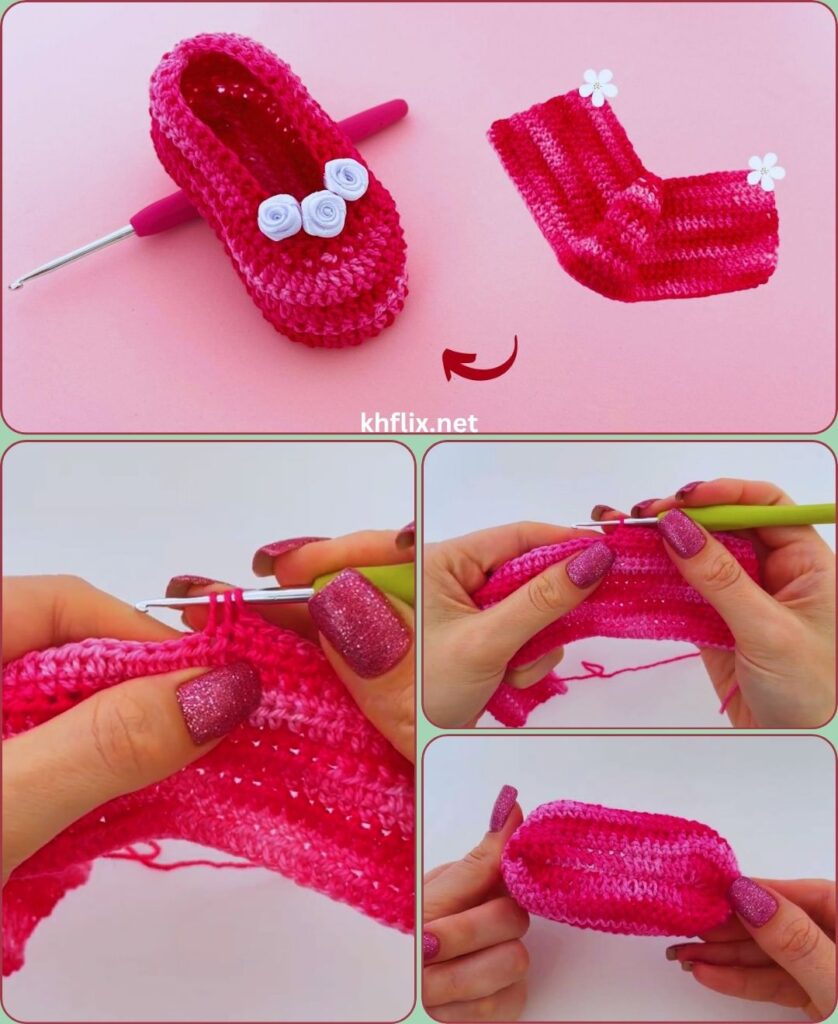
👣 Step 1: Make the Sole (Base of Shoe)
Start with red yarn.
- Chain 10–11 (for newborn size)
- In 2nd chain from hook:
- 2 single crochet
- Single crochet across foundation chain
- At end stitch, add 5 single crochet (to round toe)
- Continue on opposite side of chain
- Join with slip stitch
✔ You now have a soft oval red sole.
👉 Tip: Keep stitches even so both shoes match.
👟 Step 2: Build the Second Round (Widen Sole)
- Chain 1
- Work single crochet around entire sole
- Add increases at toe and heel if needed
- Join with slip stitch
✔ This makes the sole stronger and slightly wider.
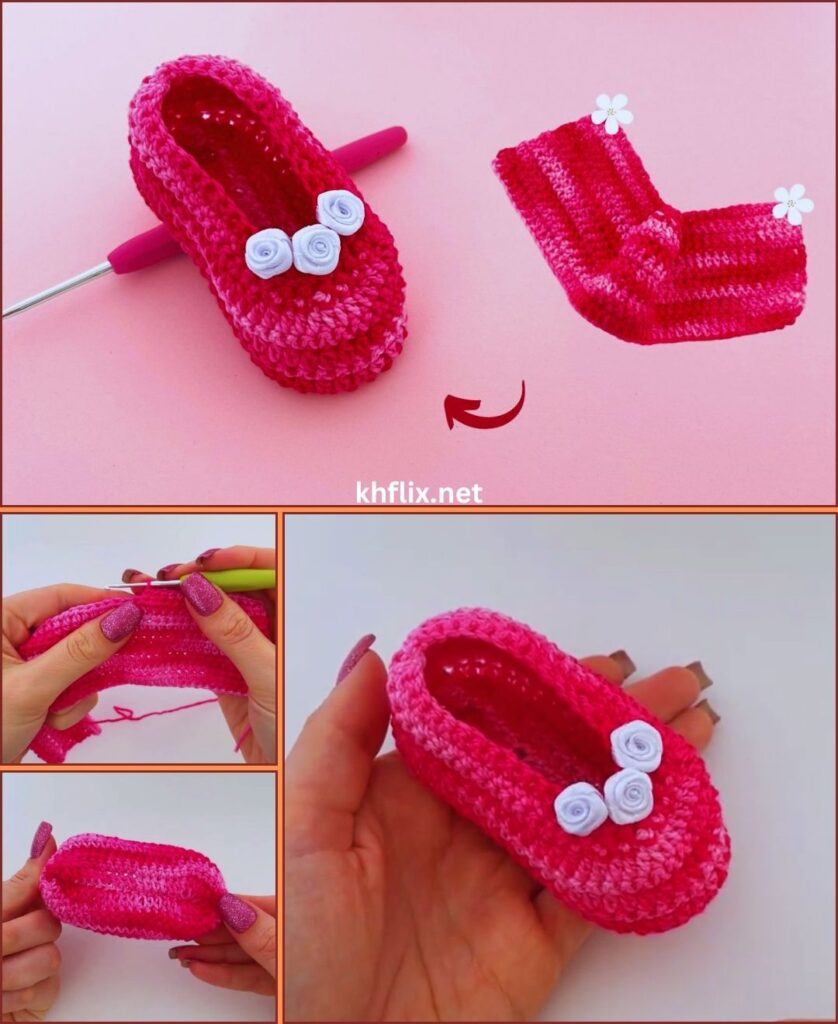
🧱 Step 3: Create Shoe Shape (Side Walls)
Now we start forming the shoe.
- Chain 1
- Work single crochet in back loops only (BLO) around
✔ This creates a neat ridge and helps the shoe stand upright.
👉 This step gives a professional shoe shape using simple stitches.
👶 Step 4: Build Shoe Body
Continue with red yarn:
- Work 2–3 rounds of single crochet
- Do not increase
- Keep stitches even and smooth
✔ This forms the body of the baby shoe.
🔻 Step 5: Shape the Toe
Now we shape the front:
- Find center front of shoe
- Start decreases:
- sc2tog across front section
- Continue normal stitches around
- Repeat 1–2 rounds
✔ The shoe starts forming a soft rounded toe.
👟 Step 6: Create Opening (Ankle Area)
Continue working around top:
You can choose one style:
Option 1: Simple open shoe
- 1–2 rounds single crochet
Option 2: Soft cuff
- 3–4 extra rounds for folded edge
✔ Red color makes even simple design look elegant.
🎀 Step 7: Add Strap (Optional)
For better fit:
- Attach red yarn on side
- Chain 12–15
- Single crochet back
- Attach to opposite side
Optional:
- Add a small white or gold button
✔ Keeps shoe secure on baby’s feet.
✨ Step 8: Decoration Ideas for Red Baby Shoes
To enhance beauty, you can add:
- 🤍 White crochet flower
- ✨ Gold ribbon bow
- ❤️ Tiny heart applique
- 🎀 Small lace edge
- 🧵 White border around opening
👉 Red + white combination looks very elegant.
🧵 Step 9: Finishing Touch
After completing both shoes:
- Cut yarn carefully
- Weave in all ends
- Shape shoes with hands
- Make sure both shoes match
✔ Your red baby shoes are ready!
💡 Helpful Tips for Perfect Result
- Keep stitch tension even
- Use soft baby yarn for comfort
- Count stitches every round
- Crochet both shoes step-by-step together
- Avoid tight stitching (shoe should be soft)
⚠️ Common Mistakes to Avoid
❌ Uneven sole shape
✔ Always count stitches carefully
❌ Toe too sharp
✔ Decrease slowly, not suddenly
❌ Shoes different size
✔ Make both shoes side-by-side
🌹 Final Thoughts
Making easy step-by-step baby shoes in red color is a fun and rewarding crochet project. The red yarn gives a bold, beautiful, and elegant finish while the simple structure keeps it beginner-friendly.
This pattern is perfect for quick gifts, baby photoshoots, or handmade business products. With just basic stitches and a little patience, you can create adorable baby shoes that look professional and feel soft and comfortable.
As you practice, you can try adding different colors, patterns, or decorations to make your designs even more unique.
Happy crocheting! ❤️👶🧶