 by
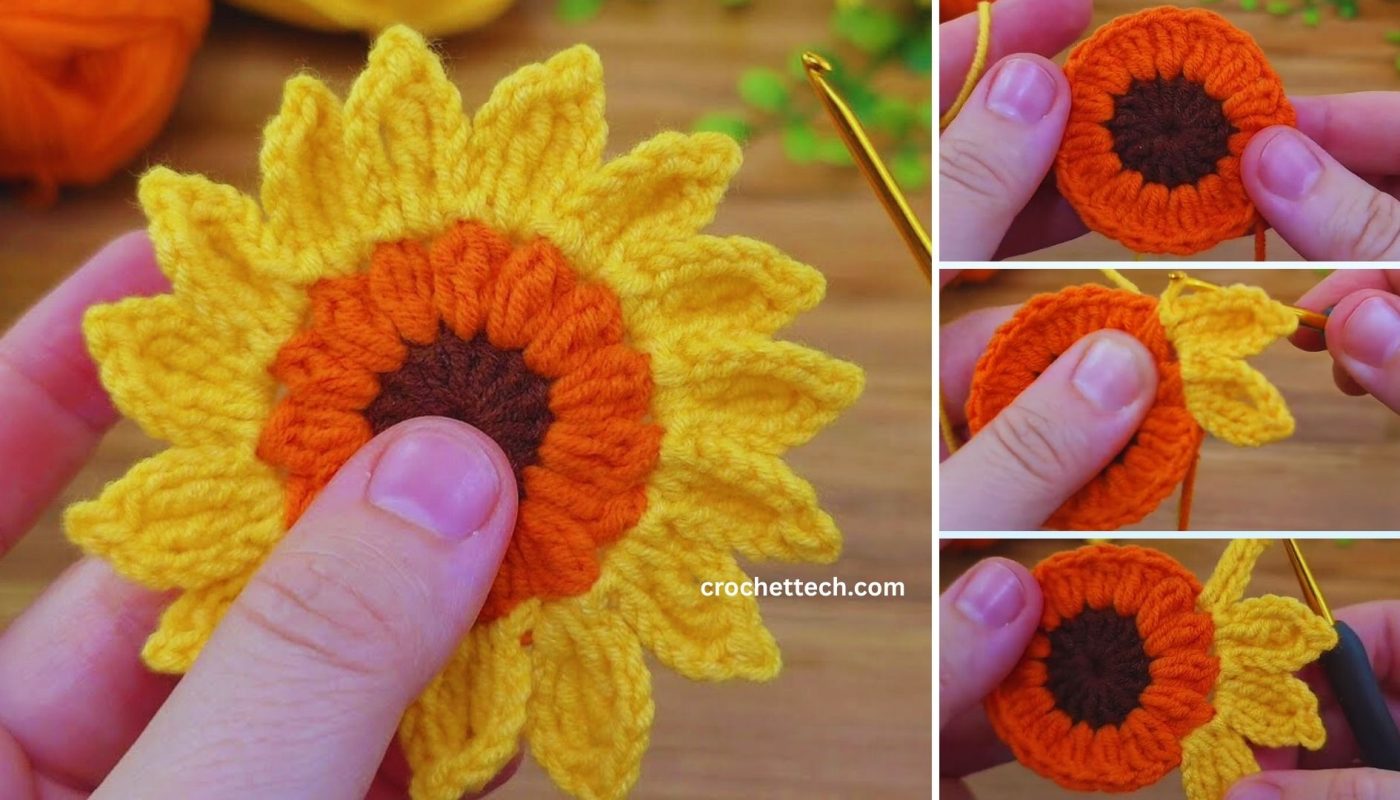
by Let’s crochet a vibrant and cheerful 3D sunflower with three colors! This detailed guide will show you how to create a beautiful, layered sunflower that really pops, perfect for embellishing blankets, hats, bags, or even as a standalone decorative piece. The three colors will add depth and realism to your bloom.
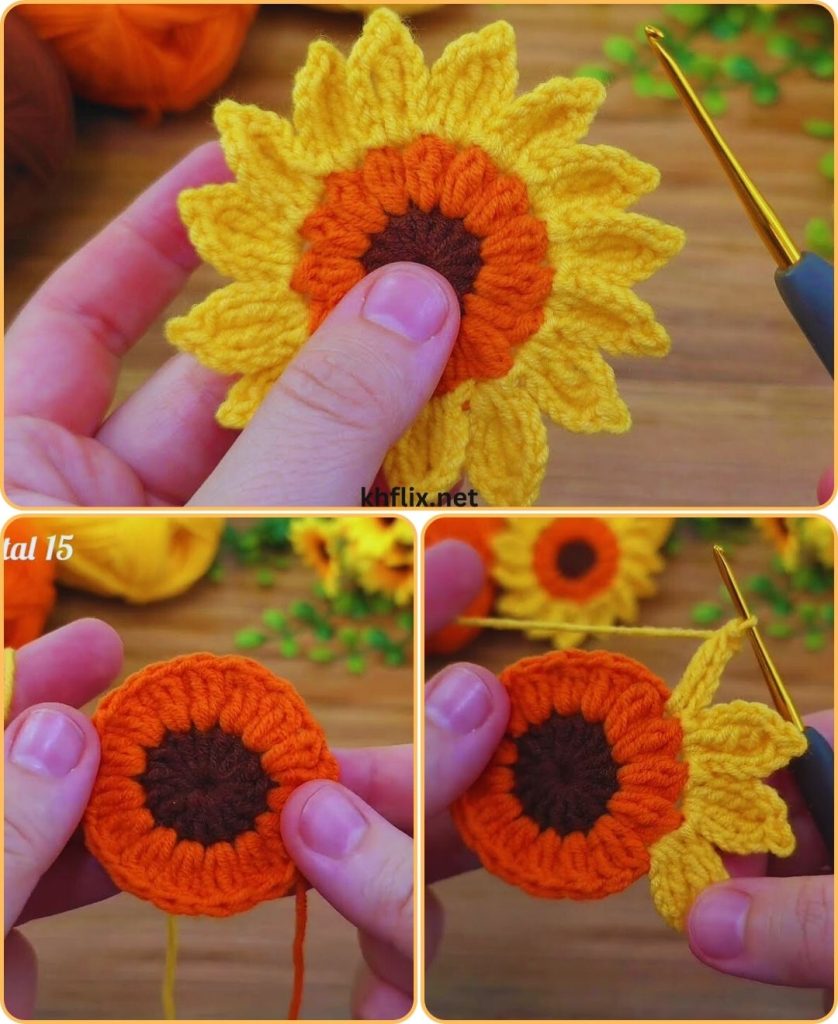
How to Crochet a 3D Sunflower with Three Colors: A Detailed Step-by-Step Guide
This tutorial focuses on creating a multi-layered sunflower with a textured center and distinct petals, using three different yarn colors to mimic the natural beauty of a real sunflower. We’ll build it from the center outwards, ensuring each layer contributes to its beautiful 3D effect.
Skill Level: Intermediate
This project assumes you’re comfortable with:
- Chain (ch): The basic foundation.
- Slip Stitch (sl st): For joining rounds and neatening.
- Single Crochet (sc): A dense stitch, great for the center.
- Half Double Crochet (hdc): An intermediate stitch.
- Double Crochet (dc): A common stitch for height.
- Treble Crochet (tr) / Triple Crochet: A taller stitch for outer petals.
- Magic Ring (MR): An adjustable ring to start circular projects neatly.
- Working in rounds: Both continuous and joined rounds.
- Working into specific stitches or chain spaces.
- Changing colors: You’ll be switching colors frequently.
- Weaving in ends securely.
Finished Sunflower Dimensions (Approximate):
A finished sunflower using worsted weight yarn will typically be about 3-5 inches (7.5-12.5 cm) in diameter, depending on your tension and the number of petal layers you choose to add.
Materials You’ll Need:
- Yarn: Small amounts of Worsted Weight (Medium #4) Cotton or Acrylic Yarn. Cotton is great for stitch definition, while acrylic is softer.
- Color 1 (Dark Brown/Black): For the very center of the sunflower, mimicking the dark seeds. (Approx. 5-10 yards)
- Color 2 (Medium Brown/Yellow-Orange): For the textured “seed” area around the center. (Approx. 10-15 yards)
- Color 3 (Bright Yellow): For the vibrant petals. (Approx. 20-30 yards)
- Optional Color (Green): For leaves if you plan to add them. (Small amount)
- Crochet Hook: Size G/4.0mm or H/5.0mm. A 4.0mm hook will create a slightly denser, firmer sunflower, while a 5.0mm will result in a slightly looser, softer one. Choose based on your preference and yarn.
- Yarn Needle (Tapestry Needle): Essential for seamlessly weaving in all your loose yarn tails.
- Scissors: For cutting your yarn.
- Stitch Marker (Optional): Helpful for marking the beginning of your rounds.
Understanding the Sunflower Construction:
We’ll build this 3D sunflower in distinct layers, changing colors as we go to create its realistic appearance:
- Inner Center (Color 1): The very heart of the flower.
- Textured Seed Area (Color 2): Crocheted over the inner center to create a bumpy, realistic seed effect.
- Petal Base (Color 3): The foundation for the petals, usually worked behind or into the seed area.
- Petals (Color 3): Individual petals crocheted in layers, often using taller stitches to make them stand out.
Let’s Crochet Your 3D Sunflower!
Part 1: The Inner Center (Color 1 – Dark Brown/Black)
This is the very core of your sunflower.
- Start: With Color 1, create a Magic Ring (MR).
- Alternative start (if MR is tricky): Chain 4, then slip stitch (sl st) into the first chain to form a ring.
- Round 1:
- Chain 1 (does NOT count as a stitch).
- Work 8 single crochet (sc) stitches into the Magic Ring.
- Slip stitch (sl st) into the first sc of the round to join.
- [Total: 8 sc]
- If using MR, gently pull the tail tightly to close the center hole.
- Fasten off Color 1, leaving a short tail for weaving in.
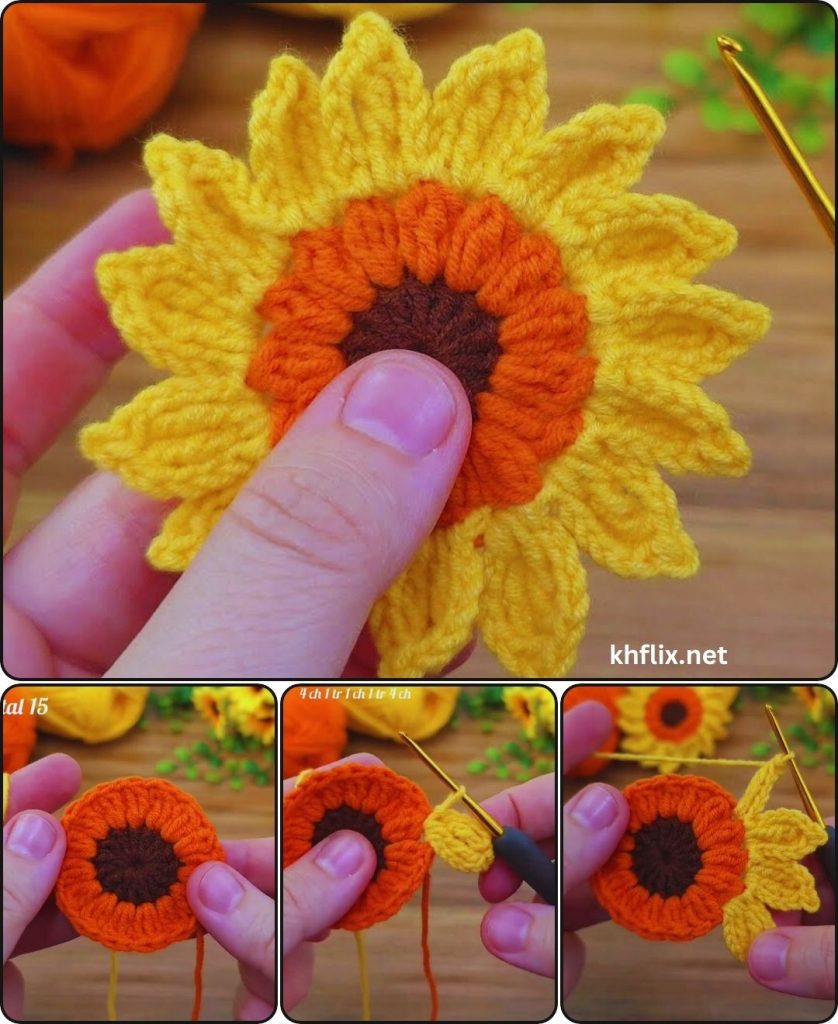
Part 2: The Textured Seed Area (Color 2 – Medium Brown/Yellow-Orange)
This round creates the distinctive textured center of the sunflower. We’ll use the Bobble Stitch or a similar textured stitch for this, combined with single crochets.
- Join Color 2: Join Color 2 with a slip stitch (sl st) into any sc stitch from Round 1.
- Round 2 (Textured Seeds):
- Chain 1 (does NOT count as a stitch).
- In the same sc stitch where you joined: Work 1 single crochet (sc).
- In the next sc stitch: Work 1 Bobble Stitch (Bo).
- Bobble Stitch (Bo) using 4 DC: *Yarn over, insert hook into designated stitch, yarn over, pull up a loop, yarn over, pull through 2 loops* (2 loops on hook). Repeat from * to * 3 more times in the same stitch (you will have 4 partial double crochets, and 5 loops on your hook). Yarn over, pull through all 5 loops on your hook.
- *Work 1 sc into the next sc stitch.
- Work 1 Bo into the next sc stitch.*
- Repeat from * to * around. You should have 4 sc and 4 bobble stitches, alternating.
- Slip stitch (sl st) into the first sc of the round to join.
- [Total: 4 sc, 4 Bo = 8 stitches overall]
- Fasten off Color 2, leaving a short tail for weaving in.
- Alternative Textured Stitch: If the bobble stitch is too complex, you can simply work 2 sc into each stitch around (16 sc total) for a slightly less raised, but still full, center.
Part 3: The Petal Base (Color 3 – Bright Yellow)
This round will create the foundation for your petals, making them stand out from the textured center.
- Join Color 3: Join Color 3 with a slip stitch (sl st) into any single crochet stitch from Round 2 (the sc’s you made between the bobbles).
- Round 3 (Petal Base):
- Chain 1 (does NOT count as a stitch).
- Work 1 sc into the same stitch where you joined.
- Work 1 sc into the top of the next Bobble Stitch.
- Repeat *1 sc in next sc, 1 sc in next Bobble Stitch* around.
- Slip stitch (sl st) into the first sc of the round to join.
- [Total: 8 sc]
- Note: You are working into the stitches of Round 2, effectively creating a new layer behind the bobbles that will serve as the base for the petals.
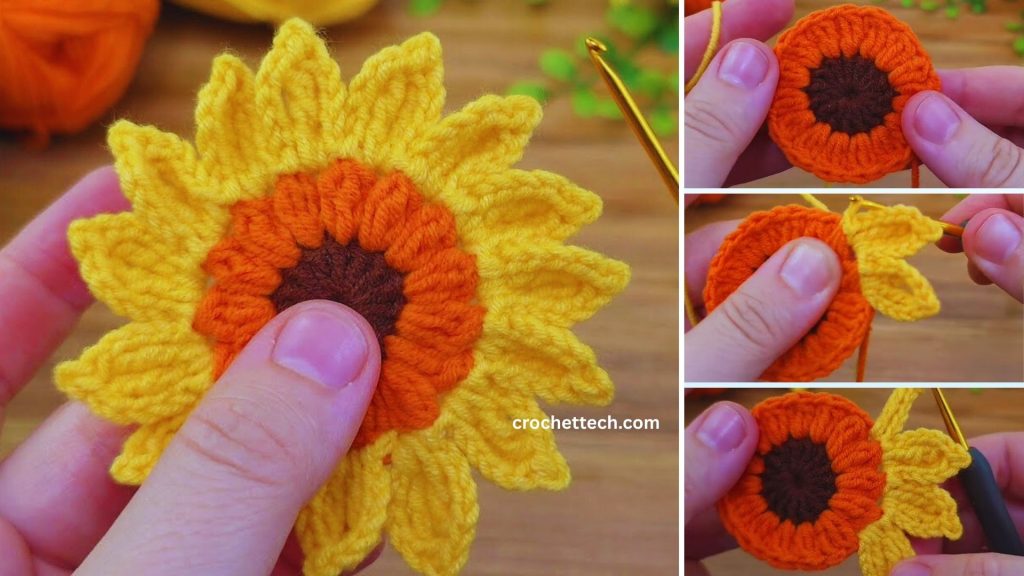
Part 4: The Petals (Color 3 – Bright Yellow)
Now for the iconic petals! We’ll make them by working multiple stitches into the same base stitch to create individual petals.
- Round 4 (Petals):
- Do NOT chain 1 to start this round. We’ll start directly with the petal stitch.
- In the very first sc stitch of Round 3 (where you just slip stitched into):
- Work (1 sc, 1 hdc, 1 dc, 1 hdc, 1 sc) all into the same sc stitch. This forms your first petal.
- *In the next sc stitch: Work (1 sc, 1 hdc, 1 dc, 1 hdc, 1 sc) all into the same sc stitch.*
- Repeat from * to * around. You will create 8 petals in total.
- After the last petal, slip stitch (sl st) into the first sc of the very first petal to join.
- [Total: 8 petals]
- Fasten off Color 3, leaving a short tail for weaving in.
- Optional for Larger/Pointier Petals: If you want longer or more defined petals, you can use taller stitches within the petal sequence. For example:
- (1 sc, 1 hdc, 1 dc, 1 tr, 1 dc, 1 hdc, 1 sc) all into the same stitch for a larger, more pointed petal. This would require more yarn.
Part 5: Finishing Touches
- Weave in ALL Remaining Ends:
- This is absolutely crucial for a neat, durable sunflower. You’ll have several tails from your color changes. Use your yarn needle to meticulously weave in every single loose yarn tail.
- How to Weave Neatly: Weave the tails into the stitches of the same color as the tail. Weave in one direction for about 1.5-2 inches (4-5 cm), then subtly change direction and weave back through some of the same stitches. This “locks” the tail in place and prevents it from unraveling. Be patient and thorough; well-woven ends are practically invisible.
- Blocking (Optional but Recommended):
- Blocking can help your sunflower lie flatter, even out the petals, and truly make the 3D effect pop.
- Gently mist your sunflower evenly with water (especially if using cotton yarn).
- Carefully flatten the center and arrange the petals outwards. You can gently tug on them to shape them as desired.
- Allow the sunflower to air dry completely on a flat surface. This might take several hours.
- Add Leaves (Optional – Green Yarn):
- If you’d like to add a leaf or two for realism, you can make simple leaf shapes.
- With green yarn, Chain 7.
- Work 1 sc in the 2nd ch from hook, 1 hdc in next ch, 1 dc in next 2 ch, 1 hdc in next ch, 1 sc in last ch.
- Fasten off, leaving a tail for sewing.
- Make 1 or 2 leaves, then use your yarn needle to securely sew them to the back or side of your sunflower. Weave in tails.
Congratulations! You’ve now created a vibrant and beautiful 3D sunflower with three colors! This charming handmade embellishment is ready to brighten up any project or space.
What creative project will your new sunflower adorn?