 by
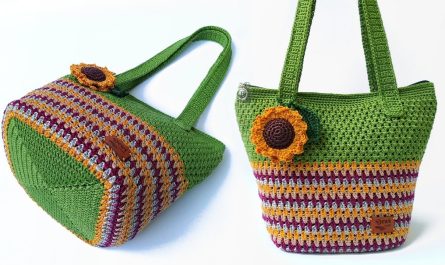
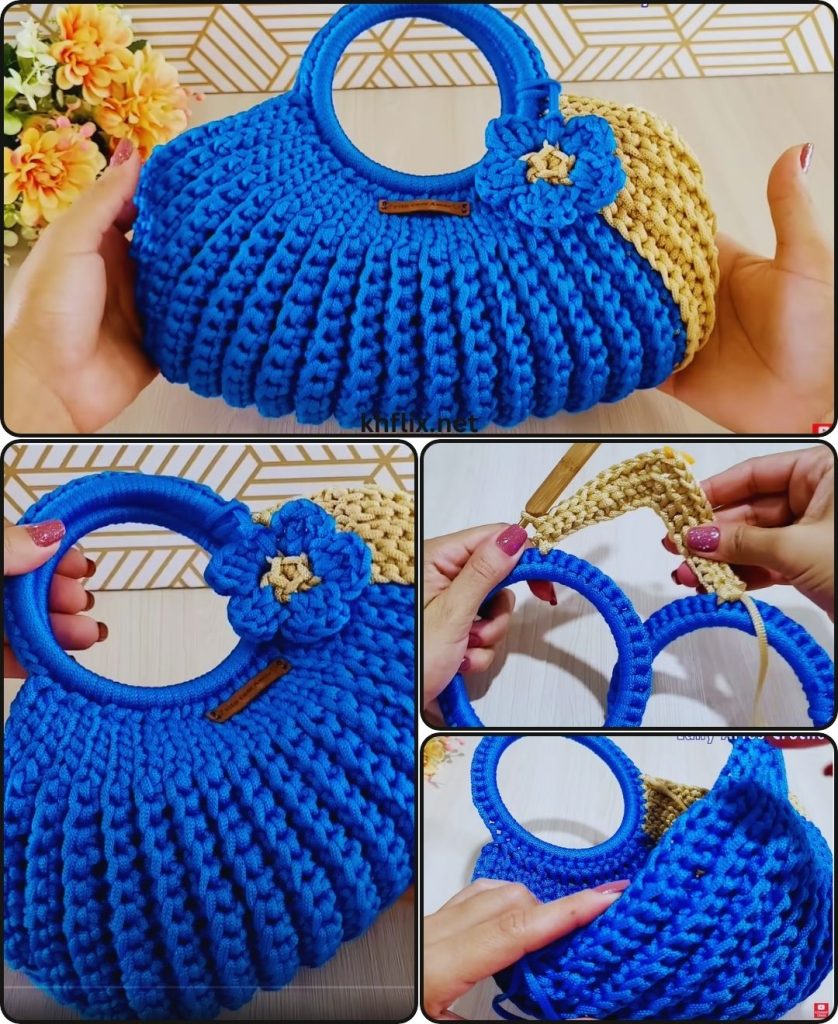
by Let’s create a truly stunning crochet tote bag adorned with a beautiful 3D flower arrangement! This project is all about combining the practicality of a handmade tote with the artistic flair of dimensional floral embellishments. You’ll learn to make a sturdy bag and then craft and arrange individual 3D flowers to create a unique, eye-catching design.
How to Make a Crochet Tote Bag with a 3D Flower Arrangement
This comprehensive tutorial will guide you through crocheting a functional and stylish tote bag, then show you how to create and arrange various 3D flowers to add a beautiful, tactile, and personalized touch. We’ll focus on a sturdy stitch for the bag’s body and clear instructions for the flowers, allowing you to bring your floral vision to life.
Skill Level: Intermediate
This project is ideal if you’re comfortable with:
- Chain (ch): The basic foundation.
- Slip Stitch (sl st): For joining rounds and neatening.
- Single Crochet (sc): A dense stitch, great for sturdy bag fabric.
- Half Double Crochet (hdc): A good intermediate stitch for height.
- Double Crochet (dc): A common stitch for taller elements.
- Treble Crochet (tr): A taller stitch for larger petals.
- Magic Ring (MR): An adjustable ring to start circular projects neatly (alternative provided).
- Puff Stitch / Bobble Stitch: For textured flower centers.
- Working in rounds: Crocheting in a continuous or joined circular/oval manner.
- Working into specific stitches or chain spaces.
- Creating a strong, even tension.
- Weaving in ends securely.
Finished Bag & Flower Dimensions (Approximate):
This pattern creates a medium-sized tote, typically around 12-14 inches (30-35 cm) wide and 10-12 inches (25-30 cm) tall (excluding handles). The 3D flowers will vary in size, from 1.5 inches (4 cm) for smaller blooms to 3-4 inches (7.5-10 cm) for larger ones, allowing for a dynamic arrangement.
Materials You’ll Need:
- Yarn:
- Main Bag Color: Approximately 500-700 yards (450-640 meters) of Worsted Weight (Medium #4) Cotton or Cotton Blend Yarn. Cotton is highly recommended for bags due to its durability, minimal stretch, and excellent stitch definition. Choose a color that will complement your flower arrangement (e.g., natural beige, classic black, forest green, or a muted pastel).
- Flower Colors: Various small amounts (approx. 5-15 yards each, depending on flower size and quantity) of Worsted Weight (Medium #4) Yarn in a range of colors for your 3D flowers. Think about a cohesive palette:
- Center Colors: Yellow, brown, or black for sunflower/daisy centers.
- Petal Colors: Pinks, reds, purples, oranges, whites, yellows, blues – choose a variety!
- Leaf/Stem Colors: Several shades of green.
- Crochet Hook: Size H/5.0mm. This size creates a dense fabric suitable for a sturdy bag and works well for the flowers too.
- Yarn Needle (Tapestry Needle): Essential for seamlessly weaving in all your loose yarn tails and for securely sewing the flowers onto the bag.
- Scissors: For cutting your yarn.
- Stitch Marker (Optional but Highly Recommended): Very helpful for marking the beginning of your rounds.
- Optional for Flower Embellishment: Small beads, pearl buttons, or embroidery floss for flower centers or added detail.
- Fabric Lining (Optional but Recommended): About 0.75-1.5 yards (0.7-1.4 meters) of coordinating fabric, needle, and thread/sewing machine for a more professional finish and added durability.
Understanding the Bag & Flower Construction:
We’ll approach this project in two main phases:
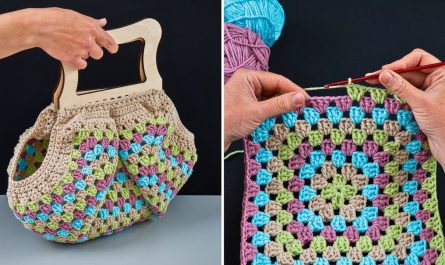
- Crocheting the Tote Bag: This forms the sturdy canvas for your floral art. It will be built seamlessly from an oval base.
- Crocheting and Arranging 3D Flowers: You’ll create individual flowers and leaves, then meticulously arrange and attach them to the finished bag.
Let’s Crochet Your Tote Bag with 3D Flower Arrangement!
Part 1: Crocheting the Tote Bag
We’ll use a simple yet strong stitch pattern to ensure your bag is durable and holds its shape well.
- Crocheting the Sturdy Oval Base (Main Bag Color):
- Make a slip knot and chain 36. (Adjust for bag width; keep it an even number.)
- Round 1: Work 2 sc into the 2nd ch from your hook. Work 1 sc into each of the next 33 chains across. Work 3 sc into the very last chain. Working down the opposite side of the foundation chain: Work 1 sc into each of the next 33 chains across. Work 1 sc into the very first chain. Sl st into the first sc to join. [Total: 72 sc]
- Round 2: Ch 1 (does not count as a stitch). Work 2 sc into the first stitch. Work 1 sc into the next 34 stitches. Work 2 sc into each of the next 3 stitches. Work 1 sc into the next 34 stitches. Work 2 sc into each of the last 2 stitches. Sl st into the first sc to join. [Total: 78 sc]
- Round 3: Ch 1. Work 2 sc into the first stitch. Work 1 sc into the next 35 stitches. Work 2 sc into each of the next 3 stitches. Work 1 sc into the next 35 stitches. Work 2 sc into each of the last 2 stitches. Sl st into the first sc to join. [Total: 84 sc]
- Base Check: Your base should be a flat oval. Adjust increases if it curls or ruffles. Do not fasten off.
- Building the Bag Body (Main Bag Color):
- Transition Round: Ch 1. Work 1 single crochet in the Back Loop Only (BLO) of each stitch around. Sl st into the first sc to join. [Total: 84 sc] (This creates a defined edge, helping the bag stand upright.)
- Body Rounds: Ch 1. Work 1 sc into each stitch around (now working through both loops). Sl st into the first sc to join. Repeat this round for approximately 25-30 more rounds, or until your bag reaches the desired height (e.g., 10-12 inches / 25-30 cm).
- Maintain consistent tension for an even fabric. Do not fasten off.
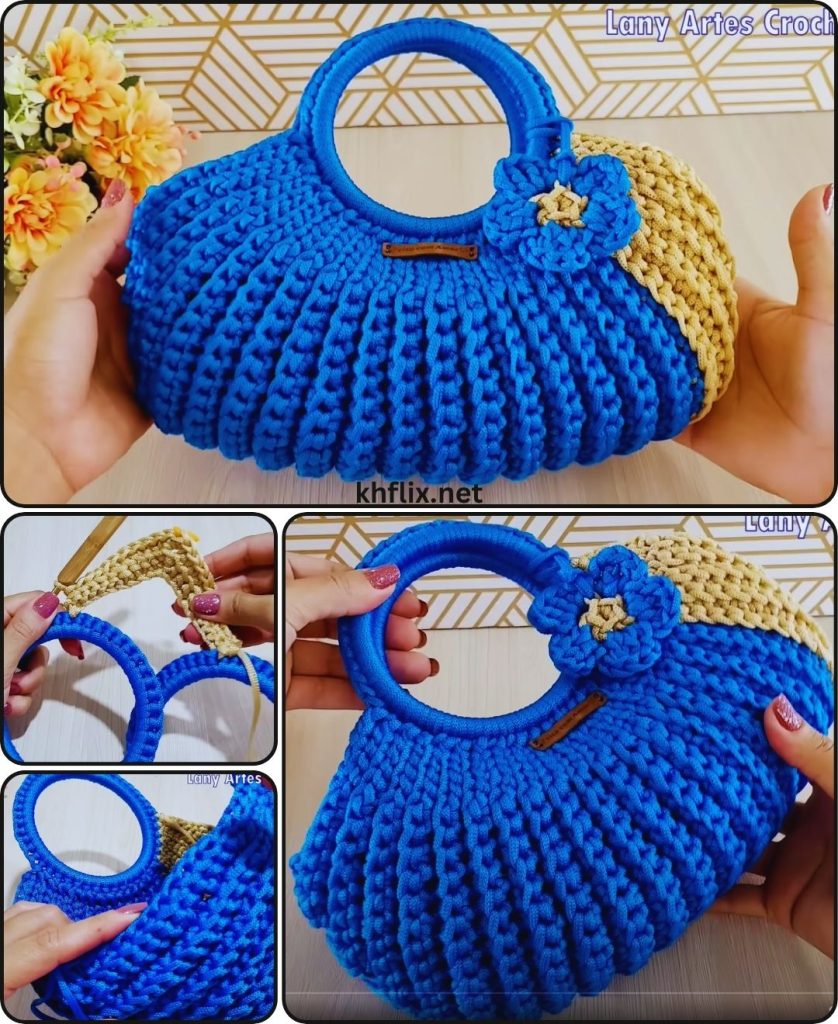
- Adding the Top Border (Main Bag Color):
- Border Rounds: Ch 1. Work 1 sc into each stitch around. Sl st into the first sc to join. Repeat this round for 3-4 more times. This creates a very dense and firm top border.
- Optional Firm Edge (Crab Stitch): For an exceptionally firm and decorative edge, add a final round of Crab Stitch (Reverse Single Crochet). Ch 1. Work 1 sc into the stitch to your right (working backward) in each stitch around. Sl st into the first crab stitch to join.
- Fasten off, leaving a 6-inch (15 cm) tail for weaving in.
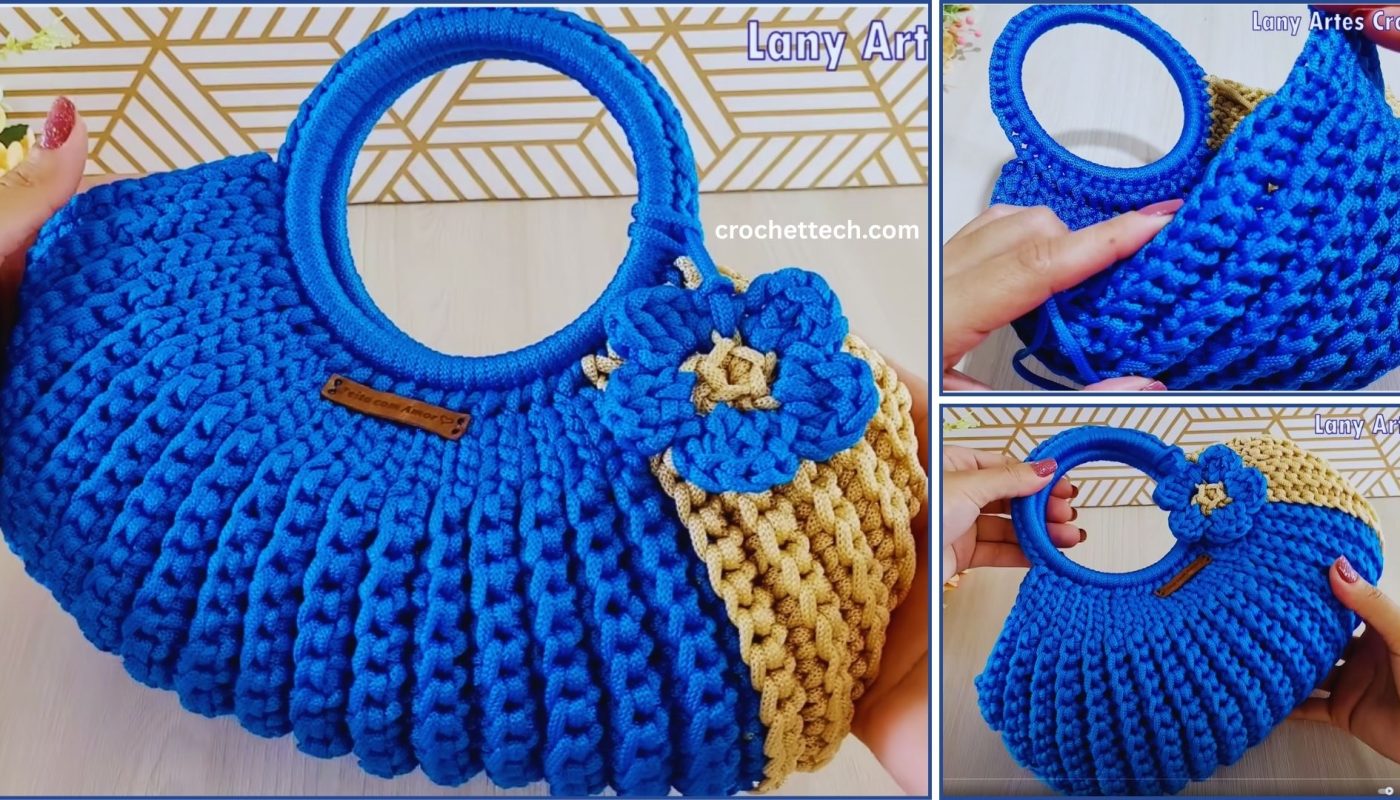
- Crafting and Attaching the Handles (Main Bag Color):
- Crocheted Handle (Make 2):
- Ch 70 (adjust for desired strap length).
- Row 1: Work 1 sc into the 2nd ch from hook. Work 1 sc into each remaining ch across. [Total: 69 sc]
- Ch 1, turn.
- Row 2: Work 1 sc into each sc across the row. [Total: 69 sc]
- Repeat Row 2 for 2-3 more rows until your handle reaches the desired width (e.g., 4-5 rows total for a sturdy handle).
- Fasten off, leaving a very long tail (at least 15-20 inches / 38-50 cm) at each end of the strap for sewing.
- Make a second identical strap.
- Attaching the Handles: Lay your bag flat. Position the handles on the inside of the bag’s top border. Typically, each handle is centered over the side curve, approximately 3-4 inches (7.5-10 cm) in from the side edges. Thread a long tail from a handle onto your yarn needle. Stitch firmly back and forth through the handle end and the bag’s top border multiple times to ensure a very strong attachment. Repeat for all four handle ends. Weave in any remaining handle tails very securely.
- Crocheted Handle (Make 2):
Part 2: Crocheting Your 3D Flower Arrangement
This is where your creativity shines! We’ll provide patterns for a few versatile 3D flowers. You can make multiples of each, or mix and match as you like. Aim for at least 3-5 flowers of varying sizes and 2-3 leaves for a nice arrangement.
Important Note for all Flowers/Leaves: Always fasten off each flower/leaf, leaving a tail of at least 10-12 inches (25-30 cm) for sewing them onto the bag.
A. Simple Layered Rose (Versatile & Classic)
This creates a spiraled rose.
- Color 1 (Inner Petals): Chain 30.
- Row 1 (Base): Sc into 2nd ch from hook and each ch across. (29 sc). Ch 1, turn.
- Row 2 (Smallest Petals): (Sc, ch 1) into first sc, skip 1 sc, (sc, ch 1) into next sc. Repeat from * to * across. Ch 2, turn.
- Row 3 (Medium Petals): (2 hdc, ch 1) into first ch 1 space, (2 hdc, ch 1) into next ch 1 space. Repeat from * to * across. Ch 3, turn.
- Row 4 (Largest Petals): (3 dc, ch 1) into first ch 1 space, (3 dc, ch 1) into next ch 1 space. Repeat from * to * across. Fasten off.
- Assembly: Starting from the end with the smallest petals, tightly roll the strip into a rose shape. Use the long tail and your yarn needle to sew firmly through all layers at the base to secure the shape.
B. Puff Stitch Flower (Textured & Full)
This creates a round, puffy flower.
- Color 1 (Center – e.g., yellow): Create a Magic Ring (MR). Ch 2 (does not count as st). Work 10-12 hdc into MR. Sl st to first hdc to join. Pull MR tail tight. Fasten off.
- Color 2 (Petals – e.g., pink): Join Color 2 with a sl st into any hdc from the previous round.
- Petal Round: Ch 1 (does not count). In the same stitch: Work 1 Puff Stitch (Yarn over, insert hook into stitch, yarn over, pull up a loop – repeat 4 more times in the same stitch; 11 loops on hook; yarn over, pull through all 11 loops. Ch 1 to secure). Sl st into the next hdc stitch. Repeat (Work 1 Puff Stitch in next hdc, ch 1 to secure. Sl st into next hdc) around. You will have 5-6 petals. Fasten off.
C. Simple Daisy/Sunflower (Classic & Cheerful)
This creates a flat or slightly raised flower.
- Color 1 (Center – e.g., brown/yellow): Create a Magic Ring (MR). Ch 1. Work 8 sc into MR. Sl st to first sc to join. Pull MR tail tight. Fasten off.
- Color 2 (Petals – e.g., white/yellow): Join Color 2 with a sl st into any sc from the center.
- Petal Round: In the same stitch: (Ch 2, 2 dc, ch 2, sl st). Sl st into next sc. In the next sc: (Ch 2, 2 dc, ch 2, sl st). Repeat from * to * around. You will have 8 petals. Fasten off.
D. Simple Leaf (Essential Greenery)
- Color (Green): Ch 8.
- Work 1 sc into the 2nd ch from hook. Work 1 hdc into the next ch. Work 1 dc into the next 2 chains. Work 1 hdc into the next ch. Work 1 sc into the last ch.
- Ch 2 (leaf point).
- Working down the opposite side of the foundation chain: Work 1 sc into the same stitch as the last sc. Work 1 hdc into the next hdc. Work 1 dc into the next 2 dc. Work 1 hdc into the next hdc. Work 1 sc into the last sc.
- Sl st into the first sc to join. Fasten off.
- Make 2-3 leaves of varying shades of green.
Part 3: Assembling the 3D Flower Arrangement
This is the creative culmination of your project!
- Arrange Your Flowers:
- Lay your completed tote bag flat.
- Carefully arrange all your crocheted flowers and leaves on the front of the bag (or wherever you desire the arrangement to be). Experiment with different layouts, overlapping petals, and placing larger flowers behind smaller ones to create depth. Think about color balance and visual flow.
- Use sewing pins to temporarily hold the flowers and leaves in place once you are happy with the arrangement. Take a photo with your phone to remember the layout.
- Sewing the Flowers & Leaves:
- Thread the long tails from each flower and leaf onto your yarn needle.
- Starting with the largest/bottom-most elements in your arrangement, begin sewing them onto the bag.
- Stitch firmly through the back of each flower/leaf and into the stitches of the bag. Use small, inconspicuous stitches to avoid them being visible from the front. Go through the back of the flower/leaf multiple times to ensure it’s securely attached and won’t detach.
- Work your way up, attaching the layers of flowers and leaves. For flowers with open centers, you might stitch through the very center. For puff flowers, stitch around the base of the puff.
- Once each element is securely sewn, weave in any remaining tails into the back of the flower/leaf itself or into the bag’s fabric, ensuring they are invisible.
- Add Embellishments (Optional):
- If you have small beads or pearl buttons, you can sew them into the centers of some of your flowers for extra sparkle or detail.
- You can also use embroidery floss to add small French knots or lines for texture or “stems” if desired.
Part 4: Final Finishing Touches
- Weave in ALL Remaining Ends:
- This is paramount for a professional-looking and durable bag. You’ll have tails from your bag construction, handle attachments, and every single flower/leaf. Use your yarn needle to meticulously weave in every single loose yarn tail.
- Technique: Weave into stitches of the same color. Go in one direction for 1.5-2 inches (4-5 cm), then change direction and weave back through some of the same stitches to “lock” the tail. Trim excess close to the fabric.
- Blocking (Optional but Highly Recommended):
- Blocking can significantly improve the shape, drape, and overall finish of your crocheted bag and help the 3D flowers really pop.
- Method (Wet Blocking – Ideal for Cotton/Acrylic):
- Gently stuff your bag with clean towels or crumpled paper to fill it to its desired shape. Avoid overstuffing.
- Using a spray bottle, lightly mist the entire bag and flowers evenly with water until damp but not soaking wet.
- Carefully shape the bag, ensuring the base is flat, sides are even. Gently arrange and flatten/shape the petals of your 3D flowers as desired.
- Allow the bag to air dry completely and thoroughly in a well-ventilated area before removing the stuffing. This can take 24-48 hours.
- Add a Fabric Lining (Optional for Professional Finish):
- A fabric lining provides a smooth interior, hides all your yarn tails, prevents small items from slipping through stitches, and adds significant durability and structure.
- Measure the inside dimensions of your finished bag. Cut fabric pieces (typically two main body pieces and one bottom piece) adding a seam allowance.
- Sew the fabric pieces together to create an inner lining bag.
- Insert the fabric lining into your crocheted bag.
- Fold over the top raw edge of the fabric lining and hand-stitch it neatly to the inside top border of your crocheted bag using a needle and matching thread.
Congratulations! You’ve successfully created a truly unique and beautiful crochet tote bag with a stunning 3D flower arrangement! This handmade creation is not just a practical accessory; it’s a piece of wearable art, showcasing your skill and creativity. Enjoy carrying your one-of-a-kind bag wherever you go!