 by
by Absolutely! Here’s a detailed, long-form guide and pattern for making a crochet crossbody bag using a checkered stitch pattern. This article is designed for advanced beginners to intermediate crocheters and will walk you through everything—from materials to final assembly—with helpful tips and clear steps.
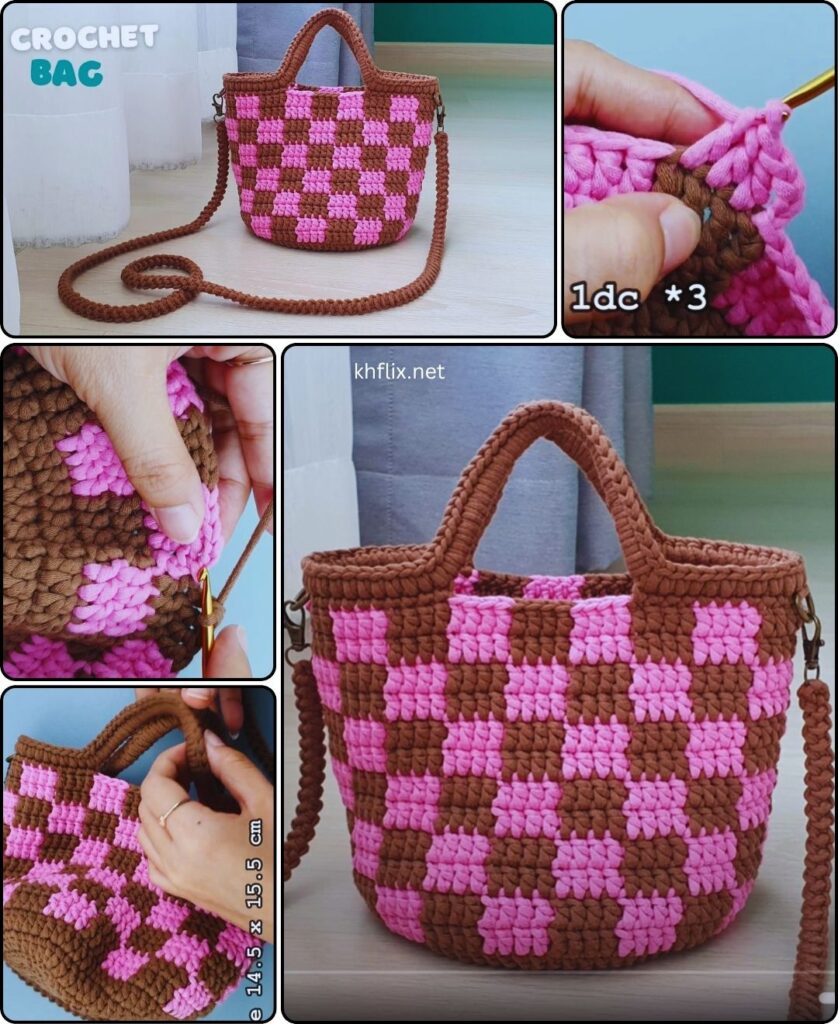
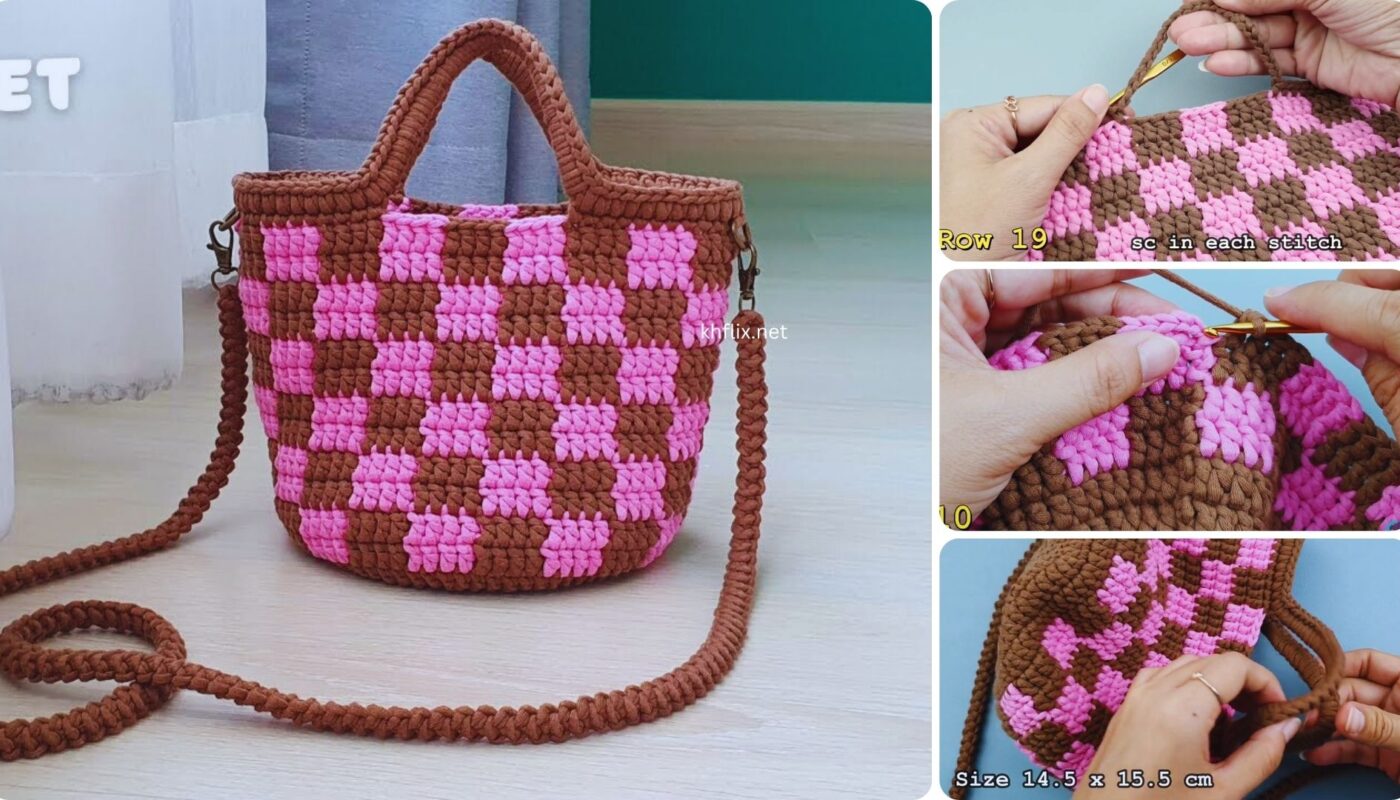
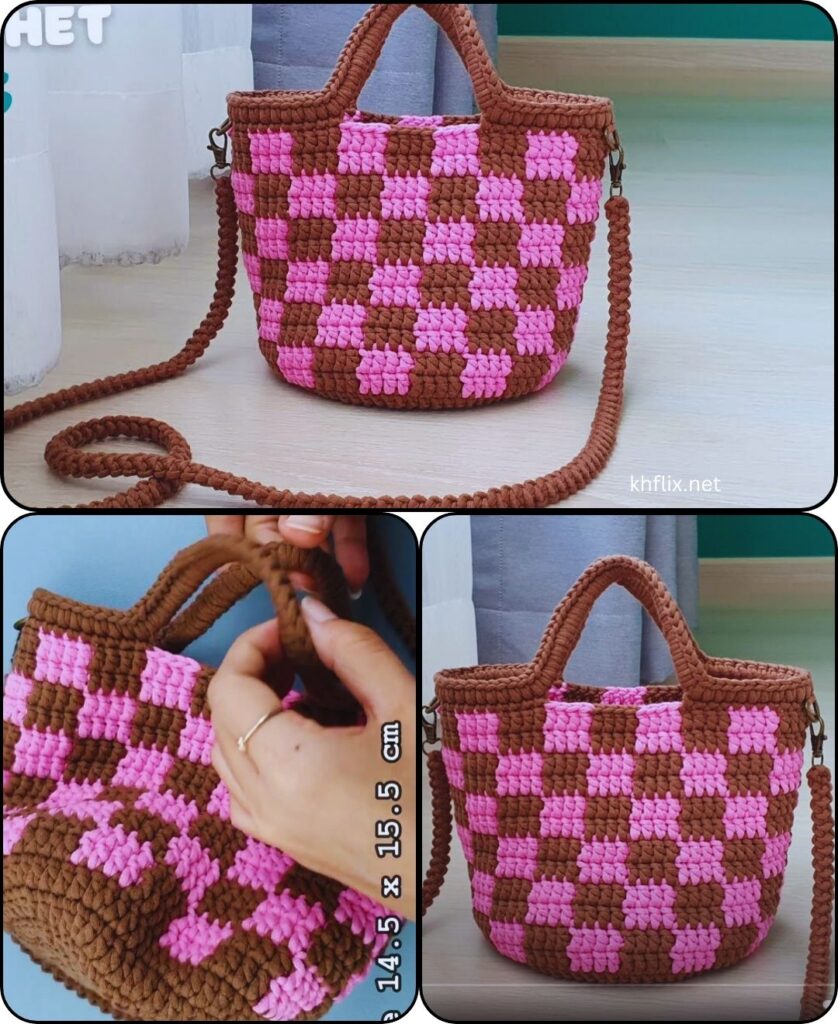
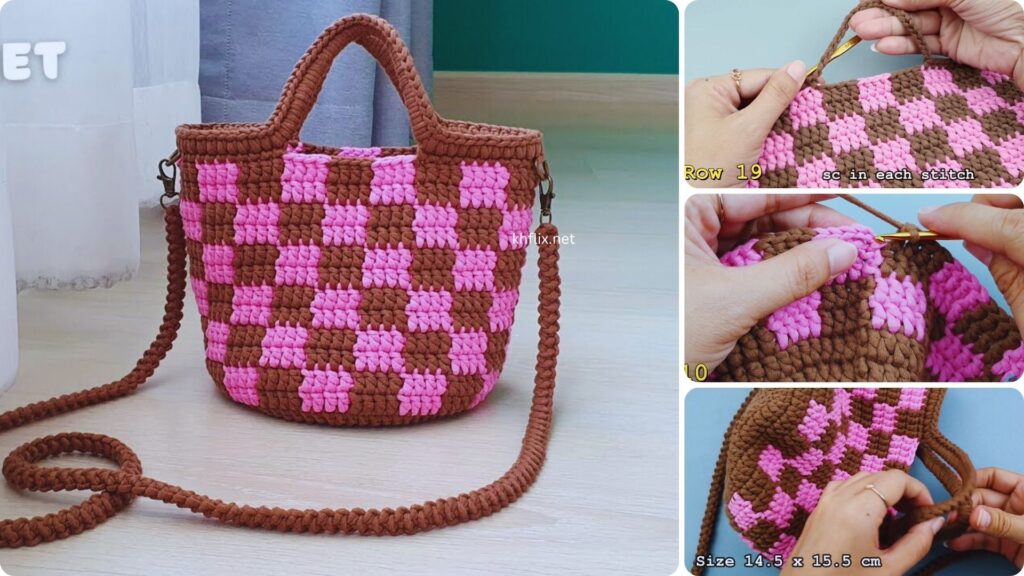
🧶 How to Crochet a Checkered Stitch Crossbody Bag: A Complete Step-by-Step Pattern
A crochet crossbody bag is not only a functional accessory but also a stylish statement piece. Using the checkered stitch pattern adds texture and visual interest, giving the bag a classic, timeless look that works for any season. Whether you want a small daily purse or a larger crossbody satchel, this pattern can be easily adjusted in size.
🧰 Materials Needed
Before we get started, gather the following tools and supplies:
🪢 Yarn
- Worsted weight cotton yarn (Category 4)
- Color A (Main): Approx. 150g
- Color B (Contrasting color for checkers): Approx. 100g
Cotton yarn is recommended for strength and structure.
🪝 Crochet Hook
- 4.0 mm or 4.5 mm (G/6 or 7) hook (Check your yarn label for best match)
🧵 Other Tools
- Scissors
- Yarn needle (for weaving ends and seaming)
- Stitch marker (optional)
- Lining fabric (optional, for a more professional finish)
- Magnetic clasp or zipper (optional)
🧵 Crochet Stitches & Abbreviations (US Terms)
| Abbreviation | Full Name |
|---|---|
| ch | Chain |
| sc | Single Crochet |
| dc | Double Crochet |
| sl st | Slip Stitch |
| st(s) | Stitch(es) |
| RS/WS | Right Side / Wrong Side |
📐 Finished Size
- Approx. 9″ wide x 8″ tall
- Strap: ~45” (adjustable)
You can easily adjust the size by modifying the starting chain (width) and number of rows (height).
📋 Pattern Overview
We’ll construct the body of the bag as a flat rectangle, using alternating blocks of color to create a checkered pattern (each “checker” is 4 stitches wide by 4 rows tall). Then we’ll fold and seam the rectangle into a pouch and attach a crocheted strap.
🔲 Step-by-Step Instructions
🧩 Step 1: Foundation Chain
Using Color A,
Ch 44 (or a multiple of 8 + 4 for checkered blocks)
This gives you 5 checkered blocks across (4 stitches each).
🧩 Step 2: Work the Checkered Pattern
You will be alternating blocks of Color A and Color B every 4 stitches and 4 rows.
💠 Checkered Stitch Repeat (4×4 Pattern)
Each “checker” block is:
- 4 stitches wide
- 4 rows tall
You’ll carry the unused yarn along the row (tapestry crochet style) and switch colors where needed.
🪡 Rows 1–4: Checkered Row Set A
- Row 1 (RS): With Color A, sc in first 4 sts, switch to Color B, sc in next 4 sts, alternate to end. Turn.
- Row 2–4: Continue same color sequence, sc across, changing colors at the same intervals. Turn after each row.
📝 You’ll have alternating vertical color blocks.
🪡 Rows 5–8: Checkered Row Set B (Offset the pattern)
- Row 5 (RS): Start with Color B this time, sc in first 4 sts, switch to Color A, sc in next 4 sts, alternate. Turn.
- Row 6–8: Maintain this new sequence for 4 rows.
Repeat Rows 1–8 until your piece measures about 16 inches tall (folded will be ~8 inches).
🧮 You should end with a Row 4-type pattern so the checker repeats evenly.
🪡 Step 3: Fasten Off & Weave in Ends
- Cut yarn and weave in all loose ends.
- Block the piece flat if necessary.
👜 Step 4: Fold & Seam the Bag
- Fold the rectangle in half width-wise, with the RS facing out.
- Seam both side edges using sc, sl st, or whipstitch.
- Leave the top open—this is your bag’s opening.
🪢 Step 5: Strap (Crossbody)
You can crochet a simple cord or strap as follows:
Option 1: Simple Strap
- Ch ~150 (or desired length)
- Sc in each ch across. Fasten off.
Option 2: Thicker Strap
- Ch 6
- Row 1: Sc in 2nd ch from hook and across (5 sc).
- Row 2–desired length: Ch 1, turn, sc across.
- Fasten off and attach both ends to the side seams of the bag.
🧵 You can also braid yarn, use leather straps, or add adjustable buckles for extra flair.
🧷 Step 6: Add Lining (Optional)
- Cut fabric slightly larger than your bag’s interior.
- Fold edges inward and hand-sew or machine stitch into place.
- Attach a zipper or magnetic clasp if desired.
🧼 Finishing Touches
- Trim any loose threads.
- Block your bag again if it curls.
- Add a decorative button, tag, or patch if you like.
🌟 Tips & Variations
- Use chunky yarn and a larger hook for a more boho-style bag.
- Try different color combinations like monochrome, pastel blocks, or bold contrasting colors.
- Add tassels, fringe, or pom-poms to the flap or sides.
- Use granny squares or mosaic crochet instead of checkers for variety.
🧡 Final Thoughts
Making your own crochet crossbody bag using a checkered stitch pattern is an enjoyable and rewarding project. It combines visual appeal with practical use and offers endless possibilities for customization. Whether you’re a hobbyist or an aspiring small business owner, this bag design is modern, stylish, and beginner-friendly—with just enough challenge to keep it exciting.
So grab your yarn and hook, and crochet your way to a fashionable, functional new accessory!