 by
by ✔ Very Useful & Decorative
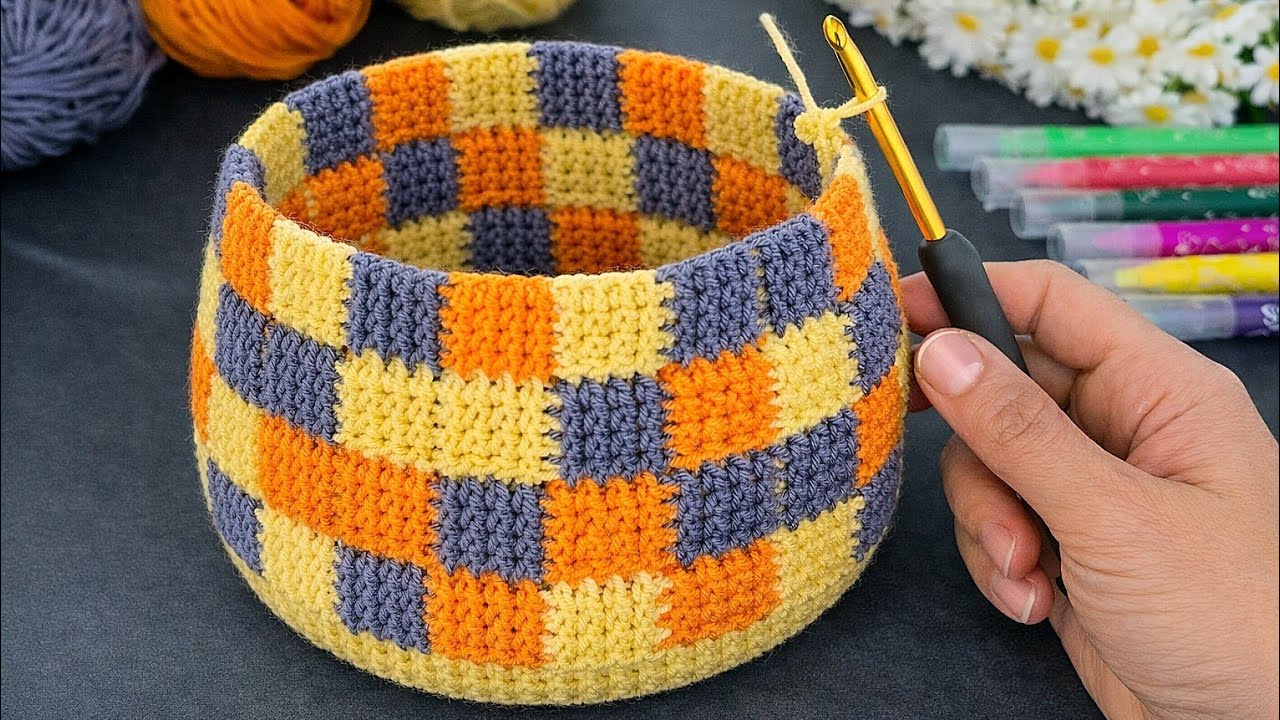
Crochet wicker baskets are one of the most satisfying DIY projects you can make. They are practical, stylish, sturdy, and surprisingly easy, even if you’re not an advanced crocheter. A crochet wicker basket or organizer box can instantly elevate your home décor while helping you keep things neat and tidy. From storing yarn, toys, cosmetics, stationery, or bathroom essentials to serving as a decorative centerpiece, these baskets are endlessly versatile.
In this article, you’ll learn how to make a super easy crochet wicker basket, along with tips to achieve a strong, boxy shape and a beautiful woven look that mimics real wicker. Whether you’re a beginner or an experienced crocheter, this project is relaxing, fast, and incredibly rewarding.
Why Crochet a Wicker Basket?
Crochet wicker baskets are popular for many reasons:
- ✔ Easy to make – uses basic crochet stitches
- ✔ Budget-friendly – yarn is affordable and customizable
- ✔ Durable & reusable – perfect for daily use
- ✔ Decorative – adds handmade charm to any room
- ✔ Customizable – size, color, and shape can be changed easily
Unlike plastic storage boxes, crochet baskets bring warmth and personality into your space. They also make wonderful handmade gifts for birthdays, housewarmings, or holidays.
Materials You Will Need
To make a sturdy crochet wicker basket or organizer box, choose materials carefully.
Yarn
- Cotton yarn (best choice for structure)
- T-shirt yarn or macramé cord for extra stiffness
- Medium to bulky weight yarn works best
Tip: Cotton yarn holds its shape better than acrylic and gives a clean, professional finish.
Crochet Hook
- Use a hook slightly smaller than recommended on the yarn label
- This creates tighter stitches and a firmer basket
Other Supplies
- Scissors
- Stitch marker
- Measuring tape
- Optional: cardboard or plastic canvas for extra base support
Basic Stitches Used
This project is beginner-friendly and mainly uses:
- Chain (ch)
- Single crochet (sc)
- Slip stitch (sl st)
- Half double crochet (optional for texture)
If you can crochet in the round and count stitches, you can make this basket.
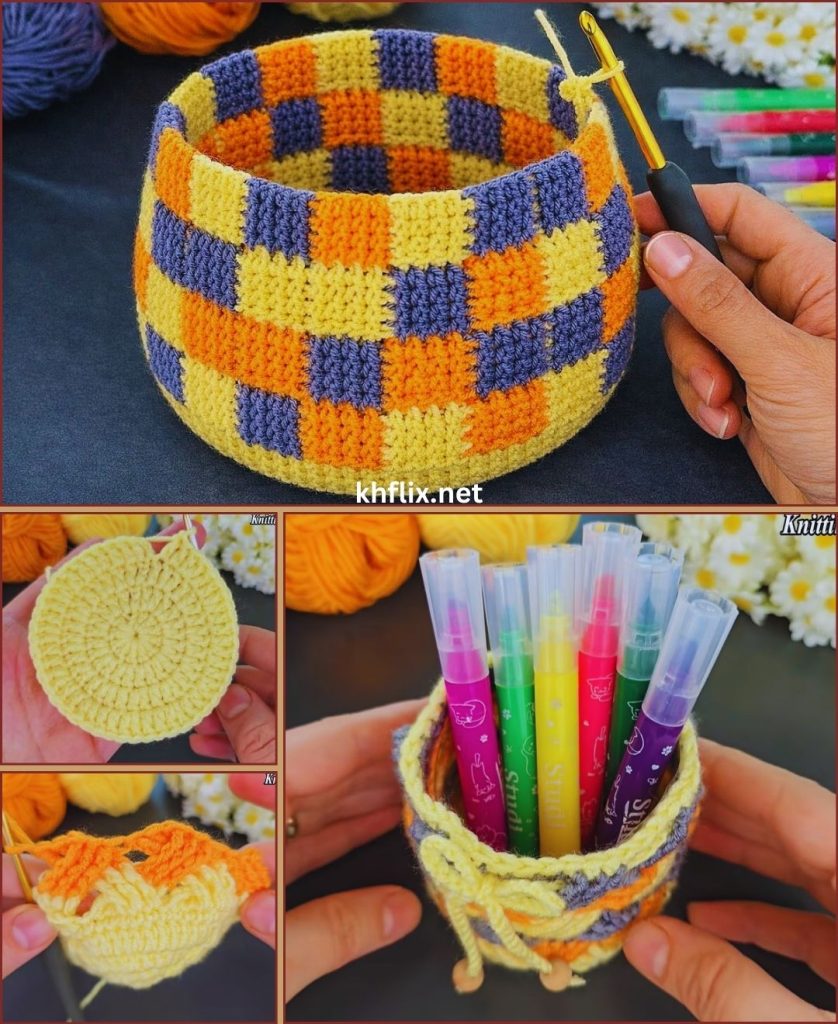
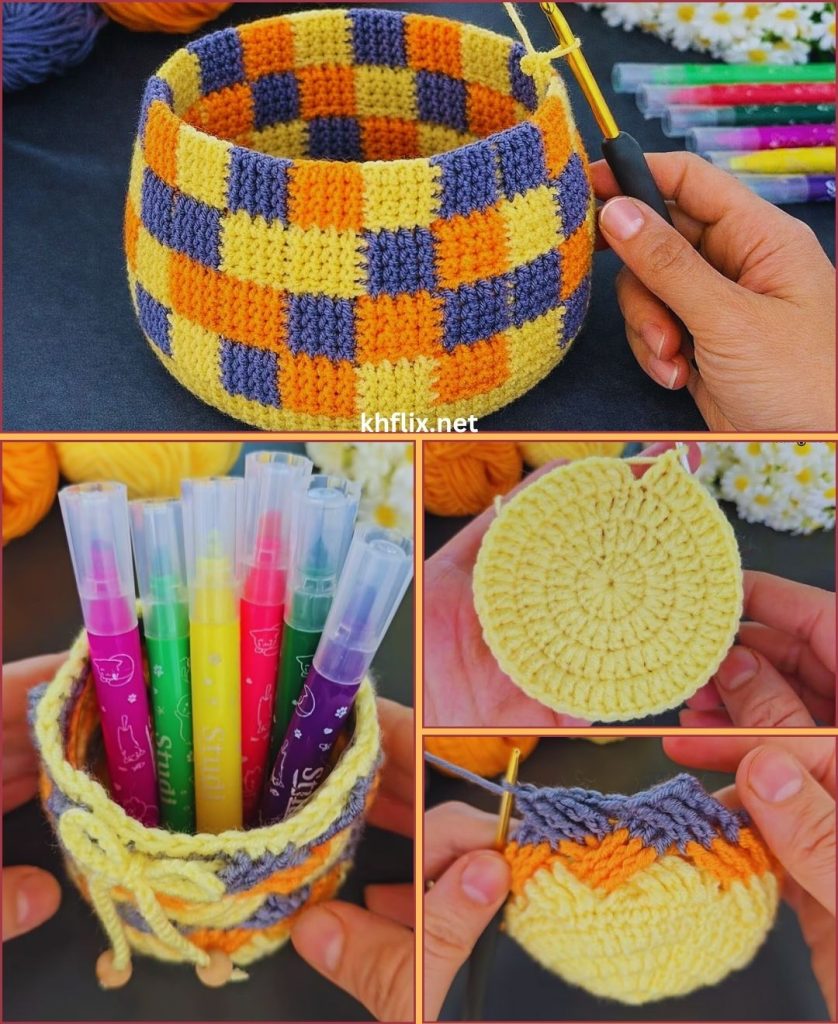
Step-by-Step: How to Crochet a Super Easy Wicker Basket
Step 1: Create the Base
- Start with a magic ring or chain 4 and join to form a ring.
- Work single crochets into the ring.
- Increase evenly in each round to create a flat circle or rectangle (depending on your desired shape).
Important: Keep the base flat. If it curls, add more increases. If it waves, reduce increases.
This base determines the final size of your basket.
Step 2: Build the Basket Walls
- Once the base is complete, crochet single crochet stitches in the back loop only.
- This technique creates a sharp fold that helps the basket stand upright.
- Continue crocheting without increases to form the sides.
Using tight stitches is key to achieving that wicker-style look.
Step 3: Create the Wicker Texture
To mimic the woven wicker appearance:
- Use single crochet or waistcoat stitch
- Work stitches tightly and evenly
- Keep consistent tension throughout
This creates a thick, basket-like texture that looks structured and professional.
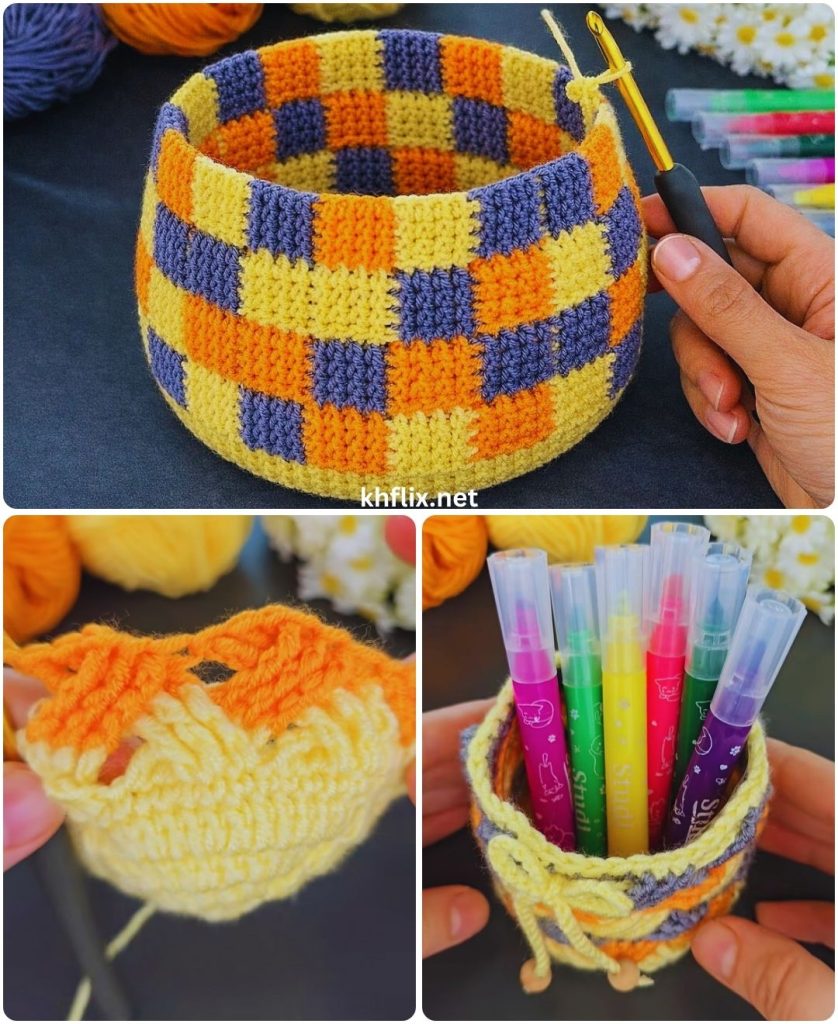
Step 4: Shape the Organizer Box
For a box-style basket:
- Crochet straight up for sharp corners
- Avoid increasing or decreasing
- Use stitch markers to mark corners if working in a rectangle
For a rounded basket:
- Continue crocheting evenly in the round
Step 5: Finish the Top Edge
A neat edge gives your basket a polished look.
Options include:
- One round of slip stitches
- Reverse single crochet (crab stitch)
- Simple single crochet round
Fasten off and weave in all ends securely.
Making the Basket Sturdier
If you want a firmer organizer box:
- Use double strands of yarn
- Insert cardboard or plastic canvas into the base
- Spray lightly with fabric stiffener
- Crochet with very tight tension
These tricks help the basket stand on its own without collapsing.
Decorative Ideas & Customization
One of the best things about crochet wicker baskets is customization.
Color Ideas
- Neutral tones for modern décor
- Pastels for nurseries
- Earthy colors for boho interiors
- Two-tone or striped designs
Handles & Details
- Crochet handles on both sides
- Wooden buttons or leather tags
- Ribbons or lining fabric
- Label tags for organizing
Where to Use Your Crochet Basket
This organizer box is incredibly versatile:
- Living room: remotes, magazines
- Bedroom: accessories, skincare
- Bathroom: towels, toiletries
- Kids’ room: toys, books
- Craft room: yarn, tools
- Office: stationery, documents
It’s both useful and decorative, making it a perfect solution for stylish storage.
Care & Maintenance
- Hand wash or gentle machine wash
- Reshape while damp
- Air dry completely
- Avoid hanging heavy items
Proper care ensures your basket lasts for years.
Final Thoughts
A super easy crochet wicker basket or organizer box is more than just a storage solution—it’s a beautiful handmade décor piece that reflects creativity and care. With simple stitches, minimal materials, and a bit of patience, you can create something truly useful and decorative for your home.
Whether you make one or several in different sizes, these crochet baskets are addictive to create and always appreciated. Once you make your first one, you’ll want a basket in every room!
Happy crocheting 🧶✨
If you want, I can:
- Rewrite this for SEO or YouTube description
- Simplify it for absolute beginners
- Add crochet pattern-style instructions
- Customize it for a specific basket size
Just tell me!