 by
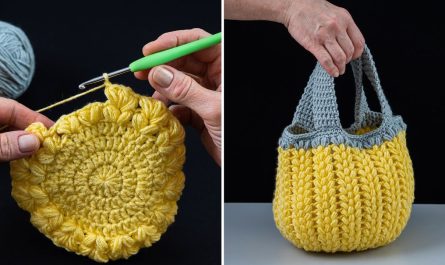
by Let’s create a fabulous crochet tote bag that turns heads! This project is designed to be easy for beginners, focusing on simple stitches and clear steps that build your confidence. The “head-turning” magic comes from choosing a beautiful yarn, consistent tension, and a simple yet elegant design that looks far more complicated than it is.
How to Crochet a Head-Turning Tote Bag – Easy for Beginners | Step-by-Step
This detailed guide will walk you through crocheting a sturdy, stylish tote bag perfect for everyday use, market trips, or as a chic accessory. We’ll focus on creating a dense fabric that holds its shape well, using just a few basic stitches.
Skill Level: Easy
You’ll only need to know a few fundamental crochet stitches:
- Chain (ch): The foundation of most crochet projects.
- Slip Stitch (sl st): Used for joining rounds.
- Single Crochet (sc): A compact, dense stitch, great for sturdy bags.
- Half Double Crochet (hdc): A slightly taller stitch, providing good fabric for bags.
- Working in rounds: Crocheting in a continuous spiral or joined rounds.
- Creating a Magic Ring (MR) or Adjustable Ring: (Optional but highly recommended for a tight center).
Finished Tote Bag Dimensions (Approximate):
Your finished tote bag will typically measure around 12-14 inches (30-35 cm) wide and 13-15 inches (33-38 cm) tall (excluding handles). Handle drop will be about 8-10 inches (20-25 cm). You can easily adjust these dimensions by adding or subtracting rounds and rows.
Materials You’ll Need:
- Yarn: Approximately 500-700 yards (450-640 meters) of Worsted Weight (Medium #4) or Aran Weight (Heavy Worsted #4/5) Cotton or Cotton Blend Yarn.
- Why Cotton/Cotton Blend? Cotton is fantastic for bags because it’s sturdy, durable, holds its shape well, and is less prone to stretching than acrylic. A blend can offer a bit more softness while retaining cotton’s strength.
- Color Choice: This is where the “head-turning” element truly shines!
- Solid & Bold: A single, vibrant color like a deep teal, mustard yellow, fuchsia, or emerald green.
- Neutral with Pop: A classic black, navy, or cream with a bright, contrasting color for the handles.
- Variegated: A single skein of beautifully dyed variegated yarn where the colors do all the work for you!
- Crochet Hook: Size H/5.0mm or I/5.5mm. A slightly smaller hook will create a denser fabric for a sturdier bag, while a slightly larger hook will make a more flexible bag. Choose based on your yarn and desired firmness.
- Yarn Needle (Tapestry Needle): This blunt-tipped needle is essential for seamlessly weaving in all your loose yarn tails.
- Scissors: For cutting your yarn.
- Stitch Markers (Optional but Recommended): Very helpful for marking the start of rounds, especially if you’re working in a spiral, or for marking handle placement.
Gauge:
Gauge isn’t critically strict for a tote bag, as it doesn’t need to fit precisely like a garment. However, consistent tension is paramount. It ensures your bag is sturdy, holds its shape, and has an even fabric. If your stitches are too loose, the bag might be floppy; too tight, and it could be too rigid or pucker. Aim for a fabric that’s firm but not overly stiff.
Abbreviations Used in This Pattern:
- ch: chain
- sl st: slip stitch
- sc: single crochet
- hdc: half double crochet
- st(s): stitch(es)
- MR: Magic Ring (also called Magic Circle or Adjustable Ring)
- rep: repeat
- FO: Fasten Off
- (): repeat instructions within parentheses a specified number of times.
- []: indicates the total number of stitches at the end of a specific round or row.
Let’s Crochet Your Head-Turning Tote Bag!
We’ll build this bag from the bottom up, starting with a sturdy oval base, then working up the sides, and finally adding the handles.
Part 1: The Oval Base (Bottom of the Bag)
This base needs to be strong and flat to support the contents of your bag. We’ll work in an oval shape to create a good foundation.
- Start: Ch 31. (This creates a starting chain of 30 usable stitches for your oval base. For a wider base, chain more stitches; for a narrower base, chain fewer. Just ensure it’s an odd number.)
- Round 1:
- Work 2 sc in the 2nd ch from hook.
- Work 1 sc in each of the next 28 chs.
- Work 4 sc in the last ch (this forms the end curve).
- Now, working down the other side of the starting chain: Work 1 sc in each of the next 28 chs.
- Work 2 sc in the very last ch (the same ch where you put your first 2 sc).
- Sl st into the first sc to join the round.
- [64 sc]
- Round 2:
- Ch 1 (does NOT count as a stitch).
- Work 2 hdc in each of the first 2 sts (increases for the curve).
- Work 1 hdc in each of the next 28 sts.
- Work 2 hdc in each of the next 4 sts (increases for the curve).
- Work 1 hdc in each of the next 28 sts.
- Work 2 hdc in each of the last 2 sts (increases for the curve).
- Sl st into the first hdc to join.
- [72 hdc]
- Round 3:
- Ch 1.
- Work (1 sc in next st, 2 sc in next st) rep 2 times (increases).
- Work 1 sc in each of the next 28 sts.
- Work (1 sc in next st, 2 sc in next st) rep 4 times (increases).
- Work 1 sc in each of the next 28 sts.
- Work (1 sc in next st, 2 sc in next st) rep 2 times (increases).
- Sl st into the first sc to join.
- [80 sc]
- Round 4 (Creating the Defined Bag Edge):
- Ch 1.
- Work 1 sc in the BLO (Back Loop Only) of each stitch around.
- Sl st into the first sc to join.
- [80 sc]
- This BLO round creates a distinct ridge, making the bag’s side walls stand up nicely and giving a clean edge to the bottom.
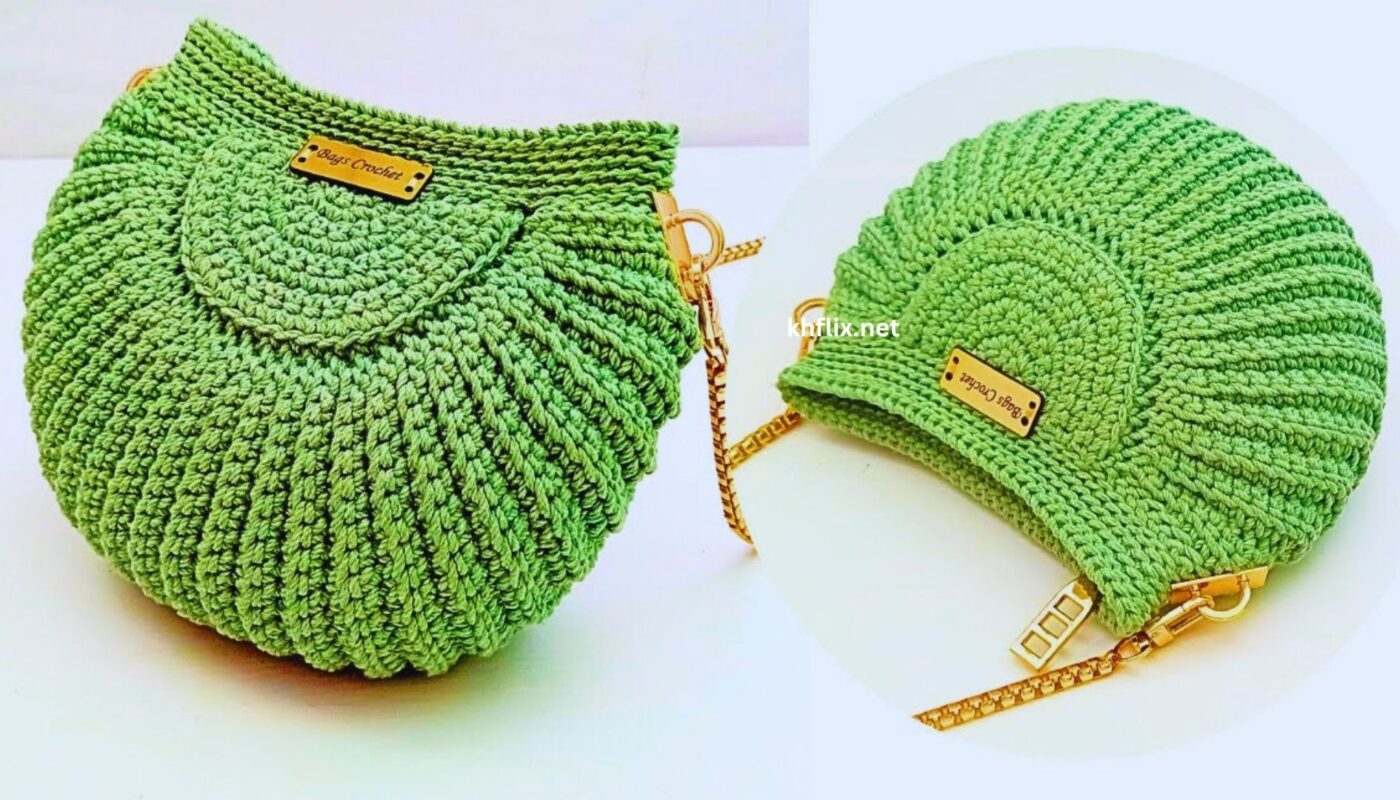
Part 2: Building the Bag Sides (Main Body)
We’ll use a simple single crochet stitch for a dense, sturdy bag body. You can work in continuous spirals or joined rounds. For beginners, joined rounds are recommended for easier stitch counting and a cleaner seam.
- Round 5:
- Ch 1.
- Work 1 sc in each stitch around.
- Sl st into the first sc to join.
- [80 sc]
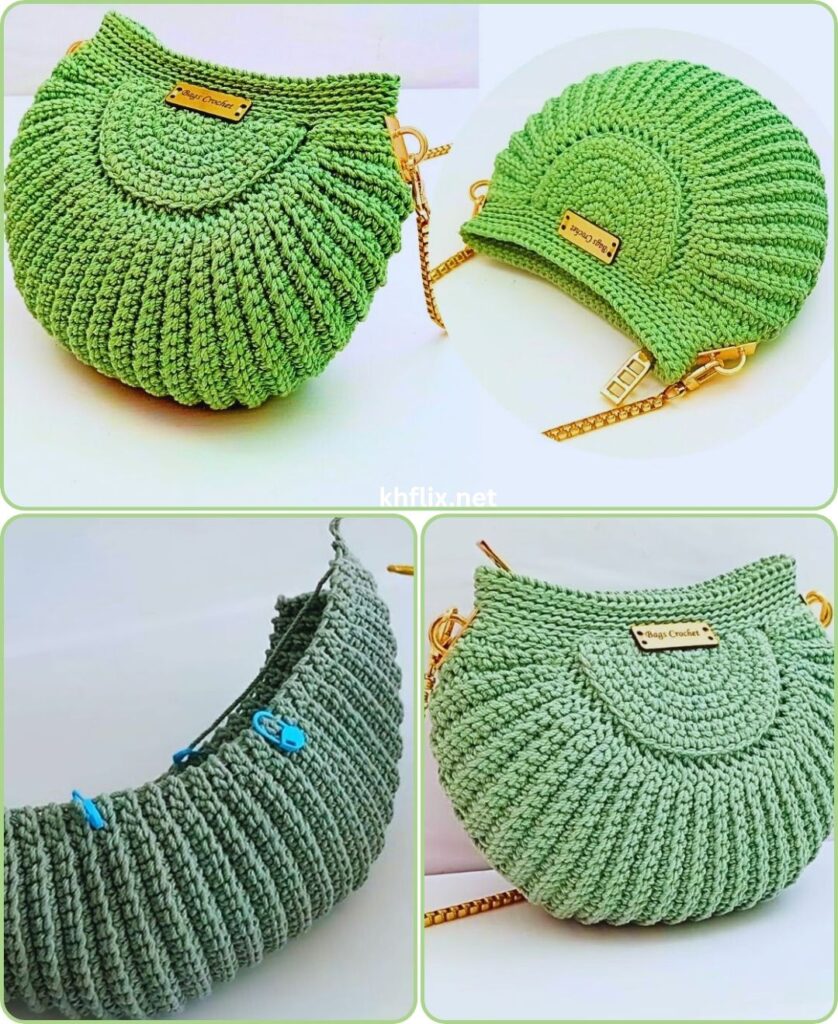
- Round 6 – Round 35 (or until desired height):
- Repeat Round 5.
- Continue repeating this round until your bag reaches your desired height. For a 13-15 inch tall bag, you’ll likely need about 30-35 rounds. This is where you can truly customize the size!
- Do NOT Fasten off after the last side round.
Part 3: Creating the Handles
We’ll work the handles directly onto the bag.
- Preparation for Handle Placement:
- You’re at the end of your last side round (e.g., Round 35).
- Ch 1. Work sc in the next few stitches to position your starting point. You want to divide your total stitches (80 in our example) into four equal sections for the handle attachments.
- So, 80 stitches / 4 sections = 20 stitches per section.
- Mark the stitch where you want the start of your first handle attachment, the end of the first handle attachment, the start of the second, and the end of the second.
- Example placement for 80 stitches:
- Work sc in first 10 sts (this gets us to the side/front of the bag).
- Mark st 11. (Start of Handle 1)
- Mark st 20. (End of Handle 1)
- Work sc in sts 21-30.
- Mark st 31. (Start of Handle 2)
- Mark st 40. (End of Handle 2)
- Work sc in sts 41-50.
- Mark st 51. (Start of Handle 3)
- Mark st 60. (End of Handle 3)
- Work sc in sts 61-70.
- Mark st 71. (Start of Handle 4)
- Mark st 80. (End of Handle 4)
- Round 36 (Creating Handle Gaps):
- Ch 1.
- Work 1 sc in each stitch until you reach your first handle starting mark (e.g., st 11).
- Ch 40 (or more/less for desired handle length).
- Skip the stitches between your first handle starting mark and ending mark (e.g., skip stitches 11-20, which is 10 stitches).
- Sc into the stitch after your first handle ending mark (e.g., st 21).
- Work 1 sc in each stitch until you reach your second handle starting mark (e.g., st 51).
- Ch 40.
- Skip the stitches between your second handle starting mark and ending mark (e.g., skip stitches 51-60, which is 10 stitches).
- Sc into the stitch after your second handle ending mark (e.g., st 61).
- Work 1 sc in each remaining stitch around until you reach the beginning of the round.
- Sl st into the first sc to join.
- [40 sc + 2 x 40-ch handles = 120 total “stitches” in the round]
- Round 37 (Reinforcing Handles):
- Ch 1.
- Work 1 sc in each sc stitch around.
- When you reach a chain-40 handle, work 1 sc into each of the 40 chains across the handle. This will cover the chains and make the handle sturdy.
- Continue working 1 sc in each sc stitch on the bag body, and then 1 sc in each chain of the second handle.
- Sl st into the first sc to join.
- [120 sc]
- Round 38 (Final Handle Reinforcement):
- Ch 1.
- Work 1 sc in each stitch around.
- Sl st into the first sc to join.
- [120 sc]
- Fasten off (FO), leaving a 6-inch tail.
Part 4: Finishing Your Tote Bag
- Weave in All Ends:
- This is a crucial step for a neat, professional, and durable tote bag. Thread each yarn tail onto your yarn needle.
- Carefully weave them through several stitches of the same color on the inside of your bag. Try to go through the middle of the stitches to fully hide the tails. Weave in one direction for a few stitches, then change direction slightly and weave back for a few stitches (this “locks” the tail in place and prevents it from unraveling).
- Take your time with this to ensure your bag looks impeccable and will last through many uses.
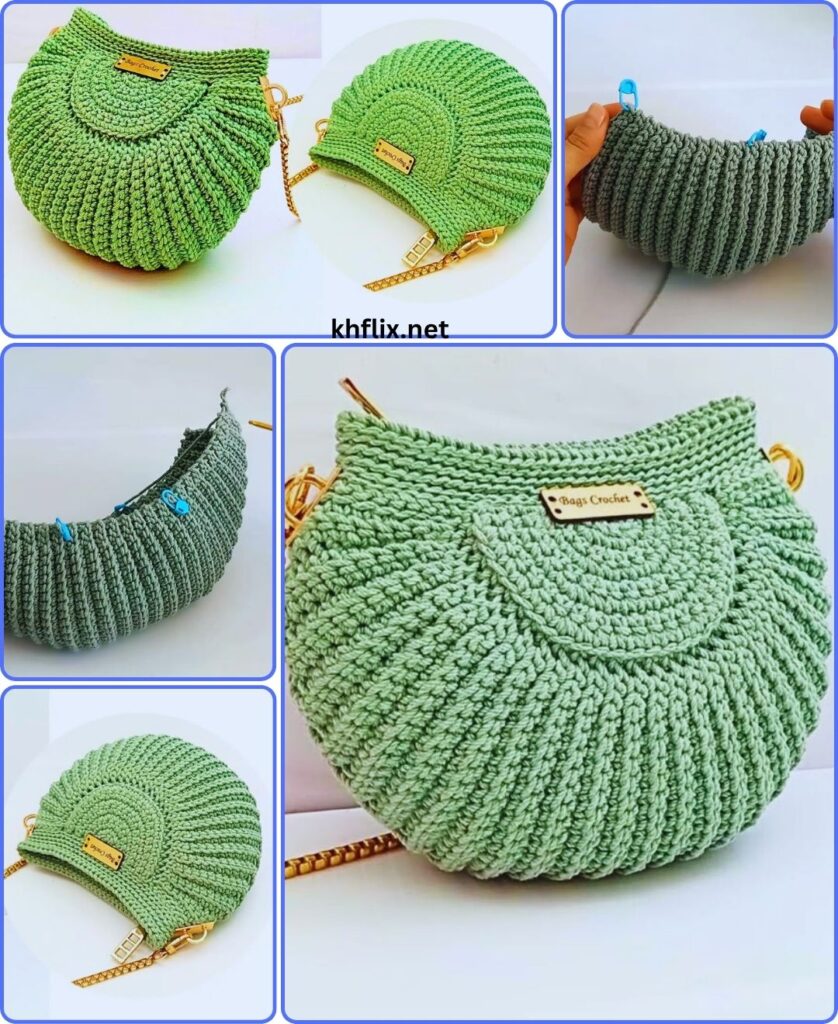
- Shape (Optional):
- Gently stuff your bag with towels or pillows to help it take its final shape. You can use a light steam block if your yarn allows. Hover a steamer or an iron (on a low, steam setting) over the fabric without touching it, then gently pat and shape. Allow it to air dry completely. This can help even out any tension discrepancies and make the bag lie nicely.
You’ve now created a truly fantastic and eye-catching crochet tote bag! This beginner-friendly project proves that simple stitches and good yarn choices can create stunning results. How will you customize your next tote to make it even more uniquely yours?