 by
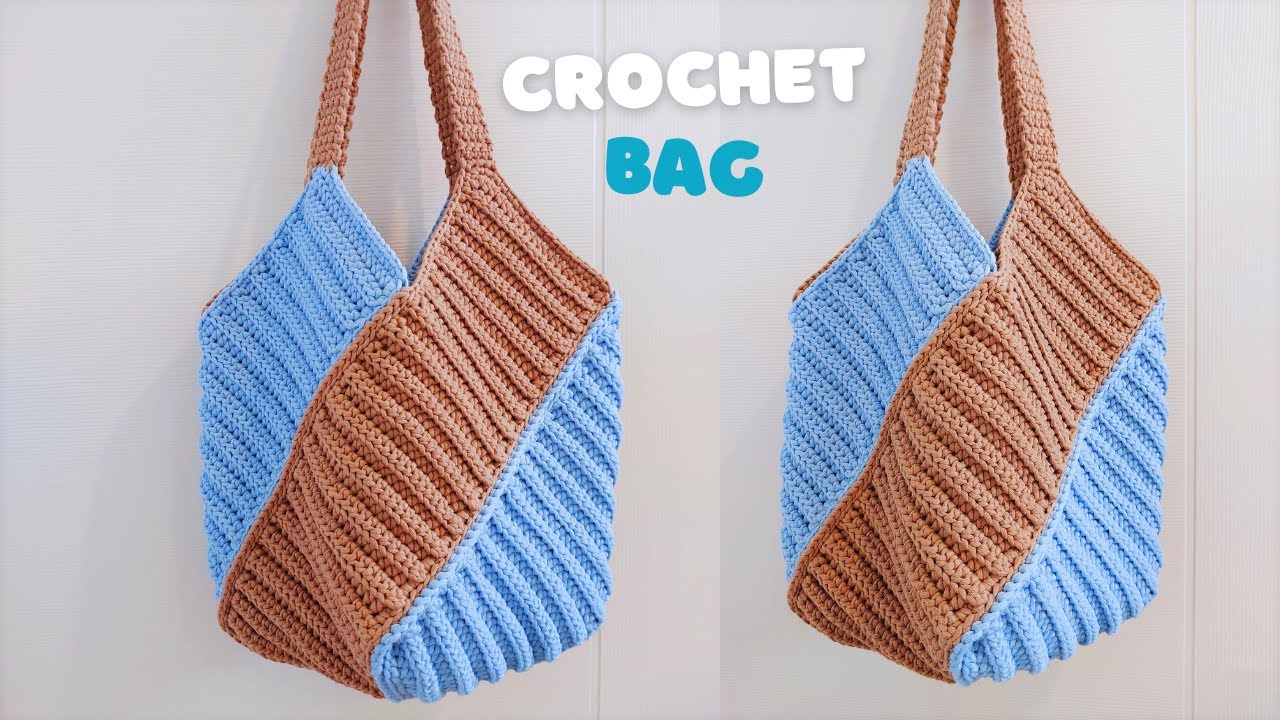
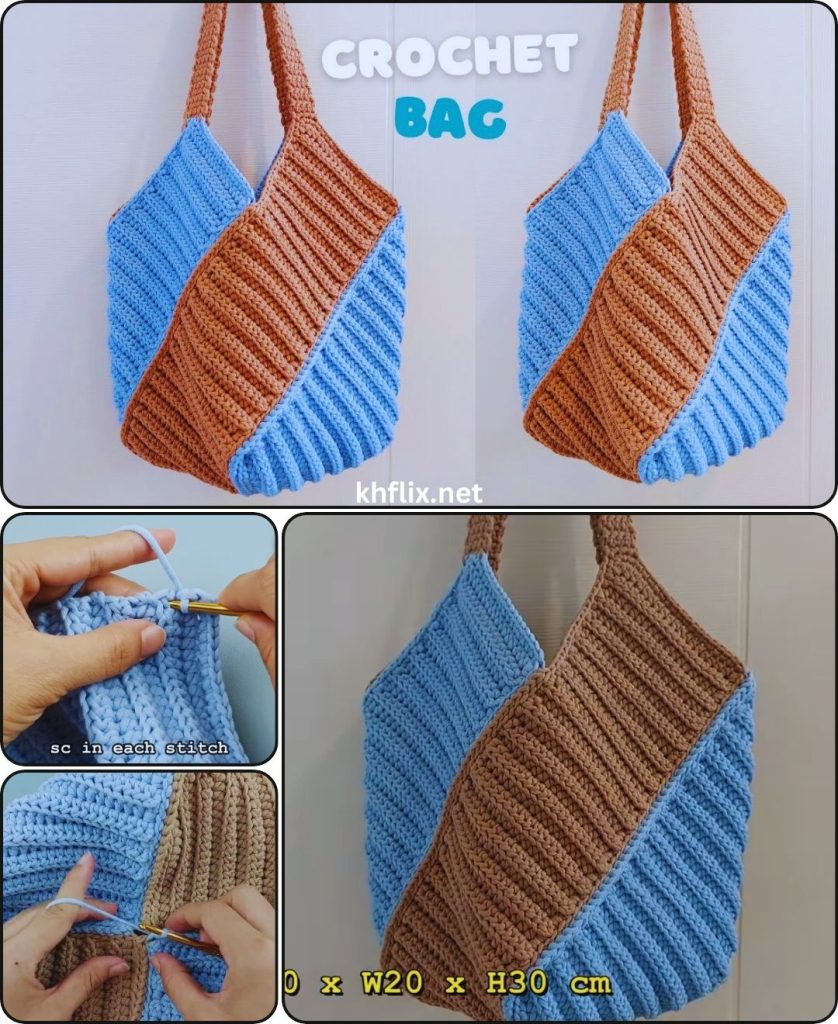
by The crochet windmill bag is a stylish and unique accessory, perfect for adding a pop of color to your outfit. The design gets its name from the pinwheel or windmill shape that emerges from the spiral color changes. While it may look complex, this bag is a great project for beginners who are comfortable with basic stitches and want to practice changing colors.
This guide will walk you through each step of the process, from choosing your materials to adding the finishing touches, ensuring you can confidently create a beautiful two-color windmill bag.
Part 1: Understanding the Windmill Design
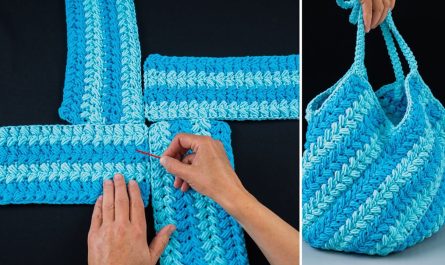
The windmill effect is achieved by working in a continuous spiral and strategically changing colors. The “blades” of the windmill are formed by the stitches of one color stacking on top of each other, while the second color creates the contrasting background. Because you don’t join rounds, the color changes create a sloped, seamless line that gives the illusion of a spinning pinwheel.
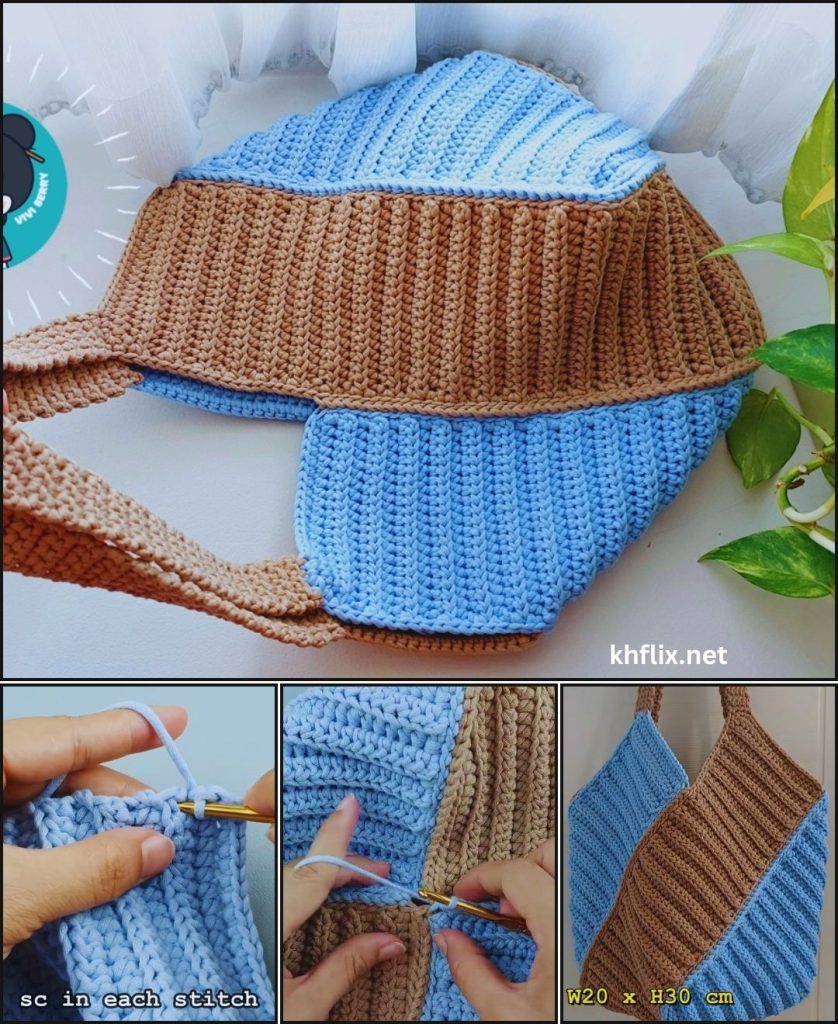
This bag is worked in single crochet (sc) stitches throughout, which is a great, simple stitch for beginners to use.
Part 2: Essential Supplies
- Two colors of yarn: Choose two contrasting colors of the same weight. A good choice is a worsted weight (medium/size 4) yarn, preferably in a durable fiber like cotton or a cotton blend. This will give your bag a sturdy structure.
- Crochet Hook: A hook size appropriate for your yarn. For worsted weight yarn, a 5.0mm (H-8) hook is a good starting point.
- Scissors: For cutting yarn.
- Stitch Marker: This is essential. Since you’re working in a continuous spiral, you need a stitch marker to keep track of the beginning of each round.
- Tapestry Needle: For weaving in ends.
Part 3: Step-by-Step Tutorial
This pattern is for a small to medium-sized bag. You can easily adjust the size by changing the number of stitches in your starting chain.
Pattern Key:
- Ch: Chain
- Sc: Single Crochet
- Sl st: Slip Stitch
- CC: Change Color
Color A: Your main color (e.g., White) Color B: Your accent color (e.g., Blue)
Step 1: Creating the Base
The base is worked in an oval shape, which provides a flat bottom for your bag.
- With Color A, ch 21 (or any odd number for your desired length).
- Round 1: Sc in the 2nd ch from the hook and in each ch across until you reach the last ch. Work 3 sc in the last ch. Now, working along the other side of the starting chain, sc in each stitch until you reach the last stitch. Work 2 sc in the last stitch. Do not join. Place a stitch marker in the last stitch to mark the end of the round.
- Round 2 and beyond (Base): Work 1 sc in each stitch around the oval, placing 3 sc in the stitches at the curved ends to keep the shape flat. Continue this until your base is the desired size.
Step 2: Starting the Windmill Body
Once your base is the size you want, you will begin working the sides of the bag. This is where the magic happens.
- First Round of Sides: Work a round of sc in the back loop only of each stitch. This creates a defined edge between the base and the body of the bag and helps the bag stand up straight. Remove the stitch marker and place it in the first stitch of this round.
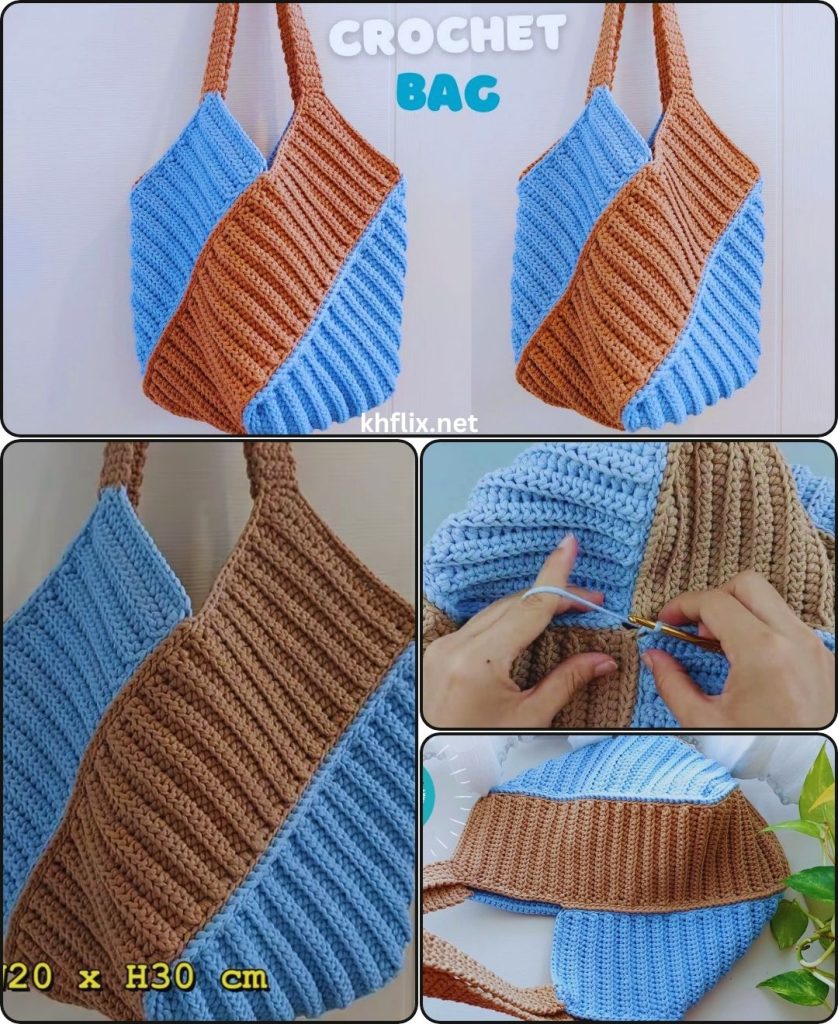
- Start the Windmill Pattern: For the next round, you will be working the windmill pattern. The pattern is a repeat of a 5-stitch sequence. The first four stitches are worked in Color A, and the fifth stitch is where you will introduce Color B.
- Round 3: With Color A, work 4 sc.
- CC to Color B: On the 5th sc, work the stitch almost to completion (insert hook, yarn over with Color A, pull up a loop). Drop Color A, yarn over with Color B, and pull through both loops on the hook to complete the stitch. Now, with Color B, work the next 5 sc.
- CC to Color A: On the 6th sc, work the stitch almost to completion. Drop Color B, yarn over with Color A, and pull through both loops on the hook to complete the stitch. With Color A, work the next 5 sc.
Step 3: Continuing the Pattern
Continue this pattern of alternating colors in 5-stitch segments.
- Work 5 sc in Color A, change to Color B on the 5th stitch.
- Work 5 sc in Color B, change to Color A on the 5th stitch.
The key to the windmill effect is to keep the stitch count of the colored segments consistent. Your color changes will gradually slope upward, creating the pinwheel effect.
Continue working in this spiral until your bag reaches the desired height. Remember to move your stitch marker up at the end of each round.
Tips for a Clean Look:
- Carry the Inactive Yarn: As you work with one color, lay the inactive yarn along the top of your stitches and crochet over it. This hides the yarn inside the stitches, creates a more solid fabric, and prevents you from having to weave in hundreds of ends.
- Maintain Tension: Keep your tension consistent, especially when carrying the inactive yarn. Pulling it too tight can cause your bag to pucker, while leaving it too loose can make it visible through the stitches.
Step 4: Creating the Handles
Once your bag is the desired height, you will work the final rounds and create the handles.
- Top Border: Work 2-3 final rounds in a single color (either Color A or Color B) using single crochet stitches. This provides a clean, sturdy top edge and a good foundation for your handles.
- Mark Handle Placement: Lay your bag flat and use stitch markers to mark the desired placement of your handles. They should be centered on the front and back of the bag.
- Create the Handles: Sc in each stitch until you reach your first marker. Chain a number of stitches for your handle (e.g., ch 50-60 for a comfortable shoulder strap). Skip the stitches between the two markers and sc in the first marked stitch of the other side of the handle. Repeat this for the second handle.
- Strengthen the Handles: Work at least two more rounds of single crochet around the entire top of the bag, working into each stitch of the bag body and into each chain of the handle. This reinforces the handles, making them much stronger.
Step 5: Finishing Touches
- Weave in All Ends: Use your tapestry needle to carefully weave in any remaining yarn tails.
- Blocking (Optional): If your bag is a bit misshapen, you can gently block it by spritzing it with water and shaping it to your desired form.
- Add a Liner (Optional): A fabric liner can add a professional touch and prevent small items from falling through the stitches.
With this guide, you have all the tools to crochet a beautiful and functional two-color windmill bag. Enjoy the process and the unique, swirling design you create.