by
by Crocheting your own bag is one of the most satisfying beginner-friendly projects in crochet. Not only is it practical, but it’s also stylish, customizable, and a perfect way to use your yarn stash. Even if you’ve just learned basic stitches like chain and single crochet, you can create a beautiful handmade bag with a few simple techniques.
In this tutorial, we will go step by step to create a beginner-friendly crochet bag that is functional, durable, and visually appealing.

Why Make a Crochet Bag?
Crochet bags are popular for many reasons:
- Beginner-Friendly: Simple stitches like single crochet or half double crochet are enough to make a sturdy bag.
- Customizable: You can make them in any size, color, or style.
- Practical: Perfect for shopping, daily use, or as a decorative storage solution.
- Fun Project: Quick results and highly rewarding.
- Perfect Gift: Handmade bags make thoughtful gifts.
Even a small beginner bag can look stylish and professional with just a little attention to detail.
Skill Level & Time Required
- Skill Level: Beginner
- Time Required: 3–6 hours depending on size and complexity
- Yarn Required: Medium-weight cotton or acrylic yarn
Materials Needed
Yarn
- Cotton yarn: Strong and durable, holds shape well
- Acrylic yarn: Softer, stretchy, and colorful
- Weight: Medium / Worsted weight (Category 4)
Suggested Colors: Neutral for everyday use (white, beige, gray) or bold colors for a statement bag.
Crochet Hook
- 4.5 mm – 5.5 mm depending on yarn thickness
Additional Tools
- Scissors
- Yarn needle
- Stitch markers (optional)
- Measuring tape
- Button, snap, or zipper (optional, for closure)
Basic Crochet Stitches You Need to Know
This tutorial uses beginner-friendly stitches:
- Chain (ch) – foundation stitch
- Slip stitch (sl st) – joining and finishing rounds
- Single crochet (sc) – sturdy, dense stitch
- Half double crochet (hdc) – slightly taller than sc, still strong
Optional: Double crochet (dc) for texture or decorative patterns.
Step-by-Step Guide: Beginner Crochet Bag
We’ll make a simple rectangular tote bag – easy for beginners.

Step 1: Decide Bag Size
A common beginner size:
- Width: 30–35 cm
- Height: 28–30 cm
You can adjust by adding or reducing stitches.
Step 2: Crochet the Base Panel
- Foundation chain: Chain the width of your bag (e.g., ch 35).
- Row 1: Single crochet in the second chain from the hook and across.
- Row 2 onwards: Chain 1, turn, single crochet across.
- Repeat until the rectangle reaches the desired height.
Tip: Keep stitches tight to make the bag sturdy.
Step 3: Join the Sides
- Fold the rectangle in half, with the right sides facing out.
- Use single crochet or slip stitch to join the side edges, leaving the top open.
- Make sure the seams are secure.
You now have a basic bag shape.
Step 4: Strengthen the Top Edge
- Attach yarn to the top edge.
- Single crochet evenly around the opening.
- Work 2–3 rounds to create a strong, reinforced edge.
This prevents stretching and gives the bag a neat finish.
Step 5: Make the Handles
Option 1: Crochet Handles Directly
- Decide where the handles will go.
- Chain 30–40 stitches for one handle.
- Skip stitches on the top edge and attach with a single crochet.
- Repeat for the second handle.
Option 2: Separate Handles
- Crochet two strips and sew them securely to the top edge.
- Reinforce by stitching extra rows for strength.
Step 6: Optional Bag Closure
- Button loop: Simple and effective.
- Magnetic snap: Easy to attach.
- Zipper: Slightly more advanced but professional.
- Open-top bag: Perfectly fine for casual use.

Tips for Making a Durable Crochet Bag
- Use tight stitches for strength.
- Use cotton yarn for a firm structure.
- Reinforce the handles with extra rows.
- Avoid very loose tension or very soft yarn.
- Optional: Line the bag with fabric for extra sturdiness.
Design & Color Ideas
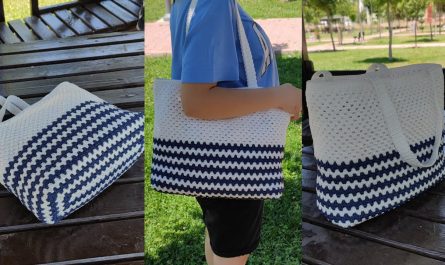
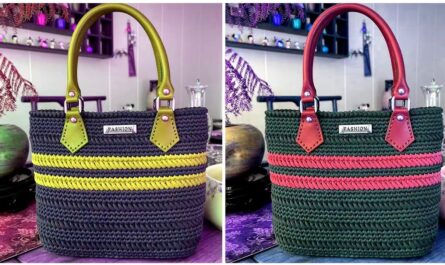
- Solid color for a classic look.
- Stripes with 2–3 colors.
- Ombre or gradient yarn for a modern touch.
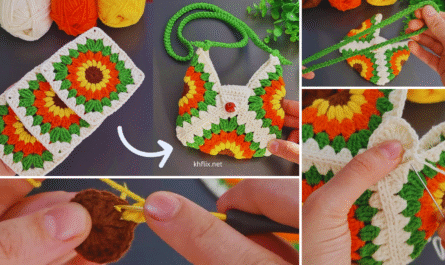
- Add a flower motif, granny squares, or other decorative elements.
Common Mistakes & Fixes
- Bag stretches: Use tighter stitches or smaller hook.
- Uneven edges: Count stitches and rows carefully.
- Weak handles: Reinforce with extra rows or sew additional yarn.
- Bag curls: Add a round of single crochet at the top edge for stability.
Creative Uses for Your Crochet Bag
- Grocery shopping or market bag
- Everyday handbag
- Beach bag
- Craft or yarn storage
- Gift bag
- Small backpack or casual tote
Care Instructions
- Hand wash or machine wash gently.
- Lay flat to dry.
- Avoid hanging heavy items for long periods.
- Reshape while damp.
Why This Project Is Perfect for Beginners
- Uses only basic stitches
- Minimal shaping required
- Quick results for motivation
- Functional and stylish final product
- Builds confidence for more advanced crochet projects
Final Thoughts
Crocheting your own bag is a fun, rewarding project that combines practicality with creativity. With a simple rectangular shape, single crochet stitches, and beginner-friendly techniques, anyone can make a durable and beautiful handmade bag.
Once you’ve mastered your first bag, you can experiment with different sizes, stitch patterns, colors, and decorative details.
Grab your yarn, pick a hook, and start crocheting your very first bag today. Every stitch brings you closer to a functional, handmade piece you can proudly use or gift. 🧶👜✨
If you want, I can also write a super detailed tutorial with step-by-step photo instructions and patterns for a beginner crochet bag that looks stylish and professional.
Do you want me to do that next?