 by
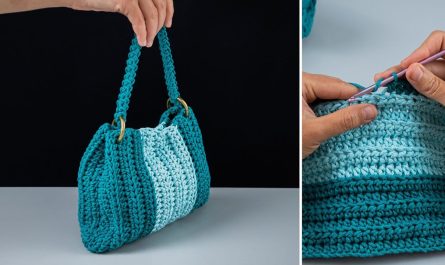
by Creating your own crochet tote handbag is a rewarding project, especially when it’s both easy to make and results in a beautifully designed accessory. This tutorial will guide you through constructing a sturdy and stylish tote using simple stitches and a lovely textured pattern, perfect for everyday use.
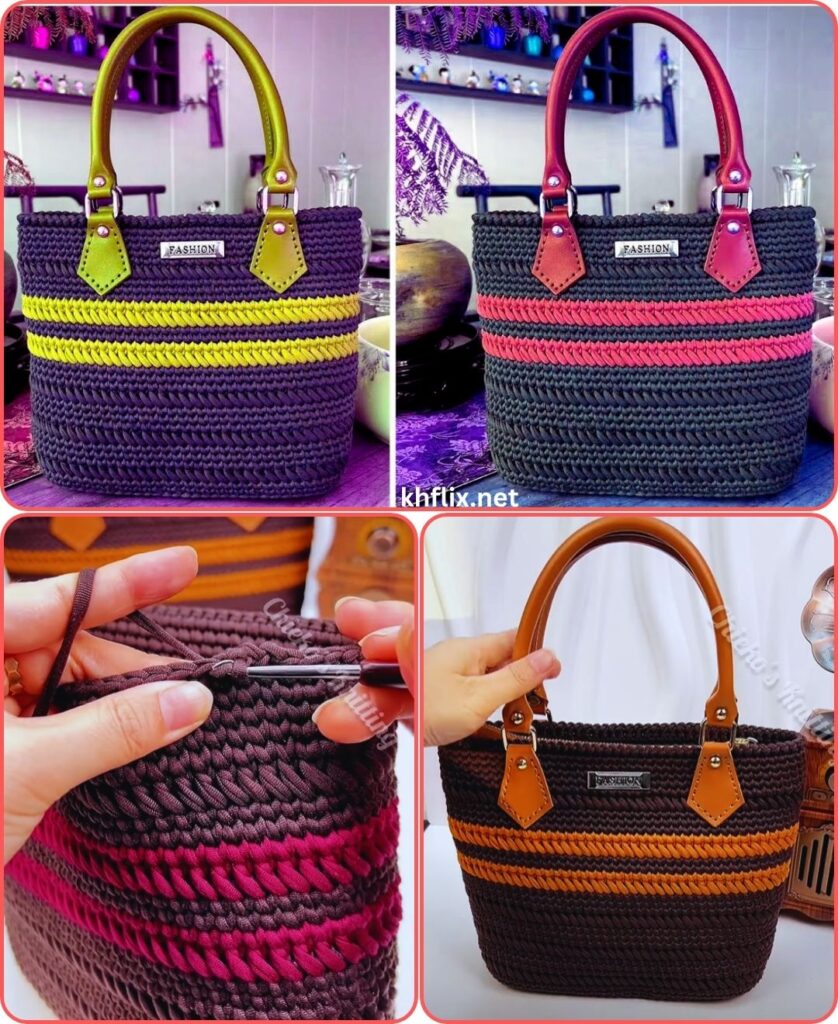
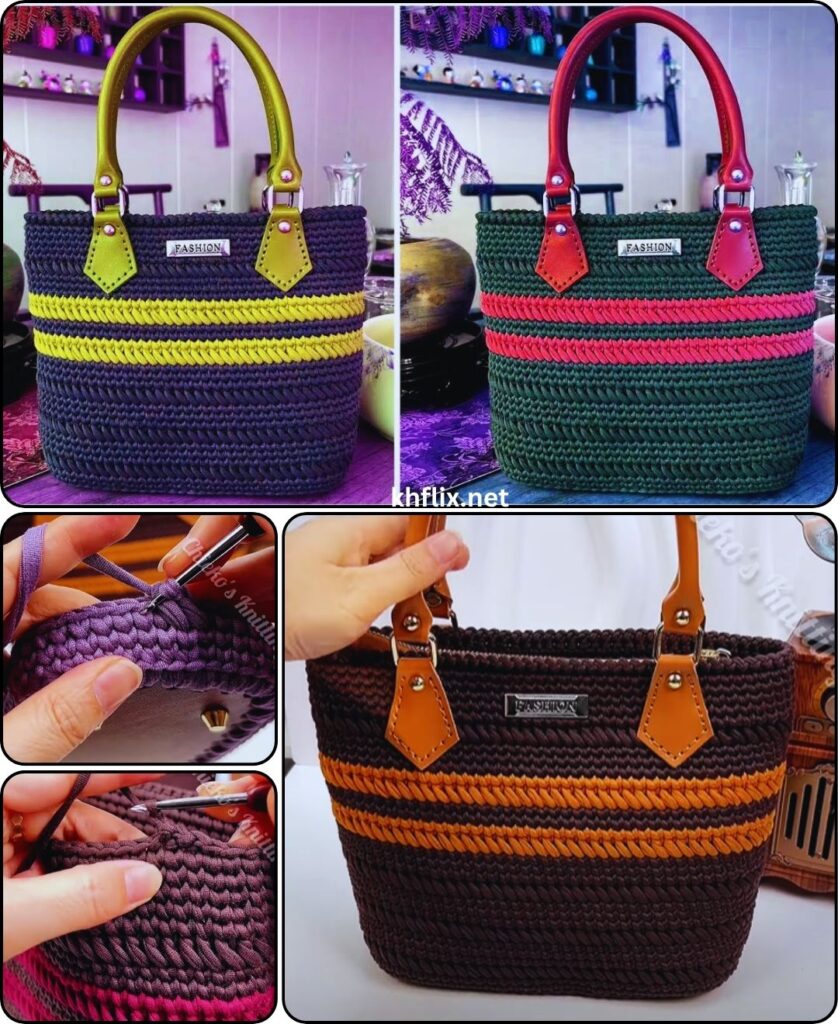
Easy Crochet & Beautifully Designed Tote Handbag Tutorial
Project Overview: This pattern focuses on creating a practical and aesthetically pleasing tote bag. We’ll start with a classic oval base, then build the body using the simple yet effective Moss Stitch (also known as the Granite Stitch or Linen Stitch), which creates a dense, durable, and attractive fabric. Finally, we’ll add two sturdy, crocheted handles.
Skill Level: Beginner-Intermediate (Requires familiarity with basic stitches, working in the round, and understanding stitch patterns like the Moss Stitch).
Finished Bag Dimensions (Approximate):
- Base: 14 inches (35.5 cm) long x 6 inches (15 cm) wide
- Bag Height: 12-14 inches (30.5-35.5 cm)
- Handle Length (each): Approximately 20-22 inches (50-56 cm)
Materials You’ll Need:
- Yarn:
- Worsted Weight (Medium #4) Cotton or Sturdy Acrylic Yarn: Approximately 800-1000 yards (730-915 meters) total.
- Why these yarns? Cotton provides excellent durability, stitch definition, and less stretch, making it ideal for bags. Sturdy acrylic yarn is also a great, affordable alternative. Avoid very soft or fuzzy yarns if you want a bag that holds its shape well.
- Color Suggestion: Choose one main color for a cohesive look, or two complementary colors for a subtle color-blocked base/body or striped effect.
- Crochet Hook:
- Size H/5.0mm (or the hook size that helps you achieve the recommended gauge, ensuring a dense and sturdy fabric suitable for a bag).
- Yarn Needle (Tapestry Needle): Essential for weaving in all loose yarn ends and for securely sewing the handles to the bag.
- Scissors
- Stitch Marker (Highly Recommended): To mark the beginning of each round.
- Optional:
- Fabric for lining (about 1 yard).
- Sewing machine or hand-sewing needle and matching thread (if adding a lining).
- Magnetic snap closure or a large button.
Gauge (Crucial for Consistent Bag Size!):
Achieving the correct gauge is very important for the final size and structure of your tote bag.
With your H/5.0mm hook, working in Moss Stitch (sc, ch 1, sk 1):
- 16 stitches (counting sc and ch-1 spaces as stitches) = 4 inches (10 cm)
- 16 rows (Moss Stitch) = 4 inches (10 cm)
Your fabric should feel firm and dense. If your swatch is larger than the specified measurements, try going down a hook size. If it’s smaller, try going up a hook size.
Abbreviations Used:
- ch: chain
- sl st: slip stitch
- sc: single crochet
- hdc: half double crochet
- st(s): stitch(es)
- inc: increase (work 2 stitches into the same stitch)
- BLO: back loop only
- ch-1 sp: chain-1 space
- FO: fasten off
Understanding Tote Bag Construction & The Moss Stitch:
- Bag Base: We’ll start by crocheting a flat, oval shape. This forms the sturdy foundation for the bottom of your tote.
- Bag Body (Moss Stitch): The sides of the bag are then built upwards from this base using the Moss Stitch. This stitch pattern is created by alternating single crochet and chain 1 stitches, working single crochets into chain-1 spaces from the previous row. This creates a beautifully textured, dense fabric that is perfect for a durable bag.
- Handles: We’ll crochet two separate, sturdy handle pieces that will then be securely sewn to the top edges of the bag.
How to work the Moss Stitch (in the round for this bag):
- Round 1: (Assuming you have a base of sc stitches) sc in first st, ch 1, sk next st. Repeat around. Sl st into the first sc to join.
- Round 2: (Start new round in a ch-1 sp) ch 2 (counts as ch 1 sp and 1 sc), sc into next ch-1 sp, ch 1. Repeat around. Sl st into the 1st sc (the 2nd ch of your beg ch-2) to join.
- Subsequent Rounds: Always work sc into ch-1 sp, ch 1, sk sc. The round will always start with ch 2 (counts as ch-1 sp + sc) into a ch-1 sp, and end by sl st into the first sc of the round (the 2nd ch of the beg ch-2).
Let’s Start Crocheting Your Tote Handbag!
Part 1: The Bag Base (Your Main Color)
We’ll begin by creating the oval base of your tote bag. For this section, we’ll work in continuous rounds (meaning you won’t join with a slip stitch at the end of each round) until the very last base round. Remember to use your stitch marker to indicate the first stitch of every round.
- With your H/5.0mm hook, ch 46. (This chain length determines the primary length of your bag. Adjust it to make your bag longer or shorter if desired.)
- Round 1: Work 2 hdc in the 3rd chain from the hook. (This counts as your first increase at one end of the oval). Work 1 hdc in each of the next 43 chains. Now, work 4 hdc in the very last chain. (This creates the smooth curve for the other end of your oval). Next, working down the opposite side of your foundation chain, work 1 hdc in each of the next 43 chains. Finally, work 2 hdc in the very last chain. (This is the same chain where you worked your initial 2 hdc, completing the oval). (You should now have a total of 94 hdc).
- Place your stitch marker in the very first hdc of this round.
- Round 2: Work 2 hdc in the first st. Hdc in the next st. Work 2 hdc in the next st. Hdc in each of the next 43 sts. Work 2 hdc in the next st. Hdc in the next st. Work 2 hdc in the next st. Hdc in the next st. Work 2 hdc in the next st. Hdc in each of the next 43 sts. Work 2 hdc in the next st. Hdc in the next st. (Total: 102 hdc).
- Round 3: Work 2 hdc in the first st. Hdc in each of the next 2 sts. Work 2 hdc in the next st. Hdc in each of the next 45 sts. Work 2 hdc in the next st. Hdc in each of the next 2 sts. Work 2 hdc in the next st. Hdc in each of the next 45 sts. Work 2 hdc in the next st. Hdc in each of the next 2 sts. (Total: 110 hdc).
- At this point, your base should be a sturdy oval, roughly 14 inches (35.5 cm) long and 6 inches (15 cm) wide. It might curl slightly upwards, which is normal as it will form the bottom of your bag.
Part 2: The Bag Body (Moss Stitch)
Now that the base is complete, we’ll build the sides of the bag straight upwards using the beautiful Moss Stitch.
- Round 4 (Creating the base edge): Work 1 sc in the BLO (back loop only) of each stitch around. (Total: 110 sc).
- Working into the back loop only creates a distinct horizontal ridge around the base, making the bag’s bottom stand out and encouraging the sides to stand up straight. Remove your stitch marker from the previous round and place it in the first sc of this current round. Sl st to the first sc to join this round for a neat transition.
- Round 5 (Start Moss Stitch): Ch 2 (counts as [ch 1 sp + 1 sc] for Moss Stitch). Work 1 sc in the next ch-1 sp (this will be the ch-1 sp created by the ch-1 from the previous round, or the equivalent space if you joined with a slip stitch). Ch 1, skip the next sc, work 1 sc in the next ch-1 sp. Repeat from * to * around. You will end with a ch 1, then sl st into the 2nd ch of your beginning ch-2 to join. (Total: 55 sc and 55 ch-1 sps).
- Remove your stitch marker and place it in the first sc of this round (which is the 2nd ch of your beg ch-2).
- Round 6 and onwards (Moss Stitch Body): Ch 2 (counts as [ch 1 sp + 1 sc]). Work 1 sc in the first ch-1 sp (this is the ch-1 sp from the previous round). Ch 1, skip the next sc, work 1 sc in the next ch-1 sp. Repeat from * to * around. You will end with a ch 1, then sl st into the 2nd ch of your beginning ch-2 to join. (Total: 55 sc and 55 ch-1 sps).
- Continue repeating this round until your bag body reaches your desired height (e.g., 12-14 inches / 30.5-35.5 cm tall from the base edge).
- Ensure your last round is a complete Moss Stitch round, ending with a sl st to join.
- FO (Fasten Off), leaving a tail for weaving in.
Part 3: The Handles (Your Main Color or a Contrasting Color)
We’ll crochet two separate, sturdy handles that will be sewn onto the bag.
- With your chosen handle color and your H/5.0mm hook, ch 61. (This chain length will result in a handle approximately 20-22 inches (50-56 cm) long when completed. Adjust this length for shorter or longer handles as desired.)
- Row 1: Work 1 sc in the 2nd chain from the hook and in each chain across. (Total: 60 sc).
- Ch 1, turn.
- Row 2: Work 1 sc in each sc across. (Total: 60 sc).
- Ch 1, turn.
- Repeat Row 2 for 3-5 more rows (for a total of 5-7 rows of single crochet), depending on how wide and sturdy you want your handles to be. A wider strap is generally more comfortable for a tote bag.
- FO (Fasten Off), leaving a very long tail (approximately 20-30 inches / 50-75 cm) on both ends of the handle for securely sewing it to the bag.
- Repeat steps 1-5 to create the second handle.

Part 4: Finishing & Assembly
- Weave in All Bag Body Ends: This is a crucial step for a clean, professional, and durable finish. Use your yarn needle to thoroughly weave in all loose yarn tails from the bag body. Ensure they are secured well on the inside of the bag to prevent them from unraveling or showing through the stitches.
- Attach the Handles:
- Lay your bag flat and identify the two longer sides for handle placement.
- On one long side, place stitch markers to denote where your handles will be attached. For example, measure 3-4 inches (7.5-10 cm) in from each side seam at the top edge of the bag. The handles will be attached between these markers. Adjust spacing to your preference.
- Position one end of a crocheted handle onto the marked area on the inside top edge of the bag.
- Using one of the long tails you left on the handle and your yarn needle, securely sew the handle end to the bag using strong, neat stitches (like whip stitches or mattress stitches). Go through both layers of the handle and through the dense top edge of the bag. Reinforce the attachment by sewing back and forth multiple times to ensure durability.
- Repeat this process for the other end of the same handle, attaching it to the opposite side of the bag, making sure the handle is not twisted.
- Repeat the entire process for the second handle on the remaining long side of the bag.
- Optional: Add a Fabric Lining (Highly Recommended for Durability & Functionality):
- A fabric lining will protect your crocheted stitches from stretching or catching on items, prevent small items from slipping through any tiny gaps in the crochet work, and give your bag a more polished, professional finish.
- Measure: Measure the exact circumference of your crocheted bag opening and the height of the crocheted bag body.
- Cut Fabric: Cut a piece of sturdy fabric (like cotton broadcloth, quilting cotton, or canvas) that is 1 inch (2.5 cm) wider than the bag’s circumference and 2 inches (5 cm) taller than the bag’s height.
- Sew Lining: Fold the fabric in half (right sides together) and sew up the side seam and the bottom seam. If desired, create boxed corners on the bottom of the lining to match the bag’s oval base. Hem the top edge of the lining by folding it over twice (e.g., 1/2 inch then another 1/2 inch) and pressing or sewing it down.
- Insert & Attach: Carefully place the finished fabric lining inside your crocheted bag, ensuring it fits snugly. Hand-stitch the top hem of the lining to the inside top edge of your crocheted bag using small, neat stitches that don’t show through to the outside.
- Optional: Add a Closure:
- You can sew a magnetic snap closure (easily found at craft stores) to the top center of the bag (on the inside of the lining or directly to the crochet fabric).
- Alternatively, sew a large decorative button onto the front center of the bag, and crochet a simple loop (using a chain and slip stitch) on the back to fit over the button.
Your beautiful, handmade, easy crochet tote handbag is now complete and ready for all your adventures!
Tips for Success & Customization:
- Yarn Choice is Key: For a tote bag that holds its shape and withstands daily use, choose a yarn that is durable and has minimal stretch. Cotton, mercerized cotton, or a sturdy acrylic are excellent choices.
- Consistent Tension: Maintaining even tension throughout your crocheting is crucial. This will ensure your stitches are uniform, your fabric is smooth, and your bag holds its shape well.
- Sizing Up/Down:
- Base: Adjust your starting chain for the initial length. You can also add or remove increase rounds to change the base width, always maintaining the oval increase pattern.
- Body Height: Simply add or remove rounds in Part 2 until you reach your desired height.
- Handle Length/Width: Adjust the number of chains for the initial length and the number of single crochet rows for the width.
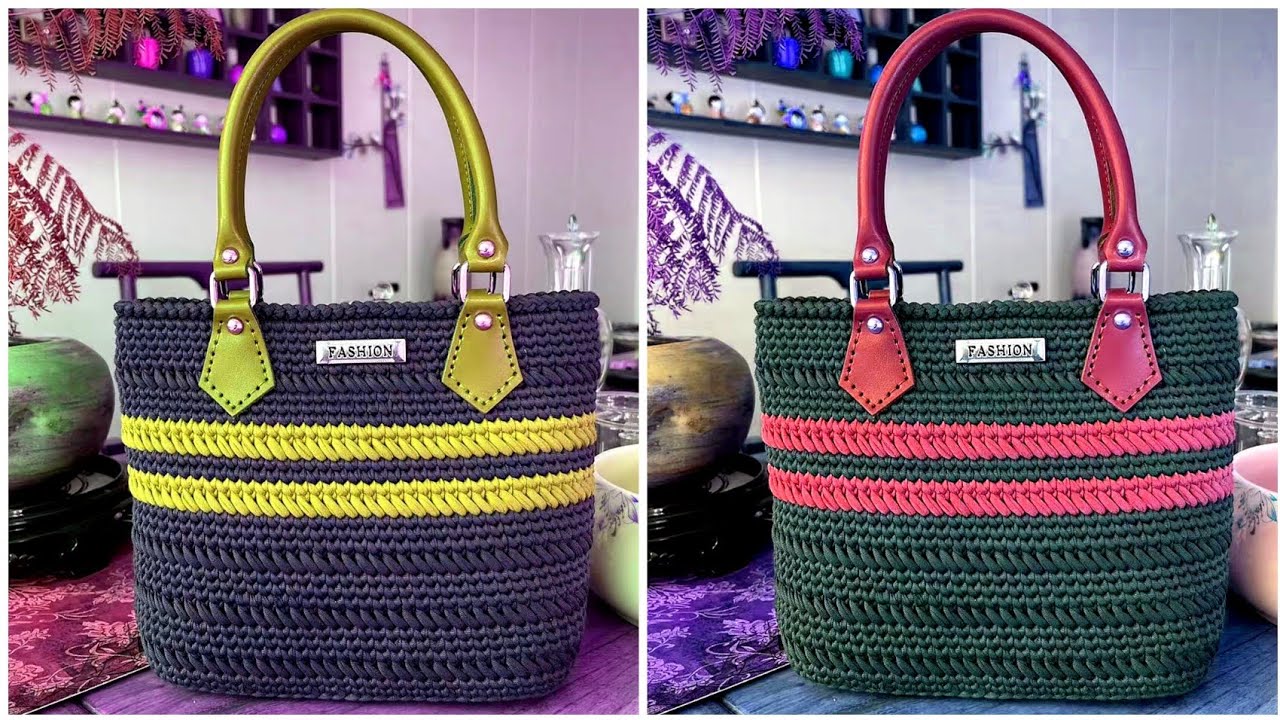
- Color Play: While this tutorial is written for a single color, feel free to use multiple colors!
- Two-Tone: Make the base one color and the body another.
- Stripes: Introduce color changes every few rounds in the body for a striped effect (remember to carry the yarn up the seam carefully or cut and weave in ends for neatness).
- Other Stitch Patterns: If you want to experiment, once you’re comfortable, you could try other simple but dense stitch patterns like single crochet (sc) throughout, or the basketweave stitch (though that uses post stitches which are slightly more advanced).
- Blocking: For the best possible shape, especially with cotton yarn, lightly mist your finished bag with water and let it air dry, potentially stuffing it loosely with towels to help it hold its form.
Enjoy creating and using your unique, handmade tote bag!