 by
by Crocheting your own bag is one of the most rewarding and practical projects for beginners. A handmade crochet bag is stylish, reusable, and customizable, making it perfect for daily use, shopping, or casual outings. In this tutorial, we will learn how to create a Bag Cris, an easy and beginner-friendly crochet bag design that looks beautiful while using simple stitches and straightforward construction.
This detailed guide will take you step by step through the entire process—from choosing materials to finishing your bag neatly—even if you are new to crochet.
Why Choose the Bag Cris Crochet Project?
The Bag Cris is ideal for beginners because:
- It uses basic crochet stitches
- The pattern is repetitive and easy to memorize
- No complex shaping is required
- The bag is sturdy and practical
- It works up quickly and looks professional
This bag is perfect for daily use, small errands, or as a handmade gift.
Materials You Will Need
Yarn
- Medium to bulky yarn (Category 4 or 5)
- Cotton yarn is highly recommended for bags due to strength and durability
- T-shirt yarn or macramé yarn also works well
- Choose solid colors for a clean look or mixed colors for a playful style
Crochet Hook
- 5.0 mm to 6.5 mm crochet hook
- Use a hook slightly smaller than recommended for tight stitches
Additional Tools
- Scissors
- Yarn needle
- Stitch markers (optional)
- Measuring tape
- Bag handles (optional, or crochet your own)
Basic Crochet Skills Required
This tutorial is beginner friendly, but you should know:
- Slip knot
- Chain (ch)
- Slip stitch (sl st)
- Single crochet (sc)
- Half double crochet (hdc) or double crochet (dc)
You don’t need advanced techniques—just consistency and patience.
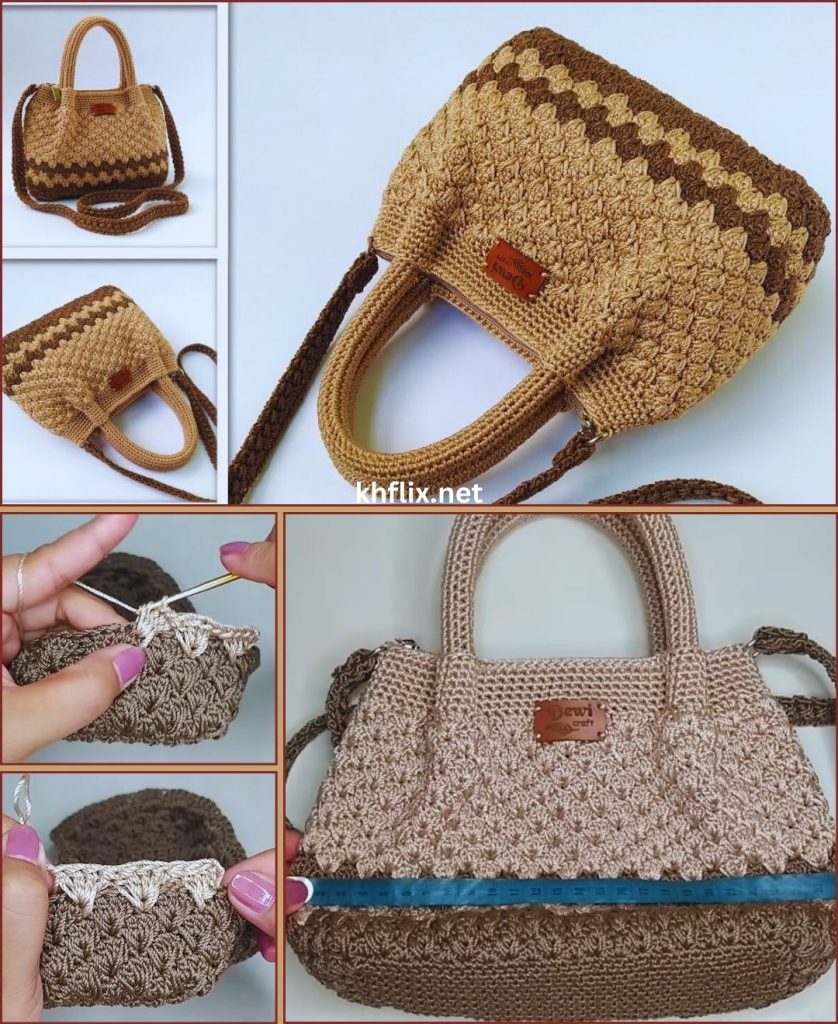
Understanding the Bag Cris Construction
The Bag Cris is made in three main parts:
- The base (bottom of the bag)
- The bag body (worked upward)
- The handles or straps
The bag is worked in rounds, making it seamless and sturdy.
Step 1: Crocheting the Bag Base
Starting the Base
- Make a slip knot
- Chain 20–25 stitches (adjust based on desired bag width)
Round 1
- Single crochet in the second chain from hook
- Single crochet in each chain across
- Work 3 single crochets in the last chain
- Continue single crocheting along the opposite side of the chain
- Work 2 single crochets in the first chain
- Join with slip stitch
This creates an oval base.
Step 2: Expanding the Base
Round 2
- Chain 1
- Single crochet around
- Increase by working 2 single crochets in the curved ends
- Join with slip stitch
Round 3
- Repeat increases only at the ends
- Stop increasing when the base reaches your desired size
Lay the base flat—it should not curl or ripple.
Step 3: Creating the Bag Sides
Round 4 (Turning the Base Upward)
- Chain 1
- Single crochet in back loops only around
- Join with slip stitch
This step forms a clean edge and helps the bag stand upright.
Step 4: Crocheting the Bag Body (Bag Cris Pattern)
Simple Stitch Pattern
You can use:
- Single crochet for a tight, sturdy bag
- Half double crochet for faster progress
- A textured stitch like single crochet + chain 1
Body Rounds
- Chain 1
- Work your chosen stitch evenly around
- Join with slip stitch
- Repeat for 15–25 rounds depending on bag height
The repetitive pattern makes this step relaxing and beginner friendly.
Step 5: Adding Texture (Optional)
To give Bag Cris a stylish look:
- Work front loop only or back loop only rows
- Add simple stitch combinations
- Change yarn color for stripes
Texture adds character without complexity.
Step 6: Shaping the Bag Opening
Once the bag reaches desired height:
- Crochet 2 rounds of single crochet
- Keep stitches tight and even
- This strengthens the opening and prevents stretching
You may reduce hook size for a firmer edge.
Step 7: Creating the Handles
Option 1: Crochet Handles
- Decide handle position
- Chain 30–40 stitches
- Skip the same number of stitches on the bag body
- Single crochet into the next stitch
- Repeat on the other side
- Reinforce handles with single crochet in next round
Option 2: Attach Ready-Made Handles
- Sew or clip handles securely
- Reinforce attachment points with extra stitches
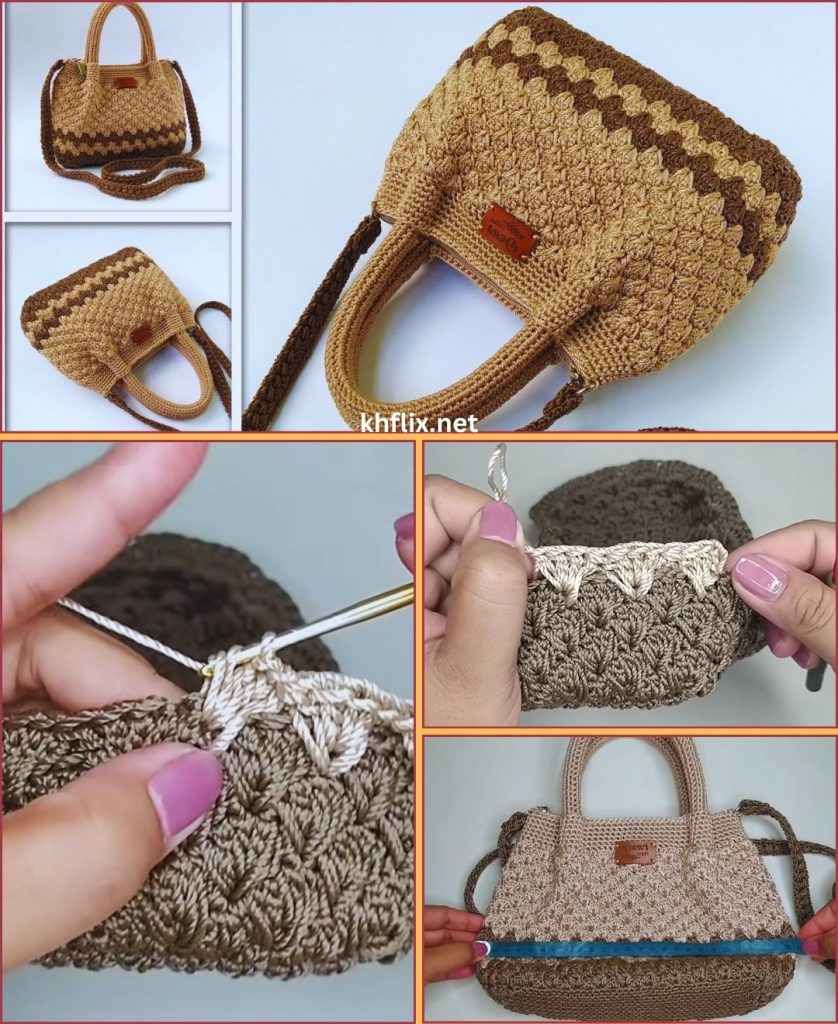
Step 8: Finishing the Bag Cris
- Cut yarn, leaving a long tail
- Pull through the last loop
- Weave in all ends securely
- Turn bag inside out if needed
- Shape gently with hands
Your Bag Cris is now complete!
Tips for Beginners
- Use stitch markers to mark round beginnings
- Keep stitches tight for durability
- Choose cotton yarn to prevent stretching
- Measure bag height as you go
- Practice stitches before starting
Customization Ideas
Once you master the basic Bag Cris, try:
- Adding a lining fabric
- Using two colors or gradient yarn
- Adding buttons or tassels
- Creating crossbody straps
- Adding a zipper or magnetic clasp
Common Beginner Mistakes to Avoid
- Using stretchy yarn
- Crocheting too loosely
- Skipping stitches in rounds
- Making handles too thin
- Not reinforcing stress points
Take your time and enjoy the learning process.
Final Thoughts
The Bag Cris crochet project is a perfect DIY tutorial for beginners who want to create something stylish, useful, and handmade. With simple stitches and easy construction, this bag helps build confidence and essential crochet skills while producing a beautiful result.
Once completed, your Bag Cris will be a reflection of your creativity and effort—and a practical accessory you’ll love using.
Happy crocheting 🧶👜✨