 by
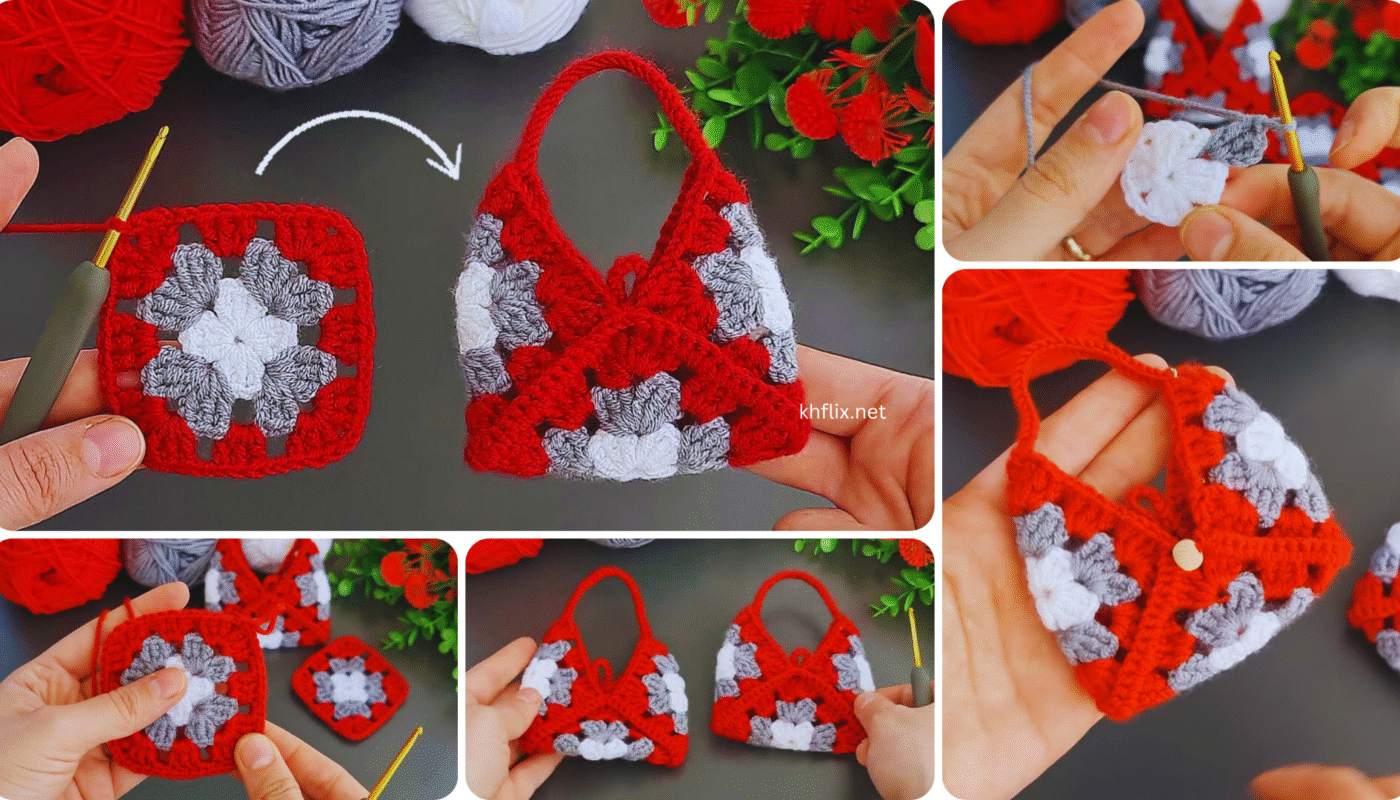
by Absolutely! Here’s a detailed step-by-step crochet pattern to make a Mini Bag Purse Keychain in red color. This adorable project is perfect for beginners and makes a great gift, party favor, or personal accessory. It’s quick to make and requires only a small amount of yarn.
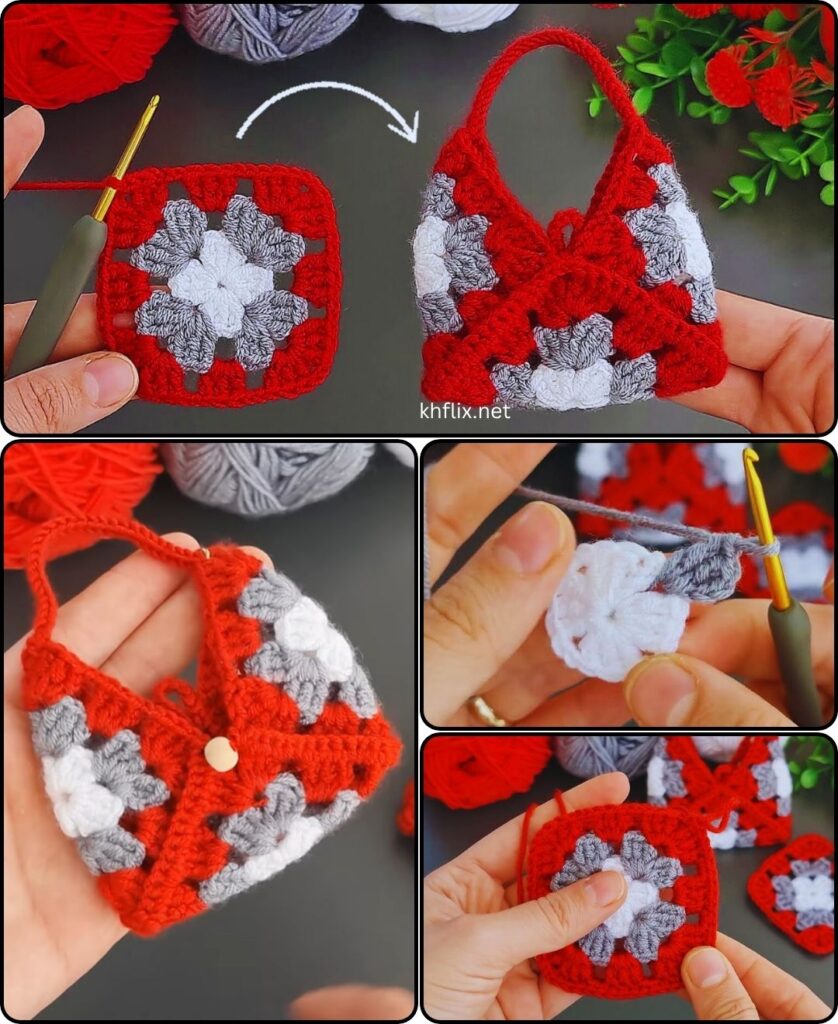
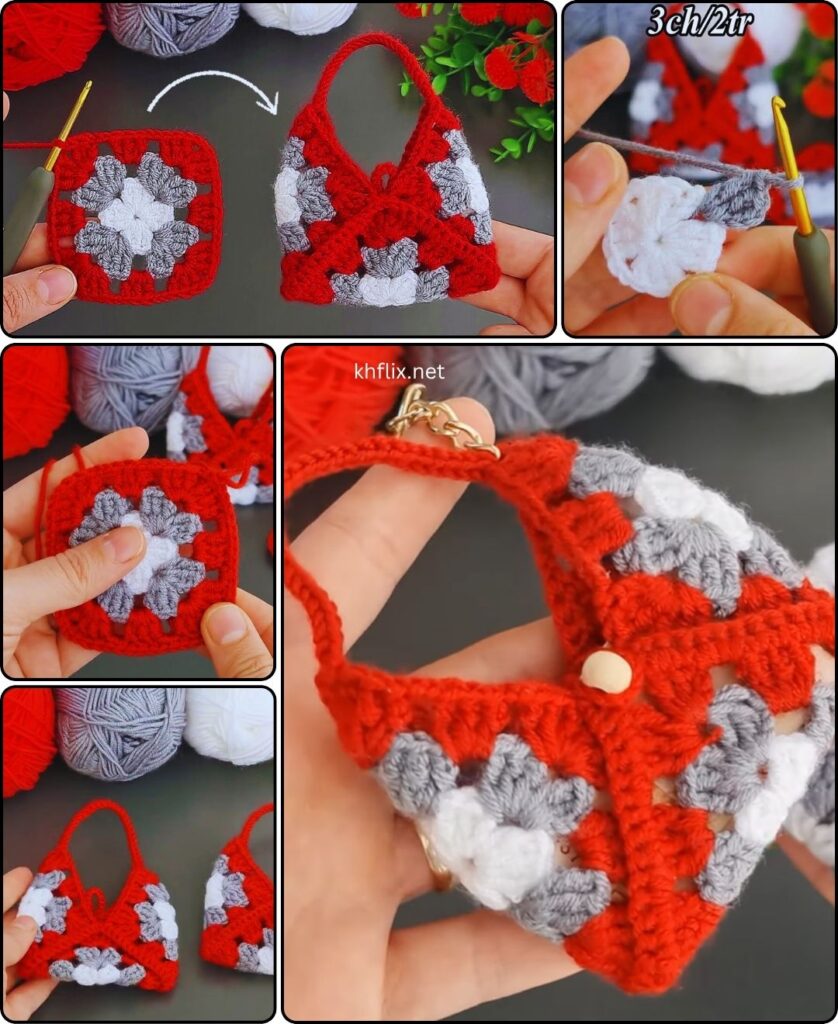
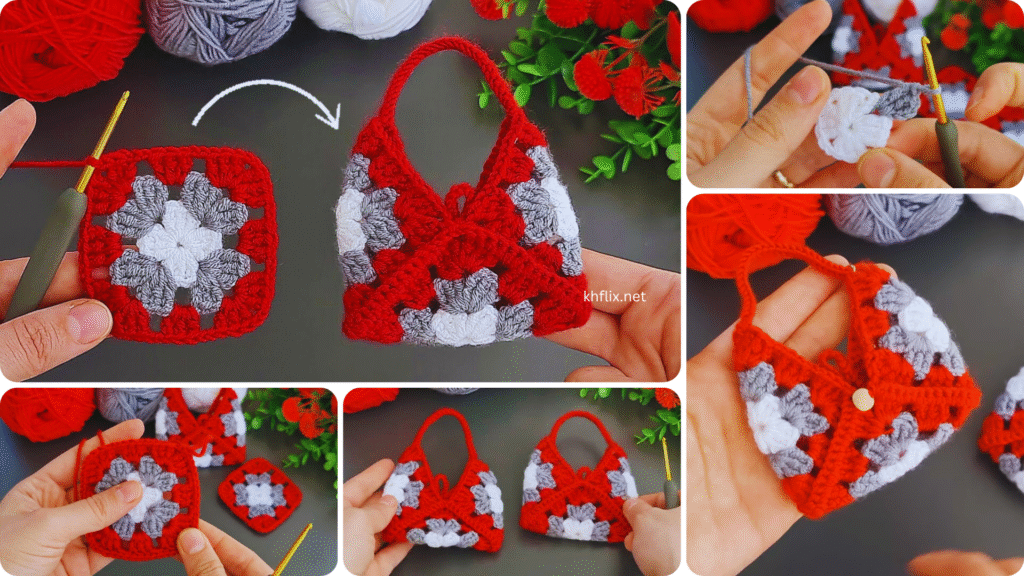
🧶 Crochet Mini Bag Purse Keychain (Red Color) – Step-by-Step Pattern
💼 Overview
A mini bag purse keychain is a cute, functional mini project that can hold coins, lip balm, earbuds, or small trinkets. You’ll create a small bag shape with a flap and attach a keyring to it. In this guide, we’ll make it in red, but feel free to add embellishments or customize the color.
🧰 Materials You’ll Need
| Item | Details |
|---|---|
| Yarn | Red cotton or acrylic yarn (Light or Worsted Weight) |
| Crochet Hook | 3.5 mm or 4.0 mm (E or G) |
| Keyring | 1 metal keychain ring with chain |
| Scissors | For trimming yarn |
| Yarn needle | For weaving in ends |
| Stitch marker | Optional, helpful for rounds |
| Button or Snap | Optional closure for the flap |
🧵 Crochet Stitches & Abbreviations (US Terms)
| Abbreviation | Stitch Name |
|---|---|
| ch | Chain |
| sc | Single Crochet |
| hdc | Half Double Crochet |
| sl st | Slip Stitch |
| st(s) | Stitch(es) |
| FO | Fasten Off |
📏 Finished Size
- Approx. 2.5” wide × 3” tall
- Easily adjustable by changing the starting chain or adding more rows
🪡 Step-by-Step Instructions
🔴 Step 1: Base Rectangle (Body of the Mini Bag)
Using red yarn:
Row 1:
- Ch 13 (this will be the width of your bag).
- Sc in 2nd ch from hook and in each across. (12 sc)
- Ch 1, turn.
Row 2–10:
- Sc in each st across (12 sc).
- Ch 1, turn.
👉 This forms the main rectangular body of the purse.
🔺 Step 2: Flap (Triangular Shape)
From the last row (Row 10):
Row 11:
- Sc in first 4 sts only.
- Ch 1, turn.
Row 12:
- Sc2tog, sc2tog (2 sc)
- Ch 1, turn.
Row 13:
- Sc2tog (1 sc)
Fasten off and weave in the end. This creates a triangular flap on one side of the rectangle.
🧷 Step 3: Fold & Seam the Purse
- Fold the rectangle from the bottom up to just below the flap (like an envelope).
- Seam the two side edges using slip stitch, whip stitch, or single crochet.
- Make sure the flap can fold over the top neatly.
🔘 Step 4: Add Closure (Optional)
You can sew a small button to the body of the purse and make a loop with yarn on the flap to close it. Alternatively, attach a small snap or Velcro under the flap.
🧲 Step 5: Attach Keyring
- Insert your hook at the top corner of the flap or side.
- Pull up a loop of yarn and ch 5–8.
- Sl st back into the starting point to form a loop.
- FO and weave in ends.
- Attach a metal keyring through the loop, or directly stitch the keychain ring to the corner using yarn or thread.
🎨 Optional Embellishments
- Add a flower or bow with contrasting yarn
- Embroider initials or a small heart
- Use gold or white thread for edging to give it a luxury feel
🧼 Care Instructions
- Hand wash gently if using cotton yarn
- Air dry flat
- Avoid heat or bleach
💡 Tips for Beginners
- Keep your tension even so the mini bag holds its shape.
- Use a stitch marker to track rows if needed.
- Practice making one with scrap yarn before using premium yarn or keychain parts.
🧡 Final Thoughts
This tiny crochet mini bag purse keychain is fast, fun, and satisfying. It’s an ideal stash buster and makes a thoughtful handmade gift. You can personalize it in countless ways—change the size, color, or closure style, and make it truly your own.