 by
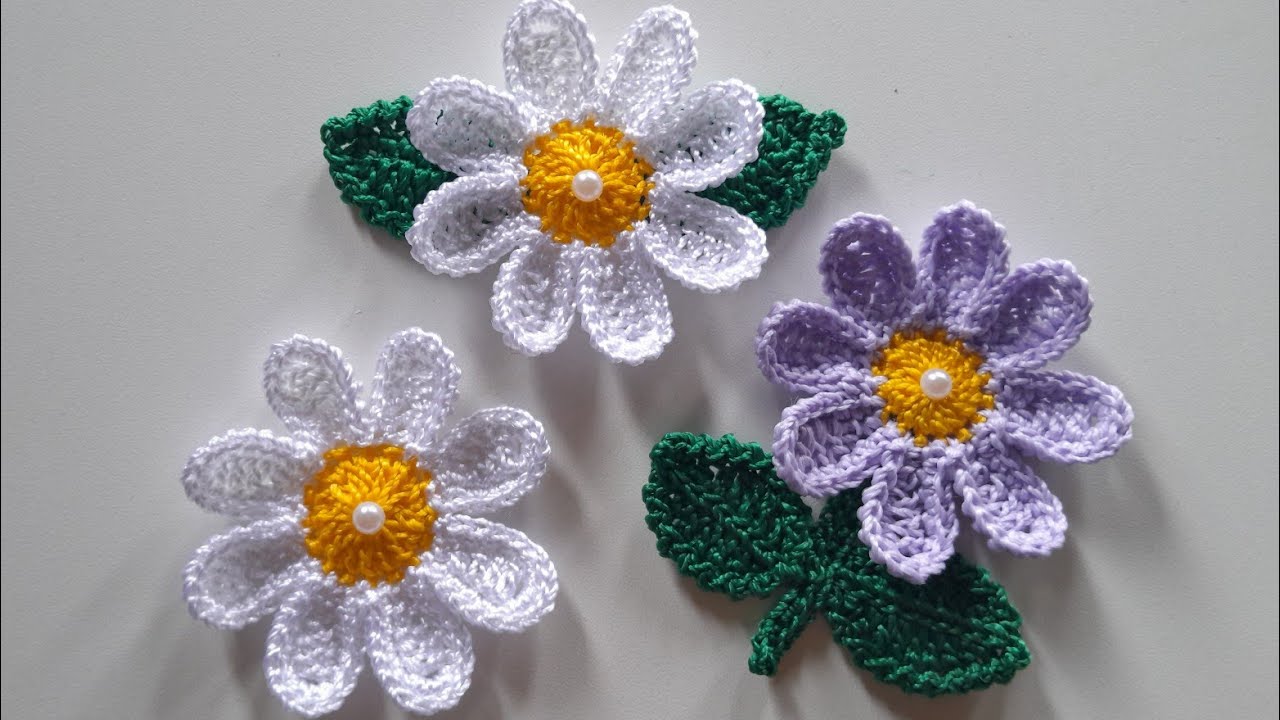
by Crocheting a daisy is one of the most satisfying and beginner-friendly projects you can try. These cute little flowers can be used for decorating bags, hats, blankets, or even turned into jewelry and home décor. In this detailed guide, you’ll learn everything—from materials to finishing touches—so you can confidently create your own crochet daisies.
🌼 1. Materials You’ll Need
Before you start, gather the following:
- Yarn (3 colors):
- Yellow (center)
- White (petals)
- Green (optional for leaves)
- Crochet hook (usually 2.5mm–4mm depending on yarn)
- Yarn needle (for weaving ends)
- Scissors
- Stitch marker (optional but helpful)
👉 Tip: Cotton yarn works best for flowers because it holds shape well.
🧵 2. Basic Crochet Stitches You Should Know
If you’re a beginner, make sure you understand these basic stitches:
- Magic Ring (MR)
- Chain (ch)
- Slip Stitch (sl st)
- Single Crochet (sc)
- Half Double Crochet (hdc)
- Double Crochet (dc)
👉 Don’t worry if you’re not perfect—this project is great practice!
🌼 3. Step-by-Step Instructions
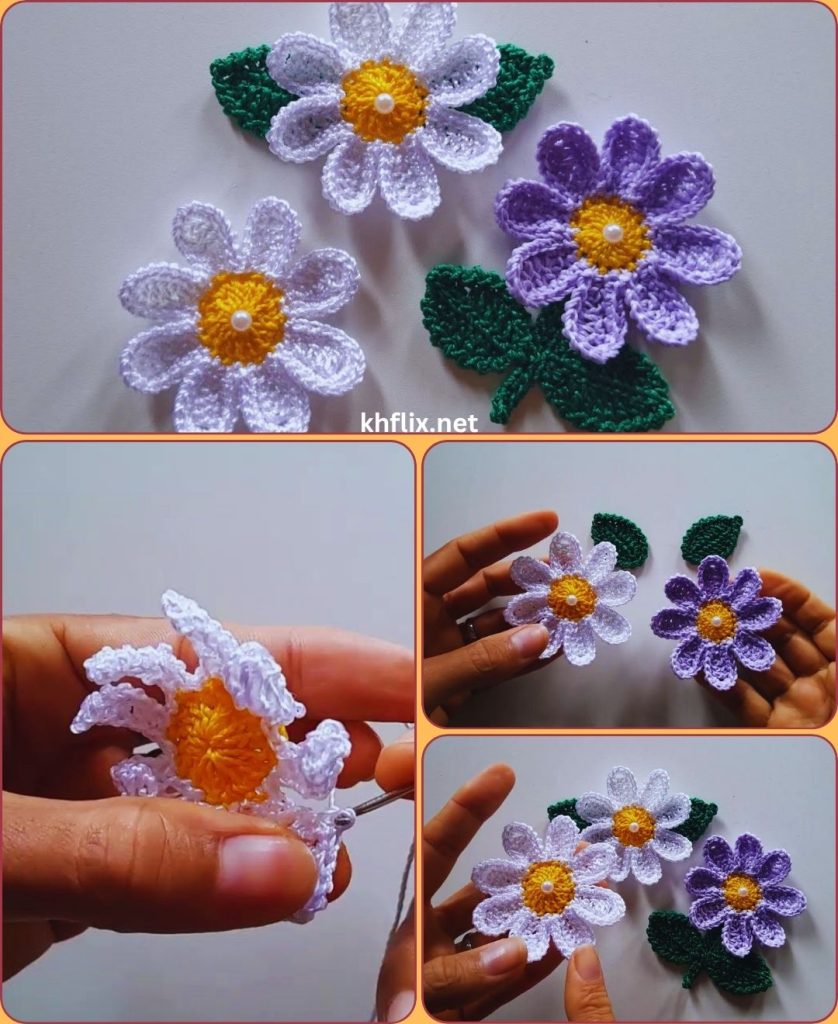
🔶 Step 1: Create the Center (Yellow Part)
- Start with a magic ring (MR)
- Chain 1 (this does not count as a stitch)
- Work 6–10 single crochets (sc) into the ring
- Pull the ring tight
- Join with a slip stitch into the first stitch
✔ You now have a small circular center
👉 Tip: More stitches = fuller center
⚪ Step 2: Add the Petals (White Yarn)
- Attach white yarn to any stitch
- Chain 2 or 3
- In the same stitch, make:
- 2 double crochets (dc)
- Chain 2
- Slip stitch into the same stitch
✔ That completes one petal
Repeat Around
- Move to the next stitch and repeat the same pattern:
- (sl st, ch 2, 2 dc, ch 2, sl st)
✔ Continue until you have petals in every stitch
👉 Usually you’ll get 6–10 petals depending on your center size
🌼 Step 3: Finish the Flower
- After your last petal, slip stitch to secure
- Cut yarn, leaving a tail
- Pull through and tighten
- Use a yarn needle to weave in ends neatly
✔ Your daisy is now complete!
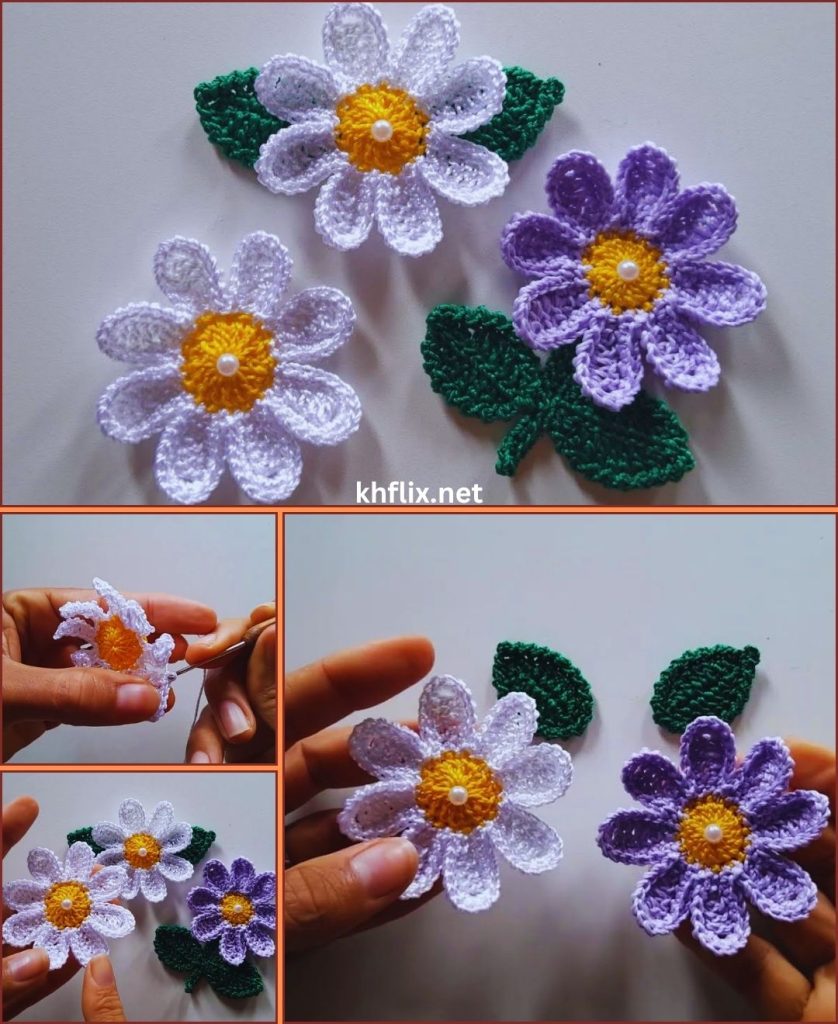
🍃 Optional: Add Leaves
To make your daisy more realistic:
- Attach green yarn at the back
- Chain 5–7
- Slip stitch back along the chain
✔ Repeat for multiple leaves if desired
🌸 4. Tips for Perfect Crochet Daisies
- Keep tension even → prevents curling
- Use smaller hook → tighter, cleaner petals
- Block your flower → spray lightly with water and shape it
- Mix colors → try pink, blue, or pastel petals for creative designs
🎨 5. Creative Ways to Use Crochet Daisies
Once you’ve made a few, try using them in projects:
- Sew onto hats or bags
- Make a daisy chain garland
- Decorate blankets or scarves
- Create earrings or brooches
- Use for gift wrapping decoration
⚡ 6. Common Mistakes (and Fixes)
❌ Petals curling
✔ Use looser tension or bigger hook
❌ Flower looks uneven
✔ Count stitches carefully
❌ Center too loose
✔ Tighten magic ring firmly
🌼 7. Beginner-Friendly Pattern (Quick Version)
If you want a simple version:
- MR, 8 sc, join
- (ch 2, 2 dc, ch 2, sl st) in each stitch around
✔ Done!
💛 Final Thoughts
Crocheting a daisy is a small project, but it teaches big skills—working in the round, stitch combinations, and color changes. Once you master this, you can easily move on to more complex floral designs.
Take your time, enjoy the process, and don’t worry if your first flower isn’t perfect—each one gets better 🌸