 by
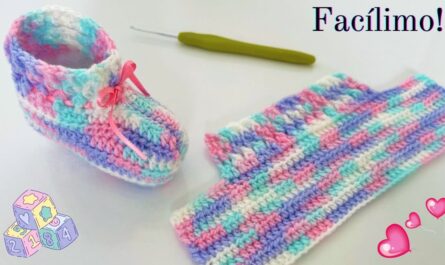
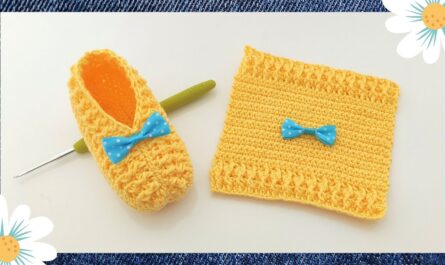
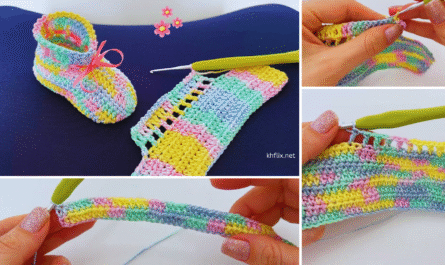
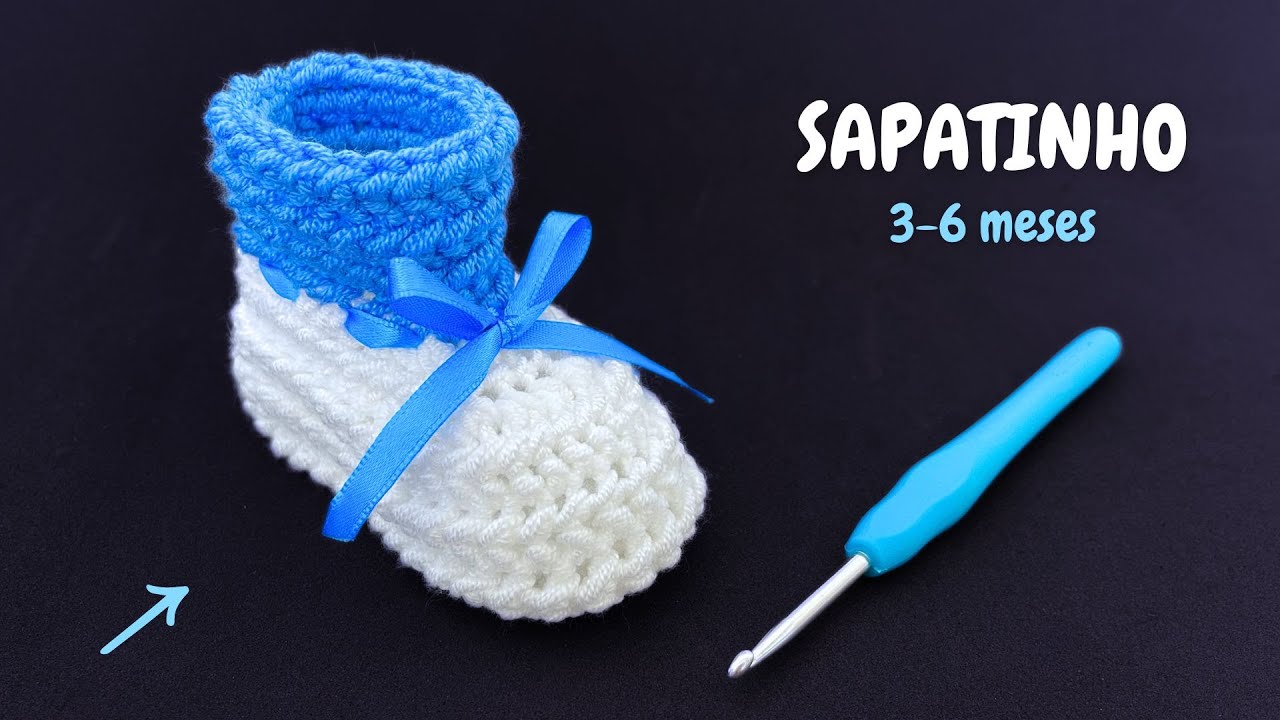
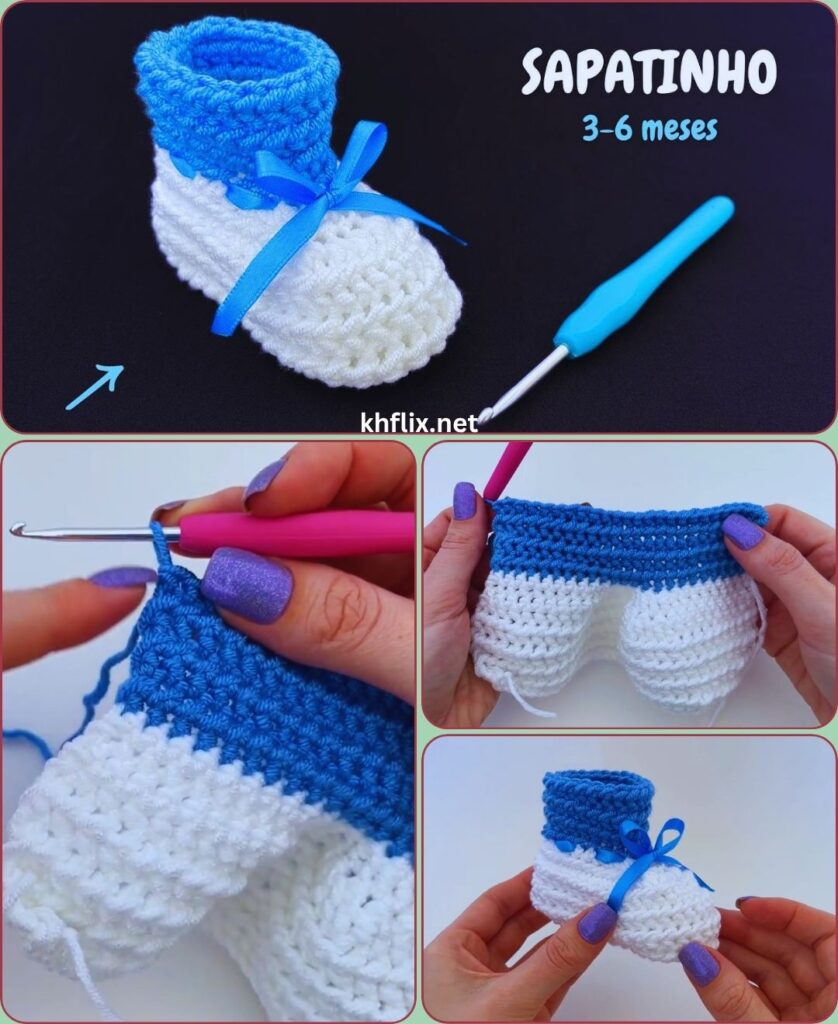
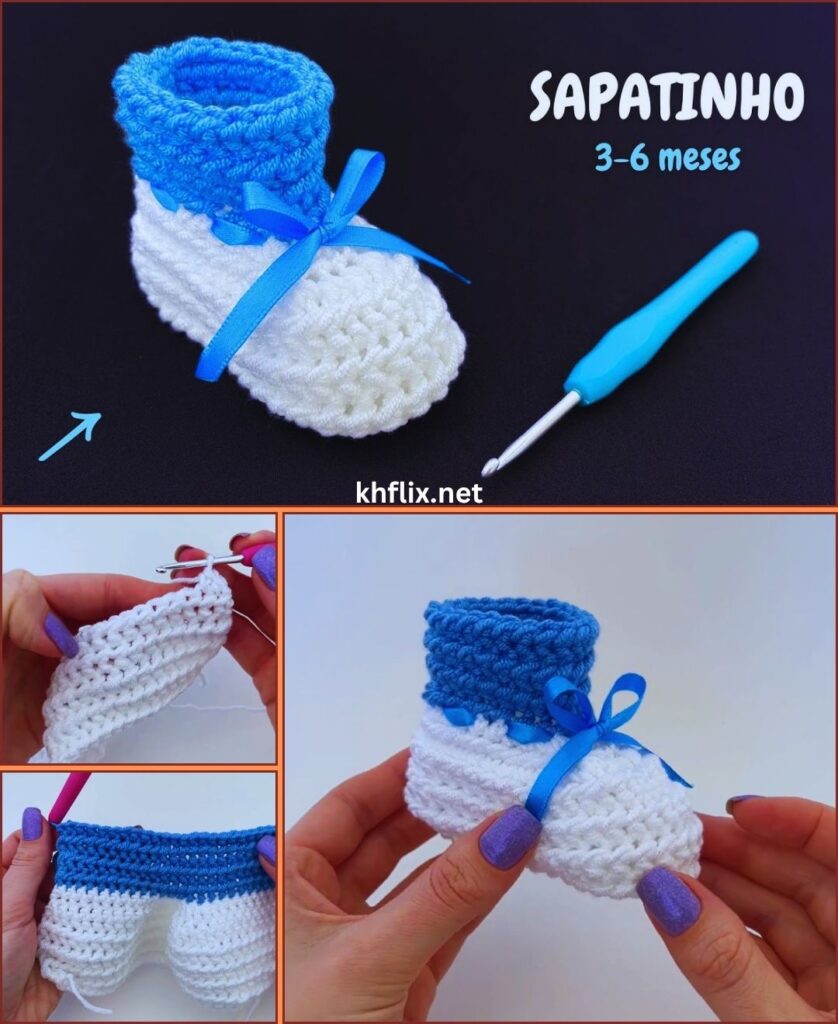
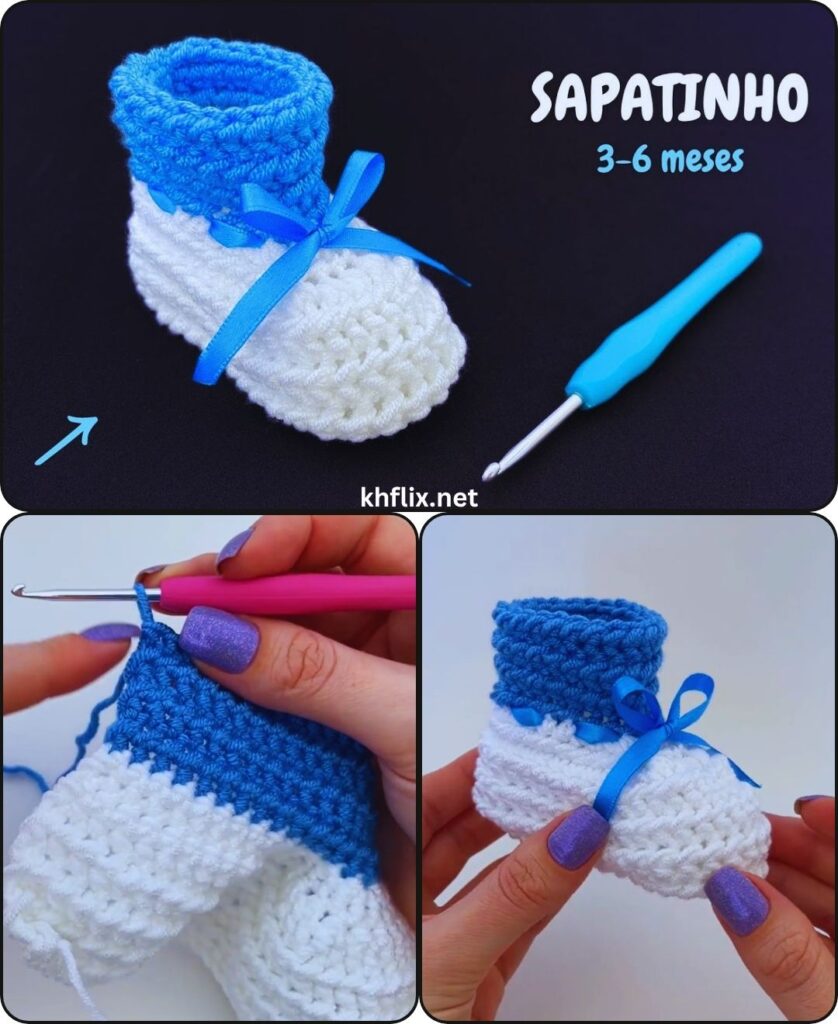
by Crochet booty shoes (baby booties) are one of the most versatile and creative projects you can make. Unlike basic baby shoes that use only one stitch type, this design explores different crochet stitches in one pair of shoes, creating texture, style, and a more professional handmade look.
This guide will show you how to make beautiful crochet baby booties using different stitches step by step, even if you are still a beginner. The goal is to help you combine simple stitches into a stylish design that looks unique, modern, and handmade with love.
🌟 Why Make Booty Shoes with Different Stitches?
Using different stitches makes your baby booties more interesting and elegant.
Benefits:
- 🧶 More texture and design variety
- 👶 Soft but stylish baby footwear
- 🎨 Creative freedom with stitch patterns
- 💎 Handmade premium look
- 🎁 Perfect for gifts or selling
- 🪡 Great way to improve crochet skills
Instead of plain shoes, you get a designer-style baby bootie.
🧶 Materials You Need
Keep it simple and baby-safe:
Yarn:
- Soft baby acrylic yarn
- Cotton yarn (light and breathable)
- 1–2 colors (optional for contrast)
Hook:
- 3.0 mm – 4.0 mm crochet hook
Tools:
- Yarn needle
- Scissors
- Stitch markers (optional)
🧠 Stitches Used in This Design
This is a multi-stitch baby bootie pattern:
- Chain (ch)
- Slip stitch (sl st)
- Single crochet (sc)
- Half double crochet (hdc)
- Double crochet (dc)
- Front loop / back loop crochet (FLO / BLO)
- Single crochet decrease (sc2tog)
👉 Each stitch adds a different texture to the shoe.
👣 Step 1: Crochet the Base Sole (Simple Structure)
Start with a soft oval sole.
Instructions:
- Chain 11
- Work 2 single crochet in 2nd chain
- Single crochet across chain
- Add 5 sc in last stitch (curved toe)
- Work along opposite side
- Join with slip stitch
✔ You now have a basic baby shoe sole.
👟 Step 2: Strengthen the Sole (Texture Start)
Now we introduce a stitch variation:
- Round 2: half double crochet (hdc) around entire sole
- Add small increases at toe and heel
✔ This makes the base thicker and more durable.
👉 HDC gives a slightly raised texture compared to SC.
🧱 Step 3: Create Shoe Shape Using Back Loop Stitch
Now we build structure:
- Work single crochet in back loop only (BLO)
✔ This creates:
- A visible ridge
- Strong shoe structure
- Clean separation between sole and body
👉 This is a key “bootie shaping” technique.
🎨 Step 4: Add Texture Body (Mix of Stitches)
Now we start the creative part.
Round 1:
- 1 single crochet (sc)
- 1 half double crochet (hdc)
Repeat around
✔ This creates soft rib texture.
Round 2:
- Alternate double crochet (dc) and single crochet
✔ This gives a raised decorative pattern.
👶 Step 5: Shape the Front Toe
Now we reduce stitches for shaping:
- Mark front center
- Use sc2tog (decrease stitch)
- Continue normal stitches around
- Repeat 1–2 rounds
✔ The toe becomes round and baby-friendly.
🌸 Step 6: Decorative Upper Pattern (Different Stitch Design)
Now we make the bootie stylish.
Option A: Shell Stitch Edge
- 5 dc in same stitch
- Skip 1 stitch
- Repeat
✔ Creates a flower-like top edge.
Option B: Ribbed Texture
- Front post double crochet (FPDC)
- Back post double crochet (BPDC)
✔ Creates stretchy sock-like top.
Option C: Simple Elegant Edge
- Single crochet + chain spaces
- Light and clean design
👟 Step 7: Add Bootie Ankle Height
Continue stitching upward:
- 2–4 rounds depending on size
- Use single crochet or rib stitch
- Keep structure soft but firm
✔ This creates the “bootie” style shape.
🎀 Step 8: Add Strap or Closure (Optional)
For better fit:
- Attach yarn to side
- Chain 12–15
- Single crochet back
- Attach to opposite side
Optional decorations:
- Button
- Bow
- Small flower
✨ Step 9: Finishing Touches
To complete your booties:
- Cut yarn neatly
- Weave all ends inside
- Shape with hands
- Match both shoes carefully
✔ Your multi-stitch booties are ready!
🎨 Stitch Combination Ideas
Here are creative stitch combinations:
Soft Baby Style:
- Sole: SC
- Body: HDC
- Top: Shell stitch
Cozy Winter Bootie:
- Sole: SC
- Body: BLO SC
- Top: Rib stitch (FPDC/BPDC)
Fancy Gift Bootie:
- Sole: HDC
- Body: DC + SC mix
- Edge: Shell stitch
💡 Pro Tips for Perfect Booties
✔ Always count stitches per round
✔ Use soft yarn for comfort
✔ Don’t make stitches too tight
✔ Combine only 2–3 stitch types per shoe
✔ Keep both shoes symmetrical
⚠️ Common Mistakes to Avoid
❌ Mixing too many stitches randomly
✔ Keep pattern organized
❌ Uneven tension
✔ Practice consistent stitching
❌ Shoes too stiff
✔ Use softer yarn or larger hook
🌈 Color Ideas for Stitch Designs
- White + pastel pink
- Blue + white ribbed style
- Cream + beige textured booties
- Rainbow mixed stitch design
- Grey + yellow modern look
👉 Different stitches look even better with color contrast.
👶 Final Thoughts
Making crochet booty shoes with different stitches is a creative way to upgrade your crochet skills and produce unique handmade baby footwear. Instead of simple designs, you are combining textures, patterns, and shaping techniques to create something truly special.
This project is perfect for:
- Beginners learning new stitches
- Handmade gift makers
- Crochet sellers
- Creative hobby projects
With practice, you can design your own signature baby booties using different stitch combinations and color styles.
Happy crocheting! 🧶👶✨