 by
by A detailed beginner-friendly guide
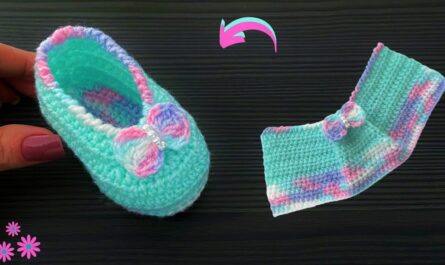
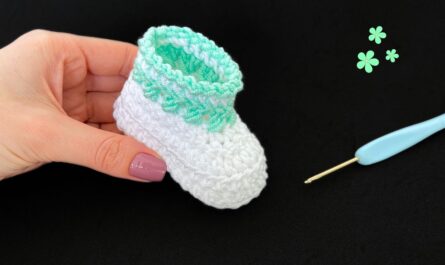
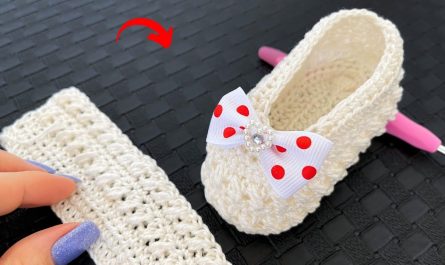
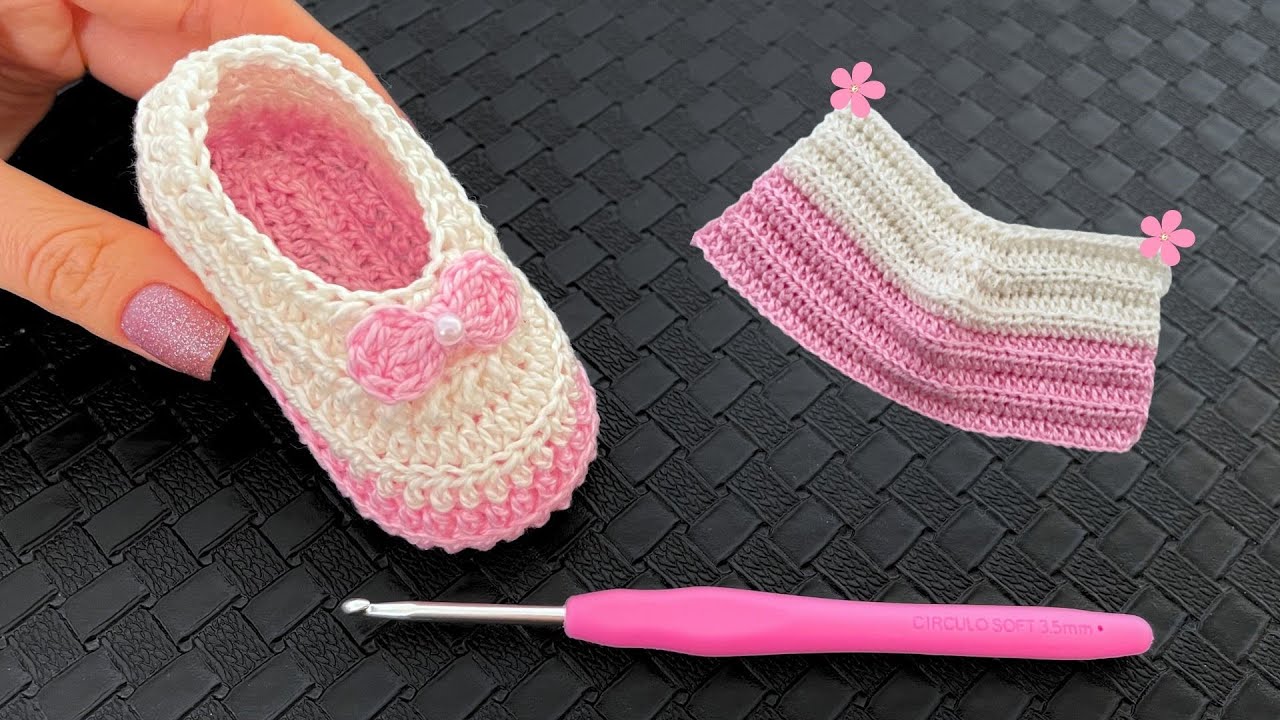
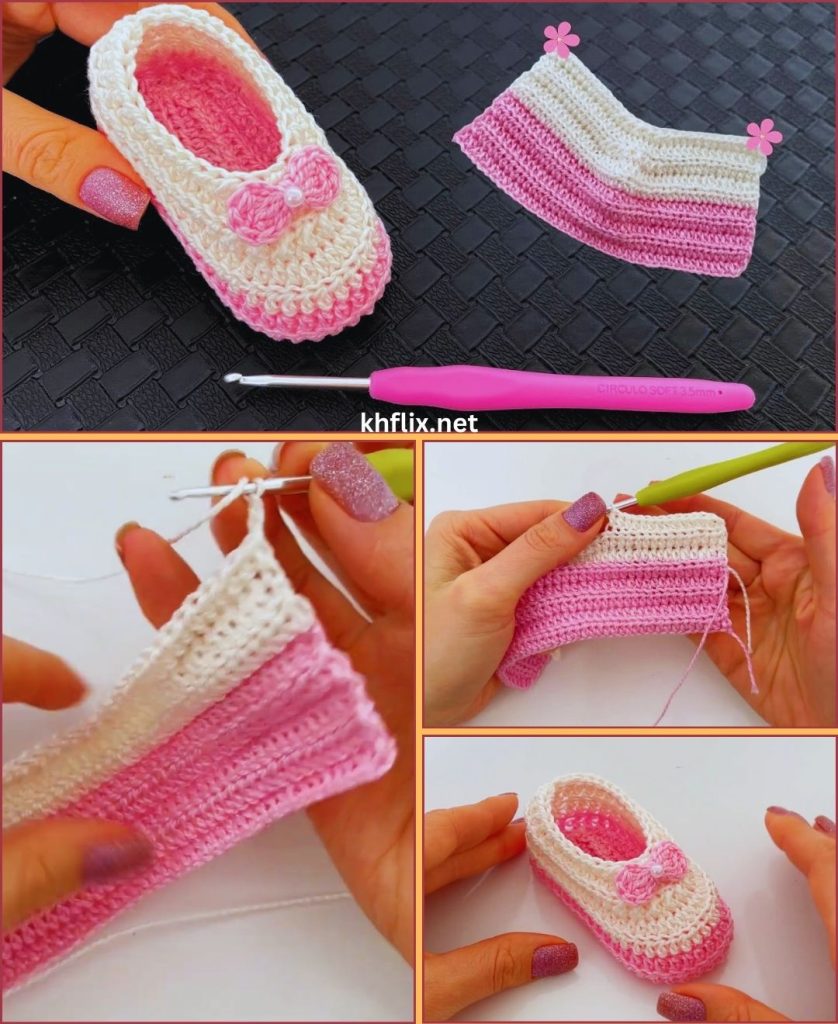
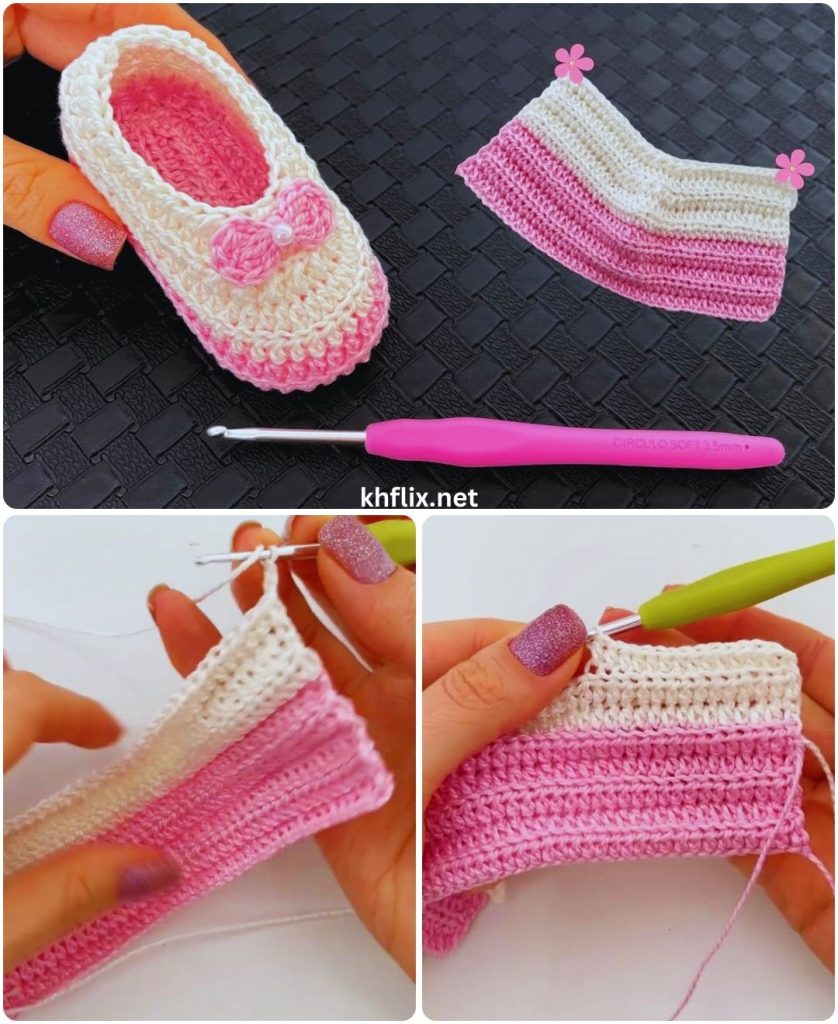
Crochet booties are one of the most loved handmade baby items. They are small, quick to make, and incredibly adorable. Adding two decorative lines (stripes) makes the design look stylish and professional — yet the pattern remains very simple.
In this detailed guide, you’ll learn step-by-step how to make an easy crochet bootie with two lines, even if you are a beginner.
👶 Why Make Crochet Booties?
Crochet booties are:
- ✅ Soft and comfortable for babies
- ✅ Quick to complete (1–2 hours per pair)
- ✅ Affordable (uses small amount of yarn)
- ✅ Perfect for gifts and baby showers
- ✅ Great for beginners learning crochet
And the two-line design gives them a modern, clean look without adding difficulty.
🧵 Materials You Will Need
Keep everything simple.
Yarn
- Soft baby yarn (DK or light worsted weight recommended)
- Color A – Main color
- Color B – For the two stripes (lines)
Choose soft, breathable yarn suitable for babies.
Tools
- 3.0 mm – 4.0 mm crochet hook
- Yarn needle
- Scissors
- Stitch marker (optional)
- Measuring tape
📏 Baby Size Guide (0–6 Months)
For beginners, start with newborn size:
- Sole length: about 3.5–4 inches (9–10 cm)
- Starting chain: usually 10–11 chains
You can adjust size later by adding or reducing chains.
🪡 Stitches Used (Very Basic!)
This pattern uses only simple stitches:
- Chain (ch)
- Slip stitch (sl st)
- Single crochet (sc)
- Half double crochet (hdc)
That’s all. No complicated techniques.
👣 Step 1: Make the Sole
We begin from the bottom of the bootie.
Using Color A:
- Chain 11.
- In the second chain from hook, work 2 hdc.
- Work 1 hdc in next 8 stitches.
- In the last stitch, work 5 hdc (this forms the toe curve).
- Now work along the other side of the chain:
- 1 hdc in next 8 stitches
- 3 hdc in final stitch
- Join with slip stitch.
You now have an oval shape — this is the sole base.
👣 Step 2: Increase the Sole
Round 2:
- Chain 1.
- Work 2 hdc in first stitch.
- 1 hdc in each stitch until you reach the curved toe.
- Increase evenly around the toe (2 hdc in each curved stitch).
- Continue around.
- Join.
Round 3:
- Repeat increases around toe and heel area.
- Join.
Your sole should now measure about 3.5–4 inches.
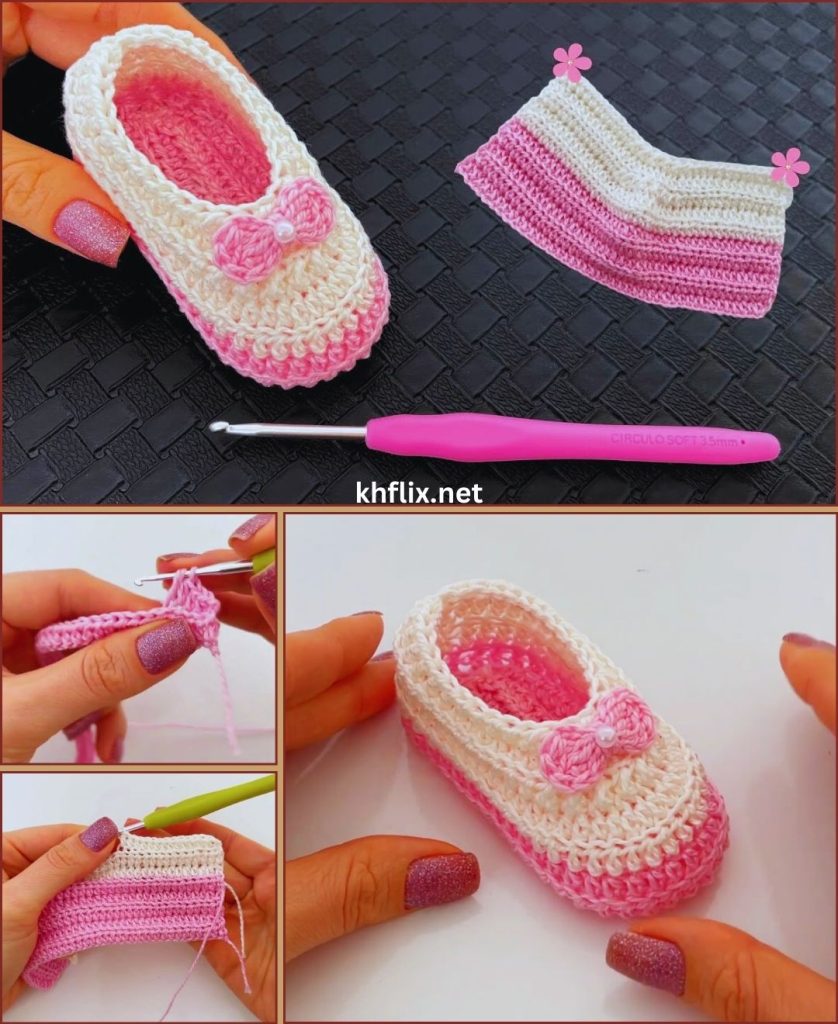
🎨 Step 3: Add the First Line (Stripe #1)
Now we create the first decorative line.
Switch to Color B.
Round 4:
- Attach Color B.
- Work 1 single crochet (sc) in each stitch around.
- Join with slip stitch.
- Fasten off Color B.
This creates a clean stripe around the sole edge.
👢 Step 4: Build the Bootie Wall
Switch back to Color A.
Round 5:
- Work in back loops only (important for shaping).
- 1 hdc in each stitch around.
- Join.
Round 6:
- 1 hdc in each stitch around.
- Join.
Now the sides of the bootie begin to stand up.
🎨 Step 5: Add the Second Line (Stripe #2)
Attach Color B again.
Round 7:
- 1 sc in each stitch around.
- Join.
- Fasten off.
Now you have two neat lines:
- One near the sole
- One near the top edge
This simple detail makes the bootie look stylish and well-designed.
👶 Step 6: Shape the Toe Area
Switch back to Color A.
Round 8:
- Work hdc until you reach the front center (about 10 stitches).
- Work hdc2tog (half double crochet two together) across the toe section.
- Continue normal hdc on sides.
- Join.
Round 9:
- Repeat decreases across the toe area.
- Join.
This creates the rounded front of the bootie.
🧶 Step 7: Create the Ankle Section
To make it a bootie (not just a shoe), we add height.
Round 10:
- 1 hdc in each stitch around.
- Join.
Round 11:
- Repeat 1 hdc in each stitch.
- Join.
You can add more rounds if you want taller booties.
🎀 Optional: Add a Simple Ribbed Top
For a stretchy ankle:
- Work front post/back post double crochet around.
- This creates a ribbed texture.
Or keep it simple with single crochet.
✨ Finishing Touches
- Weave in all loose ends carefully.
- Trim excess yarn.
- Gently shape the bootie with your hands.
Now repeat all steps to make the second bootie.
🎨 Best Color Combinations for Two-Line Booties
Try these combinations:
- White + navy
- Pink + white
- Gray + yellow
- Mint + cream
- Beige + brown
Two contrasting colors make the stripes stand out beautifully.
💡 Tips for Perfect Stripes
To make the lines look clean:
- Change colors in the last yarn-over of the previous stitch.
- Pull new yarn tightly to avoid gaps.
- Keep your tension even.
- Join rounds neatly for smooth stripes.
Clean stripes = professional look.
🧼 Safety Tips for Baby Booties
✔ Use soft, washable yarn
✔ Avoid loose buttons or beads
✔ Secure all yarn ends tightly
✔ Ensure no rough seams inside
Comfort and safety always come first.
⏱ How Long Does It Take?
For beginners:
- 1–2 hours per pair
After practice:
- 45–60 minutes per pair
They are small and quick, which makes them very satisfying projects.
💰 Can You Sell Crochet Booties?
Yes! Handmade baby items are very popular.
Reasons they sell well:
- Perfect for baby showers
- Custom color options
- Affordable gifts
- Cute photography props
Two-line designs look modern and premium, yet remain easy to produce.
🏁 Final Thoughts
Making an easy crochet bootie with two lines is:
- Beginner-friendly
- Affordable
- Fast to complete
- Stylish
- Customizable
With just basic stitches and two yarn colors, you can create beautiful handmade booties that look professionally made.
Take your time.
Keep your stitches even.
Practice one pair.
After that, you’ll be making them quickly and confidently.
If you would like, I can also provide:
- A printable row-by-row pattern format
- Instructions for different baby sizes
- A video-style written tutorial
- A more advanced designer version
Just tell me 🧶👶