 by
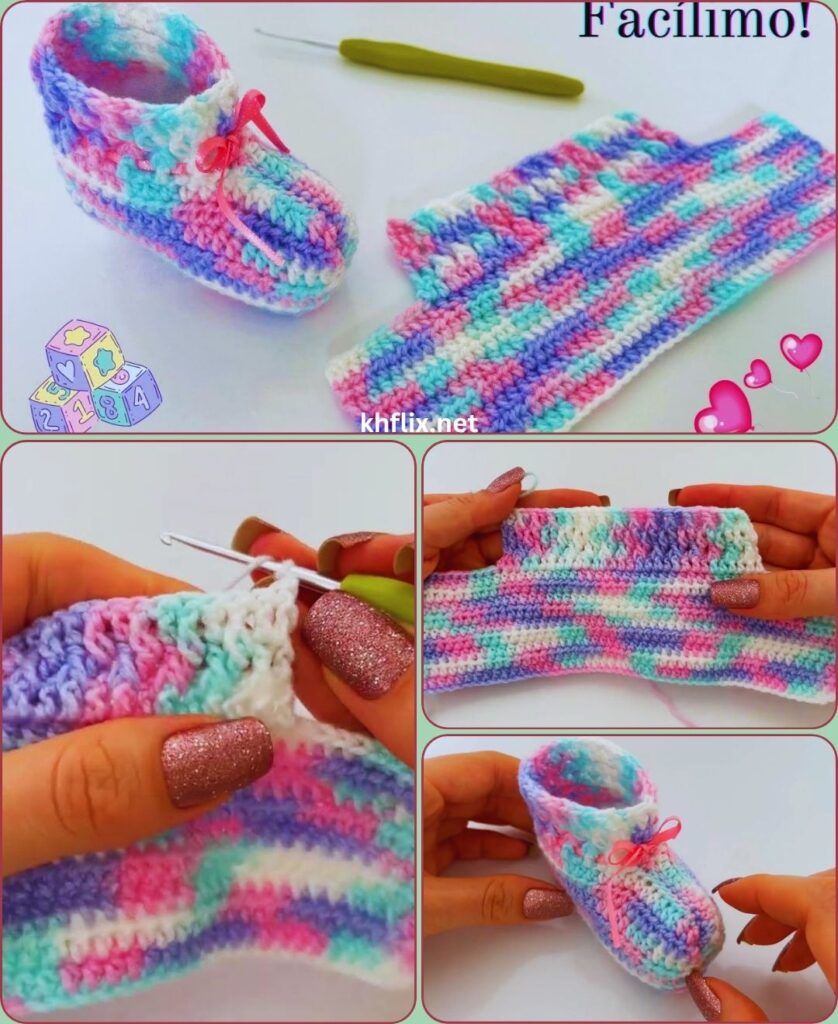
by Crochet baby shoes are one of the most enjoyable projects for beginners, and adding colorful stripes makes them even more adorable. A striped crochet baby shoe combines simple stitches with eye-catching color changes, creating a fun and modern design that’s perfect for newborns and infants. Whether you’re making them as a thoughtful gift, for your own baby, or to sell as part of your handmade collection, striped baby shoes are always a popular choice.
This step-by-step guide will teach you how to make easy crochet shoes for babies with a striped color design, using beginner-friendly stitches and simple shaping techniques.
🌈 Why Choose Striped Crochet Baby Shoes?
Striped baby shoes are both playful and stylish. Alternating colors can make even the simplest crochet pattern look unique and professional.
Benefits of Striped Crochet Shoes
- 👶 Soft and comfortable for delicate baby feet
- 🌈 Bright and colorful appearance
- 🧶 Perfect for beginners
- 🎁 Excellent handmade baby shower gift
- 📸 Beautiful for newborn photography
- 💖 Easy to customize with your favorite colors
- ♻ Great way to use leftover yarn
A striped pattern gives each pair of shoes a cheerful and handmade charm.
🧶 Materials You’ll Need
Before you begin, prepare all your crochet supplies.
Yarn
Choose soft baby-friendly yarn, such as:
- Baby acrylic yarn
- Soft cotton yarn
- Cotton-acrylic blend
For the striped design, choose two or three colors.
Popular combinations include:
- 🤍 White + Blue
- ❤️ Red + White
- 💛 Yellow + White
- 💗 Pink + White
- 💚 Mint Green + White
- 💙 Navy Blue + Gray
- 🤎 Beige + Cream
Use one color for the sole and alternate the colors on the upper section for a classic striped effect.
🪝 Crochet Hook
Recommended hook sizes:
- 3.5 mm
- 4.0 mm
Choose the size recommended for your yarn to ensure the shoes remain soft and flexible.
✂️ Additional Tools
You’ll also need:
- Yarn needle
- Scissors
- Stitch marker (optional)
- Measuring tape
🧵 Basic Crochet Stitches
This beginner-friendly pattern uses only easy stitches.
You’ll practice:
- Chain (ch)
- Slip Stitch (sl st)
- Single Crochet (sc)
- Half Double Crochet (hdc)
- Double Crochet (dc)
- Single Crochet Two Together (sc2tog)
These basic stitches create a comfortable and durable baby shoe.
👣 Step 1: Crochet the Sole
The sole provides the foundation of the shoe.
Instructions
- Begin with your main color.
- Chain 11 stitches.
- Work two single crochet into the second chain from the hook.
- Crochet one single crochet into each chain.
- Place five single crochet into the last chain.
- Continue along the opposite side of the chain.
- Join with a slip stitch.
You should now have a smooth oval-shaped sole.
👟 Step 2: Add a Second Sole Round
Strengthen the sole by crocheting another round.
- Chain one.
- Crochet evenly around.
- Increase only at the toe and heel.
- Join with a slip stitch.
This creates a sturdy yet flexible base.
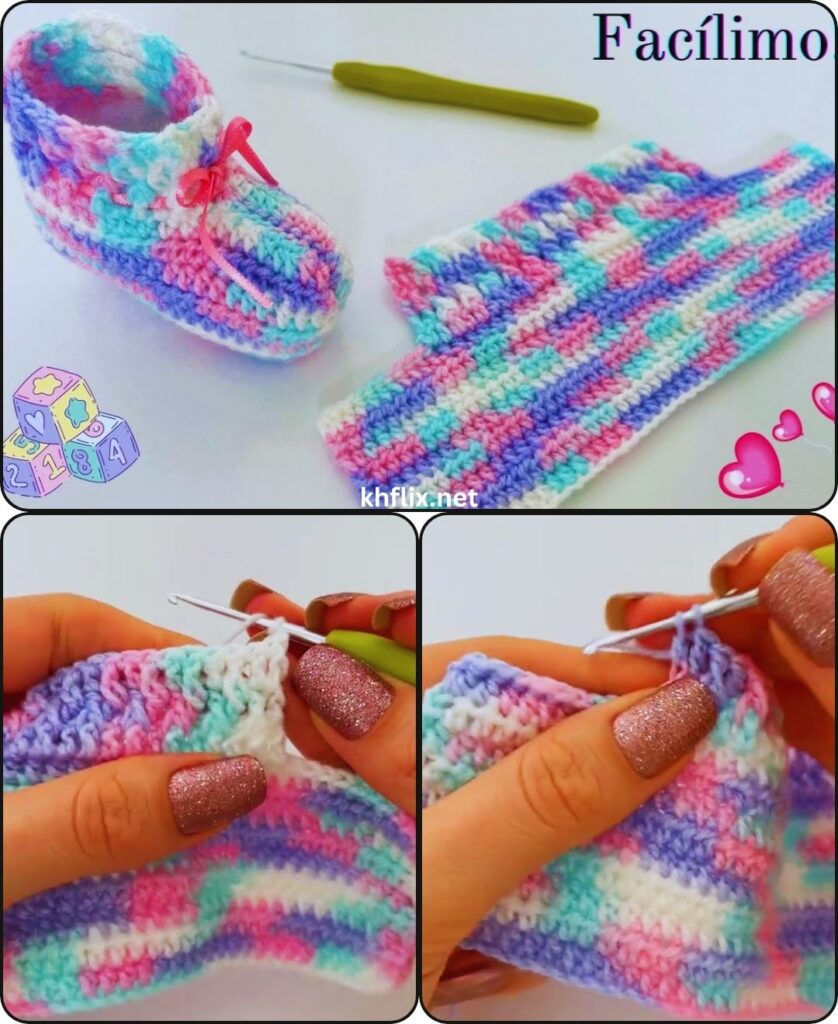
🧱 Step 3: Build the Side Walls
Now begin shaping the shoe.
Crochet one complete round using:
Single Crochet in the Back Loops Only
This creates:
- A decorative ridge
- Strong side walls
- A professional-looking finish
The shoe will naturally begin standing upright.
🌈 Step 4: Create the Striped Pattern
Now it’s time to add the colorful stripes.
Simple Stripe Method
- Crochet one full round using Color A.
- Join and fasten off.
- Attach Color B.
- Crochet one full round.
- Continue alternating colors every round.
For thinner stripes, change colors every round.
For wider stripes, crochet two rounds before switching colors.
Always finish the final stitch of the round with the new color to create clean, even stripes.
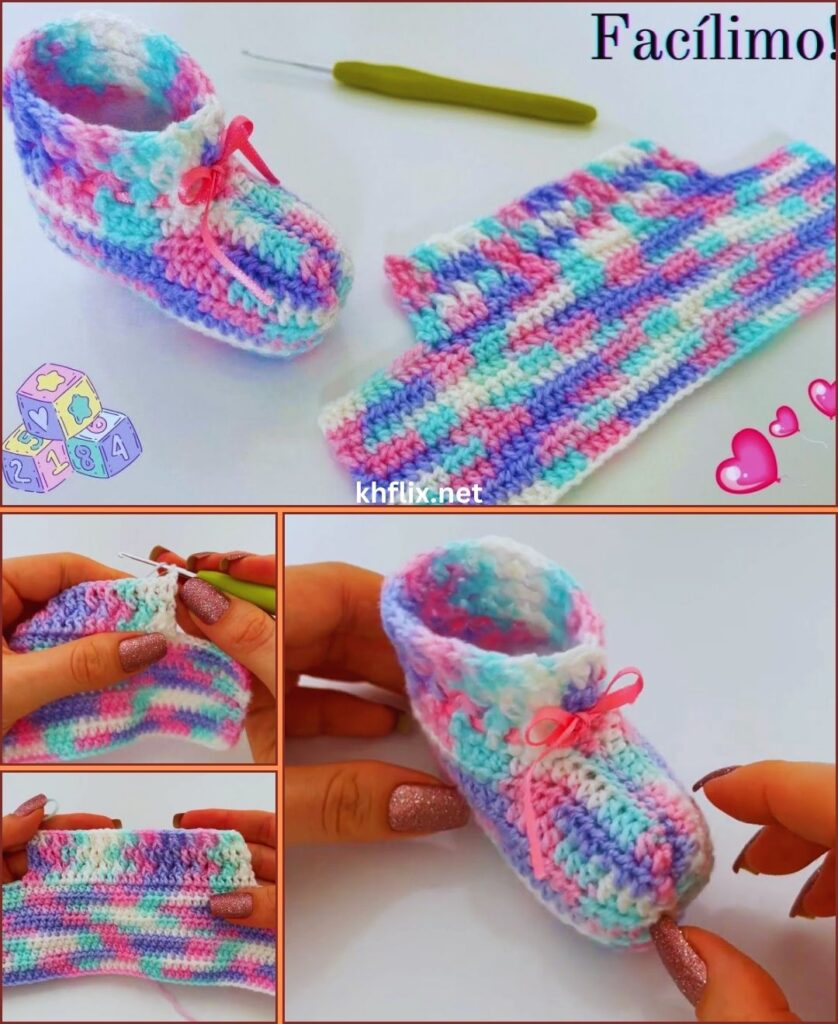
👶 Step 5: Crochet the Body
Continue crocheting one stitch into every stitch around.
Do not increase.
Maintain consistent tension while changing colors.
The shoe body should remain smooth and evenly shaped.
🔻 Step 6: Shape the Toe
To create the rounded front:
- Find the center front of the shoe.
- Crochet single crochet two together (sc2tog) across the toe section.
- Continue normally around the remaining stitches.
- Repeat another decrease round if needed.
The toe should become soft and rounded while maintaining the striped pattern.
🌸 Step 7: Finish the Top Edge
Complete the opening with a neat border.
Options include:
Simple Edge
One round of single crochet.
Decorative Edge
Alternate slip stitches and chain stitches for a subtle textured finish.
A clean edge gives the shoe a polished appearance.
🎀 Step 8: Optional Decorations
Enhance your striped baby shoes with simple embellishments.
Ideas include:
- Small crochet bow
- Tiny flower
- Decorative button
- Heart appliqué
- Star appliqué
- Crochet leaf
- Mini pom-pom
Use decorations sparingly to keep the shoes lightweight and comfortable.
🧵 Step 9: Finish Your Shoes
Complete the project by:
- Cutting the yarn.
- Pulling the yarn through the final loop.
- Weaving in all loose ends.
- Trimming excess yarn.
- Gently shaping both shoes.
Compare the shoes to ensure they match in size and stripe placement.
💡 Helpful Tips for Beginners
For the best results:
- Change colors at the end of each round.
- Keep your stitch tension even.
- Count stitches after every round.
- Crochet both shoes at the same time.
- Weave in yarn ends securely.
- Use soft baby-safe yarn.
These small details make your finished shoes look professional.
⚠️ Common Mistakes to Avoid
Uneven Stripes
Always change colors at the same point in each round.
Visible Color Jumps
Complete the final yarn-over of the last stitch with the new color before joining.
Shoes Become Different Sizes
Count your stitches carefully throughout the project.
Loose Yarn Ends
Securely weave in every color change to prevent unraveling.
🌈 Beautiful Striped Color Ideas
Try these fun combinations:
- 🤍 White + Sky Blue
- ❤️ Red + White
- 💛 Yellow + White
- 💗 Pink + White
- 💚 Mint + Cream
- 💙 Navy + White
- 🩶 Gray + White
- 🤎 Beige + Brown
You can also create rainbow stripes using several bright colors for a playful design.
🧼 Caring for Crochet Baby Shoes
To keep your handmade striped shoes looking beautiful:
- Hand wash gently using mild detergent.
- Use cool or lukewarm water.
- Do not wring or twist the fabric.
- Lay flat on a towel to dry.
- Store in a clean, dry place away from direct sunlight.
Proper care helps preserve both the shape and the vibrant striped colors.
👶 Final Thoughts
Learning how to make an easy step-by-step crochet shoe for baby with striped color is a wonderful way to improve your crochet skills while creating a fun, colorful, and practical handmade accessory. Using basic stitches and simple color changes, you can transform an ordinary baby shoe into a stylish striped design that stands out beautifully.
As you become more confident, experiment with different stripe widths, color combinations, textured stitches, or decorative trims to create your own unique style. Every pair you crochet will help you develop better technique while producing a handmade keepsake filled with creativity and love.
Whether you’re making them for your own baby, giving them as a thoughtful gift, or selling them as part of your crochet collection, these striped baby shoes are sure to bring smiles and keep little feet warm and comfortable.
Happy crocheting, and enjoy every colorful stitch as you create beautiful striped baby shoes by hand! 🌈🧶👶