 by
by Certainly! Here’s a long, detailed article that walks through a complete tutorial pattern for making beautiful crochet baby booties. This guide is beginner-friendly, with thorough explanations, stitch descriptions, and tips. You can use this for personal crafting, blogs, or instructional content.

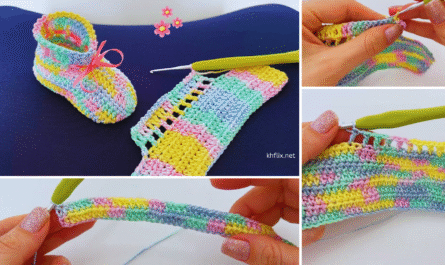
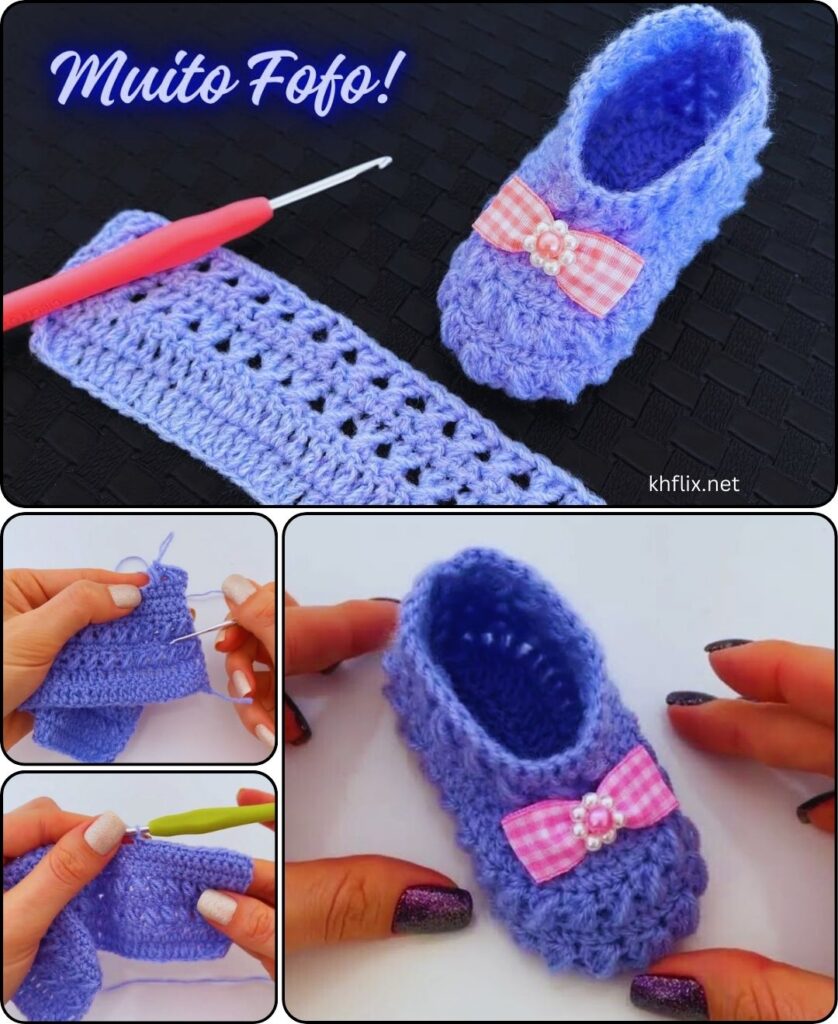
🧶 Complete Tutorial: How to Make Beautiful Crochet Baby Booties (Step-by-Step Pattern)
Baby booties are among the most adorable and cherished handmade gifts you can create for newborns. Soft, cozy, and full of charm, they’re also practical for keeping tiny feet warm. Whether you’re a beginner looking for your first baby project or an experienced crocheter in need of a quick gift idea, this step-by-step crochet baby booties pattern will help you make a gorgeous pair in just a few hours.
This tutorial includes everything from materials, sizing, and stitch explanations to detailed instructions and styling tips.
📏 Bootie Size Guide
The pattern below is for 0-3 months (approx. 3.5 to 4 inches or 9–10 cm long). You can adjust the size by changing your hook size or using a different yarn weight.
| Age | Sole Length | Hook Suggestion |
|---|---|---|
| 0-3 months | 3.5–4 inches | 4.0 mm (G) |
| 3-6 months | 4–4.5 inches | 4.5 mm (7) |
| 6-12 months | 4.5–5 inches | 5.0 mm (H) |
🧵 Materials Needed
To get started, gather the following supplies:
- Worsted weight yarn (medium #4) – Use soft, baby-safe yarn (cotton, acrylic, or blend).
- Crochet hook size 4.0 mm (G) – Adjust as needed for size or tension.
- Yarn needle – For weaving in ends.
- Scissors
- Stitch markers (optional) – Helpful for marking rounds.
- Decorative items (optional) – Buttons, bows, or small appliqués.
📘 Crochet Stitches Used (U.S. Terms)
Before you begin, make sure you are familiar with these basic stitches:
- ch (chain) – Yarn over, pull through loop.
- sl st (slip stitch) – Insert hook, yarn over, pull through all loops.
- sc (single crochet) – Insert hook, yarn over, pull through, yarn over, pull through both loops.
- hdc (half double crochet) – Yarn over, insert hook, yarn over, pull through all three loops.
- dc (double crochet) – Yarn over, insert hook, yarn over, pull through, yarn over, pull through two loops twice.
- sc2tog (single crochet two together) – A decrease stitch.
👣 Tutorial: How to Make Crochet Baby Booties
🔹 Part 1: Crochet the Sole
The sole is worked in the round using basic increases to shape the toe and heel.
- Ch 10 (foundation chain).
- Round 1:
- In 2nd ch from hook: 2 sc
- Sc in next 6 ch
- In last ch: 5 sc
- Continue on the opposite side: Sc in next 6
- 2 sc in last ch
- Join with a sl st (21 stitches total)
- Round 2:
- Ch 1
- 2 sc in first stitch, sc in next 6
- 2 sc in each of next 5 stitches (toe curve)
- Sc in next 6
- 2 sc in each of last 2 stitches
- Sl st to join (30 stitches)
- Round 3:
- Ch 1
- Sc in 7, 2 sc, 1 sc pattern across next 6 stitches (toe curve)
- Sc in 7, 2 sc in last 3
- Join with sl st (36 stitches total)
📌 Tip: Place a marker at the start of each round if you’re working in continuous rounds.
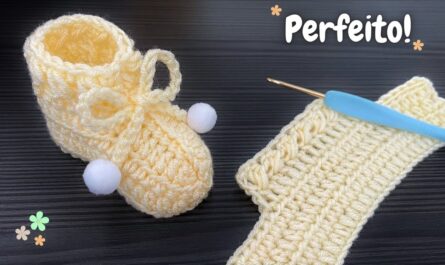
🔹 Part 2: Upper Bootie (Side Walls)
Now we build the sides of the bootie.
- Round 4 (Back Loops Only):
- Ch 1, sc in back loops only around
- Sl st to join (36 stitches)
- This creates a neat edge at the base of the bootie wall.
- Round 5:
- Ch 1, sc in each stitch around
- Sl st to join
- Round 6:
- Ch 1
- Sc in 12, sc2tog 6 times, sc in remaining stitches
- Join with sl st (reduces toe area)
- Round 7:
- Ch 1
- Sc in 10, sc2tog 5 times, sc in remaining
- Join with sl st
- Round 8:
- Sc in each stitch around (typically around 26-28 stitches now)
- Join with sl st
Now the bootie should resemble a little shoe with a rounded toe.
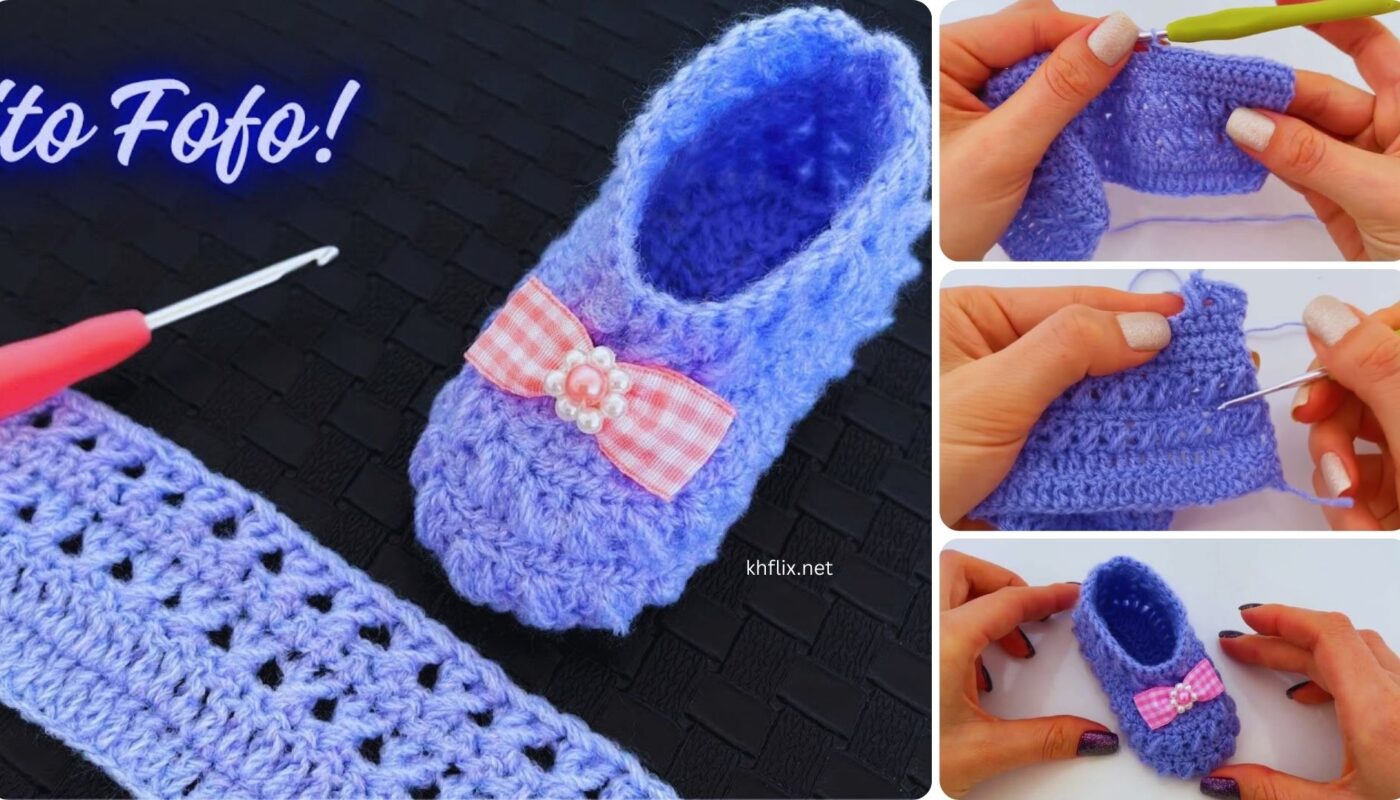
🔹 Part 3: Cuff or Ankle Strap (Customizable)
Choose from a few different finishing styles:
🧦 Option A: Simple Cuff
- Rounds 9-11:
- Ch 1, hdc in each stitch around
- Join each round with sl st
- Fasten off after desired cuff height
👡 Option B: Mary Jane Style with Strap
- After round 8, fasten off.
- Attach yarn at side of bootie.
- Ch 10 (or as needed), attach with sl st to opposite side.
- Sc back along the chain, fasten off.
- Add a decorative button to the side.

🌼 Option C: Ribbed Fold-Down Cuff
- Attach yarn to top edge, ch 1.
- Work 6 rows of sc in back loop only for a ribbed effect.
- Fold the top down to create a stylish cuff.
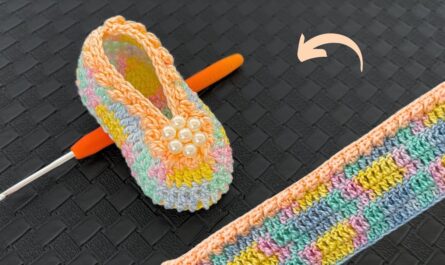
🎀 Finishing Touches
- Weave in all ends using a yarn needle.
- Block the booties gently with steam or by shaping them with tissue.
- Sew on buttons, bows, or appliqués for added flair.
- Make sure no small parts can be pulled off easily (baby safety!).
✅ Tips for Perfect Baby Booties
- Soft yarn is a must – Babies have sensitive skin.
- Keep your tension even – Especially around decreases.
- Stitch markers help – Marking toe decreases makes life easier.
- Make both booties the same day – To keep your gauge and memory consistent.
🌈 Optional Customizations
- Use two or three colors for stripes or ombre effects.
- Add a crocheted flower or bow to the toe.
- Make themed booties (bunny ears, bear faces, etc.)
- Use a sparkly yarn for festive occasions like birthdays or baby showers.
📸 Share Your Booties!
Once you’ve finished your baby booties, take a picture and share your creation! Handmade baby items are not only adorable, but also meaningful gifts that will be cherished for years.
🧶 Conclusion
Creating crochet baby booties is a joyful and rewarding project that brings warmth and love to tiny feet. This detailed tutorial helps you craft a pair that is not only functional but also beautifully made. With a little creativity, you can personalize the design and make booties for any occasion — from newborn hospital outfits to first birthdays.
Happy crocheting!