 by
by Absolutely! Below is a detailed, long-form article on how to make a beautiful crochet tote bag in yellow color. This project is perfect for spring or summer and is both stylish and functional. The tutorial walks you through everything from materials to finishing, with options to customize for your style.
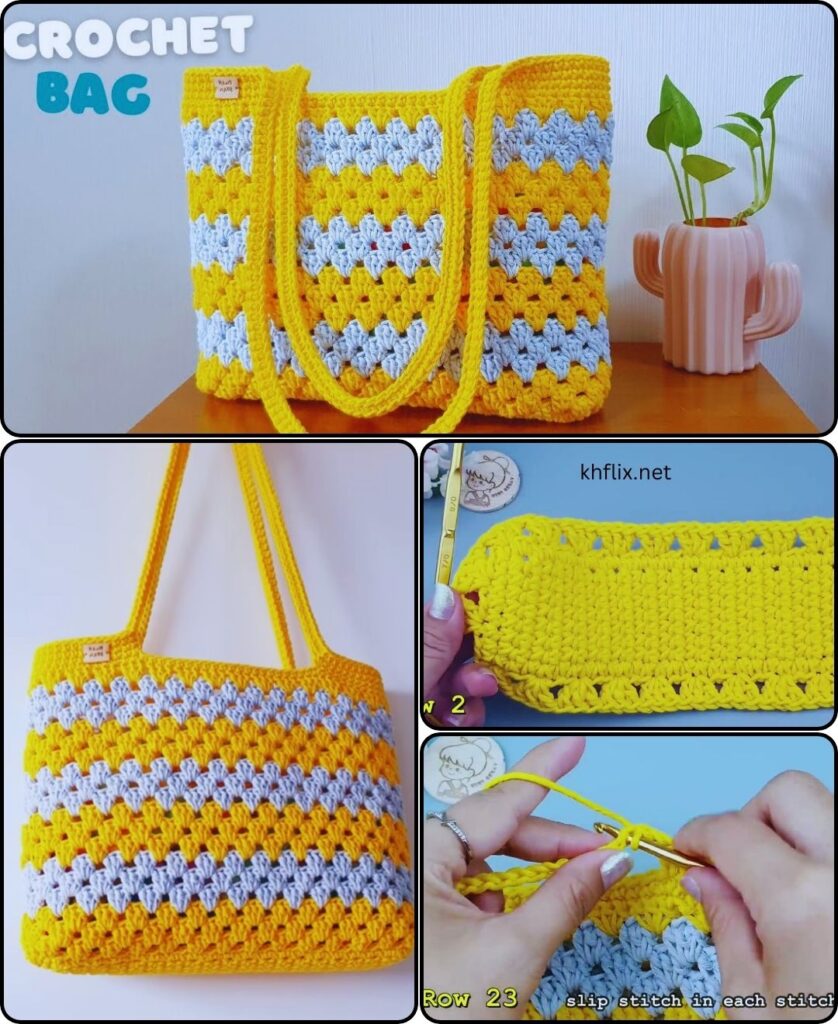
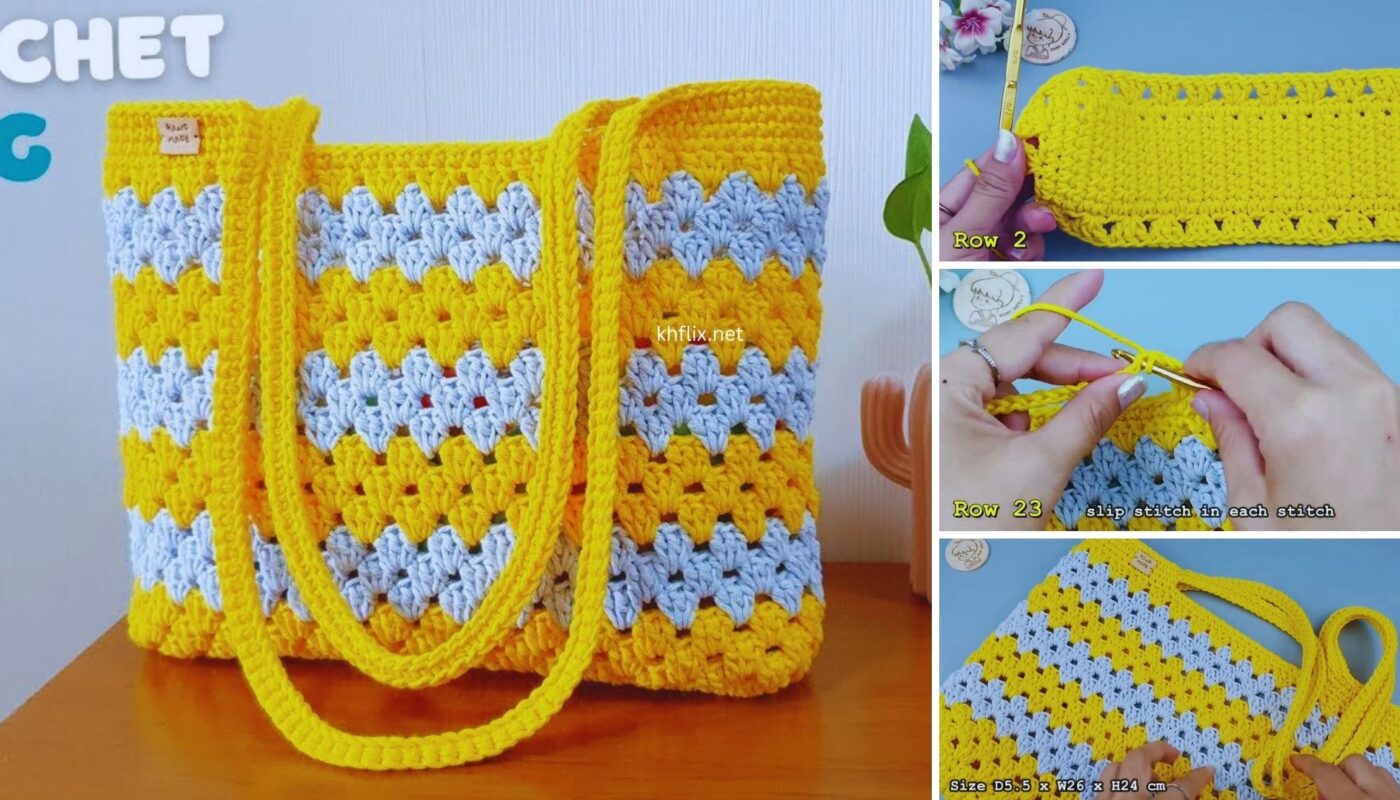
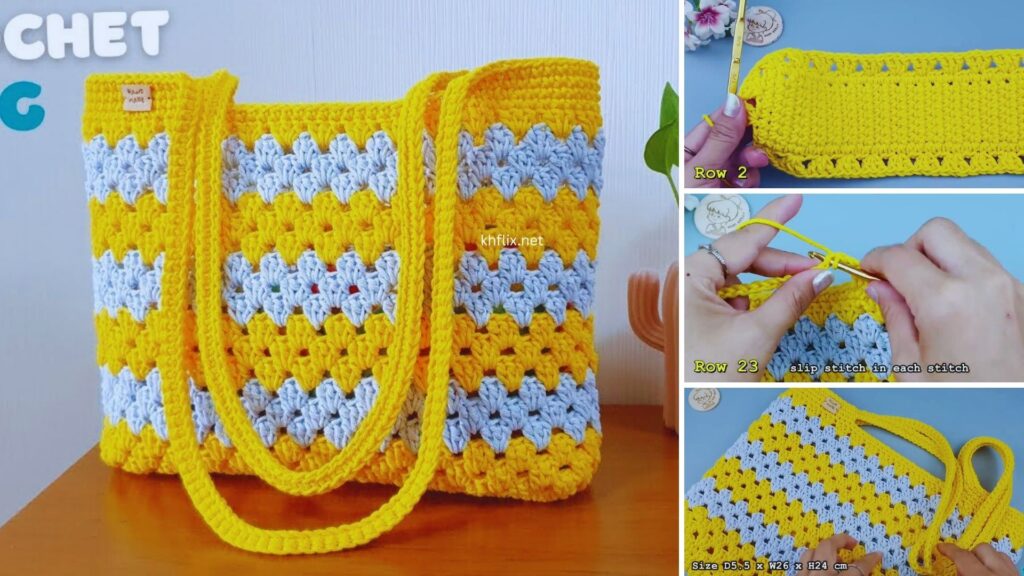
🧶 How to Make a Beautiful Crochet Tote Bag in Yellow Color (Step-by-Step Guide)
A crochet tote bag is the perfect combination of fashion and function — roomy enough to carry your essentials and stylish enough to elevate your outfit. Making one in vibrant yellow adds a cheerful pop of color that’s perfect for warm weather and bright days.
In this guide, you’ll learn how to make a handmade crochet tote bag in yellow, from choosing the right yarn and stitches to creating a durable, modern design.
🌼 Why Yellow?
Yellow symbolizes warmth, sunshine, energy, and optimism. A yellow tote bag is eye-catching, trendy, and brings joy to both the creator and the person who carries it. It pairs beautifully with neutral or white outfits and adds personality to your wardrobe.
📏 Size of the Bag
This tutorial will create a medium-sized tote bag:
- Width: ~14 inches (36 cm)
- Height: ~12 inches (30 cm)
- Strap length: ~22 inches (56 cm)
The size can easily be adjusted by changing the number of stitches or rows.
📋 Materials You’ll Need
- Yarn:
- 4 or 5 skeins of durable cotton yarn in yellow (worsted weight / category 4)
Recommended: Lily Sugar’n Cream, Paintbox Cotton Aran, or Premier Home Cotton
- 4 or 5 skeins of durable cotton yarn in yellow (worsted weight / category 4)
- Hook size: 4.5 mm or 5 mm (US size H-8)
- Yarn needle for weaving in ends
- Scissors
- Stitch markers (optional, for tracking rounds or handles)
- Lining fabric (optional but recommended for strength)
- Sewing needle and thread (for optional lining)
🧵 Stitch Knowledge You’ll Need
This pattern uses basic to intermediate crochet stitches:
- Chain (ch)
- Single Crochet (sc)
- Double Crochet (dc)
- Slip Stitch (sl st)
- Half Double Crochet (hdc)
- Back Loop Only (blo)
- Optional: Puff or Shell stitch for design accents

✨ Pattern Overview
We’ll crochet the bag from the bottom up:
- Base (oval or rectangular)
- Body of the tote (rows or rounds)
- Straps
- Finishing and optional lining
🪡 Step-by-Step Instructions
🧱 STEP 1: Crochet the Bag Base
Option A: Oval Base (Worked in the round)
- Ch 25 (This will determine the length of your base)
- Round 1: Sc in 2nd ch from hook, sc in next 22 sts, 3 sc in last st. Rotate and continue on the opposite side of the chain: sc in next 22 sts, 2 sc in last ch. Sl st to join.
- Round 2: Ch 1, sc in each st around, placing 2 sc in each of the 3 corner stitches from the previous round. Sl st to join.
- Round 3–6: Continue in the round, increasing at corners to shape the base into a flat oval. You should end up with about 80–90 sts around.
TIP: Use stitch markers to mark increases if needed.
🧺 STEP 2: Build the Body of the Tote
Switch to working in rounds with no increases.
- Round 7: Ch 1, sc in back loops only (BLO) around. This gives the base a defined edge.
- Rounds 8–35 (or until desired height):
Work in rounds of hdc or dc to build the sides of the bag.
You can add texture or pattern with optional stitches:
- Every 4 rows, switch to a puff stitch row for texture.
- Alternate dc and sc rows for a woven look.
Color Variation Tip:
If you want subtle contrast, use a second shade of yellow (e.g., mustard or lemon) every 6 rows.
🎒 STEP 3: Add the Bag Handles
You’ll crochet these directly into the top of the bag.
- Determine handle placement:
Flatten the bag and place stitch markers about 3 inches in from each side. - Handle Row (Row 36):
Sc in each st around, but when you reach the marker:- Ch 50 (or more for longer straps), skip 10–12 sts, and continue sc on the other side.
- Repeat for second handle.
- Row 37:
Sc in each stitch and across each handle chain. This strengthens the straps. - Row 38–39 (optional):
Repeat for thicker handles and a sturdier top edge.
🪡 STEP 4: Finishing Touches
Weaving in Ends
Use a yarn needle to carefully weave in all yarn tails to the inside of the bag.
Optional: Add a Lining
Lining your bag helps it keep shape and prevents stretching.
- Cut a rectangle of fabric slightly larger than the bag.
- Sew the sides with a straight stitch (wrong sides together).
- Insert into the bag, fold edges over, and sew to the inner top using hand-stitching.
Optional: Add Embellishments
- Crochet a flower or sun applique to sew onto the bag.
- Add a wooden button or snap to close the top.
- Add a tassel or charm in a matching or contrasting color.
🧽 Care Instructions
Because this is a cotton bag:
- Hand wash or use delicate machine cycle
- Dry flat to maintain shape
- Avoid heavy stretching or overloading
🎁 Styling Ideas
- Pair your yellow tote bag with white or denim outfits for a fresh summer look.
- Use it as a market bag, beach bag, or book bag.
- Make matching accessories (like a yellow crochet wallet or keychain).
- Gift it with a bouquet of flowers or a bottle of lemonade for a themed present!
💡 Customization Ideas
- Use granny squares for a patchwork-style bag
- Add pockets inside or out using leftover yarn
- Crochet a drawstring lining for added security
- Try a macramé-style strap with braided yarn
🧵 Summary
| Step | Task |
|---|---|
| 1 | Crochet the base (oval or rectangle) |
| 2 | Build the body using hdc or dc |
| 3 | Add handles with chained straps |
| 4 | Finish with optional lining or decoration |
🌟 Final Thoughts
A handmade yellow crochet tote bag is more than just a functional accessory — it’s a joyful expression of your creativity. Whether you keep it for yourself or give it as a gift, each stitch you make is part of a story you’re crafting. With endless ways to personalize and play with design, this project is sure to bring sunshine wherever it goes.