by
by Certainly! Below is a long, detailed article on how to make a beautiful crochet baby cardigan and hat using five colors. It covers every step from planning, material selection, construction, color coordination, and finishing. This is ideal for intermediate-level crocheters or confident beginners looking to challenge themselves.
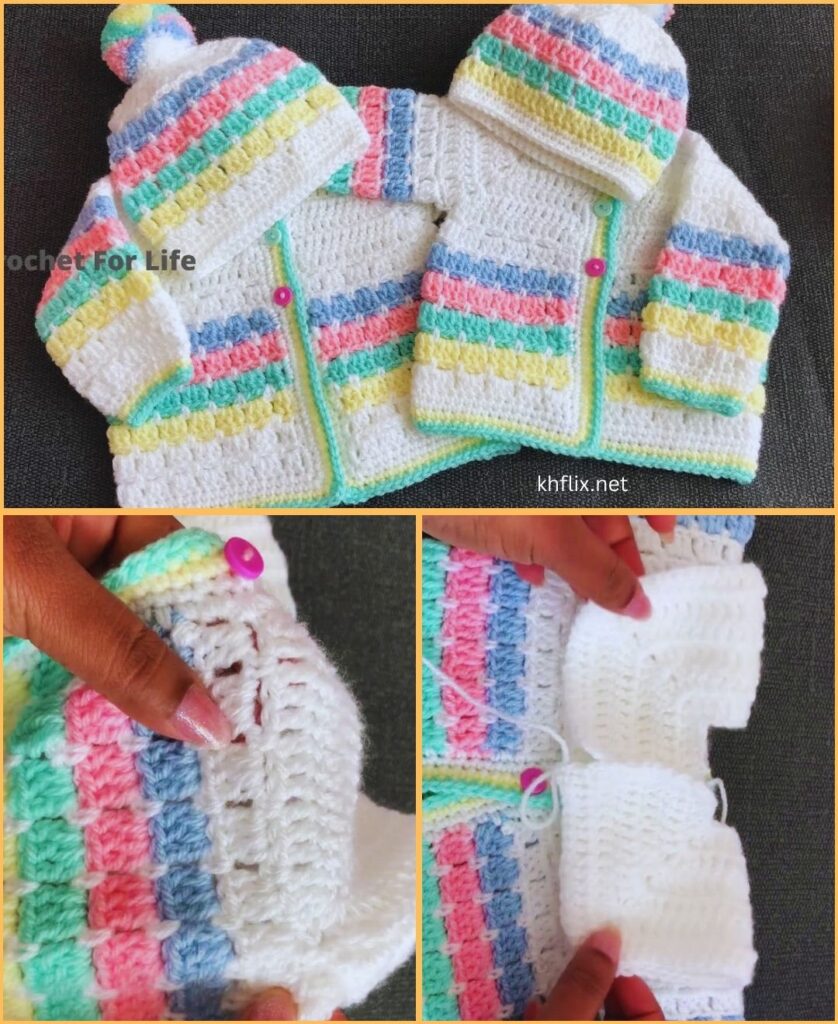
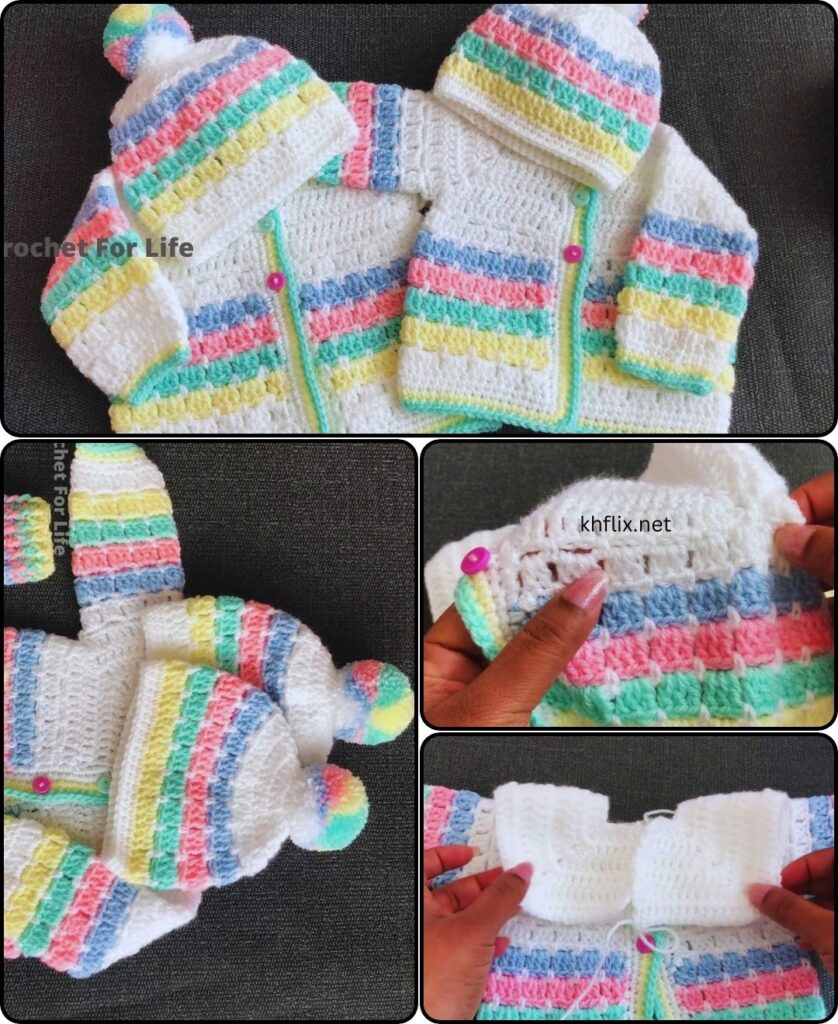
🧶 How to Make a Beautiful Crochet Baby Cardigan and Hat Using Five Colors
Creating a handmade baby cardigan and hat is a heartfelt project filled with creativity and love. When you use five different yarn colors, the possibilities for a beautiful, playful design expand even more. This long guide will walk you through every stage of making a stunning crochet baby cardigan and hat using five coordinated colors.
🪡 Why Crochet with Five Colors?
Color adds charm, character, and contrast to your work. Using five different colors allows you to:
- Create striking stripe patterns
- Highlight design elements like cuffs, hems, and collars
- Give the final piece a vibrant, cheerful appearance
- Make a gender-neutral or theme-specific gift (e.g., pastel rainbow, forest tones, candy brights)
📏 Sizing Information
This pattern will be for 0–6 months. Sizing adjustments will be noted if you wish to scale up or down.
📋 Materials List
- Yarn (DK/Light worsted weight recommended):
- Color A – Main body color
- Color B – Sleeves
- Color C – Borders (ribs, collar, and hem)
- Color D – Decorative stripe or detail
- Color E – Accent (flower, pom-pom, or hat topper)
- Crochet hook: 4.0 mm (G-6)
- Stitch markers
- Scissors
- Yarn needle
- Buttons – 3 to 5 small buttons for cardigan
- Measuring tape
Recommended Yarns:
Choose soft, baby-friendly yarns like:
- Bernat Softee Baby
- Paintbox Baby DK
- Stylecraft Special DK
- Lion Brand Baby Soft
🔤 Basic Stitches Used
- Ch – Chain
- Sl st – Slip Stitch
- Sc – Single Crochet
- Hdc – Half Double Crochet
- Dc – Double Crochet
- Fpdc / Bpdc – Front / Back Post Double Crochet (for ribbing)
- Inc – Increase (2 dc in same st)
- Dec – Decrease (dc2tog)
🧥 Part 1: Crochet Baby Cardigan
We will use the top-down raglan method, which is seamless and allows you to try on as you go (or measure easily).
Step 1: Planning Your Color Scheme
You have five colors. Here’s a simple way to organize them:
- Color A: Body of the cardigan
- Color B: Sleeves
- Color C: Hems, collar, button band
- Color D: Stripes through the body and sleeves
- Color E: Optional – edging, small motif, or contrast button border
Step 2: Creating the Yoke (Top-Down)
Using Color A:
- Foundation Chain: Ch 52
- Row 1: Dc in 4th ch from hook and in each across (49 dc)
- Row 2: Ch 2 (counts as dc), dc in next 7, (dc, ch 1, dc) in next repeat 3 more times for the four raglan increases (shoulders). Continue across row with dc.
Use stitch markers at the ch-1 spaces – these are your raglan points.
- Rows 3–8: Continue working in dc, placing (dc, ch 1, dc) into each ch-1 space to expand the yoke. Each row should increase the stitch count evenly across body and sleeves.
At the end of this stage, the yoke should form a rectangular shape with corners.
Step 3: Splitting for Sleeves
Once your yoke is wide enough:
- Divide into front left, sleeve, back, sleeve, front right.
- Join underarm by chaining 6 (for 0–6 months), skip over sleeve stitches.
- Continue working in rows along the body only.
Step 4: Body of the Cardigan
Switch to Color A, and:
- Continue with dc rows down the body.
- After every 4 rows, insert a 2-row stripe using Color D.
- Repeat stripe pattern 2 or 3 times depending on desired length.
Finish the body with 3–4 rows of fpdc/bpdc ribbing using Color C.
Step 5: Sleeves
Using Color B:
- Attach yarn at underarm gap.
- Work in rounds using dc, decreasing 1 stitch every 4 rows.
- Add a stripe with Color D midway (optional).
- End sleeve with 3 rows of ribbing using Color C.
Repeat for the second sleeve.
Step 6: Collar and Button Band
Use Color C for edging.
Button Band:
- Work sc rows up and down the front edges.
- On the right side, create buttonholes: ch 2, skip 2 stitches evenly spaced.
- Do 3–5 rows for a neat edge.
Collar:
- Work around neckline using sc for 1 row.
- Then work 2 rows of hdc, slightly increasing at the back neck for a rounded collar.
🎩 Part 2: Crochet Baby Hat
We’ll now use matching or complementary colors from the cardigan.
Step 1: Hat Crown
Start with Color B:
- Magic Ring, ch 2
- R1: 10 dc into ring (sl st to join)
- R2: 2 dc in each st (20)
- R3: dc in 1, 2 dc in next around (30)
- R4: dc in 2, 2 dc in next around (40)
- R5: dc in 3, 2 dc in next around (50)
Continue increasing until you reach the desired crown size (~13–15 cm for 0–6 months)
Step 2: Hat Body
Switch to Color A for variety:
- Dc in each stitch around for 6–8 rows.
- Add a stripe in Color D across 2 rows for a design element.
Step 3: Ribbing
Using Color C, work 3 rows in fpdc/bpdc to create stretchy, cozy ribbing around the edge.
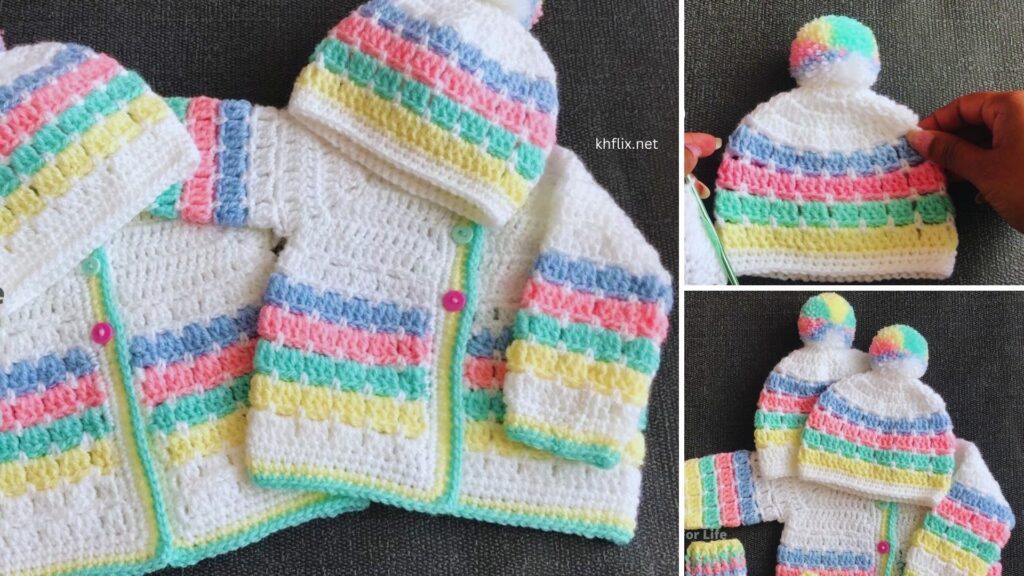
Step 4: Finishing Touch (Optional)
- Make a pom-pom in Color E and sew securely to the top.
- Alternatively, crochet a flower or star motif in Color E and stitch it to the side of the hat.
🎀 Final Touches
- Weave in all ends securely using a yarn needle.
- Block lightly (use steam blocking if using acrylic yarn) to shape the cardigan and hat properly.
- Sew on buttons.
- Add a gift tag or handmade label for a professional finish.
💡 Tips and Customization
- Adjust size by increasing foundation chain and raglan rows.
- Use bobble stitches or popcorn stitches in stripes for texture.
- Add pockets in Color D for function and decoration.
- Change yarn types for summer or winter wear (cotton vs. wool blend).
- Use gradient yarns or variegated yarns as one of your five colors for extra flair.
🎁 Wrapping It Up
This crochet baby cardigan and hat set using five beautiful colors makes for a thoughtful and treasured handmade gift. Whether you’re making it for a baby shower, holiday, or your own child, the mix of colors brings personality and warmth to your creation. With care and attention, it becomes not just clothing—but a keepsake.