 by
by Let’s crochet a stunning large rose flower! This project is perfect for those who want to create a more impactful floral piece, whether for embellishing a blanket, decorating a cushion, or as a beautiful centerpiece. While it uses the same basic principles as a smaller rose, we’ll adjust the starting chain and stitch counts to achieve a grander, more voluminous bloom.
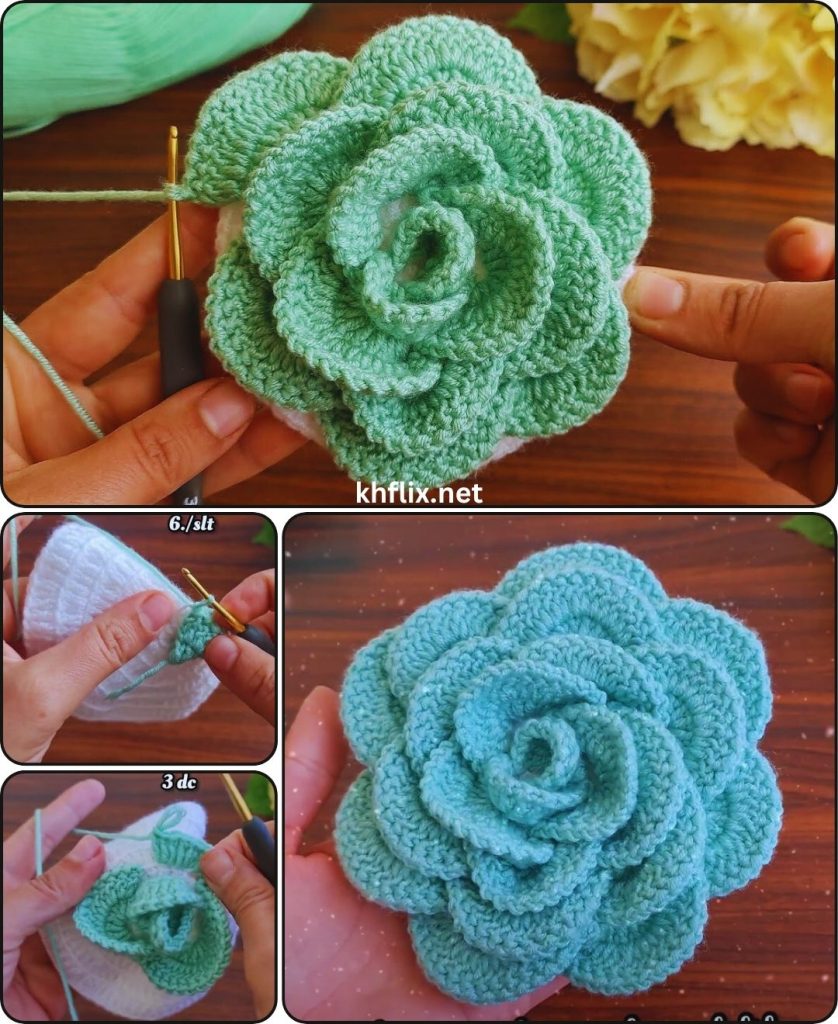
How to Crochet a Large Rose Flower (Step-by-Step Tutorial)
This detailed guide will walk you through making an impressive, full-bodied rose. We’ll focus on creating a longer, wider strip that, when rolled, forms abundant, realistic petals.
Skill Level: Advanced Beginner / Intermediate
This project is ideal if you’re comfortable with:
- Chain (ch): The basic foundation stitch.
- Slip Stitch (sl st): For neatening.
- Single Crochet (sc): A dense stitch.
- Half Double Crochet (hdc): A slightly taller stitch.
- Double Crochet (dc): A common, taller stitch.
- Triple/Treble Crochet (tr): A taller stitch, used for larger petals.
- Fastening off: Securing your work.
- Weaving in ends: The essential finishing touch.
Finished Large Rose Dimensions (Approximate):
Using worsted weight yarn and the suggested hook, your finished large rose will typically measure around 4-6 inches (10-15 cm) in diameter, depending on your tension and how tightly you roll it. This size is substantial enough to make a statement.
Materials You’ll Need:
Gathering your materials beforehand makes for a smoother crocheting experience.
- Yarn: Approximately 30-50 yards (27-46 meters) of Worsted Weight (Medium #4) Yarn.
- Choose a classic rose color like red, deep pink, cream, or even a variegated yarn for a unique, natural look.
- Crochet Hook: Size I/5.5mm or J/6.0mm. A slightly larger hook than typically used for worsted weight can create a softer, more flexible fabric, which is ideal for rolling a larger rose.
- Yarn Needle (Tapestry Needle): Essential for seamlessly weaving in your loose yarn tails and for securing the rolled rose. It has a blunt tip and a large eye.
- Scissors: Any sharp pair of scissors.
Understanding the Large Rose Construction: The Expanded Spiral Method
Similar to smaller crocheted roses, this large version is created by crocheting a long, flat, and subtly curved strip of fabric. The key differences for a larger rose are:
- Longer Starting Chain: This creates more “petal material.”
- More Stitch Variation: Using a greater range of stitches (including taller ones like triple crochet) helps create a more dramatic curve and varied petal heights, contributing to the voluminous 3D effect.
This elongated strip is then rolled up from one end to form the layered, full petals of the rose. Several strong stitches with a yarn needle at the bottom will firmly secure its shape.
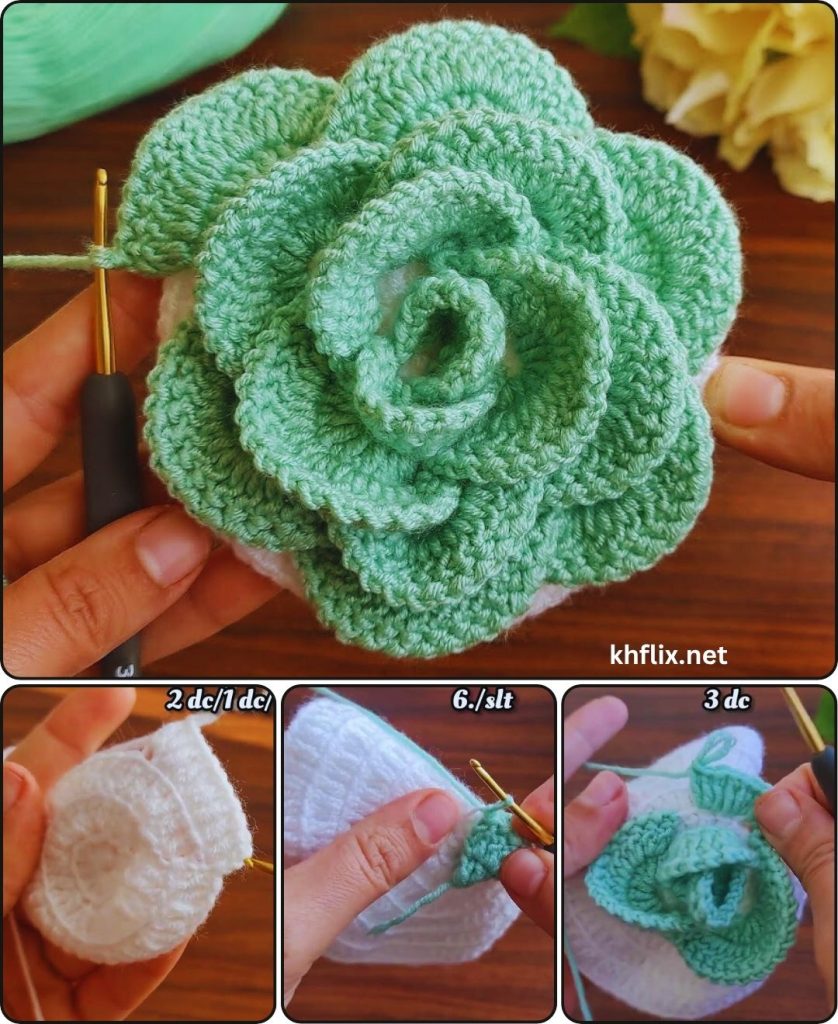
Let’s Crochet Your Large Rose Flower!
Follow these steps carefully. The key to a beautiful large rose is maintaining consistent tension, paying attention to the stitch height progression, and learning how to properly roll and secure the final piece.
Part 1: Crocheting the Rose Strip
This is the main, elongated piece that will become your large rose. We’ll use a mix of gradually increasing stitch heights to create the natural curve and varying petal sizes.
- Starting Chain:
- Begin by making a slip knot with your yarn and placing it onto your chosen hook (I/5.5mm or J/6.0mm).
- Chain (ch) 41. (This chain length is crucial for the size of your large rose. A longer chain will create an even larger rose with more petals, while a shorter chain will yield a smaller one. For your first large rose, sticking to 41 is a good starting point.)
- Row 1 (Working back down the chain – creating the petal curve):
- Work 1 single crochet (sc) into the 2nd chain from your hook.
- Work 1 sc into the next 2 chains (total 3 sc).
- Work 1 half double crochet (hdc) into the next 3 chains (total 3 hdc).
- Work 1 double crochet (dc) into the next 3 chains (total 3 dc).
- Work 1 triple/treble crochet (tr) into the next 3 chains (total 3 tr).
- Continue working 1 double crochet (dc) into each of the remaining 28 chains across the row. You should end the row with a double crochet stitch.
- Summary of stitches: sc in 2nd ch, sc in next 2 ch (3 sc total). Hdc in next 3 ch (3 hdc total). Dc in next 3 ch (3 dc total). Tr in next 3 ch (3 tr total). Dc in remaining 28 ch (28 dc total).
- You should have a total of 40 stitches across the row. This graduating sequence of stitches (sc to hdc to dc to tr and back to dc) creates the natural curve needed for the spiral.
- Fasten Off:
- After completing your last stitch, cut your yarn, leaving a very long tail (at least 20-25 inches / 50-63 cm long). This tail is absolutely crucial for shaping and securely fastening your rose.
- Yarn over with your hook, pull the cut tail completely through the loop left on your hook, and gently tug to secure the knot.
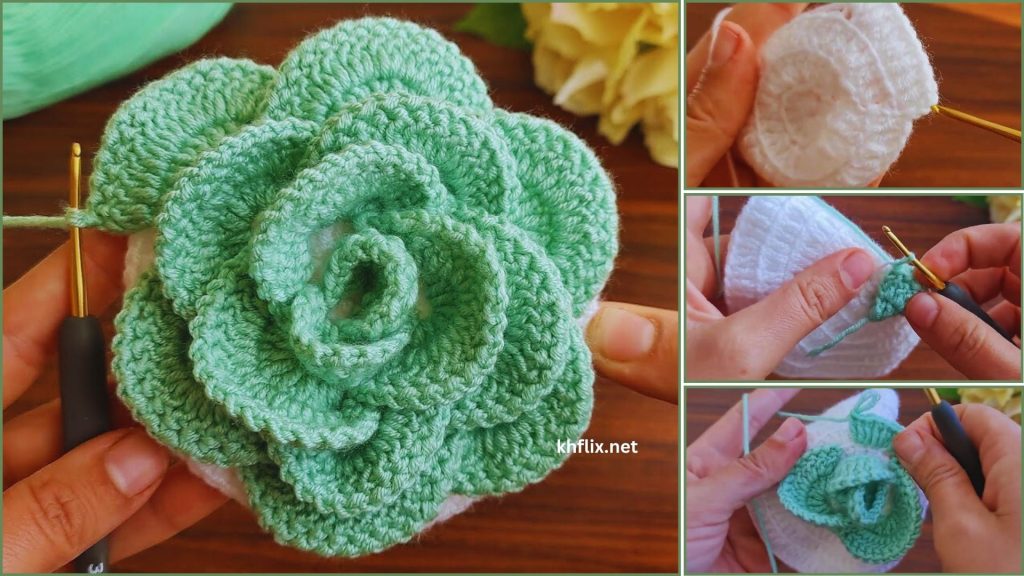
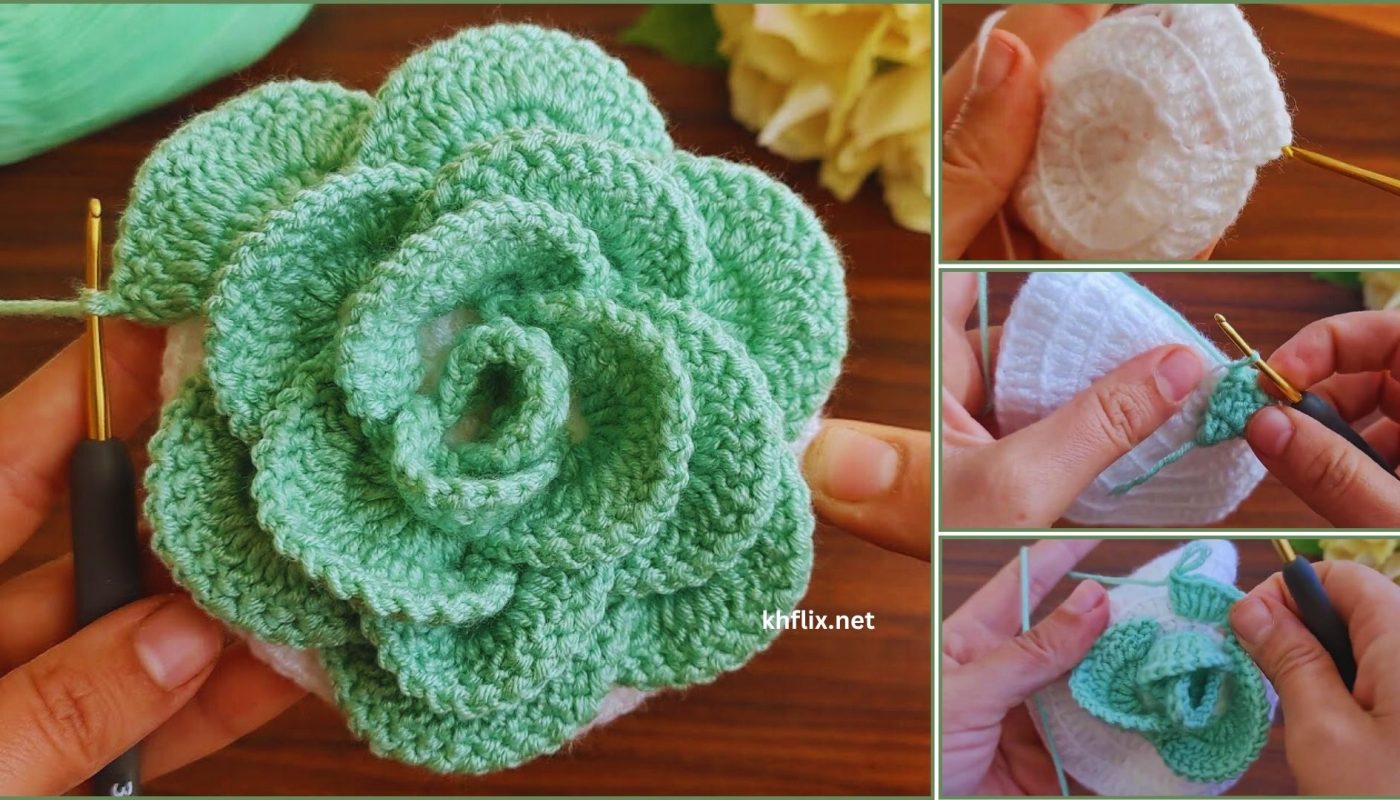
Part 2: Shaping and Securing Your Rose
This is the magical part where your flat, elongated strip transforms into a beautiful, volumetric 3D rose!
- Start Rolling:
- Hold the end of your strip that began with the single crochet (sc) stitches. This will be the tighter, smaller center of your rose bud.
- Begin to gently roll this end tightly inward, creating the very core of the rose.
- Continue to roll the strip around this center. As you roll, let the fabric naturally spiral, allowing the taller stitches (hdc, dc, tr) to form the gradually larger and fuller outer petals. Don’t roll it too tightly; allow for some natural expansion to achieve a soft, realistic bloom.
- Securing the Shape:
- Once you’ve rolled the entire strip, hold the base of the rolled flower very firmly with one hand to prevent it from unraveling.
- Thread the long yarn tail you left from fastening off onto your yarn needle.
- You will now stitch through all layers of the rolled rose at its base (the very bottom of the flower).
- Make several strong stitches, going back and forth and in different directions across the base, securing all the layers together. Imagine you’re making a few strong “X” shapes or a sturdy grid across the bottom to really hold it. Aim for stability, as this is a larger piece.
- Ensure your stitches are pulling the layers together tightly enough that the rose holds its shape well, but not so tightly that it looks squished or distorted from the top.
- Once secure, make a final small, tight knot at the base. Then, weave in any remaining tail into the rose’s base stitches to hide it completely and securely. Trim any excess.
Part 3: Final Finishing Touches
- Weave in Starting Tail:
- You will have a short tail from your initial slip knot. Thread this tail onto your yarn needle.
- Carefully weave this tail into the very center stitches on the back of your rose, ensuring it’s secure and invisible from the front. Trim any excess.
- Fluff and Shape (Optional but Recommended):
- Gently use your fingers to fluff and arrange the petals. You can slightly pull out some petals to make them more prominent or gently push others in to create a natural, organic look. This adds to the 3D effect and makes your rose truly unique.
- Blocking (Optional):
- While not always necessary for a rolled flower, a very light misting with water can help the yarn settle and the stitches even out. Do not pin, as you want to maintain the rolled dimension. Just mist and allow to air dry completely.
Congratulations! You’ve successfully crocheted a beautiful and impressive large rose flower! This project is a fantastic way to develop your skills in creating dimensional crochet pieces. What stunning project will you adorn with your magnificent new rose?