by
by Crochet lace doilies are a timeless and elegant project that showcases the beauty and intricacy of the craft. They are often considered a hallmark of a skilled crocheter, but with the right guidance, they are a completely achievable project for a confident beginner. This tutorial will walk you through a classic doily pattern, breaking down the steps and techniques to help you master the art of creating beautiful, lacy fabric.
The Foundation of a Doily: Essential Skills
Before you begin, ensure you’re comfortable with these fundamental crochet techniques. The key to a beautiful doily is consistent tension and neat stitches.
- Magic Ring (MR): The best way to start a doily to ensure there is no hole in the center.
- Chain (ch): The basis of all stitches and the key to creating open spaces in lace.
- Slip Stitch (sl st): Used for joining rounds invisibly.
- Single Crochet (sc): A sturdy stitch often used to build a foundation for taller stitches.
- Double Crochet (dc): The workhorse stitch of many lace patterns.
- Treble Crochet (tr): A taller stitch that creates a more open, airy look.
- Picot Stitch: A decorative stitch that adds a delicate, pointed edge.
Materials You’ll Need
- Yarn: Use size 10 crochet thread (sometimes called lace weight). It’s thin and lightweight, perfect for creating delicate lace. A solid color will best showcase the intricate stitch pattern.
- Crochet Hook: A steel hook in size 1.5 mm or 1.75 mm. A smaller hook is crucial for getting the right gauge and a stiff, elegant fabric.
- Tapestry Needle: For weaving in the starting and finishing ends.
- Scissors: For cutting yarn.
- Blocking Supplies: A foam mat, rust-proof T-pins, and a spray bottle for wet blocking. This final step is essential for shaping and defining your doily.
🧶 Essential Stitches and Techniques
To master elegant lace, you’ll need to be comfortable with these:
Basic Stitches (Foundation)
- Chain (ch) – forms the skeleton of lace
- Slip Stitch (sl st) – for joining or moving between motifs
- Single Crochet (sc) – provides structure
- Double Crochet (dc) – common in lacy fans and shells
- Treble Crochet (tr) – for long, flowing lace elements
Decorative Stitches (Lace Essentials)
- Picot – small loops, often used on edges
- Shell Stitch – multiple stitches into one space, creates wave-like fans
- V-Stitch – dc, ch 1, dc in the same stitch
- Mesh Stitch – alternating dc and ch-1 or ch-2 spaces
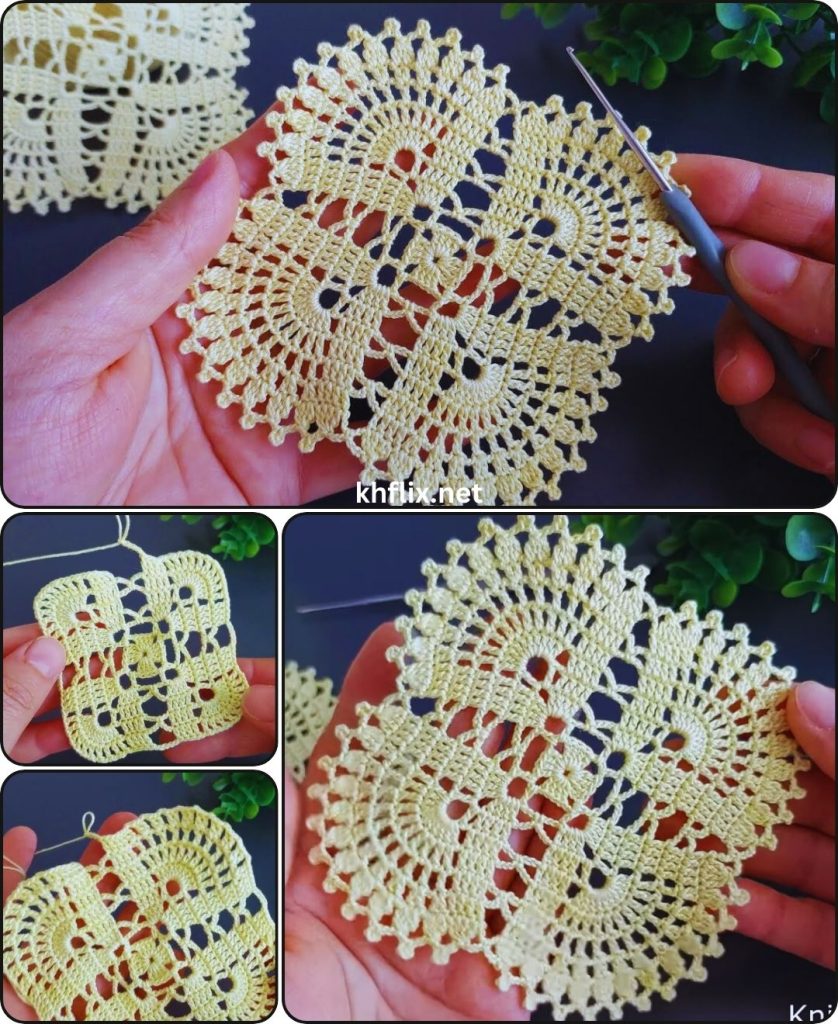
- Pineapple Stitch – classic lace motif often seen in vintage patterns
📘 Step-by-Step: How to Crochet Elegant Lace
✨ Step 1: Choose the Right Pattern
Start with a simple lace scarf, doily, or rectangular wrap. Look for beginner lace patterns with repeating motifs or simple charts.
Popular beginner lace projects:
- Lace bookmark
- Pineapple motif coaster
- V-stitch scarf
- Lacy shawl
Tip: Diagrams (chart patterns) are common in lace crochet and often easier to follow than written instructions once you’re familiar.
✨ Step 2: Select Yarn and Hook
For traditional lace:
- Use #10 cotton thread with a 1.5 mm steel hook.
For modern lace garments:
- Use lace-weight or fingering yarn (wool, silk, bamboo) with a 2.5–3.5 mm hook.
✅ Choose lighter yarns and smaller hooks to maintain elegance and airiness.
✨ Step 3: Practice Stitch Control
Lace crochet demands:
- Consistent tension: Tight tension distorts motifs; too loose and lace looks messy.
- Even chains and loops: Lace depends heavily on neat chain spaces.
🧘 Practice short rows of chain + dc mesh or V-stitches to get a feel for flow and spacing.
✨ Step 4: Learn to Read Lace Charts
Most lace patterns are charted with symbols. Here’s a quick guide:
| Symbol | Meaning |
|---|---|
| ● | Chain (ch) |
| X or + | Single Crochet (sc) |
| T | Double Crochet (dc) |
| ⊥ or ┼ | Treble (tr) |
| ∨ | V-Stitch |
Start with symmetrical motifs like mandalas, pineapples, and squares.
✨ Step 5: Use Stitch Markers
Mark important pattern repeats or corners of motifs to avoid losing your place — especially in large shawls or doilies.
✨ Step 6: Master Blocking
Blocking is essential to transform crumpled lace into open, elegant fabric.
How to block:
- Soak or mist your finished lace piece with water.
- Pin it out to shape on a foam mat or towel.
- Let it dry completely.
🔥 Steam blocking can also be used for natural fibers like wool or cotton — but avoid acrylic (it may “kill” the fibers).
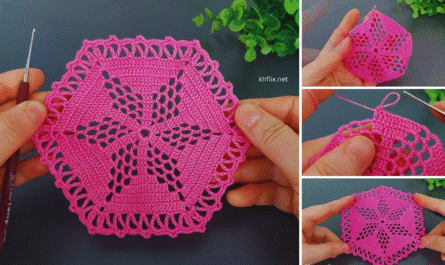
✨ Step 7: Try Joining Lace Motifs
Once you’re comfortable with individual motifs, try projects that use multiple motifs joined together, like:
- Lacy square handbags
- Motif shawls
- Lace panels in clothing
Join-as-you-go methods keep seams invisible and elegant.

🪡 Tips for Perfecting Your Lace Work
- Work in good lighting – fine threads can be hard to see.
- Use a stitch counter or notebook – helps for repeating motifs or rows.
- Check gauge with swatches – especially important in fitted lace garments.
- Take breaks – lace can be delicate on the hands and eyes.
- Don’t rush – elegance takes time and care.
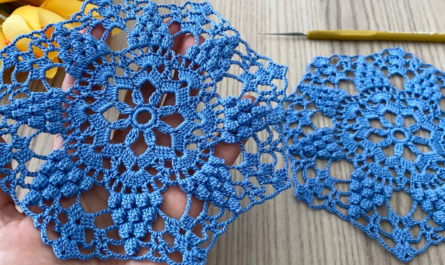
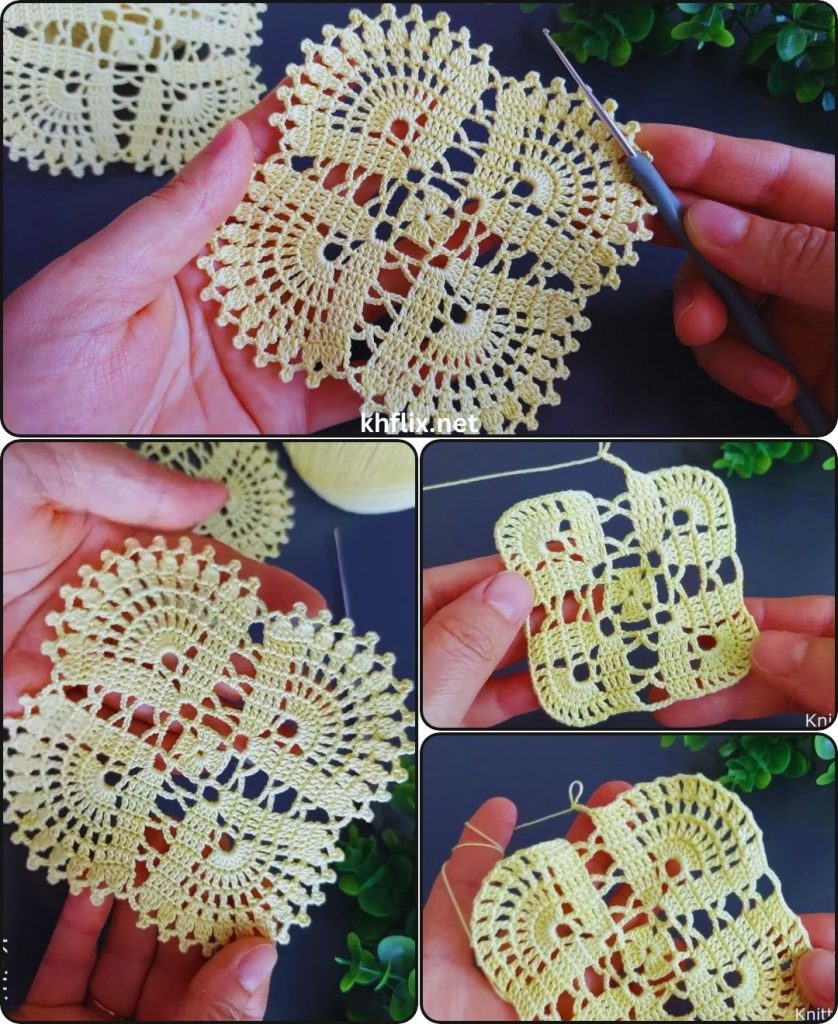
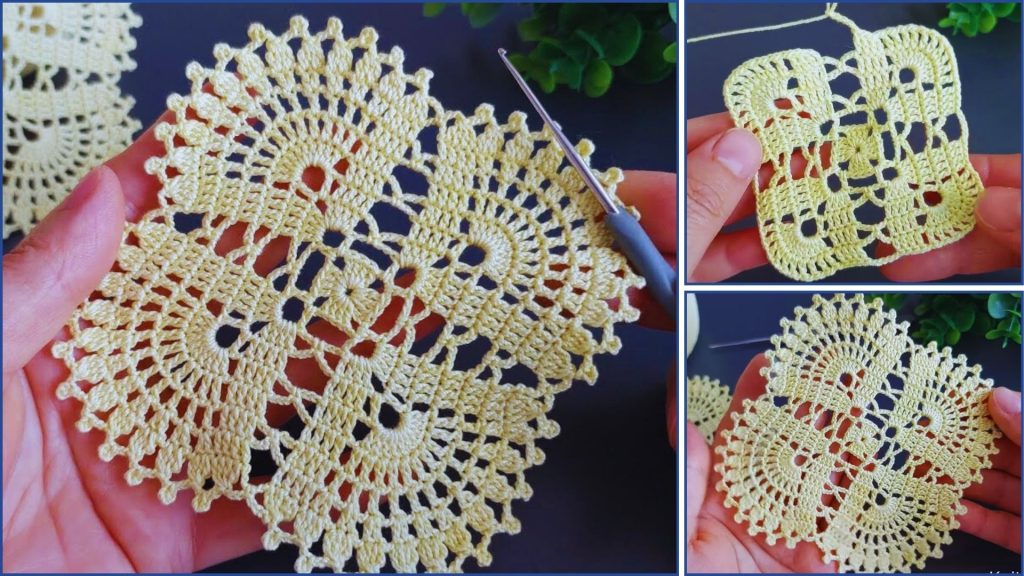
The Classic Round Doily Pattern
This pattern creates a beautiful, starburst-like doily that is perfect for practicing and mastering lace techniques.
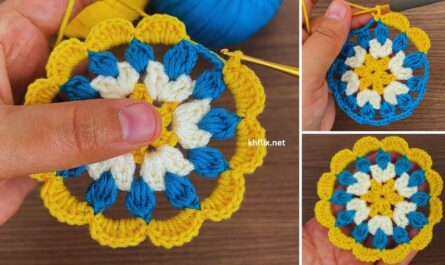
Start with a Magic Ring.
Round 1:
- Ch 3 (counts as first dc). Work 11 dc into the magic ring.
- Pull the yarn tail to close the ring tightly.
- Sl st to the top of the beginning ch 3 to join. (12 dc)
Round 2:
- Ch 3 (counts as first dc). Work 1 dc into the same stitch.
- Ch 1. *Work 2 dc into the next stitch, ch 1.* Repeat from * to * around.
- Sl st to the top of the beginning ch 3 to join. (24 dc, 12 ch-1 spaces)
Round 3:
- Ch 4 (counts as first tr). Work 1 tr into the same stitch.
- Ch 1, skip the next stitch. *Work 2 tr into the next ch-1 space. Ch 1, skip the next stitch.* Repeat from * to * around.
- Sl st to the top of the beginning ch 4 to join. (24 tr, 12 ch-1 spaces)
Round 4: (Creating the “Petals”)
- Ch 1 (does not count as a stitch). Work 1 sc into the first ch-1 space.
- Ch 3. *Work 1 sc into the next ch-1 space, ch 3.* Repeat from * to * around.
- Sl st to the first sc to join. (12 ch-3 spaces)
Round 5:
- Sl st into the first ch-3 space.
- Ch 3 (counts as first dc). Work 2 dc into the same ch-3 space.
- Ch 2. *Work 3 dc into the next ch-3 space, ch 2.* Repeat from * to * around.
- Sl st to the top of the beginning ch 3 to join. (12 clusters of 3 dc, 12 ch-2 spaces)
Round 6:
- Sl st into the next 2 stitches and into the next ch-2 space.
- Ch 1. Work 1 sc into the same ch-2 space.
- Ch 4. *Work 1 sc into the next ch-2 space, ch 4.* Repeat from * to * around.
- Sl st to the first sc to join. (12 ch-4 spaces)
Round 7:
- Sl st into the first ch-4 space.
- Ch 3 (counts as first dc). Work 4 dc into the same ch-4 space.
- Ch 2. *Work 5 dc into the next ch-4 space, ch 2.* Repeat from * to * around.
- Sl st to the top of the beginning ch 3 to join. (12 clusters of 5 dc, 12 ch-2 spaces)
Round 8: (Adding the Decorative Picots)
- Sl st into the next 2 stitches.
- Ch 3 (counts as first dc). Work 1 dc into the same stitch.
- Work a picot stitch (ch 3, sl st into the first ch). Work 2 dc into the same stitch.
- Ch 1. Skip the next 2 stitches. In the next ch-2 space, work 1 sc.
- Ch 1. Skip the next 2 stitches. *Work (2 dc, picot, 2 dc) into the next stitch. Ch 1, skip the next 2 stitches. Work 1 sc into the next ch-2 space. Ch 1, skip the next 2 stitches.* Repeat from * to * around.
- Sl st to the top of the beginning ch 3 to join.
Fasten off and weave in your ends.
🎁 Recommended Projects to Practice
| Project | Skills Practiced |
|---|---|
| Lacy Bookmark | Picots, chain control |
| Pineapple Doily | Trebles, chart reading |
| Mesh Shawl | Mesh stitch, light blocking |
| Lace Fingerless Gloves | Joining motifs, shaping |
| Lace Panel Scarf | Consistent repeats |
📚 Where to Find Lace Patterns
- Books:
- “The Complete Book of Crochet Stitch Designs”
- “Modern Crochet Lace”
- Websites:
- Ravelry
- LoveCrafts
- Pinterest (with diagrams)
✅ Summary — How to Master Elegant Crochet Lace
| Step | Focus |
|---|---|
| 1 | Learn the right stitches: dc, tr, picot, mesh, shell |
| 2 | Use fine yarn or thread with the correct hook size |
| 3 | Practice small, symmetrical lace patterns |
| 4 | Read lace charts to understand structure |
| 5 | Use stitch markers to stay accurate |
| 6 | Block everything for polished results |
| 7 | Progress to larger or wearable lace items |
The Art of Blocking: The Essential Finishing Step
Blocking is what transforms your crumpled, wavy doily into a flat, elegant piece of lace. Don’t skip this step!
- Dampen the Doily: Fill a small basin with lukewarm water and a bit of gentle soap (like a wool wash). Let the doily soak for 15-20 minutes. Gently squeeze out the water without twisting or wringing the fabric.
- Pin the Doily: Place the doily on a foam blocking mat. Starting from the center, gently stretch the doily and pin it to the mat. Make sure the points and scallops are all evenly spaced and stretched out. Use a generous number of pins to hold it perfectly in place.
- Allow to Dry: Let the doily air dry completely. This can take up to 24 hours. The starch in the thread and the act of stretching will “set” the lace, making the stitches pop and the finished doily lay perfectly flat.
Congratulations! You have now mastered the art of elegant crochet lace by creating your first doily. What color will you use for your next one?