by
by A Beautiful, Colorful, Easy Project for All Skill Levels**
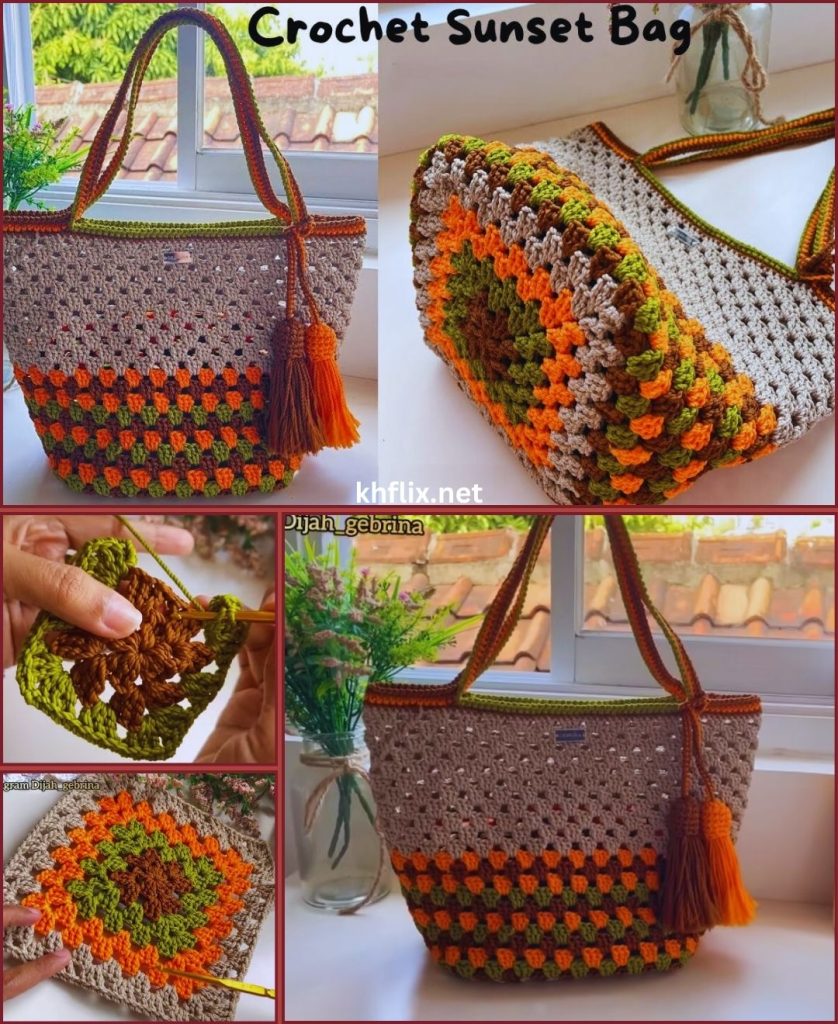
Crochet bags have become one of the biggest trends in handmade fashion, and the Sunset Granny Square Bag is an absolute favorite. With its glowing blend of warm colors, classic granny-square charm, and the simplicity of tote-style construction, this bag is both eye-catching and practical.
The “Sunset Bag” gets its name from its gorgeous gradient of sunset-inspired hues—think orange, coral, pink, gold, purple, and soft yellow—but you can use any color palette you love. Whether you’re heading to the beach, on a weekend outing, to a market, or simply want a stylish everyday bag, this project is perfect!
This step-by-step guide includes everything you need:
✔ Beginner-friendly instructions
✔ Full pattern
✔ Color tips for the sunset effect
✔ Assembly guide
✔ Strap options
✔ Blocking & finishing instructions
Let’s dive in!

🌅 What Is the Sunset Granny Square Bag?
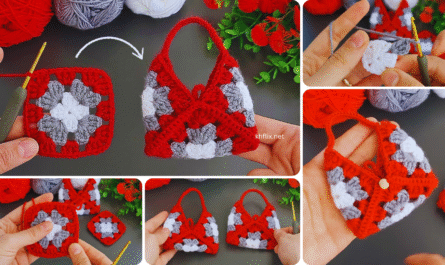
The Sunset Bag is a tote-style handbag made from granny squares—a timeless crochet motif. When arranged and joined together, the squares create a roomy, soft yet sturdy bag with a stunning patchwork appearance.
Why it’s so popular:
- ✨ Beautiful color transitions (sunset effect)
- 🧡 Easy granny square technique
- 👜 Strong, functional shape
- 🎒 Perfect for summer, markets, and beach trips
- 🎁 Makes a thoughtful handmade gift
Even beginners can make this bag!
🧶 Materials Needed
Yarn
Choose cotton or acrylic yarn in 4–6 complementary colors.
Suggested sunset palette:
- Mustard or golden yellow
- Soft orange
- Deep orange
- Coral pink
- Magenta
- Purple
Recommended yarn weight: Worsted (Medium/4)
Or DK/lightweight for a softer, drapier bag.
Hook Size
- 4.0 mm – 5.0 mm (depending on yarn weight)
Other Tools
- Yarn needle
- Scissors
- Stitch markers
- Optional: bag lining fabric, sewing needle, purse handles
🧵 Stitches Used
- CH – Chain
- SL ST – Slip Stitch
- SC – Single Crochet
- DC – Double Crochet
- GRANNY CLUSTER – (3 DC in same space)
If you know basic granny squares, you’re already halfway there!
🌄 Step-by-Step Sunset Bag Pattern
This bag is made from 13 granny squares:
- 12 squares for the bag walls
- 1 square for the bottom (optional; you can also crochet the bottom solid)
Let’s begin!
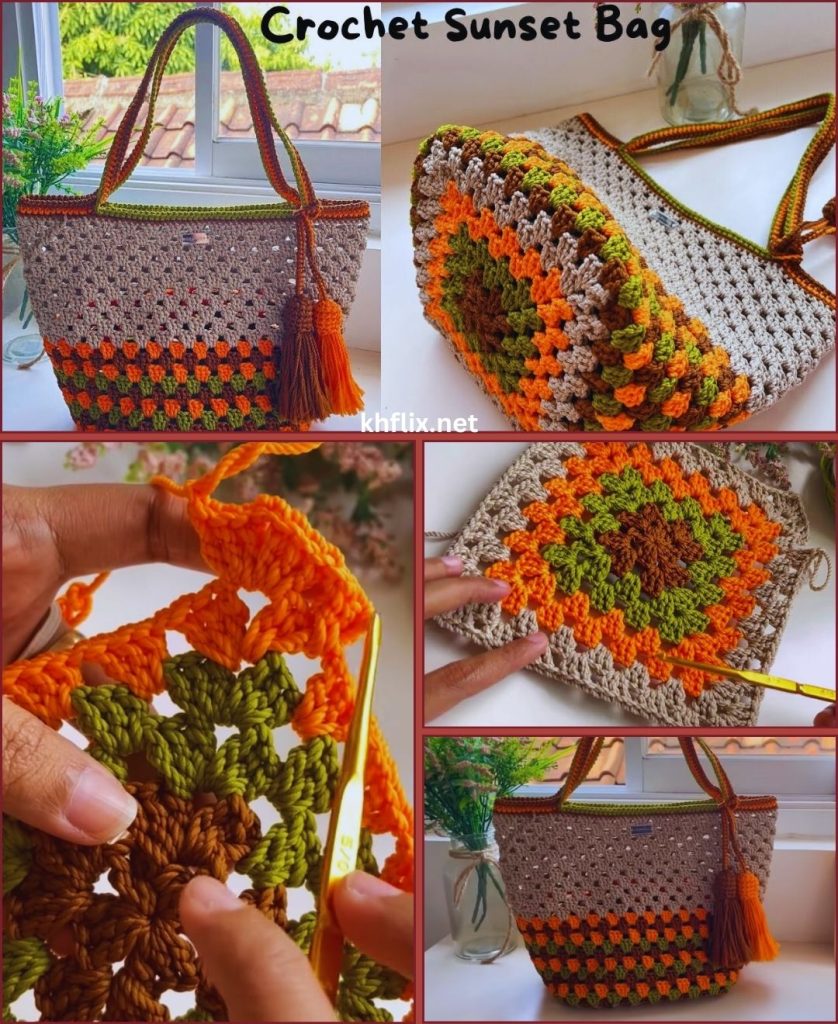
☀ Step 1: Crochet the Classic Granny Square
Round 1
- CH 4, SL ST to form a ring
- CH 3 (counts as DC)
- Work 2 DC, CH 2 into center
- Repeat 3 DC, CH 2 3 more times
- SL ST to top of CH 3
You now have the basic center.
Round 2
- SL ST into corner space
- (3 DC, CH 2, 3 DC) in same corner
- Move to next corner and repeat (3 DC, CH 2, 3 DC)
- Repeat for all 4 corners
- SL ST to join
Round 3
- Continue working groups of (3 DC) in each space
- In corners: (3 DC, CH 2, 3 DC)
Repeat this until your square reaches about:
- 15–17 cm for a medium tote
- 18–20 cm for a large tote
🌇 Step 2: Use Multiple Colors for the Sunset Effect
To get the glowing sunset gradient:
- Round 1: yellow
- Round 2: gold
- Round 3: soft orange
- Round 4: deep orange
- Round 5: coral or pink
- Round 6: magenta or plum
You can also reverse the gradient or create random color combos.
Tips:
- Always change color at the end of a round
- Use the “invisible join” for cleaner edges
Make 12 identical squares OR mix variations for a patchwork look.
🌆 Step 3: Block Your Squares
Granny squares may twist or ripple. Blocking ensures that:
- The edges stay straight
- All squares match size
- The bag assembles evenly
Lightly steam-block or pin squares to a foam board.
🌇 Step 4: Assemble the Bag
You can join squares in two ways:
A) Invisible Seam (needle join)
Best for a clean, professional look.
B) Slip Stitch Join (crochet join)
Creates a beautiful raised seam.
Bag Layout
The classic Sunset Bag uses 12 squares for the sides:
Square Layout (Front + Back)

  [1] [2] [3]
  [4] [5] [6]
  [7] [8] [9]
  [10][11][12]
If using a bottom square (optional):
- Sew square #13 to the lower center, then attach sides.
Otherwise, fold the large rectangle in half to form the bag.
🌅 Step 5: Join the Sides
Fold the assembled grid in half vertically.
Join:
- Left side
- Right side
- Bottom edge
Make sure seam alignment is neat.
☀ Step 6: Add a Top Border
Work SC around the entire opening:
Round 1
SC evenly around
(or HDC if you want a thicker rim)
SL ST to join
Round 2 (optional reinforcement)
Repeat SC or HDC
This strengthens the bag and prepares it for handles.
🌞 Step 7: Create the Handles
There are two popular strap options:
Option A: Simple Crochet Handles
Handle Pattern
- Attach yarn at a side marker
- CH 45–55 (depending on desired length)
- Skip same number of stitches on the opening
- SL ST to opposite marker
- SC back over the chain to thicken
- Repeat for second handle
Option B: Sturdy I-Cord Handles
Make two i-cords using:
- 3 stitches
- Knit or crochet technique
Attach to the inside of bag with strong stitching.
🌟 Optional: Add Lining
If you want a more secure interior:
- Cut fabric to size
- Sew using whip stitch or sewing machine
- Attach lining to inside top edge
This helps prevent stretching and gives the bag a polished finish.
🌄 Customization Ideas
Make your Sunset Bag your own!
Color Variations
- Tropical sunrise (yellow, peach, pink, turquoise)
- Twilight purple mix
- Retro 70s colors (brown, mustard, avocado, orange)
- Monochrome squares
Decorations
- Add tassels
- Sew on wooden buttons
- Add a zipper or magnetic snap
- Attach leather straps
Sizing Options
- Use chunkier yarn for a bigger, faster bag
- Make more squares for an oversized tote
- Make tiny squares for a mini handbag
🎒 Where to Use Your Crochet Sunset Bag
This bag is perfect for:
- Beach outings
- Shopping or markets
- Daily errands
- Road trips
- Summer vacations
- Book bag for students
- Picnic carry bag
Its airy, colorful granny-square style makes it a cheerful accessory.
❓ Frequently Asked Questions
Q1: Is this bag beginner-friendly?
Yes! Granny squares are perfect for beginners.
Q2: How long does it take?
- Beginners: 3–5 days
- Intermediate crocheters: 8–10 hours
Q3: Can I make the bag without lining?
Absolutely—the granny squares are strong enough on their own.
Q4: What yarn works best?
Cotton or acrylic; both give structure and vibrant colors.
🌅 Conclusion
The Crochet Sunset Granny Square Bag is a stunning, colorful project that blends tradition with modern style. With simple granny squares and a beautiful sunset palette, you can create a functional tote that becomes a daily favorite.
Whether you’re a beginner or an experienced crocheter, this bag is a joy to make and even more fun to carry. It’s not just a project—it’s a piece of art that captures the warmth and beauty of a real sunset.
If you’d like, I can also create:
✔ a printable PDF pattern
✔ a stitch diagram chart
✔ a smaller/mini sunset bag version
✔ a matching coin purse or keychain
✔ a video-style tutorial script
Just tell me!