by
by Step-By-Step Tutorial for Absolute Beginners
Crocheting baby shoes is one of the most heartwarming and rewarding projects you can make. These tiny shoes are not only adorable, but they are also soft, comfortable, and made with love, making them perfect for newborns and babies. The best part? You don’t need to be an expert. With basic stitches and simple steps, even absolute beginners can crochet delicate baby shoes successfully.
In this step-by-step guide, you’ll learn how to crochet easy and delicate baby shoes, from choosing the right yarn to finishing a soft, baby-safe design. Take your time, enjoy the process, and create something truly special.
Why Crochet Baby Shoes?
Crochet baby shoes are loved for many reasons:
- 👶 Soft and gentle on baby’s skin
- 👶 Lightweight and comfortable
- 👶 Easy and quick to make
- 👶 Perfect handmade gifts
- 👶 Customizable in color and size
They are ideal for newborn photos, baby showers, and everyday wear.
Choosing the Right Materials
When crocheting for babies, comfort and safety come first.
Yarn
- Baby yarn, soft cotton, or acrylic baby yarn
- Lightweight or medium-light yarn
- Smooth, non-scratchy texture
Important: Avoid wool or rough yarns that may irritate baby skin.
Crochet Hook
- 3.0 mm to 4.0 mm hook (depending on yarn)
- Use a smaller hook for neat, delicate stitches
Other Supplies
- Scissors
- Yarn needle
- Stitch markers (optional)
Crochet Stitches Used (Beginner-Friendly)
This baby shoe tutorial uses basic crochet stitches, perfect for beginners:
- Slip knot
- Chain (ch)
- Single crochet (sc)
- Half double crochet (hdc)
- Double crochet (dc)
- Slip stitch (sl st)
No advanced techniques are required.
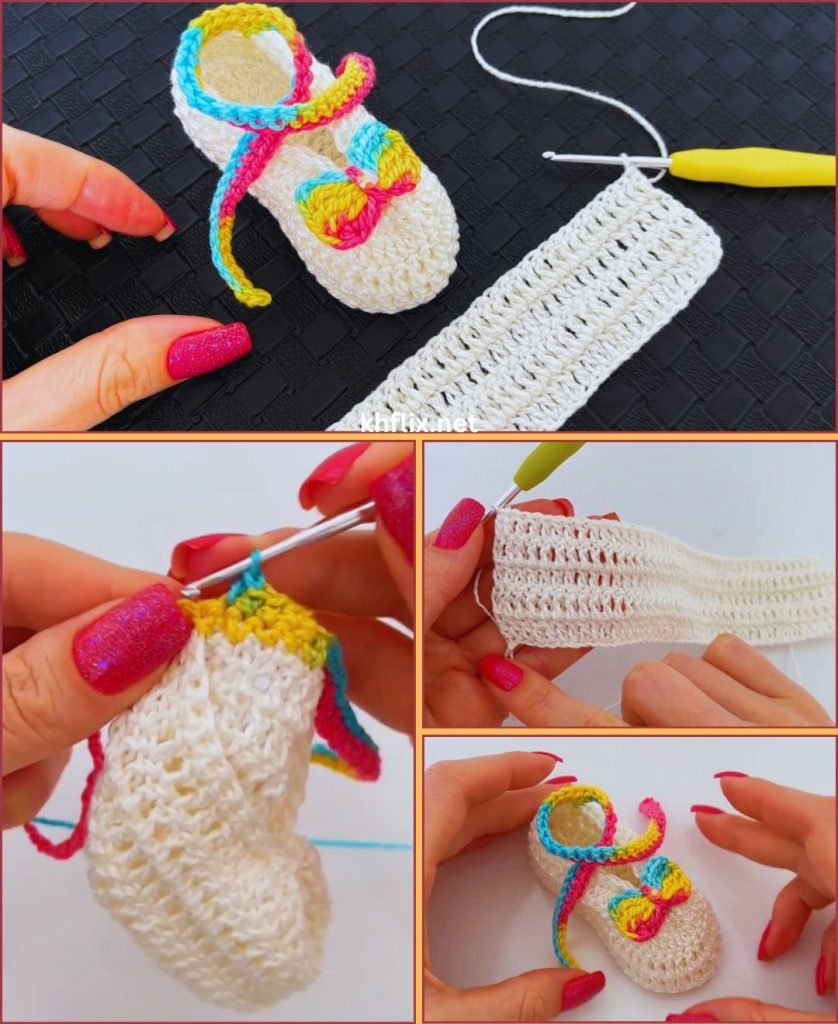
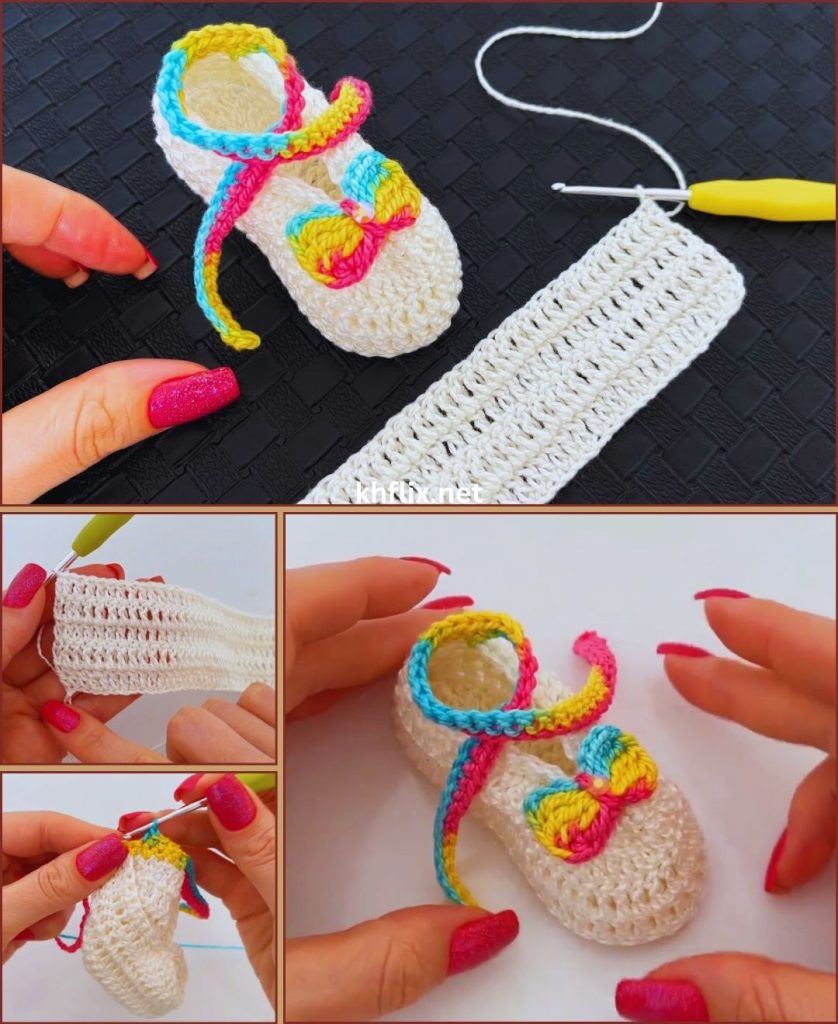
Step-by-Step: How to Crochet Easy Baby Shoes
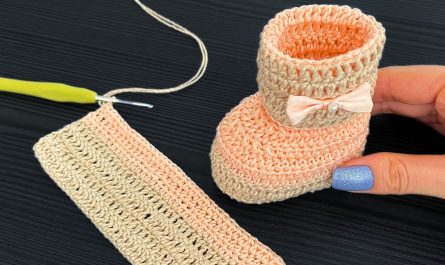
Step 1: Create the Sole
The sole forms the base of the baby shoe.
- Start with a slip knot and chain the required length (depending on baby size).
- Crochet single crochet stitches along the chain.
- Increase stitches at each end to shape the sole.
- Continue crocheting in rounds to form a soft oval shape.
The sole should lie flat and feel soft but sturdy.
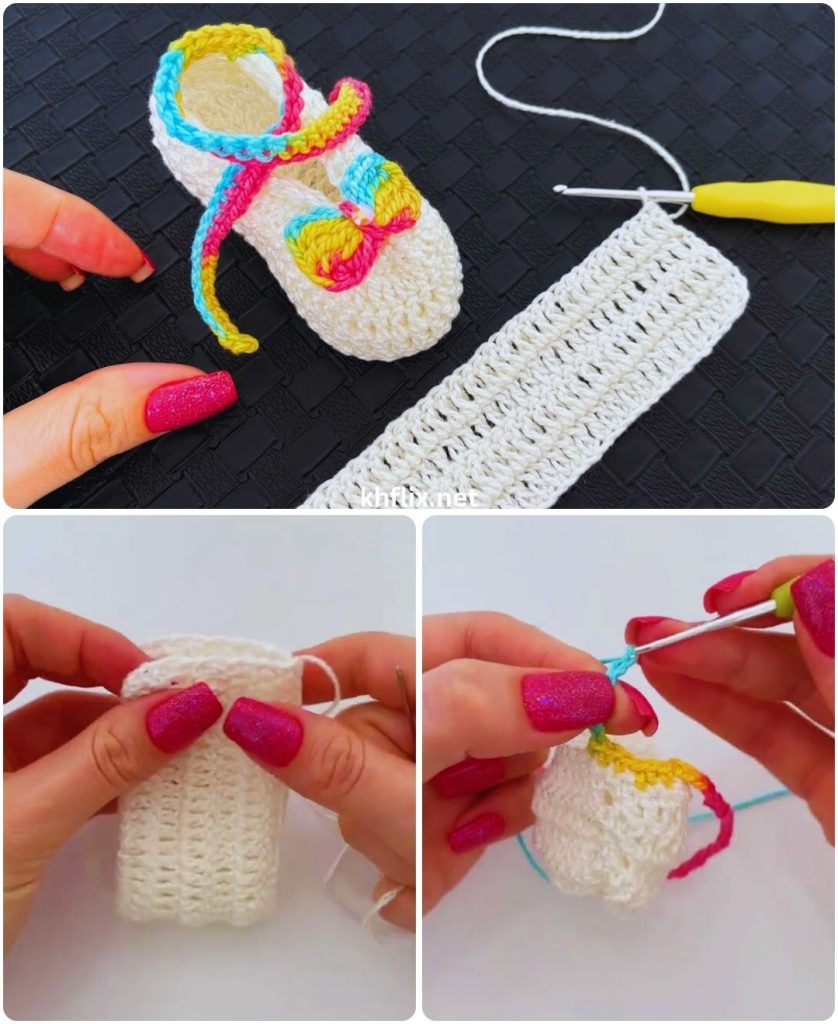
Step 2: Build the Shoe Sides
- Crochet one round in the back loop only.
- This creates a natural fold and helps the shoe stand up.
- Continue crocheting evenly around without increases.
This step begins to shape the shoe walls.
Step 3: Shape the Toe Area
- Crochet half double and double crochet stitches at the front.
- Gradually decrease stitches to gently curve the toe.
- Keep stitches loose and even for comfort.
This creates a rounded, delicate toe section.
Step 4: Form the Heel
- Crochet evenly across the back of the shoe.
- Use simple decreases to shape the heel.
- Ensure the heel fits snugly but not tightly.
A good heel shape helps the shoe stay on baby’s foot.
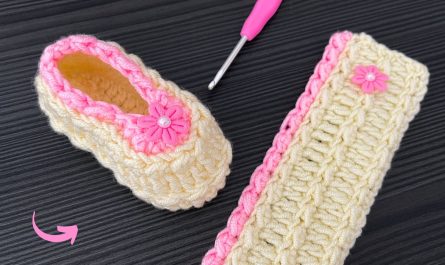
Step 5: Finish the Top Edge
A neat edge adds beauty and comfort.
Options include:
- One round of single crochet
- Slip stitch edging
- Decorative scalloped edge (optional)
Fasten off and weave in all ends securely.
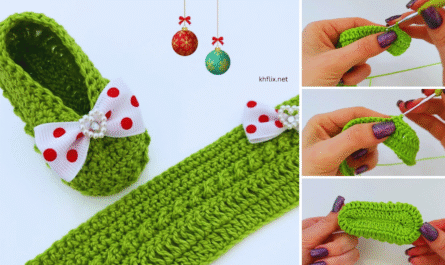
Optional Decorative Touches
You can keep baby shoes simple or add gentle decorations:
- Small crochet flowers or bows
- Soft buttons (for decoration only)
- Color changes for trim
- Crochet straps for better fit
Safety Tip: Avoid loose or hard decorations for newborns.
Sizing Tips for Baby Shoes
- Newborn: approx. 3–3.5 inches sole length
- 0–3 months: approx. 3.5–4 inches
- 3–6 months: approx. 4–4.5 inches
Always measure if possible, and keep shoes slightly roomy.
Tips for Perfect Baby Shoes
- Keep tension relaxed and even
- Use stitch markers to track rounds
- Choose soft, light colors for a delicate look
- Make both shoes the same size by counting stitches
Practice makes every pair better.
Easy Color Ideas for Delicate Baby Shoes
- White or cream
- Pastel pink, blue, or yellow
- Soft mint or lavender
- Neutral beige or gray
Soft shades enhance the delicate baby look.
Care & Washing Instructions
- Hand wash gently in cool water
- Use mild detergent
- Reshape while damp
- Air dry flat
Proper care keeps shoes soft and safe.
Perfect Occasions for Crochet Baby Shoes
- Baby shower gifts
- Newborn photography
- Hospital welcome outfits
- Christening or naming ceremonies
- Handmade keepsakes
They are small projects filled with big love.
Final Thoughts
Learning how to crochet so easy and delicate baby shoes is a beautiful way to practice crochet while creating something meaningful. This step-by-step tutorial for absolute beginners shows that you don’t need advanced skills—just patience, soft yarn, and a little time.
Every stitch you make adds warmth and care, turning simple yarn into a precious handmade treasure. Once you finish your first pair, you’ll be excited to make more in different colors and sizes.
Happy crocheting 👶🧶💖
If you’d like, I can:
- Turn this into a full written crochet pattern
- Simplify it even more for first-time crocheters
- Add baby shoe size charts
- Rewrite it for SEO or YouTube tutorials
Just let me know!