 by
by Crocheting two-color baby shoes in blue is a fun, beginner-friendly, and fast project that produces adorable, stylish, and soft footwear for babies. By combining two shades of blue or pairing blue with white or gray, you can create eye-catching shoes that look more complex than they really are.
This comprehensive guide will take you through materials, stitches, sizing, step-by-step construction, color-changing techniques, finishing touches, and variations, so even beginners can create a pair of beautiful two-color blue baby shoes quickly.
1. Why Two-Color Blue Baby Shoes?
Blue is a classic and versatile color, perfect for boys, girls, or gender-neutral gifts. Adding a second color creates:
- Visual interest – makes simple shoes look modern and stylish
- Customizability – mix dark blue with light blue, or blue with white for contrast
- Beginner-friendly design – still easy to crochet with simple stitches
- Quick project – soft, slip-on shoes are fast to make
With just two colors, you can make comfortable and durable baby shoes that are perfect for gifts, showers, or your own little one.
2. Materials Needed
Yarn
- Soft acrylic yarn – gentle on baby skin, durable, and washable
- Cotton yarn – breathable and ideal for sensitive skin
- Bamboo yarn – silky, eco-friendly, and soft
Colors: Two shades of blue, or blue paired with white/gray. For example:
- Light blue for the sole, dark blue for the upper
- Dark blue sole with light blue cuff
Weight: DK or light worsted yarn works best for baby shoes.
Crochet Hook
- Size 3.0 mm – 4.0 mm depending on yarn
- Smaller hooks produce tighter stitches for better structure
- Larger hooks create softer, more flexible shoes
Additional Tools
- Yarn needle – for weaving in ends
- Scissors
- Stitch markers – optional
- Optional decorations – small bows, buttons, or crochet flowers
3. Basic Crochet Stitches Needed
Even beginners can make these shoes using just a few stitches:
- Slip knot – starting point
- Chain (ch) – foundation stitch
- Single crochet (sc) – for firm, structured stitches
- Half double crochet (hdc) – optional for taller stitches
- Slip stitch (sl st) – joining rounds
- Increase (inc) – 2 stitches in one for widening the sole
- Decrease (dec) – combine 2 stitches for shaping the toe
4. Step 1: Measure the Baby’s Foot
Correct sizing is crucial:
| Age | Foot Length (approx.) |
|---|---|
| Newborn | 3.5 inches (9 cm) |
| 0–3 months | 3.75 inches (9.5 cm) |
| 3–6 months | 4 inches (10 cm) |
| 6–12 months | 4.5 inches (11.5 cm) |
- Adjust your foundation chain according to the baby’s foot.
- Slightly larger soles are okay for growing feet.
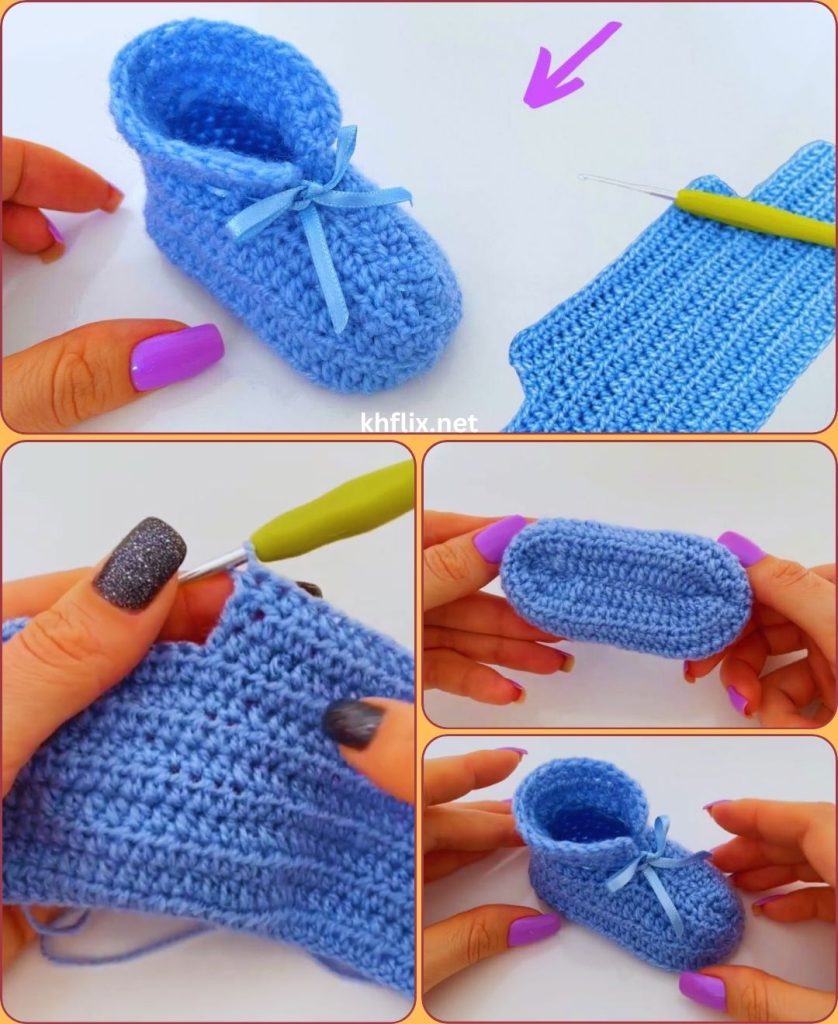
5. Step 2: Crochet the Sole
- Make a slip knot.
- Chain 12–15 stitches for newborn size (adjust as needed).
- Work single crochet stitches along the chain.
- At the end of the chain, work 3 sc in the last chain to round the toe.
- Continue along the other side, rounding the heel with 3 sc.
- Join with a slip stitch to form an oval-shaped sole.
Tip: Tight stitches help the sole maintain shape and durability.
6. Step 3: Add the First Color to the Upper
- Attach your first color at the back of the sole.
- Chain 1 (for sc).
- Work single crochet stitches evenly around the top edge of the sole.
- This row forms the base of the upper.
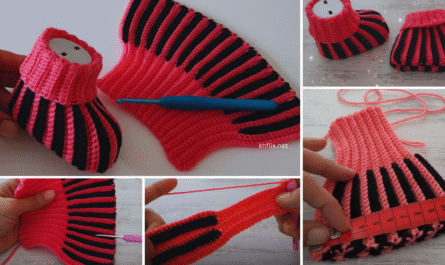
You can choose dark blue as the first color for the base or sole.
7. Step 4: Add the Second Color
To create the two-color design:
- At the end of the row, cut the first color, leaving a tail.
- Attach the second color at the start of the next row.
- Work single crochet stitches in the new color to continue the upper.
- Repeat rows with color changes as desired.
Tip: Change colors at the start of a row for clean stripe transitions.
You can alternate every row for striped shoes or make the sole one color and upper another.
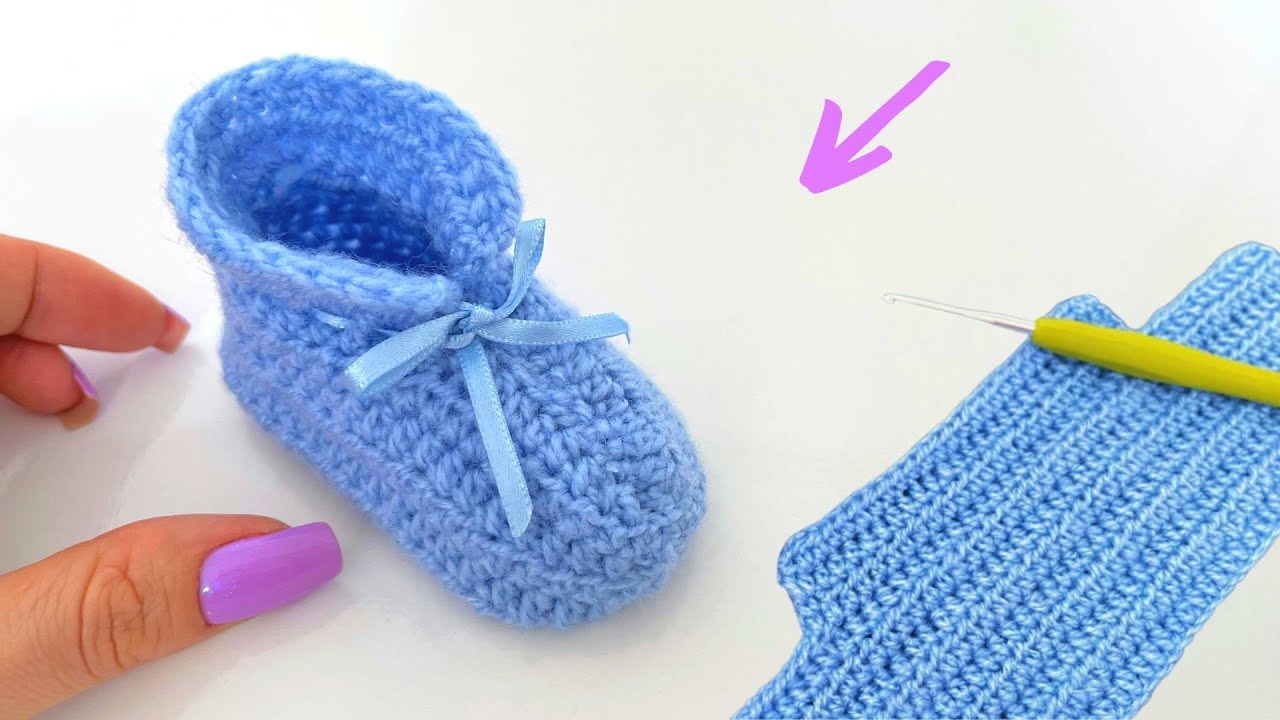
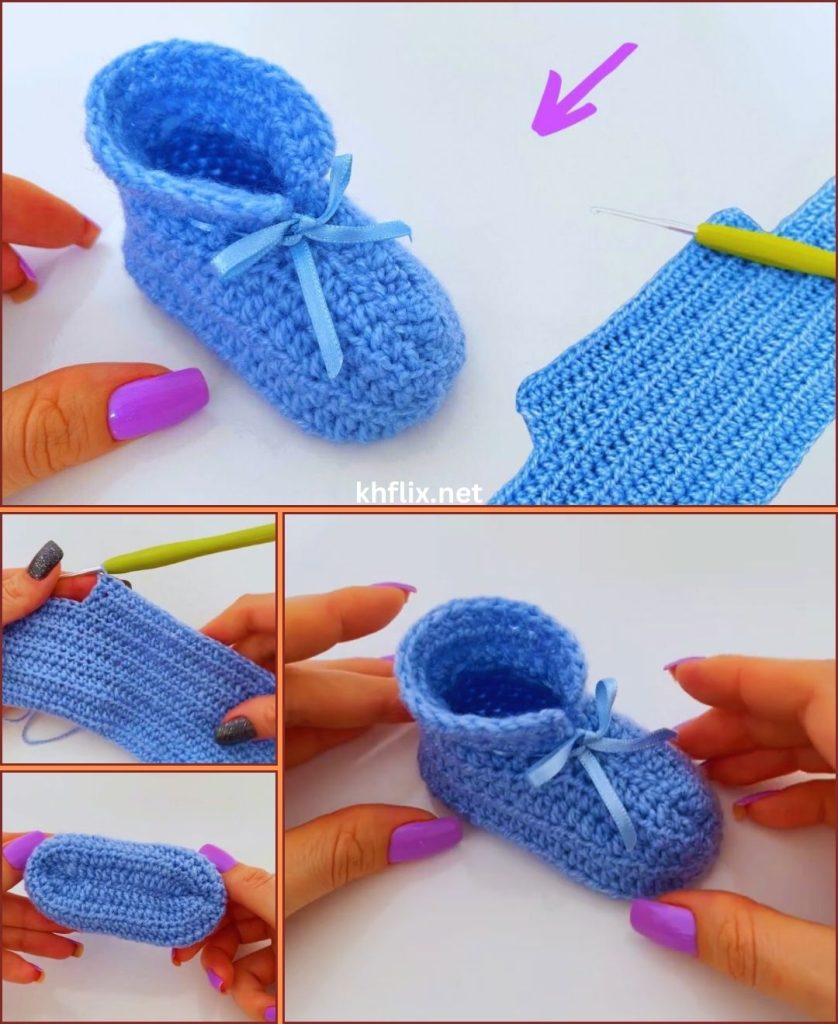
8. Step 5: Shape the Upper
- Stop stitching at the toe area to leave the foot opening.
- Optional: Increase 1 stitch at the toe center for a rounded front.
- Continue around the heel to complete the simple upper.
The slip-on design makes it easy to put the shoes on a baby’s foot.
9. Step 6: Add an Optional Cuff
- Continue crocheting single crochet rows from the ankle edge.
- Work 3–5 rows, keeping the two-color pattern consistent.
- Ensure even stitches for a smooth and polished finish.
A cuff helps the shoes stay on securely without straps or buttons.
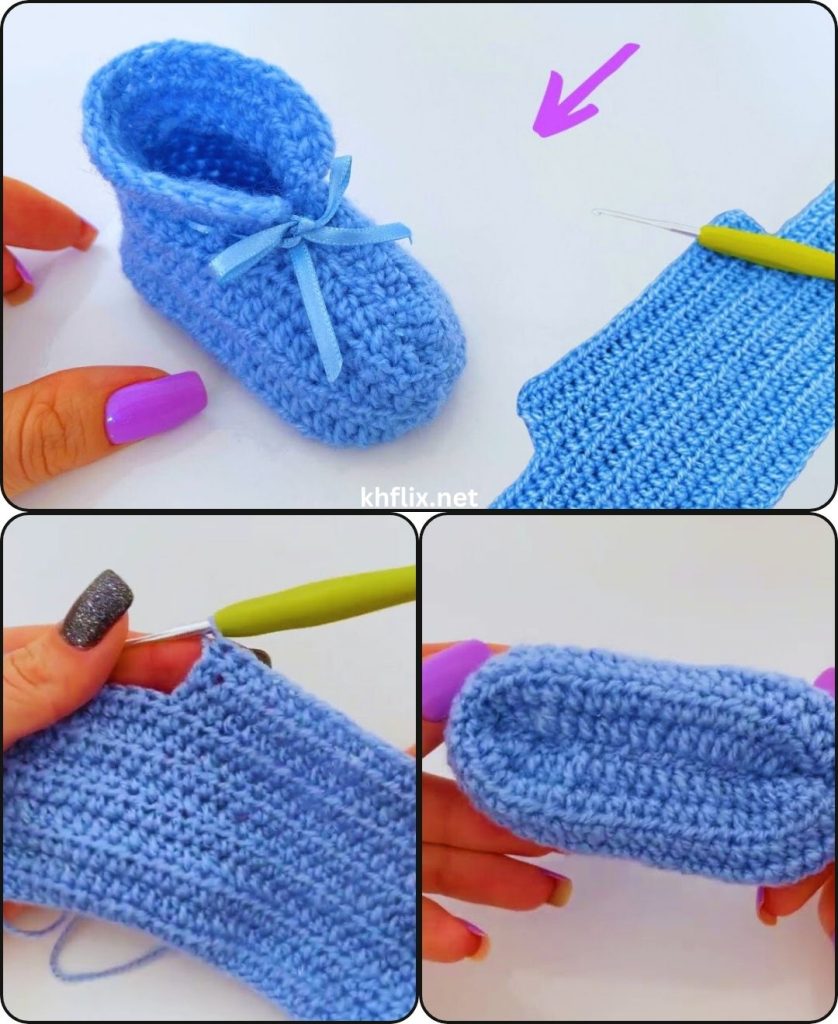
10. Step 7: Finishing the Shoes
- Cut yarn and pull through the last loop.
- Use a yarn needle to weave in all ends, including color change tails.
- Shape the shoes gently with your hands.
- Optional: Add small decorations such as bows, crochet flowers, or buttons.
11. Step 8: Make the Second Shoe
- Repeat all steps for the second shoe.
- Make sure it mirrors the first shoe, with identical color placement and stripe pattern.
Working both shoes together helps maintain symmetry.
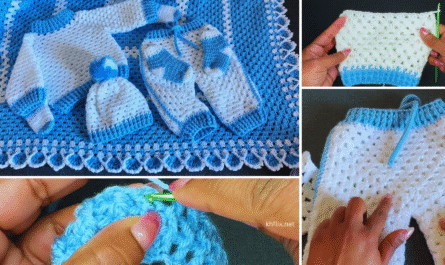
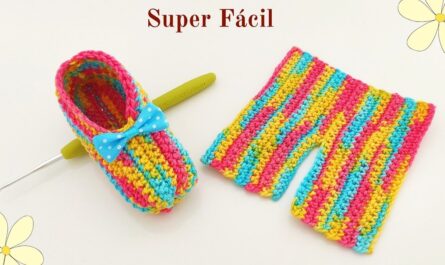
12. Design Variations for Two-Color Blue Shoes
- Solid sole, contrasting upper – dark blue sole, light blue top.
- Striped shoes – alternate two colors every row or every 2–3 rows.
- Contrasting cuff – different color cuff for style.
- Top stripe accent – single contrasting row at the toe or around the ankle.
- Color block shoes – bottom half in one color, top half in another.
Even simple slip-on shoes look professional and stylish with thoughtful color placement.
13. Tips for Success
- Use soft, baby-friendly yarn for comfort.
- Keep tight stitches on the sole to maintain shape.
- Check shoe size frequently against baby foot measurements.
- Change colors neatly at the start of a row.
- Shape shoes gently after finishing to smooth edges.
14. Benefits of Two-Color Blue Baby Shoes
- Quick and beginner-friendly project
- Soft, safe, and comfortable for babies
- Stylish and visually appealing
- Easy to customize with different color combinations
- Perfect for gifts, baby showers, or everyday wear
15. Care Instructions
- Hand wash or machine wash gently in cold water
- Air dry to maintain shape
- Avoid bleach or harsh detergents
- Reshape gently after washing
16. Conclusion
Crocheting easy and quick two-color baby shoes in blue is a simple, creative, and rewarding project. Using just a few basic stitches, even beginners can make soft, slip-on shoes that are perfect for newborns and infants.
By combining two shades of blue or pairing blue with white or gray, you can create adorable, unique shoes that look professional and stylish. With optional cuffs, stripes, or decorations, these shoes make perfect handmade gifts and are sure to be cherished. 💙👶🧶
I can also create a full step-by-step visual diagram showing each stage of these two-color blue shoes, including the sole, upper, cuff, and color transitions.
Do you want me to make that visual guide?