 by
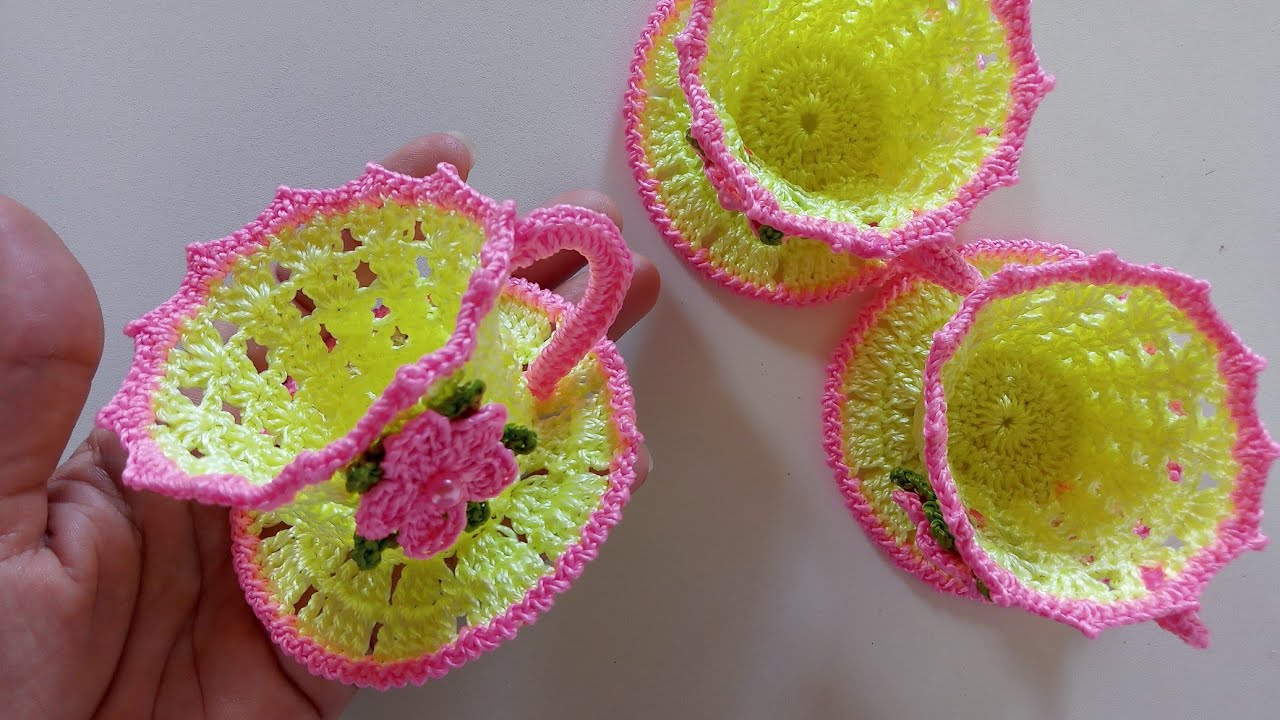
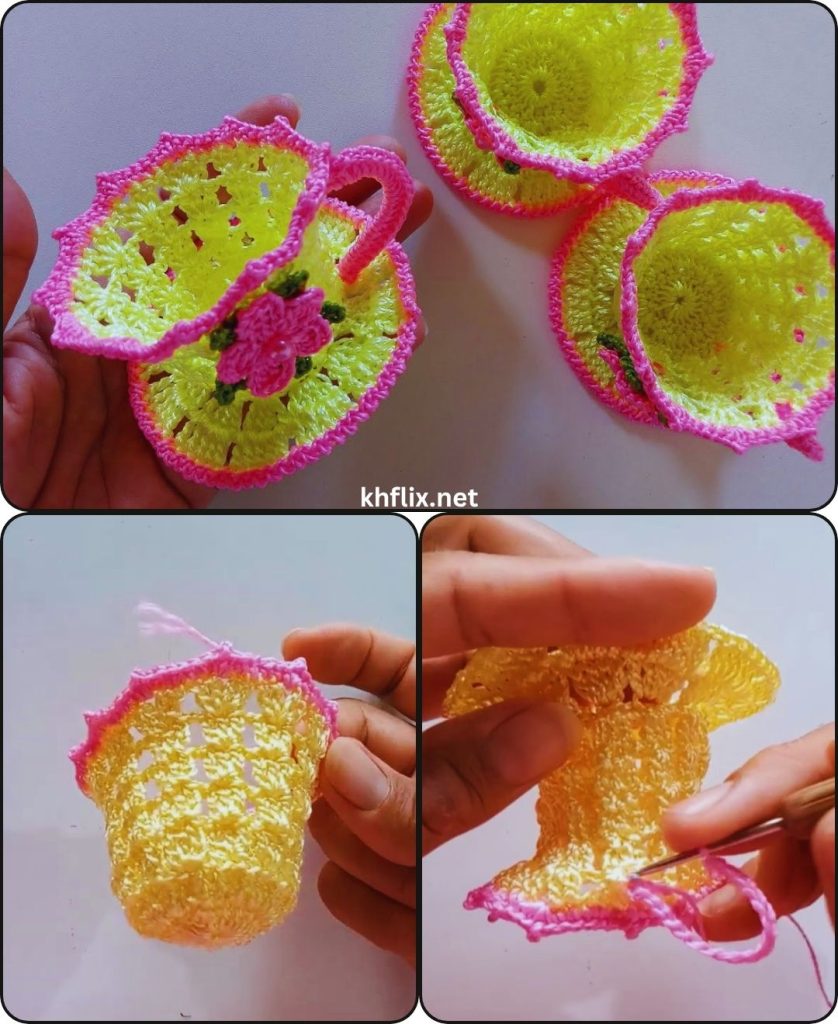
by Crocheting a mini cup (tea set piece) is a charming and creative project that perfectly reflects the handmade, resourceful spirit of crochet and recycling crafts. Inspired by simple, practical designs like those seen in Valdenete-style crochet, this project is ideal for beginners who want something quick, decorative, and versatile.
In this detailed guide, you’ll learn how to create an easy and quick crochet cup (tea set) step by step, along with ideas for turning it into a full decorative set.
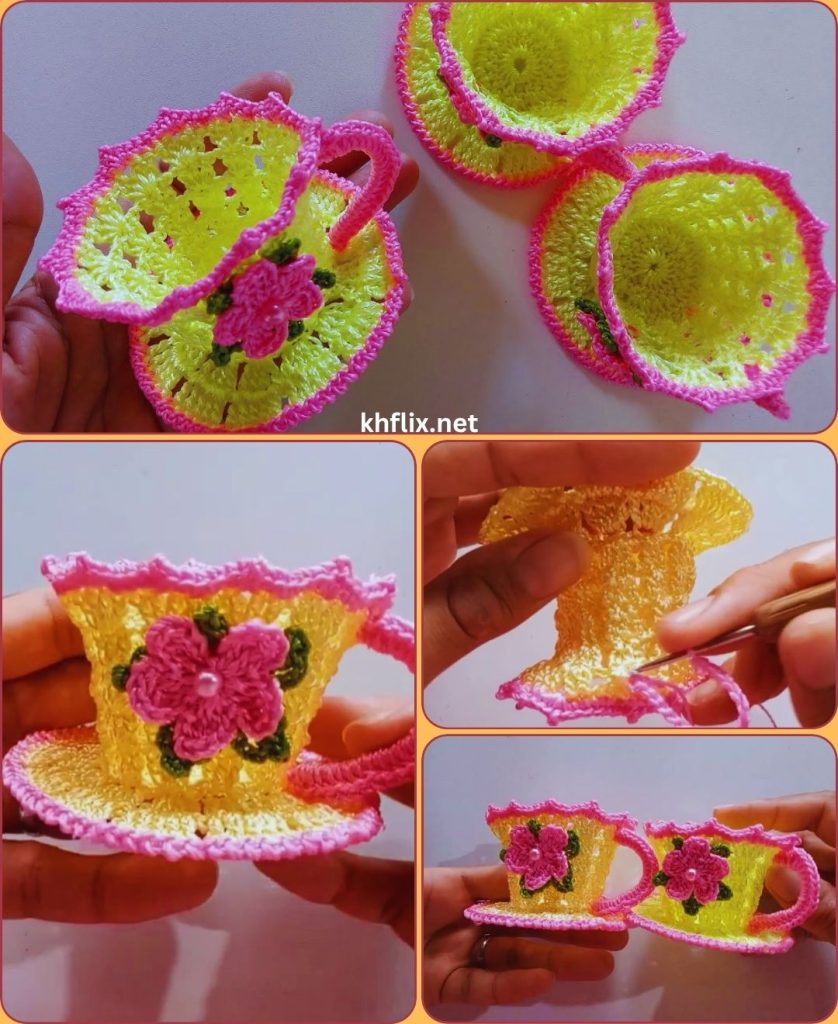
☕ How to Easy and Quick Crochet Cup (Tea Set)
Step-by-Step Tutorial for Beginners
✨ What Is a Crochet Cup?
A crochet cup is a small decorative or functional piece that can be used as:
- A toy for children’s tea sets
- A decorative item for shelves or tables
- A holder for small items (coins, clips, candies)
- A gift or craft fair product
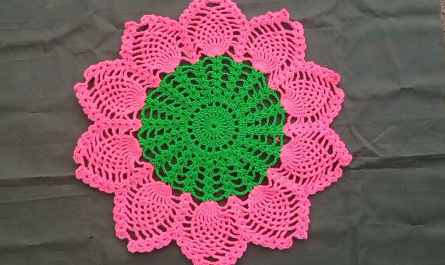
You can also expand this into a full crochet tea set with a teapot, saucer, and tray.
🌿 Why This Project Is Perfect
- Fast to make – usually under 1 hour
- Beginner-friendly – basic stitches only
- Great for scrap yarn
- Customizable – colors, sizes, and styles
🧶 Materials You’ll Need
Yarn
- Cotton yarn (recommended for structure)
- Any color you like (white, pastel, or bright tones work beautifully)
Tools
- Crochet hook (3.0 mm – 4.5 mm depending on yarn)
- Yarn needle
- Scissors
- Stitch marker (optional)
Optional
- Cardboard circle (for a firmer base)
- Hot glue (if making a decorative set)
🧵 Basic Stitches Used
This project uses simple stitches:
- Magic ring
- Chain (ch)
- Single crochet (sc)
- Half double crochet (hdc)
- Slip stitch (sl st)
🧋 Step-by-Step Instructions
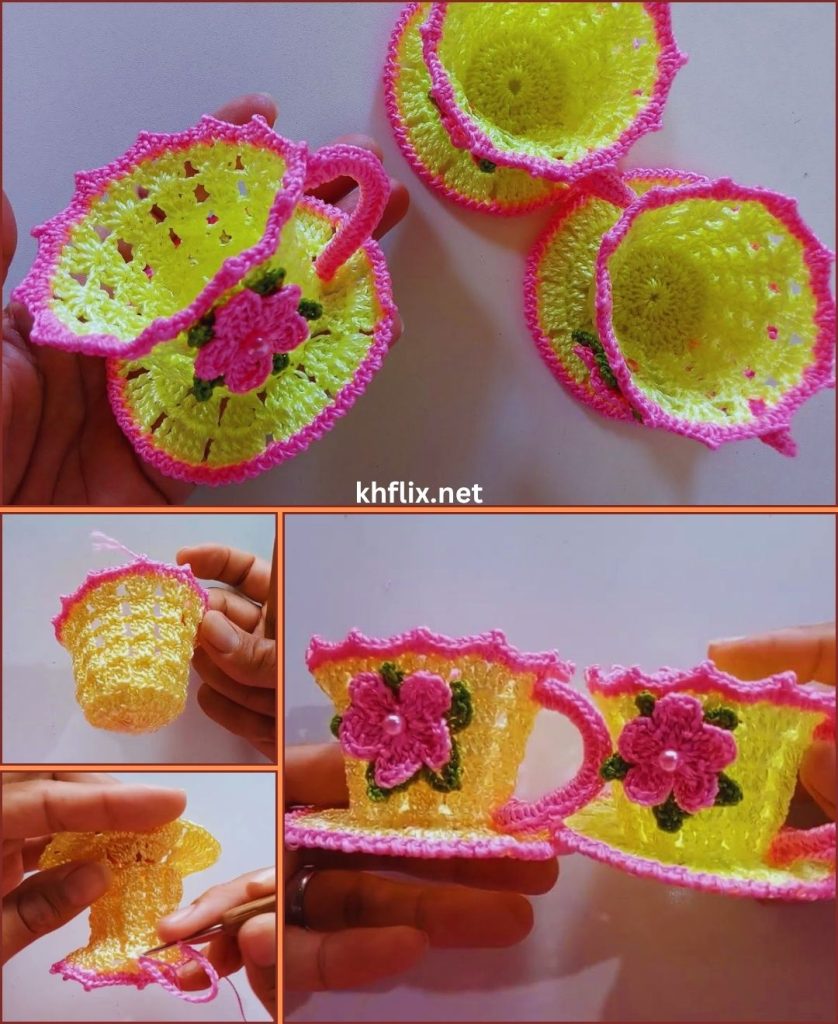
🧶 Step 1: Make the Base (Bottom of the Cup)
- Start with a magic ring
- Work 6 single crochets (sc) into the ring
- Pull tight and join with a slip stitch
Round 2:
- Work 2 sc in each stitch (increase)
- Total: 12 stitches
Round 3:
- (1 sc, 1 increase) repeat around
- Total: 18 stitches
This forms a flat circle—the base of your cup.
☕ Step 2: Build the Cup Walls
Now you’ll start shaping the cup upward.
Round 4:
- Work single crochet in back loops only
(This creates a sharp edge so the cup stands upright)
Rounds 5–8:
- 1 sc in each stitch around
- No increases
You’ll see the cup walls forming naturally.
🧋 Step 3: Shape the Rim
To give your cup a neat finish:
Option A (Simple Edge)
- Slip stitch around the top
Option B (Decorative Edge)
- (sc, hdc) repeat around
or - (sl st, ch 1) for a textured rim
Fasten off and weave in ends.
🫖 Step 4: Make the Cup Handle
Using the same yarn:
- Attach yarn to the side of the cup
- Chain 6–8 stitches
- Slip stitch back onto the cup
- Reinforce with additional stitches if needed
Fasten off and secure tightly.
🍵 Step 5: Optional – Add a Saucer
To complete the tea set look:
- Make a flat circle:
- Magic ring, 6 sc
- Increase to 12, then 18 stitches
- Add a decorative edge:
- (sl st, ch 2) repeat around
Your saucer is ready!
🧁 Step 6: Finishing Touches
- Weave in all loose ends
- Shape the cup with your fingers
- Insert a cardboard base if you want extra firmness
🎨 Creative Variations
🌈 Color Ideas
- White for a classic porcelain look
- Pastel pink or blue for a cute tea set
- Bright colors for kids’ toys
✨ Decorative Ideas
- Add a small crocheted flower
- Embroider patterns
- Sew on tiny beads or buttons
🧸 Functional Ideas
- Use as a coin holder
- Turn into a pincushion
- Make it part of a play kitchen set
💡 Tips for Beginners
- Keep stitches tight so the cup holds shape
- Use cotton yarn for better structure
- Don’t skip the “back loop only” round—it shapes the cup
- Reinforce the handle well for durability
⚠️ Common Mistakes to Avoid
- Loose stitches (cup won’t stand properly)
- Too many increases (cup becomes bowl-shaped)
- Weak handle attachment
- Skipping rounds accidentally
🫖 Expanding Into a Full Tea Set
Once you’ve made one cup, try creating:
- A teapot
- Multiple cups
- A tray
- Sugar bowl
This makes a beautiful handmade mini tea set collection.
🎁 Great Uses for Crochet Cups
- Kids’ pretend play
- Handmade gifts
- Craft fair items
- Home décor
- Desk organizers
♻️ Crochet and Recycling Spirit
This project is perfect for:
- Using leftover yarn
- Reducing waste
- Creating reusable handmade items
It reflects the essence of creative recycling through crochet—turning small materials into something meaningful and beautiful.
🌟 Final Thoughts
The easy and quick crochet cup is a delightful project that combines simplicity with creativity. It’s perfect for beginners, yet flexible enough for more advanced crafters to customize and expand into full tea sets.
With just a bit of yarn and time, you can create something adorable, practical, and full of handmade charm ☕