by
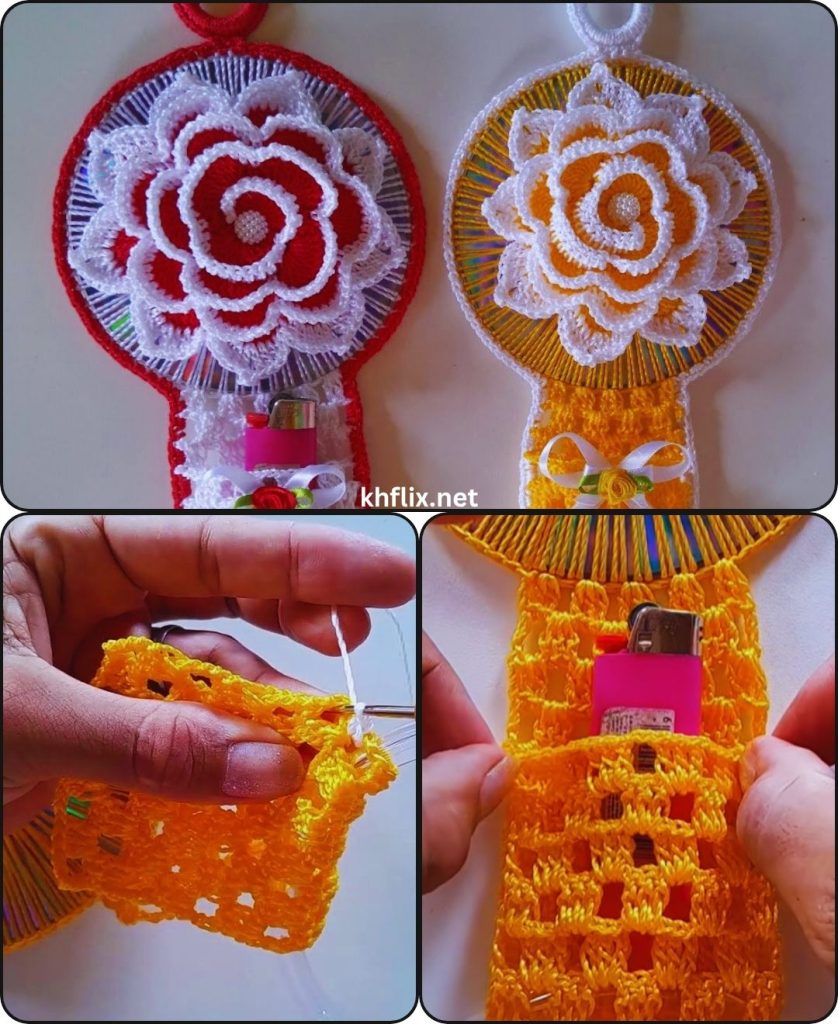
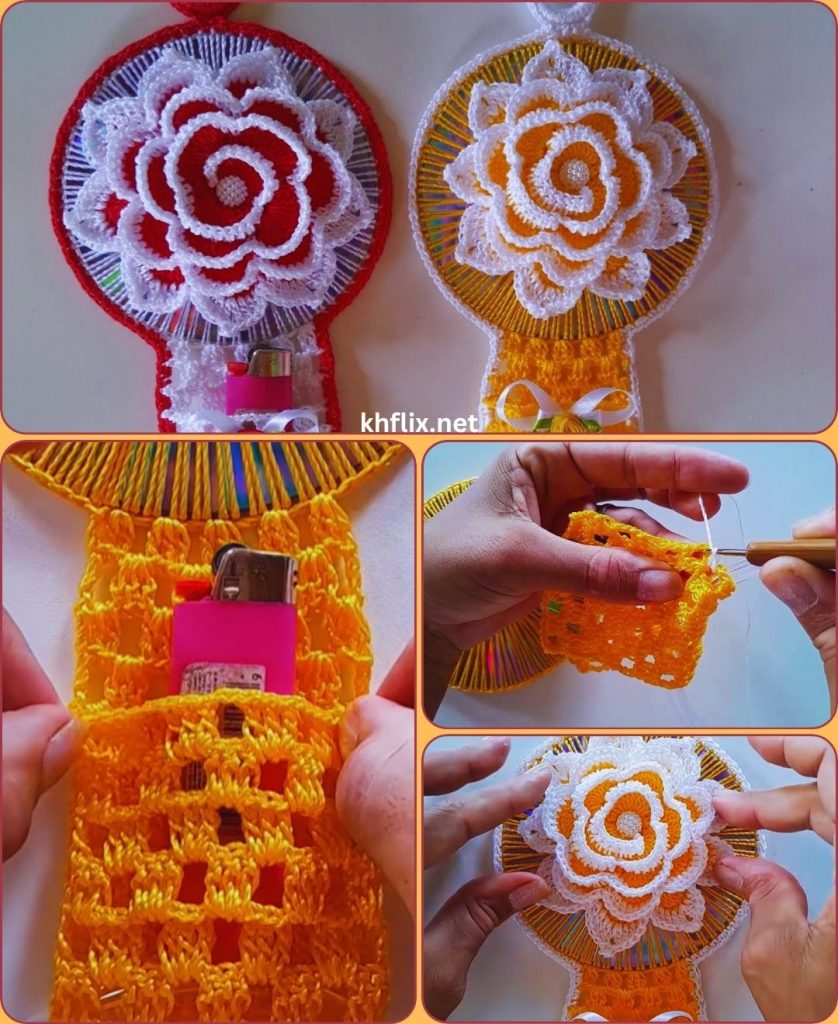
by Crocheting a dish towel with a lighter holder is a smart, practical, and creative project that blends everyday functionality with handmade charm. This type of design is especially useful in kitchens where you often need a towel—and sometimes a lighter for stoves, candles, or grills—kept in one convenient place.
In this detailed guide, you’ll learn exactly how to create a crocheted dish towel with a built-in lighter holder, step by step. It’s beginner-friendly, customizable, and perfect for gifts or home use 💛
🧶 How to Crochet a Dish Towel and Lighter Holder 💛
Step-by-Step Tutorial for Beginners
✨ What Is a Dish Towel with Lighter Holder?
This project combines:
- A crocheted top section (to hang the towel)
- A dish towel base
- A small pocket or loop to hold a lighter
It’s perfect for:
- Kitchens
- BBQ areas
- Outdoor cooking spaces
🌿 Why You’ll Love This Project
- Practical & unique – two uses in one
- Beginner-friendly – simple stitches
- Quick to make
- Great gift idea
- Uses minimal yarn
🧶 Materials You’ll Need
Yarn
- 100% cotton yarn (important for absorbency and heat resistance)
Fabric
- 1 kitchen dish towel (store-bought or handmade)
Tools
- Crochet hook (3.5 mm – 5 mm)
- Yarn needle
- Scissors
Optional
- Button (for closure)
- Elastic loop or hair tie
- Stitch markers
🧵 Basic Stitches Used
- Chain (ch)
- Slip stitch (sl st)
- Single crochet (sc)
- Half double crochet (hdc)
🧼 Step-by-Step Instructions
🧶 Step 1: Prepare the Dish Towel
- Fold the towel in half (top edge)
- Mark the center
- You can:
- Sew a straight line across the top for gathering
OR - Use a crochet hook to insert stitches directly into the fabric
- Sew a straight line across the top for gathering
Tip: If the fabric is thick, pre-poke small holes using a needle.
🧵 Step 2: Attach Yarn to Towel
- Insert hook through the towel edge
- Pull yarn through and chain 1
- Work single crochet stitches evenly across the top
This forms the base for your crochet section.
🧺 Step 3: Build the Towel Top
Now you’ll crochet upward to create the hanging portion.
Row 1:
- Single crochet across
- Chain 1, turn
Row 2–6:
- Repeat single crochet rows
- Gradually decrease stitches at edges to taper the shape
This creates a slightly triangular top.
🔘 Step 4: Create Button Loop
At the top:
- Chain 10–15 (depending on button size)
- Slip stitch back into the same stitch
- Fasten off
🔲 Step 5: Add Button
- Sew a button onto the towel below the loop
- This allows the towel to hang securely on an oven handle or hook
🔥 Step 6: Crochet the Lighter Holder
Now let’s create the small pocket or loop for the lighter.
Option A: Pocket Style
Step 1:
- Chain 10–12 stitches
Step 2:
- Work single crochet rows for 6–8 rows
Step 3:
- Fasten off and sew onto the towel front
This creates a snug pocket for the lighter.
Option B: Loop Holder (Simpler)
- Attach yarn to side of towel
- Chain 15–20
- Slip stitch back to base
This creates a loop to slide the lighter through.
✂️ Step 7: Finishing Touches
- Weave in all loose ends
- Trim excess yarn
- Check button and pocket security
- Adjust shape if needed
🎨 Customization Ideas
🌈 Color Combinations
- Neutral tones for a modern kitchen
- Bright colors for a cheerful look
- Match towel and yarn for a cohesive design
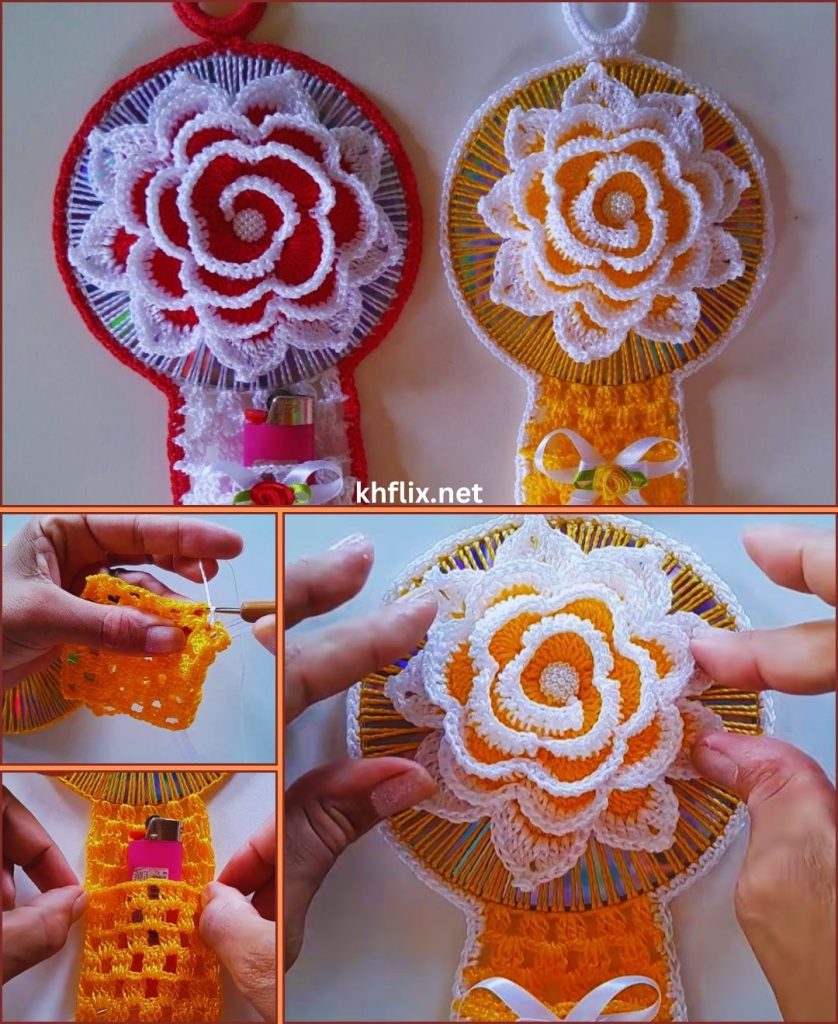
🌸 Decorative Additions
- Crochet flowers or appliqués
- Edging around the towel
- Stripes or textured stitches
🧵 Texture Variations
- Use half double crochet for thicker texture
- Add ribbing for elasticity
💡 Tips for Best Results
- Always use cotton yarn (heat-resistant and absorbent)
- Keep stitches tight for durability
- Make sure the lighter holder is snug but accessible
- Reinforce sewing areas היט
⚠️ Safety Note
- Keep the lighter secure and away from children
- Ensure the holder is tight enough to prevent slipping
- Do not expose yarn directly to flame
🎁 Great Uses for This Project
- Kitchen organization
- BBQ accessory
- Housewarming gift
- Craft fair item
- Camping or outdoor cooking tool
♻️ Eco-Friendly Benefits
This project supports sustainable crafting:
- Reuse old towels
- Reduce disposable products
- Create long-lasting handmade items
🌟 Final Thoughts
The crocheted dish towel with a lighter holder is a perfect blend of functionality, creativity, and simplicity. It’s a small project with big usefulness—ideal for beginners and experienced crocheters alike.
With just a bit of yarn and a simple towel, you can create something that makes everyday tasks easier while adding a warm handmade touch to your kitchen 💛