 by
Creating a 3D Crochet Christmas Tree Ornament with scalloped botanical boughs, a sturdy wooden trunk, and a star topper gives your holiday decor a crisp, heirloom finish. Working in continuous spiral rounds using back-loop-only ridges allows you to layer lush, overlapping branches directly onto a structured cone body.
🧶 The Holiday Botanical Toolkit
- Yarn:100% Mercerized Cotton Yarn (Sport weight / DK / Weight 3) or Worsted Weight (Weight 4). Mercerized cotton keeps the tree cone standing upright without sagging under its own weight and gives the scalloped branches razor-sharp stitch definition.
- Palette: Deep pine or forest green for the tree body and boughs, warm chestnut brown for the trunk, and bright gold or sunny yellow for the star topper and hanging loop.
- Hook: 2.5 mm or 3.0 mm (for DK cotton) or 3.5 mm (for worsted weight). A snug hook prevents stuffing from showing through the cone.
- Structural & Finishing Supplies:
- Polyfill fiber stuffing.
- Small wooden craft beads (4 mm to 6 mm) or seed pearls for ornaments, plus matching sewing thread.
- Tapestry needle, stitch marker, and sharp embroidery scissors.
🎄 Step 1: Crocheting the Structured Tree Cone (Continuous Spiral)
We build the inner cone from the top point downward, leaving exposed front loops every few rows so we can attach the cascading branches later. Use a stitch marker to track the first stitch of every round.
- Round 1: With Forest Green, make a Magic Ring and work 4 single crochets (sc) into the ring. (4 stitches)
- Round 2: Work 1 sc in each stitch around. (4 stitches)
- Round 3: (1 sc in next stitch, 2 sc in next stitch) repeat twice. (6 stitches)
- Round 4 (Branch Anchor Row): Working in the Back Loops Only (BLO), work 1 sc in each stitch around. (6 stitches)
- Round 5: Working through both loops again, (1 sc in next 2 stitches, 2 sc in next stitch) repeat twice. (8 stitches)
- Round 6: (1 sc in next 3 stitches, 2 sc in next stitch) repeat twice. (10 stitches)
- Round 7 (Branch Anchor Row): Working in BLO, work 1 sc in each stitch around. (10 stitches)
- Round 8: (1 sc in next 4 stitches, 2 sc in next stitch) repeat twice. (12 stitches)
- Round 9: (1 sc in next 2 stitches, 2 sc in next stitch) repeat 4 times. (16 stitches)
- Round 10 (Branch Anchor Row): Working in BLO, work 1 sc in each stitch around. (16 stitches)
- Round 11: (1 sc in next 3 stitches, 2 sc in next stitch) repeat 4 times. (20 stitches)
- Round 12: (1 sc in next 4 stitches, 2 sc in next stitch) repeat 4 times. (24 stitches)
- Round 13 (Bottom Edge Anchor): Working in BLO, work 1 sc in each stitch around. (24 stitches)

🌿 Step 2: Adding the Scalloped Pine Boughs
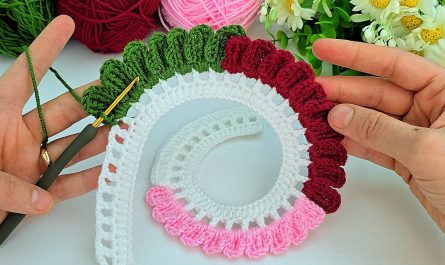
Before closing the bottom of the tree, crochet lush, ruffled boughs directly into the four unworked Front Loop Only (FLO) ridges you left on Rounds 4, 7, 10, and 13.
- Hold the tree upside down (tip pointing away from you). Attach Forest Green yarn into any unworked front loop on Round 4.
ch 2, work 2 double crochets (dc) into that same front loop,ch 2, andsl stinto the next front loop.- Repeat this scalloped shell sequence around all 6 stitches of Round 4. Fasten off and weave the tail inside the cone.
- Repeat this exact scalloped shell technique around Round 7 (5 shells), Round 10 (8 shells), and the bottom edge on Round 13 (12 shells).
🪵 Step 3: Stuffing, Base Closure & Wooden Trunk
- Stuffing the Cone: Firmly pack polyfill fiber stuffing inside the tree cone, using the back end of your crochet hook to push stuffing all the way up into the narrow top point so it feels solid and balanced.
- Closing the Base (Round 14): Attach Forest Green into the remaining back loops of Round 13. Work (1 sc in next 2 stitches, invisible decrease) 6 times. (18 stitches)
- Round 15: (1 sc in next stitch, invisible decrease) 6 times. (12 stitches). Top off with a pinch of stuffing.
- Round 16: Work 6 invisible decreases around, fasten off, and sew the remaining 6 loops tightly shut.
- Crocheting the Trunk:
- Attach Chestnut Brown yarn into the center 6 stitches at the bottom base of the tree.
- Work 3 rounds of 6 sc in a continuous spiral to form a sturdy little stump. Fasten off, sew the bottom of the trunk closed, and weave in the end.

⭐ Step 4: The Star Topper, Ornaments & Hanging Loop
- Mini 5-Pointed Star:
- With Gold Yarn, make a Magic Ring,
ch 1, and work 5 sc into the ring. Join with asl st. ch 3, work1 scin 2nd chain from hook,1 hdcin next chain, andsl stinto the next sc on the center ring.- Repeat around all 5 center stitches to create 5 sharp star points. Fasten off, leaving a 6-inch tail, and stitch the star upright onto the tip of the tree.
- With Gold Yarn, make a Magic Ring,
- Beaded Garland & Loop:
- Thread small wooden beads or seed pearls onto sewing thread and tack them along the edges of the green scallops so they catch the light like miniature baubles.
- Cut a 7-inch piece of gold yarn, thread it through the top point of the star, and tie an overhand knot to form a hanging loop.

✨ Pro-Tips for Boutique Holiday Decor
- Steam-Set the Boughs: Hold the finished tree over gentle kettle steam for 3 to 5 seconds, then press the scalloped boughs slightly outward with your fingers. Once cooled, the cotton locks into crisp, tiered layers.
- Tabletop Display Variation: Skip the hanging loop and glue a flat wooden craft disc (1.5 inches wide) to the bottom of the brown trunk so your crocheted trees stand upright as a festive centerpiece forest.