 by
by Crocheting a rose is a “rite of passage” for many beginners. It looks incredibly intricate—like a piece of art—but the secret is that it is actually one of the easiest projects to master. Unlike working in complicated spirals, the most beginner-friendly way to make a rose is by crocheting a flat strip and rolling it up like a ribbon.
This detailed guide will teach you the “Rolled Rose” technique, specifically focusing on how to add multiple colors to create depth, realism, and a stunning two-tone effect.
Materials You Will Need
To make your first multicolor rose, you don’t need fancy equipment.
- Yarn:
- Color A (Petal Main Color): Pink, Red, Yellow, or White.
- Color B (Petal Edge/Accent): A contrasting color (e.g., Dark Red for a pink rose, or White for a red rose).
- Color C (Optional Leaf Color): Green.
- Recommendation: Worsted Weight (Aran/10-ply) acrylic or cotton yarn is easiest for beginners. Cotton provides great stitch definition.
- Crochet Hook: Size 4.0mm (G/6) or 5.0mm (H/8).
- Yarn Needle (Tapestry Needle): This is essential for sewing the rose together.
- Scissors
Crochet Abbreviations (US Terms)
- ch: Chain
- sl st: Slip Stitch
- sc: Single Crochet
- hdc: Half Double Crochet
- dc: Double Crochet
- st(s): Stitch(es)
- sp: Space
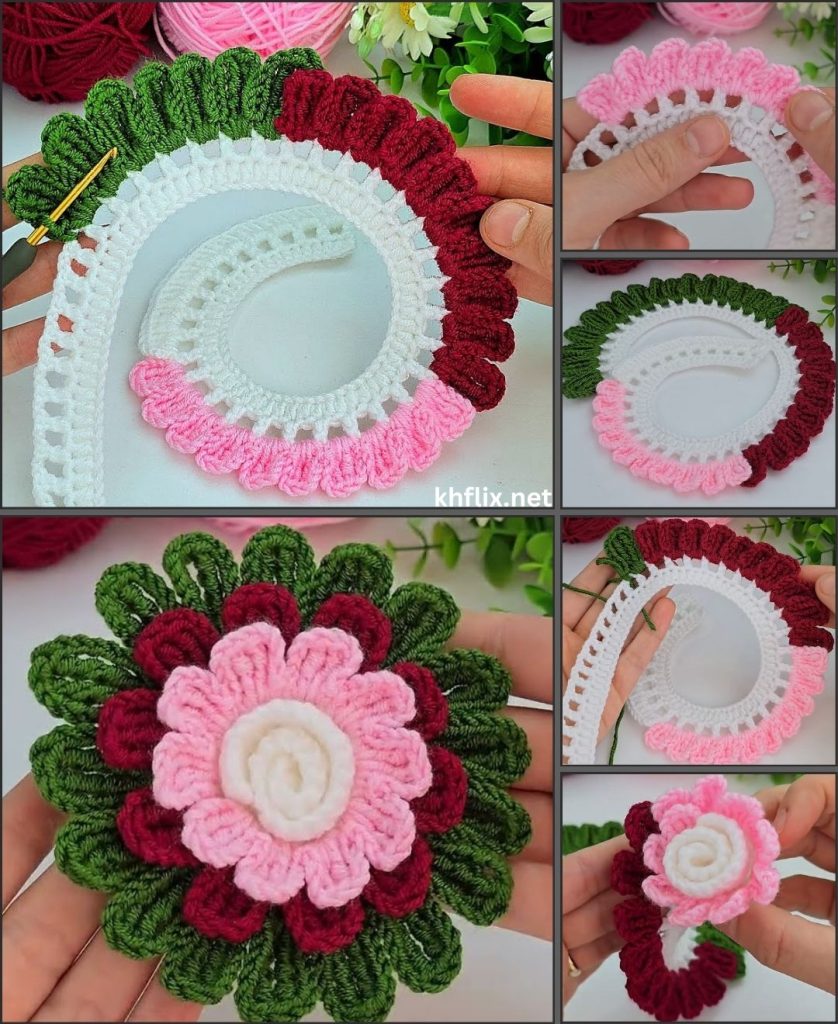
The Multicolor Strategy
There are two ways to make a multicolor crochet rose. We will focus on Method 2 in this tutorial as it is the most beautiful and professional-looking.
- The Block Method: Changing colors halfway through the strip (e.g., yellow center petals, pink outer petals).
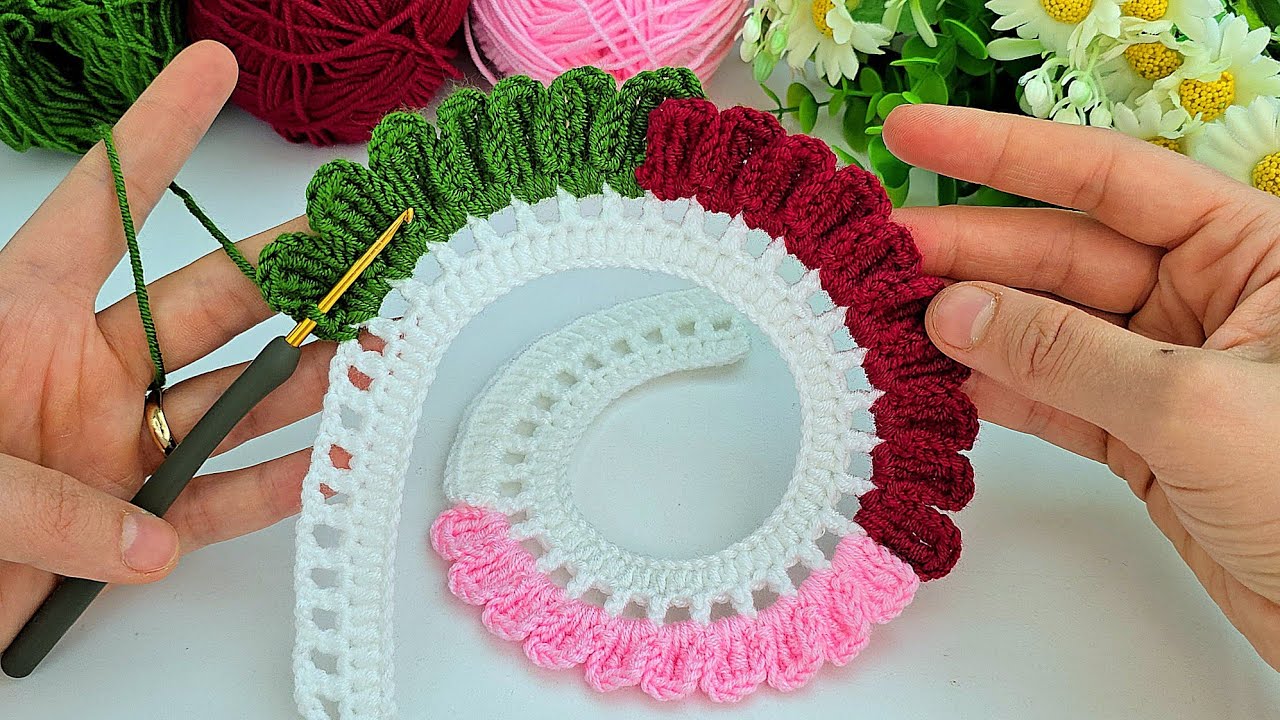
- The Edging Method (Recommended): Crocheting the petals in one color, and adding a final “trim” row in a contrasting color. This highlights the shape of every single petal.
Part 1: The Foundation (The Lattice)
The rose starts as a long, flat ladder-like strip. We will create “gaps” that we will later fill with petals.
- Start: With Color A (Main Petal Color), make a slip knot and Chain 51.
- Note: If you want a smaller rose, chain fewer (e.g., 31). If you want a giant rose, chain more (e.g., 71). Just ensure you have an odd number.
- Row 1:
- Work 1 dc in the 5th chain from the hook. (This counts as a dc + ch 1).
- *Ch 1, skip the next chain, work 1 dc in the next chain.*
- Repeat from * to * all the way to the end of the chain.
- Result: You should look like you have a long ladder or a row of “V” shapes and squares. You should have roughly 24 “spaces” or gaps.
- Turn your work.
Part 2: The Petals (Main Color)
Now we will create the scallop shapes that will become the petals. We will graduate the size of the petals (small to large) so the center of the rose looks tight and the outside looks blooming.
- Row 2 (Small Petals):
- Ch 1.
- In the first “gap” (space) from the previous row: Work (1 sc, 4 dc, 1 sc) all in that same space. This is your first petal.
- In the next gap: (1 sc, 4 dc, 1 sc).
- Repeat this for the next 6 gaps. (Total: 8 small petals).
- Row 2 (Medium Petals):
- In the next gap: Work (1 sc, 6 dc, 1 sc).
- Repeat this for the next 8 gaps.
- Row 2 (Large Petals):
- In the next gap: Work (1 sc, 8 dc, 1 sc).
- Repeat this until you reach the end of the strip.
- Fasten off Color A. (Cut the yarn and pull through).
At this point, your strip will naturally start to curl. This is a good thing! It means the petals are ruffling properly.
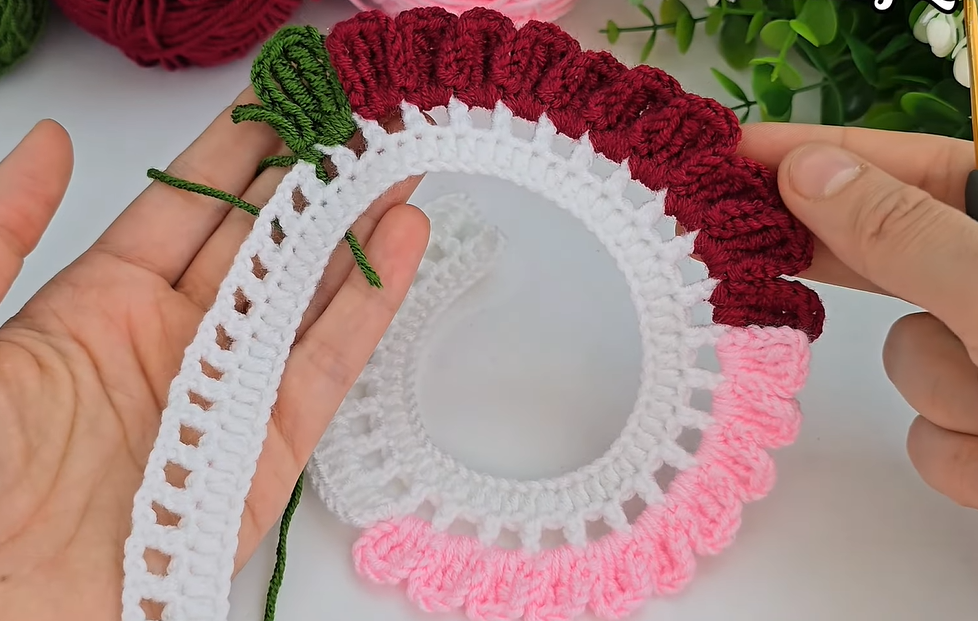
Part 3: The Multicolor Magic (The Edging)
This step transforms a plain flower into a masterpiece. We will outline the petals to make them pop.
- Join Color B:
- Go back to the beginning of the strip (where the small petals are).
- Insert your hook into the very first sc of the first petal.
- Pull through Color B (Accent Color) and ch 1.
- Row 3 (The Trim):
- Work 1 sc in each dc stitch along the top curve of the petals.
- When you reach the “valley” between two petals (where the sc stitches connect to the main bar), work a Slip Stitch (sl st) tightly. This pulls the petals apart and defines them.
- Pattern: *Sc in each dc across the top of the petal, Sl st in the space between petals.*
- Repeat this all the way to the end of the strip.
- Fasten Off: Cut Color B. You now have a long, curling, two-colored strip.
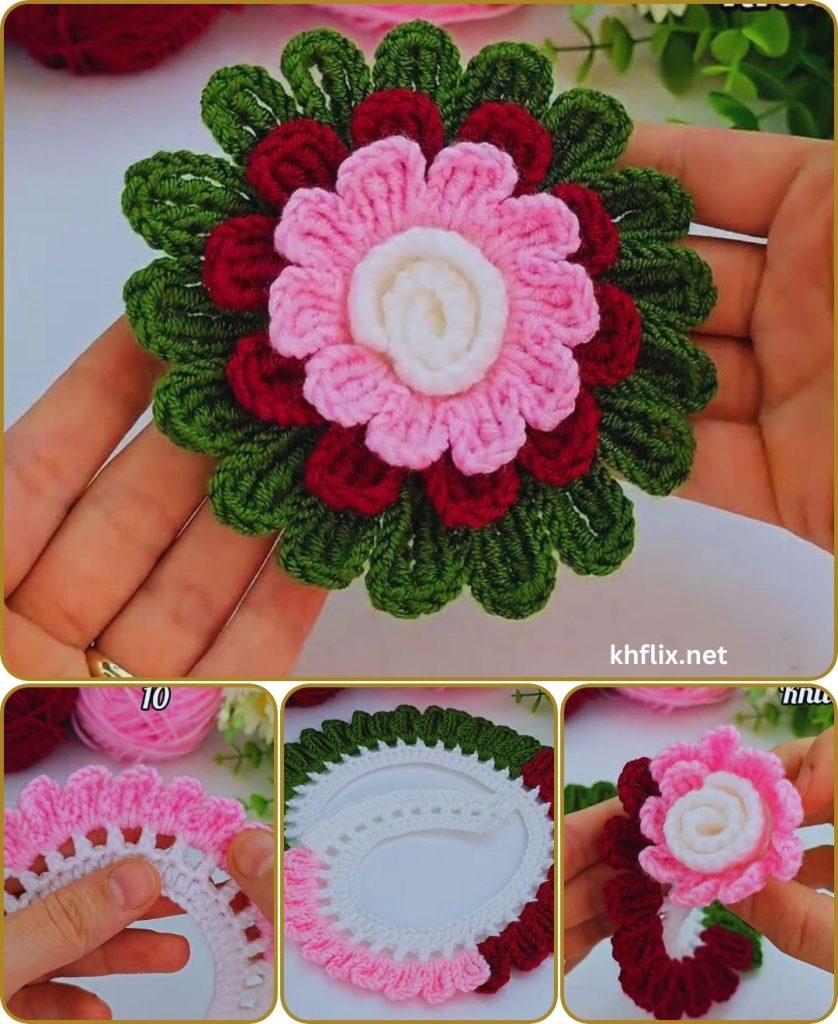
Part 4: Assembly (Rolling the Rose)
This is the most important part. The way you roll determines the shape.
- Thread the Needle: Cut a piece of yarn (about 12 inches) in Color A or B and thread your tapestry needle. Knot the end.
- Start Rolling: Hold the end of the strip with the Small Petals. Roll it tightly inward, like a cinnamon roll. This creates the “bud” center.
- Continue Rolling: Keep rolling the strip around the center bud.
- Tip: Don’t roll the outer layers too tightly. Let the Large Petals flare out slightly so the rose looks “open.”
- Ensure the bottom edge (the straight edge where you started) stays flat and aligned.
- Sewing: Flip the rose over so you are looking at the bottom.
- Push your needle through the layers of the foundation row. Stitch back and forth through the “spiral” at the base.
- Make sure you catch every layer with your needle so the center doesn’t fall out.
- Be generous with your stitches—no one will see the bottom!
- Secure: Tie a knot and trim the ends.
Bonus: Adding a Green Leaf
To make your rose look complete, add a simple leaf.
- Foundation: With Green Yarn, Ch 10.
- Side 1:
- Sc in 2nd ch from hook.
- Hdc in next ch.
- Dc in next 5 chs.
- Hdc in next ch.
- (Sc, ch 2, Sc) in the last chain. (This turns the corner).
- Side 2:
- Working down the other side of the chain (mirroring the first side):
- Hdc in next st.
- Dc in next 5 sts.
- Hdc in next st.
- Sc in last st.
- Join: Sl st to the first sc. Fasten off, leaving a tail to sew the leaf to the bottom of your rose.
Final Thoughts & Tips
- Texture: If you want a more ruffled rose, add more DC stitches to your petals in Row 2 (e.g., do 10 dc instead of 8 for the large petals).
- Yarn Choice: A mercerized cotton yarn gives a shiny, professional finish, while acrylic makes a soft, fuzzy, cozy rose.
- Usage: Sew a safety pin to the back for a brooch, attach it to a hair tie, or hot glue it onto a picture frame!
Would you like me to explain how to turn this into a full bouquet with a stem?