 by
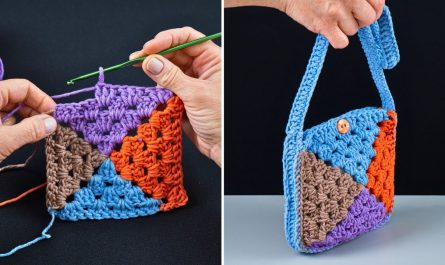
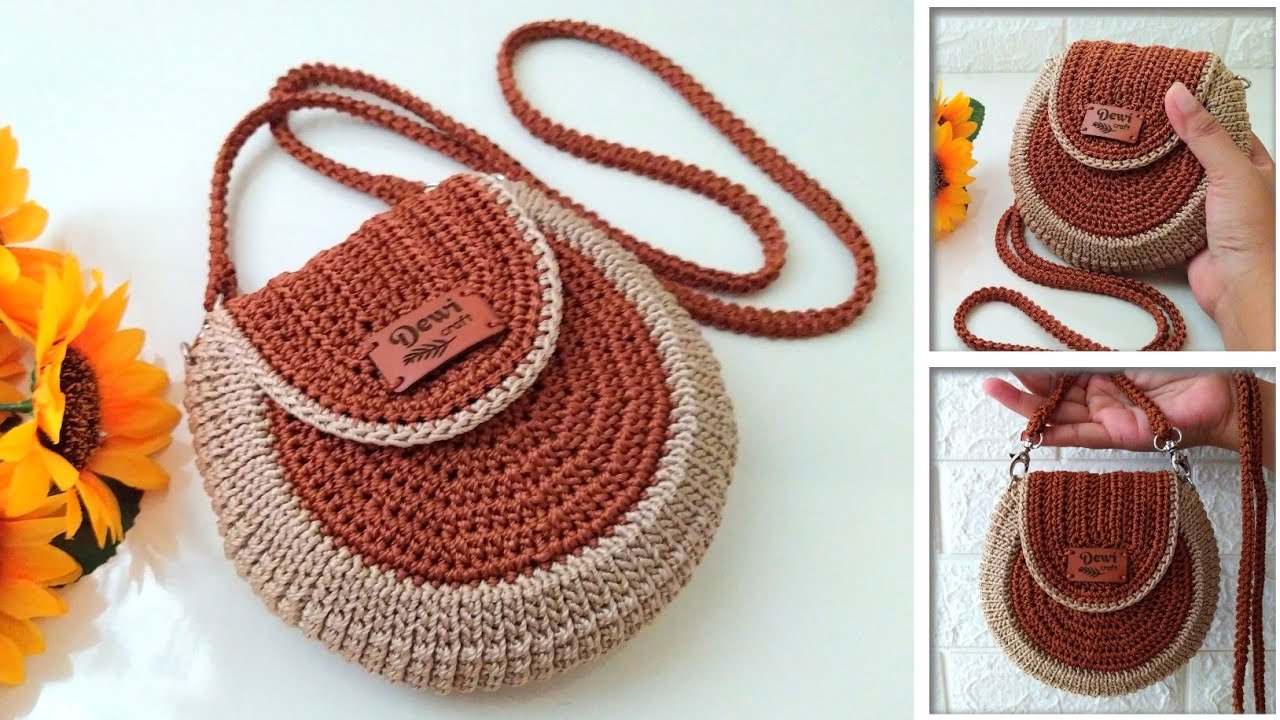
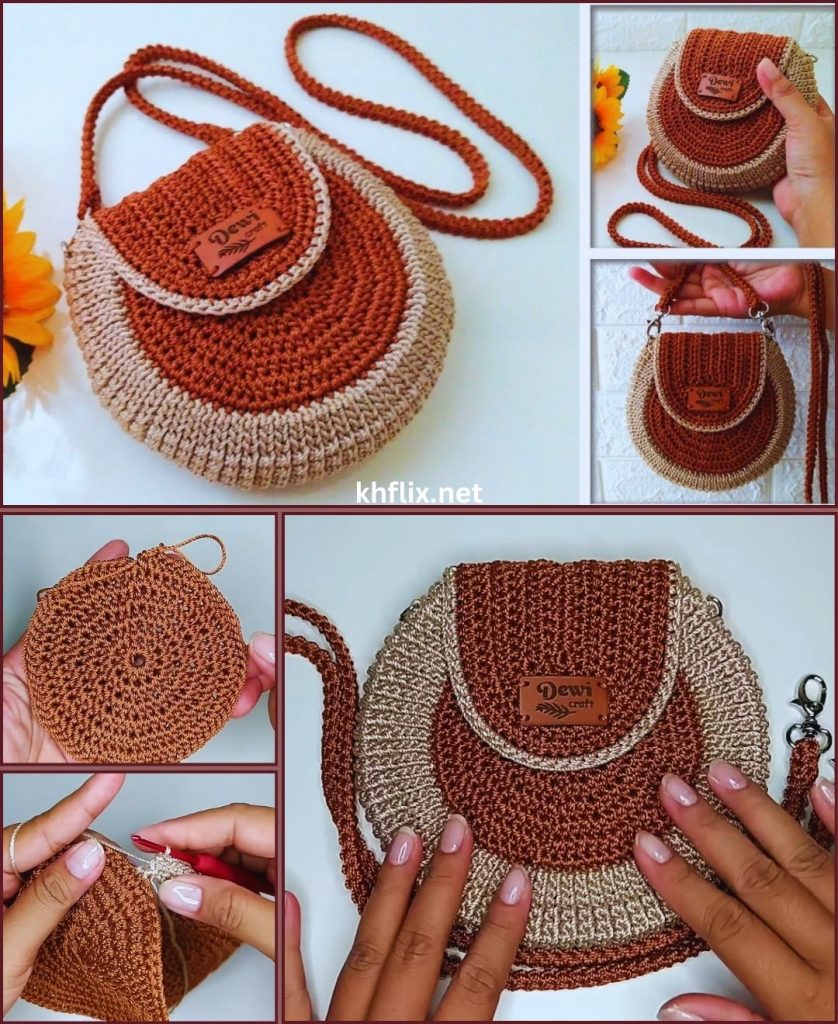
by Crocheting your own sling bag is one of the most rewarding projects because the result is both stylish and practical. The bag in your image features a round base, two colors, a curved flap, and a long crochet strap, giving it a professional, modern look while remaining beginner-friendly.
This article will guide you in detail through making the exact style shown.
🌼 💡 Materials You Will Need
Yarn
- Color A – Light beige (for the bottom half and edge of flap)
- Color B – Brown (for the upper body and inside of flap)
Recommended yarn: - Cotton cord, polyester cord, or medium-weight macrame yarn (2–3 mm)
Tools
- Crochet hook: 4.0 mm–5.0 mm depending on yarn thickness
- Stitch markers
- Scissors
- Yarn needle
- Optional: fabric for lining
- Optional: swivel hooks or metal rings for strap attachment
- Leather label/tag (optional decoration)
🧵 Basic Stitches Used
This design uses very simple stitches:
- Magic ring
- Chain (ch)
- Slip stitch (sl st)
- Single crochet (sc)
- Increase stitch (2 sc in one stitch)
- Half double crochet (hdc) (optional for flap)
If you know these basics, you can make this bag easily.
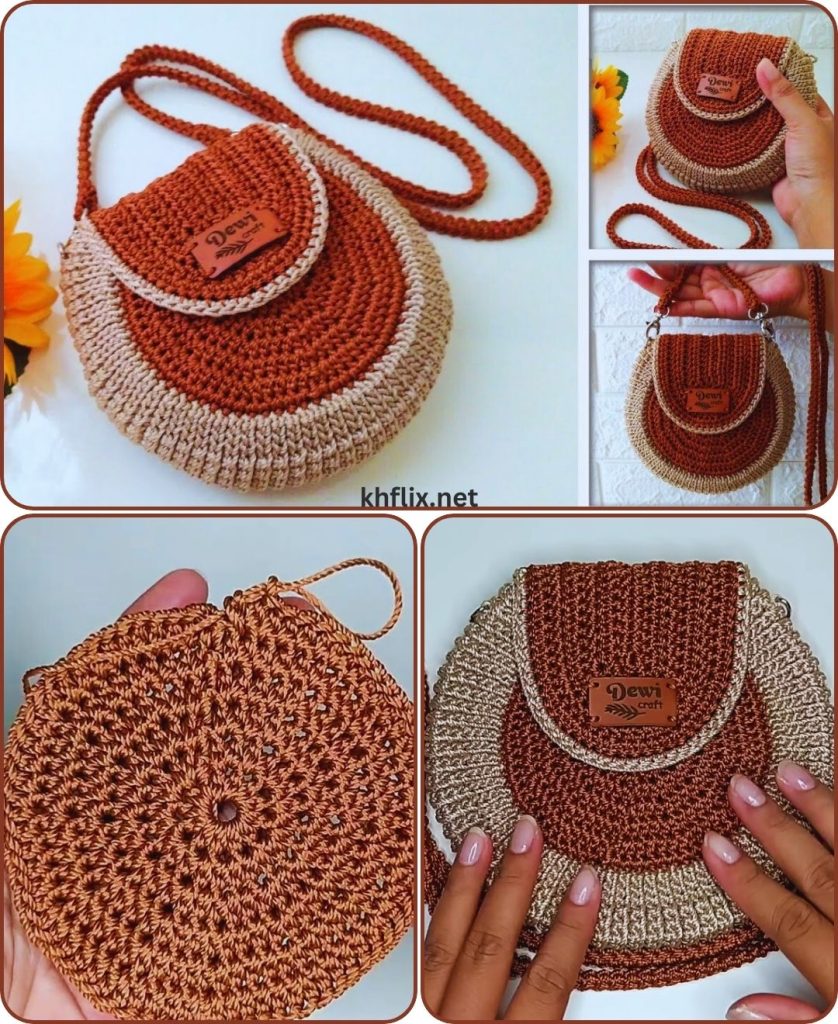
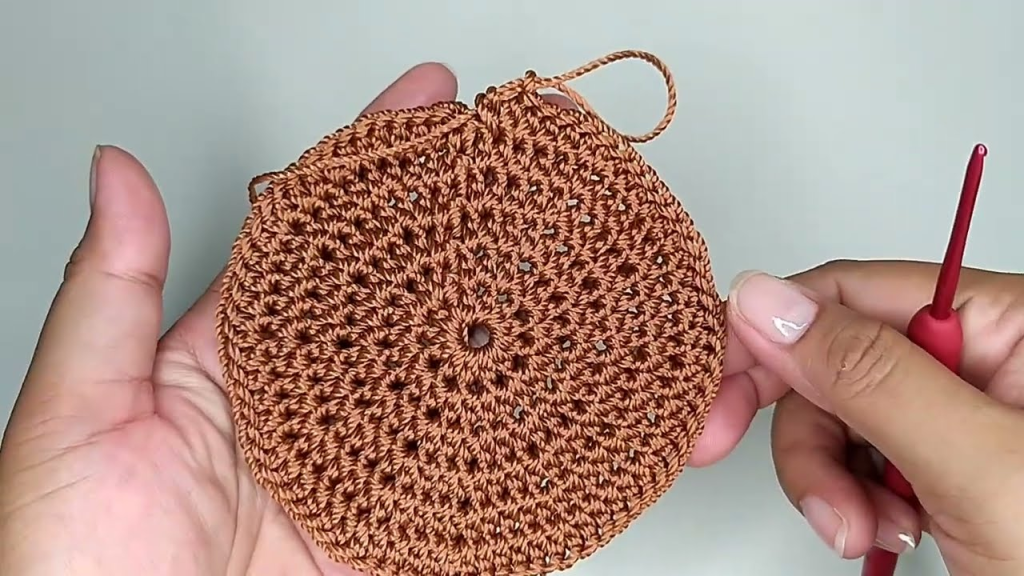
✨ SECTION 1 — Making the Round Base
The round base is the foundation of the whole bag.
Step 1: Create the Magic Ring
Using Color A, make a magic ring.
Inside the ring, crochet:
- 6 single crochets (6 sc)
Pull ring tight.
Step 2: Begin Increasing in Rounds
You’ll work in a spiral without joining.
Round 2:
- 2 sc in each stitch (6 increases) → 12 stitches
Round 3:
- 1 sc, 1 increase repeat around → 18 stitches
Round 4:
- 2 sc, 1 increase repeat around → 24 stitches
Round 5:
- 3 sc, 1 increase repeat around → 30 stitches
Continue increasing in this pattern (adding 1 more sc between increases each round) until the circle reaches the width you want for the bag — usually 20–23 cm wide.
Typically you’ll reach around 12–14 rounds.
Step 3: Make the Bottom Ribbed Texture
The bottom of the bag in your image has a subtle ribbing effect.
How to do it:
- Work one round of sc in the back loop only (BLO)
This creates a ridge and helps the body rise upward.
Switch to Color B when you reach the height transition.
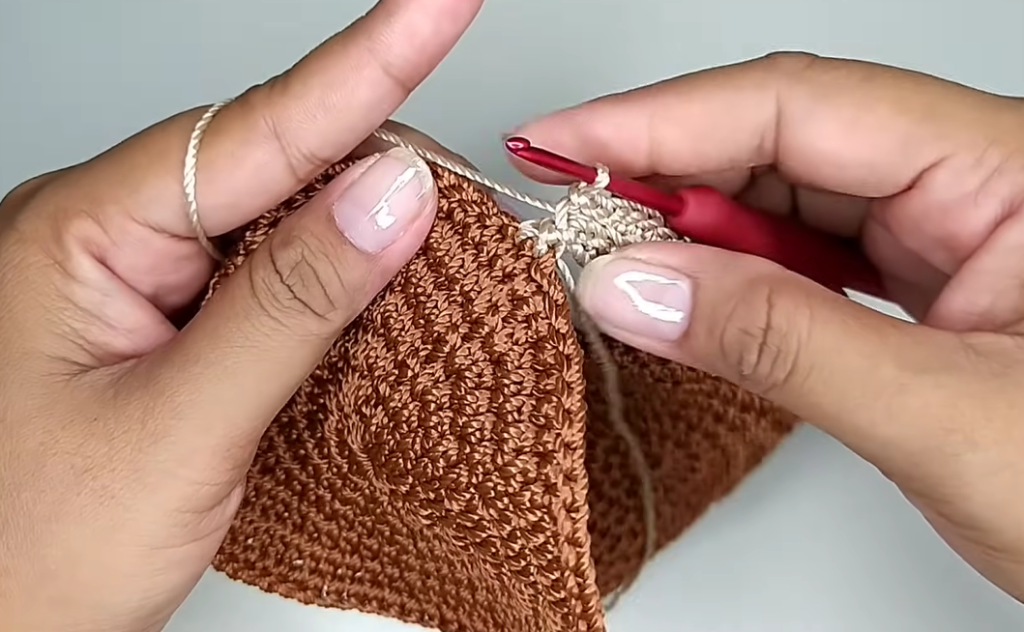
✨ SECTION 2 — Building the Body of the Bag
Now you will work straight rounds without increasing.
Step 4: Crochet Walls of the Bag
With Color B, work:
- 10–12 rounds of sc
No increases — this makes the bag’s sides curve upward.
Use a stitch marker to mark the beginning of each round.
✨ SECTION 3 — Making the Flap
The flap is worked separately, attached to the top edge, and shaped like a semicircle.
Step 5: Start the Flap
Retain Color B.
- Chain 12–18 chains (depending on flap size)
- Sc in the second chain from hook and across
You should have 10–16 stitches per row.
Step 6: Build Rows and Shape the Semicircle
You will now work in rows instead of rounds.
Row 1:
Sc across, ch 1, turn.
Row 2:
- Work 1 sc at start
- In the next stitch, do 3 sc in the same stitch (this forms the curved edge)
- Sc across remaining stitches
- Ch 1, turn
Row 3:
- Sc across to the center
- Again, place 3 sc in the center stitch
- Sc across
- Ch 1, turn
Repeat this shaping for 6–8 rows.
The flap will naturally widen and curve.
When the main brown flap is done, switch to Color A.
Step 7: Add Border to the Flap
- Using Color A, crochet one round of sc around the edges of the flap.
This neatens the shape and matches the bag’s bottom edge.
Optional: Add one round of slip stitches for decoration.
✨ SECTION 4 — Joining the Flap to the Bag
This is simple.
Step 8: Attach the Flap
Place the flap at the back of the bag, centered.
Using a yarn needle:
- Sew the straight top part of the flap to the top border of the bag.
- Ensure the curved part folds naturally forward.
Add your leather logo/tag on the flap if desired.
✨ SECTION 5 — Making the Strap
The strap is long, strong, and crocheted tightly.
Step 9: Crochet the Strap
Using Color B:
Option 1 – Simple Strap
- Chain 150–180 chains (depends how long you want it).
- Row 1: Sc in each chain.
- Row 2–4: Work additional sc rows to thicken.
This produces a strong, non-stretch handle.
Option 2 – Corded I-Cord Strap (Strongest)
For a rounder finish, create an I-cord using a smaller hook.
Step 10: Attach the Strap
You can:
Option A: Sew directly to bag
- Sew each end securely inside the bag wall.
Option B: Use metal rings/swivel hooks
(as shown in one version of your image)
- Sew short straps on each side
- Attach ring
- Clip the main strap to the rings
This makes it removable and adjustable.
✨ SECTION 6 — Finishing Touches
Step 11: Weave in Ends
Use a yarn needle to hide all yarn ends inside the bag.
Step 12: Optional — Add Lining
Cut a circle and a rectangle of fabric and sew inside for:
- More strength
- Shape retention
- Preventing stretch
🎉 Your Cute Round Crochet Crossbody Bag Is Ready!
You have created a beautiful handmade sling bag featuring:
✔ A sturdy round base
✔ Two-tone design
✔ A semicircle flap
✔ Decorative color border
✔ A strong crocheted strap
✔ A professional finish
This project is perfect for gifting, selling, or simply enjoying for yourself.