by
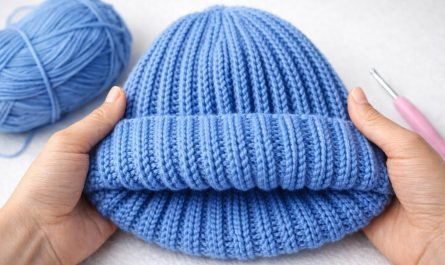
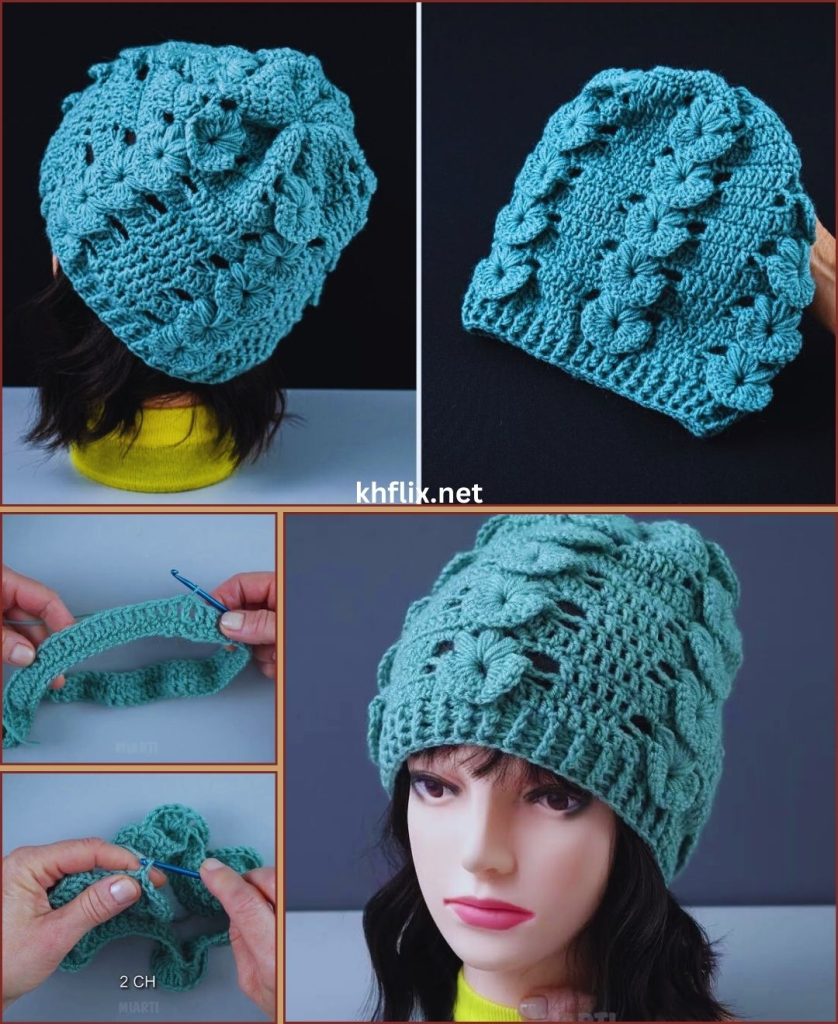
by Crocheting a hat is one of the most satisfying projects for beginners, and using a 3D crochet stitch makes it even more exciting. A 3D stitch creates a raised, textured pattern that looks complex but is actually very easy to learn. This tutorial will guide you step by step on how to crochet a very easy 3D stitch hat, even if you are a complete beginner.
By the end of this tutorial, you will understand the materials needed, basic crochet skills, how to create the 3D stitch, and how to shape your hat beautifully.
Why Choose a 3D Stitch Hat?
A 3D stitch hat is perfect for beginners because:
- It looks professional and stylish
- The stitch pattern is simple and repetitive
- Mistakes are easy to fix
- The texture hides small imperfections
- It works up quickly
This type of hat is great for winter wear, gifts, or even selling as handmade items.
Materials You Will Need
Before starting, gather all your materials. Using the right tools makes learning much easier.
Yarn
- Medium-weight yarn (Category 4 – Worsted weight)
- Soft acrylic or wool blend yarn is ideal for beginners
- Choose a light or medium color so you can see your stitches clearly
Crochet Hook
- 5.0 mm (H/8) or 5.5 mm (I/9) crochet hook
- Use the hook size recommended on your yarn label
Additional Tools
- Scissors
- Yarn needle (for weaving in ends)
- Stitch marker (optional but helpful)
Basic Crochet Skills You Need
This project is beginner-friendly, but you should be familiar with a few basic crochet stitches:
- Slip Knot
- Chain (ch)
- Slip Stitch (sl st)
- Single Crochet (sc)
- Double Crochet (dc)
If you know these stitches, you are ready to start.
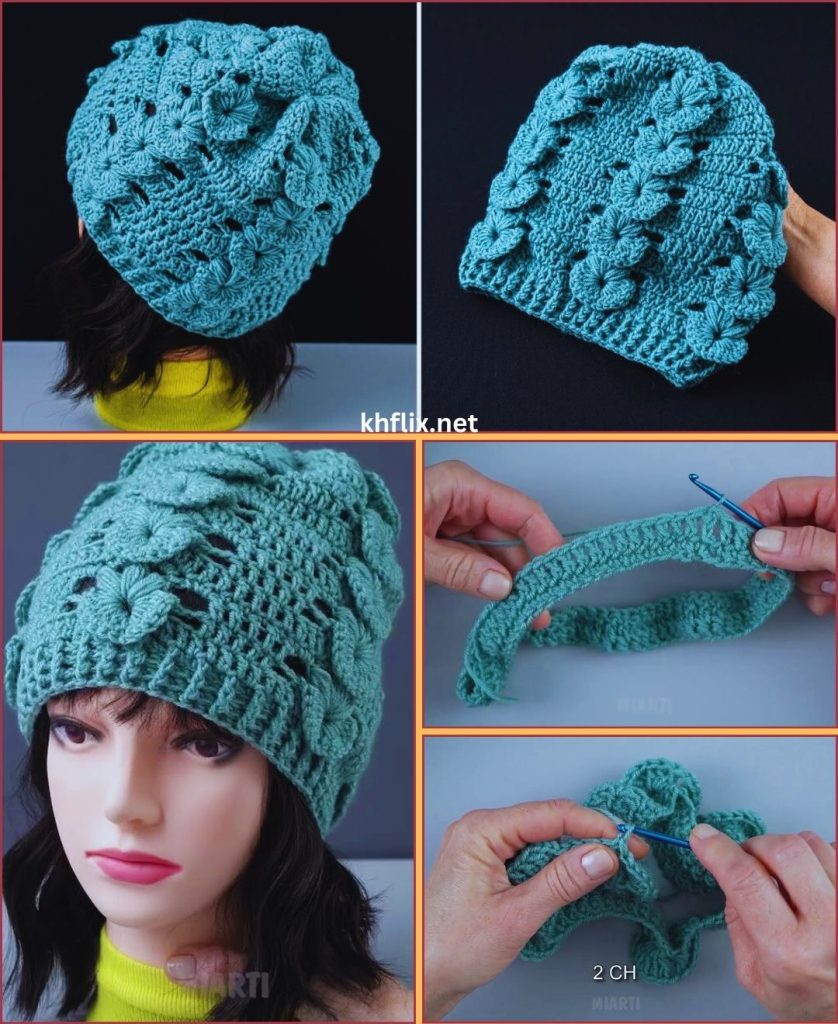
Understanding the 3D Crochet Stitch
The 3D stitch used in this hat is usually made by working stitches around the post of a stitch instead of into the top loops. This creates a raised, textured effect.
Common 3D stitches include:
- Front Post Double Crochet (FPdc)
- Puff stitches
- Popcorn stitches
In this tutorial, we focus on a very easy front-post-style texture that beginners can master quickly.
Step 1: Making the Hat Base (Magic Ring or Chain Method)
Option 1: Magic Ring (Recommended)
- Make a magic ring
- Chain 2 (counts as first stitch)
- Work 10–12 double crochets into the ring
- Pull the ring tight
- Join with a slip stitch
Option 2: Chain Method (Easier for Absolute Beginners)
- Chain 4
- Join with a slip stitch to form a ring
- Chain 2
- Work 10–12 double crochets into the ring
- Join with a slip stitch
This forms the top of your hat.
Step 2: Increasing for the Crown
To make the hat fit properly, you need to increase evenly.
Round 2:
- Chain 2
- Work 2 double crochets into each stitch around
- Join with a slip stitch
Round 3:
- Chain 2
- 1 double crochet, 2 double crochets in next stitch
- Repeat around
- Join with a slip stitch
Continue increasing in this pattern until the crown is wide enough to sit flat (about 6–7 inches in diameter for an adult).
Step 3: Starting the 3D Stitch Pattern
Once the crown is complete, stop increasing and begin the textured pattern.
Basic 3D Stitch Pattern:
- Chain 2
- Front Post Double Crochet around the next stitch
- Double crochet in the next stitch
- Repeat this pattern around
- Join with a slip stitch
This alternating pattern creates a beautiful raised 3D effect that looks intricate but is very easy to repeat.
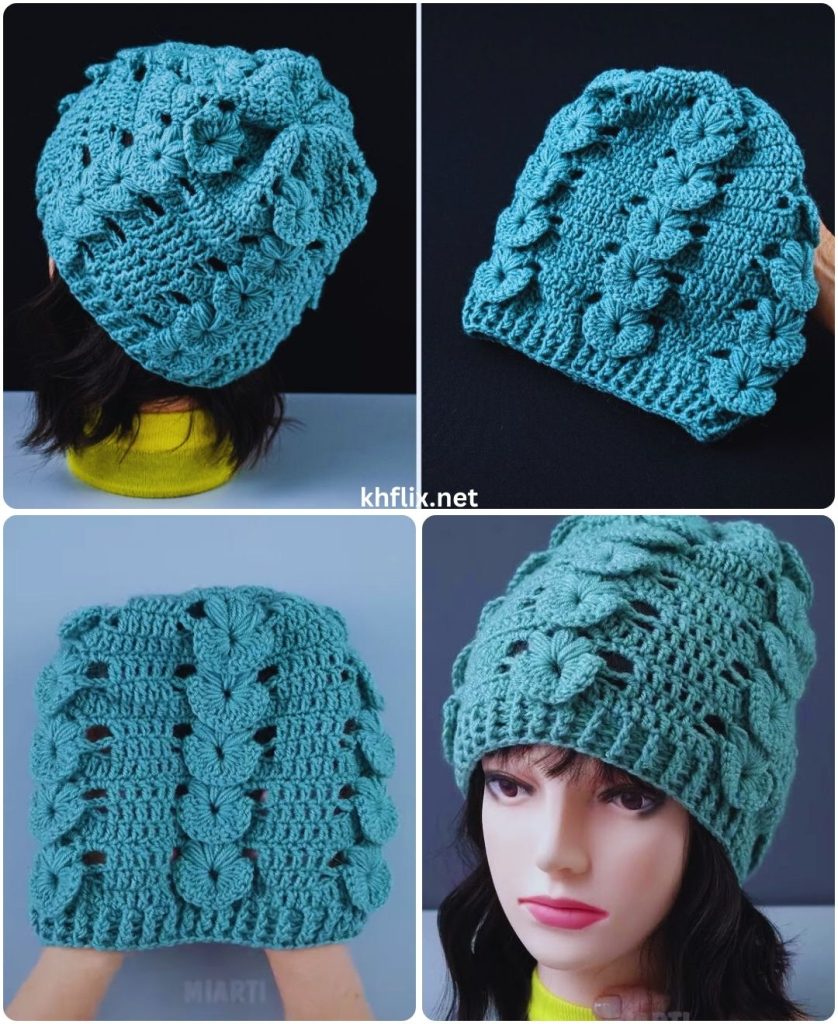
Step 4: Building the Hat Body
- Continue working the 3D stitch pattern in rounds
- Do not increase
- Try the hat on occasionally to check length
- Crochet until the hat reaches your desired height (usually 7–9 inches from the crown)
The texture will become more defined as you add more rows.
Step 5: Creating a Neat Hat Edge
To finish the hat neatly:
Simple Edge Option:
- Single crochet evenly around
- Join with a slip stitch
Ribbed Edge Option:
- Work back post double crochets around
- This creates a stretchy, snug fit
Repeat the edge round 1–2 times for a clean finish.
Step 6: Finishing the Hat
- Cut yarn, leaving a 5–6 inch tail
- Pull through the last loop to secure
- Use a yarn needle to weave in all ends
- Turn the hat right side out
- Shape gently with your hands
Your 3D stitch hat is now complete!
Tips for Beginners
- Practice the 3D stitch on a small swatch first
- Use stitch markers to track rounds
- Keep your tension relaxed
- Don’t worry if it’s not perfect – texture hides mistakes
- Count stitches to maintain consistency
Customization Ideas
Once you’re comfortable, try:
- Adding a pom-pom
- Using two colors
- Making child or baby sizes
- Adding a folded brim
- Using chunky yarn for a cozy look
Final Thoughts
Crocheting a very easy 3D stitch hat is an excellent project for beginners who want to create something beautiful and practical. The raised texture gives the hat a modern, professional appearance while still being simple enough for new crocheters.
With patience and practice, you’ll gain confidence and improve your skills with every stitch. Most importantly, enjoy the process and have fun creating your handmade crochet hat!
Happy crocheting 🧶✨