 by
by How to AN INCREDIBLY EASY TECHNIQUE – CROCHET SHOES
A Complete Beginner-to-Confident Guide
Crocheting shoes might sound complicated, but with the right technique, it becomes surprisingly simple—even for beginners. The secret isn’t advanced stitches. It’s understanding construction.
This article will teach you an incredibly easy technique for crocheting shoes using a structured, repeatable method that works for:
- Baby shoes
- House slippers
- Lightweight summer shoes
- Indoor soft sole footwear
Once you understand this method, you can customize it endlessly.
Why This Technique Is So Easy
Many crochet shoe patterns look complex because they:
- Use many shaping rows
- Require sewing multiple pieces
- Include advanced stitches
The incredibly easy technique simplifies everything into three main parts:
- The Sole (oval base)
- The Wall (build upward)
- The Top (shape and close)
That’s it.
No complicated construction. No confusing assembly.
Materials You’ll Need
Keep it simple.
Yarn
- Worsted weight (medium #4) for adult slippers
- DK/lightweight yarn for baby shoes
- Cotton or acrylic blend recommended
Hook
- 4.0 mm (G) for lightweight yarn
- 5.0 mm (H) for worsted yarn
Other Tools
- Scissors
- Yarn needle
- Stitch markers (optional but helpful)
Basic Stitches Used
This easy technique only uses:
- CH – Chain
- SC – Single Crochet
- HDC – Half Double Crochet
- SL ST – Slip Stitch
- SC2TOG – Single Crochet 2 Together (Decrease)
If you know these, you’re ready.
The Incredibly Easy 3-Part Method
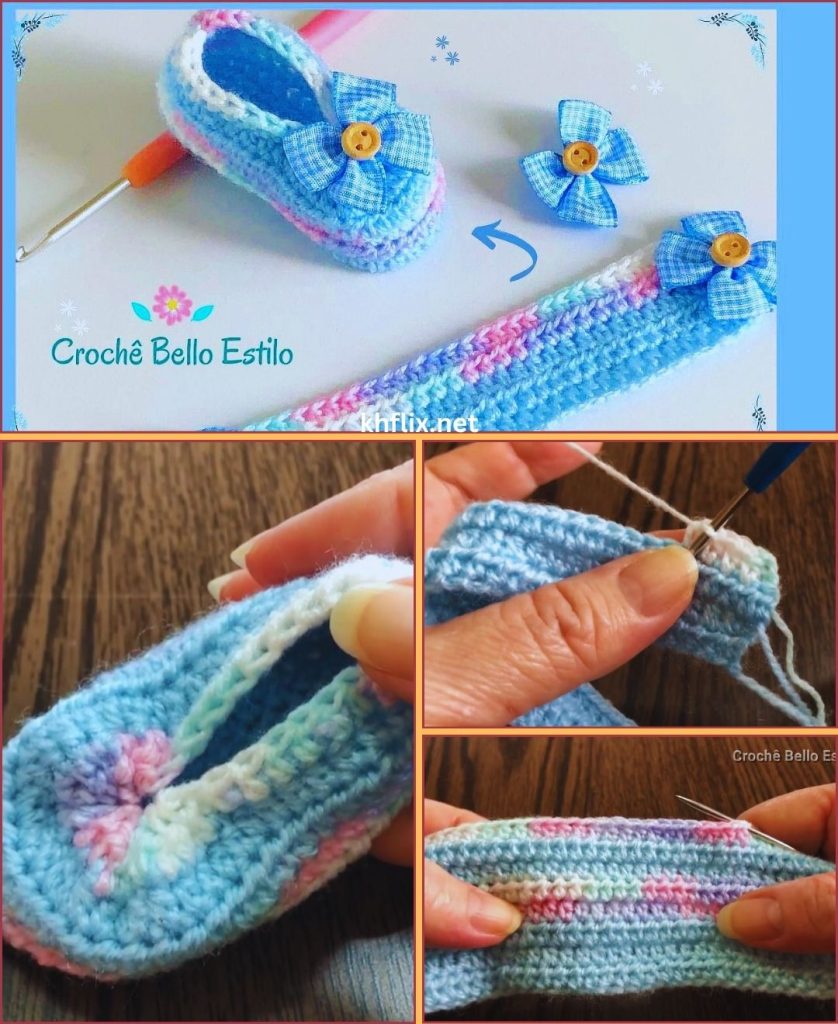
PART 1: The Sole (Foundation of the Shoe)
The sole is made in an oval shape.
Step 1: Chain Base
For an average adult slipper:
- CH 21
For baby shoes:
- CH 10–12
Step 2: Create an Oval
- SC in 2nd chain from hook
- SC across until last chain
- 5 SC in last chain
- Turn work to other side of chain
- SC across
- 3 SC in last stitch
- SL ST to join
You now have an oval.
Step 3: Increase Round
- CH 1
- SC in first stitch
- 2 SC in next stitch
- Continue around, placing increases at rounded ends
- SL ST to join
Repeat increase rounds until sole matches foot length.
💡 Tip: Always lay the sole flat. If it curls, you need more increases. If it ruffles, reduce increases.
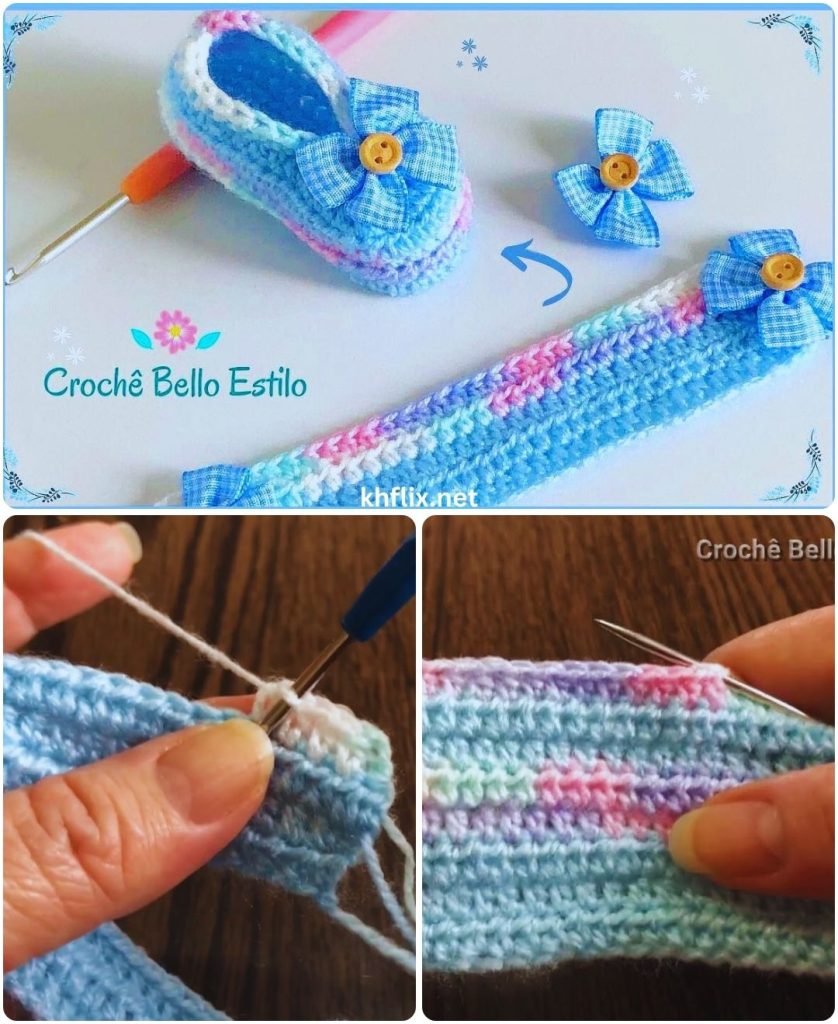
PART 2: Building the Walls (The Magic Step)
This is where the technique becomes incredibly easy.
Instead of shaping complicated panels, we simply:
Work in the Back Loops Only
- CH 1
- SC in BACK LOOP ONLY around
- SL ST to join
This creates a ridge and forces the work to turn upward.
Instant shoe shape.
Continue Upward
Now:
- CH 1
- SC in both loops around
- Repeat for 4–6 rounds (depending on height desired)
You now have a soft bowl shape.
That’s the body of the shoe.
No sewing required.
PART 3: Shaping the Toe (The Simplest Method)
This is where many patterns get complicated.
We’ll keep it simple.
Step 1: Find the Center
- Fold shoe in half
- Mark the center front
- Count 8–12 stitches across the toe (depending on size)
Step 2: Decrease Across the Front
- SC until you reach first marker
- SC2TOG across the marked stitches
- SC to end
- SL ST to join
Repeat one more decrease round if needed.
Suddenly, it looks like a real shoe.
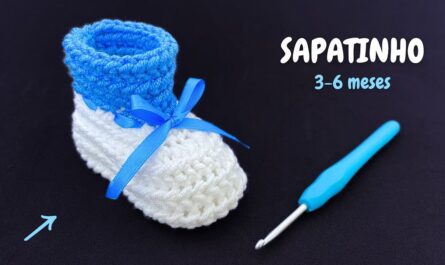
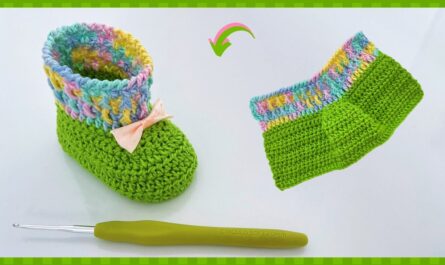
Optional: Making It a Closed Shoe
For more coverage:
- Continue decreasing over toe for 2–3 rounds
- Fasten off
- Sew small gap closed if needed
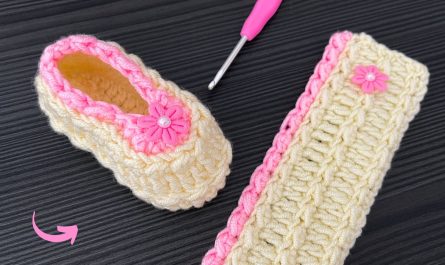
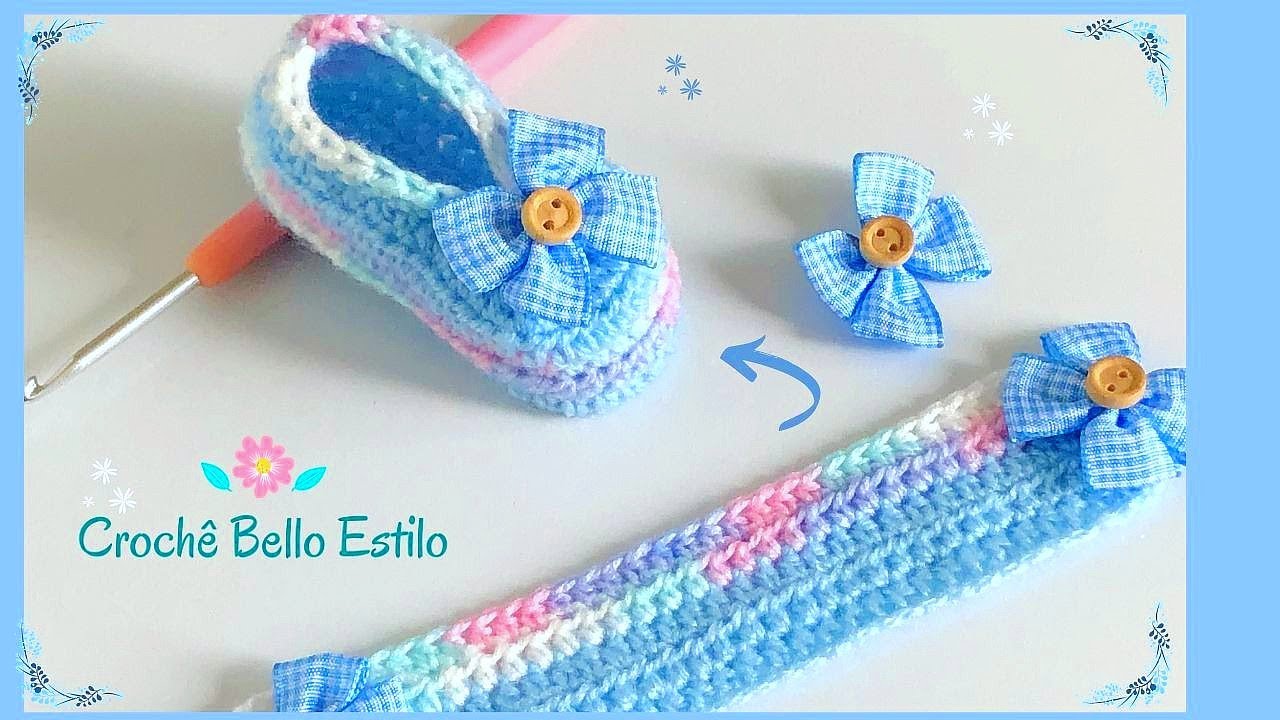
Optional: Add a Strap (Very Easy!)
- Attach yarn at side
- CH 15–20
- SL ST to opposite side
- Fasten off
Add a button for decoration.
Optional: Add a Drawstring
- CH 60
- Thread through top stitches
- Tie in bow
Perfect for baby shoes.
How to Make It Fit Perfectly
For Wider Feet:
- Add one more increase round to sole
For Narrow Feet:
- Reduce increases
For Taller Shoe:
- Add more wall rounds
For Slippers:
- Stop decreasing earlier for open top
This technique adapts easily.
Making the Sole More Durable
If making adult house slippers:
- Crochet sole with two strands of yarn
- Add a second sole and stitch together
- Sew on suede or non-slip fabric
- Use hot glue dots for grip
Common Mistakes (And Easy Fixes)
Sole Curling
Too few increases → Add more at rounded ends
Sole Ruffling
Too many increases → Reduce 1–2 increases
Shoe Too Tight
Walls too short → Add extra round
Shoe Too Loose
Decrease one extra toe round
Why This Technique Works So Well
Because it mimics how real shoes are constructed:
- Flat base
- Vertical walls
- Shaped front
No complicated pattern reading required.
Once you learn the structure, you can create:
- Ballet flats
- Loafers
- Baby booties
- Slippers
- Sandal-style shoes
All using the same foundation.
Creative Customization Ideas
Make your crochet shoes unique:
- Color block soles
- Stripes
- Decorative buttons
- Crochet flowers
- Ribbed edging
- Picot trim
- Laces
- Ankle cuffs
You can even turn them into tiny sneakers!
Beginner Confidence Tip
Make both shoes at the same time.
Crochet Round 1 of Shoe A
Then Round 1 of Shoe B
This keeps tension consistent.
Time to Complete
- Baby shoes: 1–2 hours
- Adult slippers: 2–4 hours
Very beginner-friendly.
Washing & Care
- Use washable yarn
- Wash cold
- Lay flat to dry
- Avoid high heat
Final Thoughts
This incredibly easy crochet shoe technique removes the fear from shoe-making. Instead of complicated shaping, you follow a logical 3-step structure:
- Build the sole
- Turn and build walls
- Decrease the toe
That’s it.
Once you master this simple construction method, you’ll be able to create endless variations confidently.
Would you like next:
- A full adult slipper pattern with exact stitch counts?
- A baby bootie version?
- A sneaker-style crochet shoe?
- A printable pattern layout?
- A size chart for all ages?
Tell me what you’d love to make next! 😊