 by
by A Detailed Step-by-Step Guide for Beginners
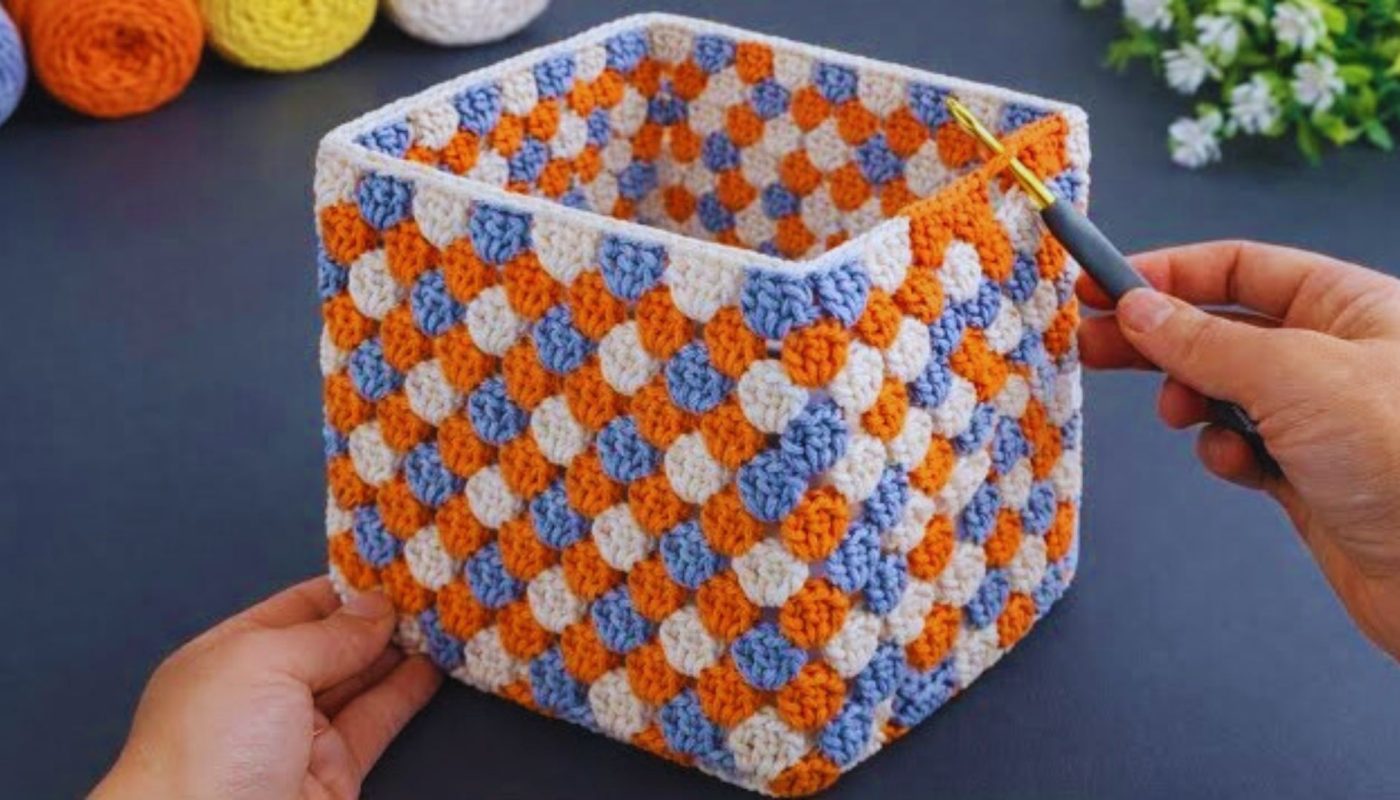
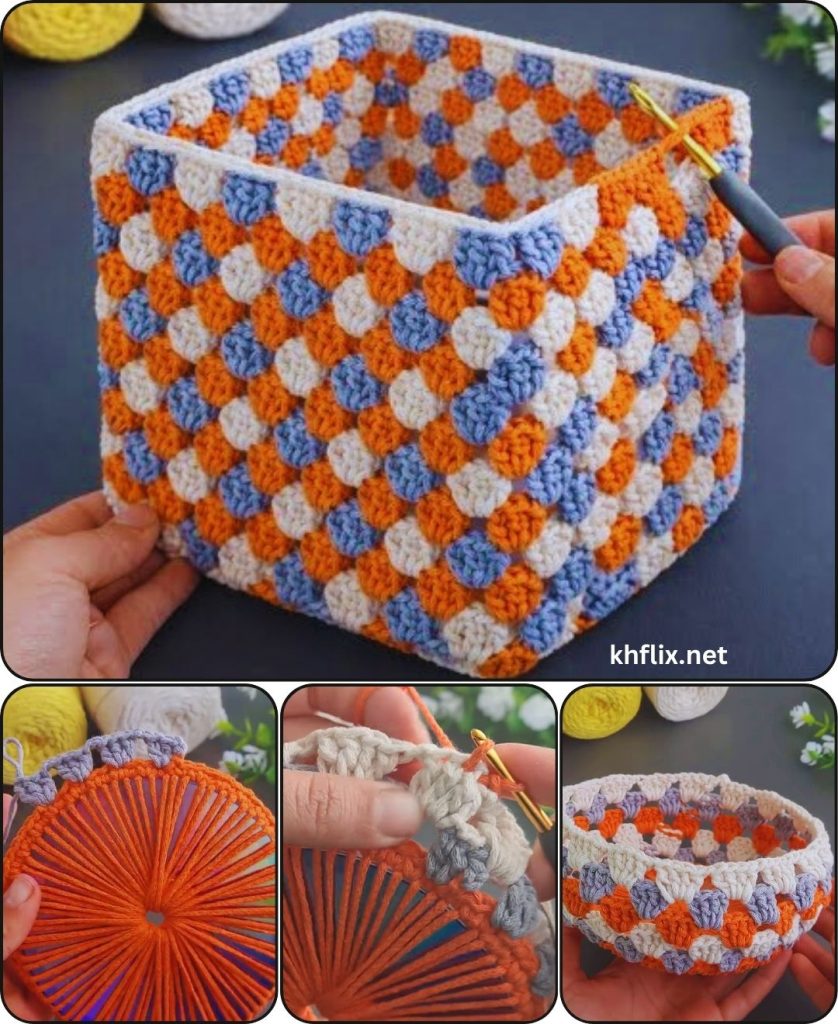
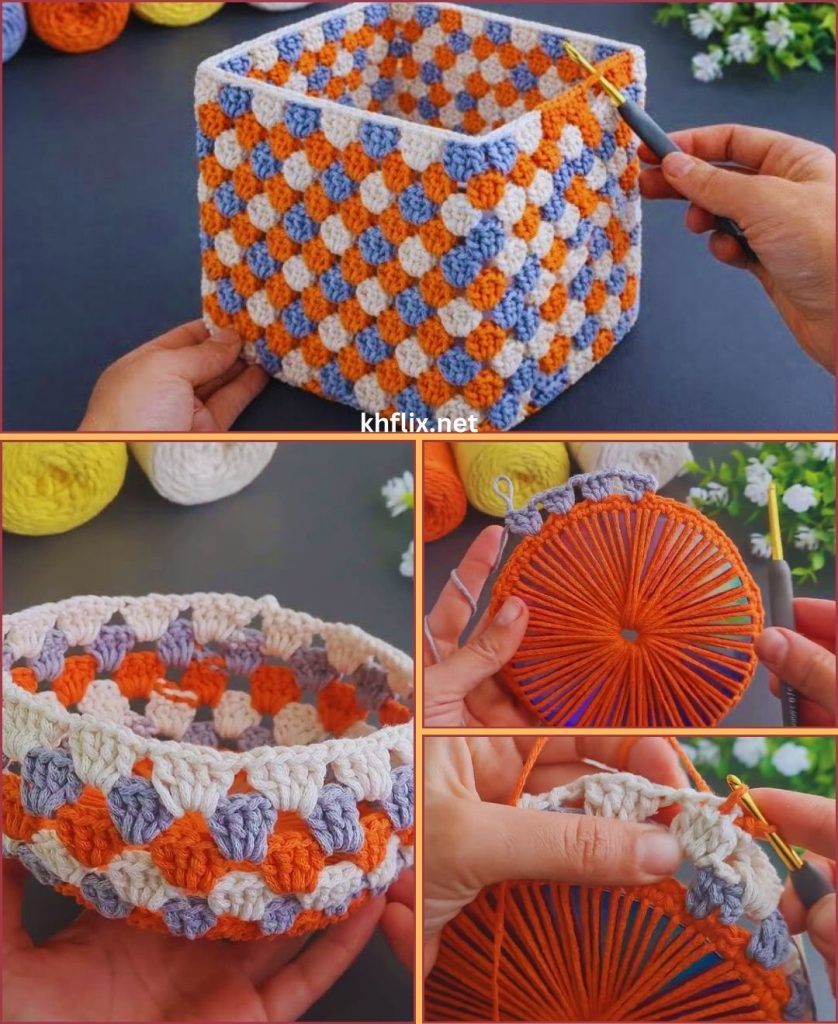
If you’re looking for a practical, decorative, and beginner-friendly crochet project, a crochet box holder with three colors is a perfect choice. It’s simple to make, works up quickly, and adds a beautiful handmade touch to your home.
This box holder can be used for:
- Tissue boxes
- Small storage boxes
- Gift boxes
- Jewelry storage
- Bathroom organizers
- Desk organizers
Using three colors makes it visually interesting while still being very easy to crochet.
Let’s dive into this detailed tutorial! 🧶✨
Why Make a Crochet Box Holder?
A crochet box holder is:
- Beginner-friendly
- Practical and reusable
- Customizable in size
- Great for home décor
- A perfect handmade gift
- Ideal for using leftover yarn
And with three colors, you can create beautiful contrast and style without complicated stitches.
Materials You Will Need
🧶 Yarn
- Medium weight (Worsted / Category 4)
- Cotton yarn is highly recommended (strong and structured)
- Three coordinating colors:
- Color A – Base
- Color B – Body
- Color C – Top edge
Example color combinations:
- Cream + Sage + Brown
- White + Pink + Gray
- Navy + Mustard + White
- Beige + Rust + Olive
🪡 Crochet Hook
- 4.0mm – 5.5mm (check yarn label)
✂️ Other Supplies
- Yarn needle
- Scissors
- Stitch marker (optional)
- Measuring tape
Basic Stitches Used
This is a very easy project using only basic stitches:
- Chain (ch)
- Slip Stitch (sl st)
- Single Crochet (sc)
- Half Double Crochet (hdc) (optional for texture)
If you can single crochet, you can make this box holder.
Choosing Your Box Size
Before starting:
- Measure your box:
- Length
- Width
- Height
Example:
- Length: 9 inches
- Width: 4.5 inches
- Height: 4 inches
We will crochet:
- A flat rectangular base
- Build walls upward
- Add decorative top edge
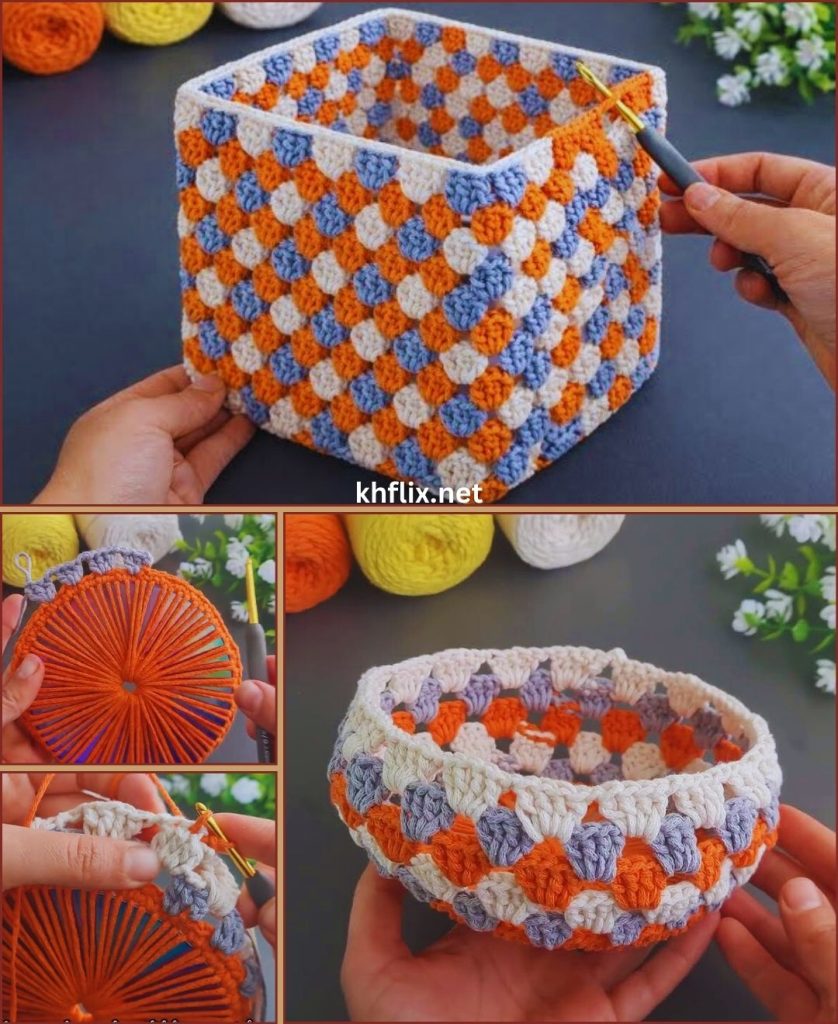
Step-by-Step: Very Easy Crochet Box Holder (Three Colors)
STEP 1: Crochet the Base (Color A)
The base should match the bottom of your box.
- Make a slip knot.
- Chain the number of stitches equal to the length of your box.
- Example: Chain 26 stitches for 9 inches.
- Add 1 extra chain for turning.
Row 1:
- Single crochet in second chain from hook.
- Single crochet across.
- Chain 1 and turn.
Row 2 onward:
- Single crochet across.
- Chain 1 and turn.
Continue until width matches your box bottom.
Fasten off.
You now have a flat rectangle.
STEP 2: Build the Walls (Color B)
Now we work upward around the base.
Attach Color B in any corner.
Round 1:
- Single crochet evenly around entire rectangle.
- Work 3 sc in each corner stitch to help it turn.
- Slip stitch to join.
Important:
Place stitch markers at corners to maintain shape.
STEP 3: Work the Height
Continue working in rounds.
Round 2–Height:
- Single crochet in each stitch around.
- No increases.
- Slip stitch to join each round.
Continue until height matches your box.
Example:
- 8–10 rounds for 4 inches height.
You now have a simple open box shape.
STEP 4: Add Third Color Decorative Top (Color C)
Attach Color C.
Round 1 (Decorative Edge Option 1 – Simple Clean Edge):
- Single crochet around.
- Slip stitch to join.
Round 2:
- Chain 1.
- Work (sc, ch 1, skip 1 stitch) around.
- Slip stitch to join.
This creates a subtle decorative top.
Decorative Edge Option 2 – Slightly Fancy but Easy
In each stitch:
- 1 single crochet
- 1 half double crochet
Alternate stitches around.
This gives texture and a finished look.
Fasten off and weave in ends.
Optional: Add a Top Opening (For Tissue Box)
If making a tissue box holder:
Before building height:
- Mark center of one long side.
- Leave opening space (skip stitches).
- Chain across opening.
- Continue single crochet around.
This creates a top slot for pulling tissues.
Optional: Reinforce for Structure
If you want it more rigid:
- Use tight tension.
- Use cotton yarn.
- Insert plastic canvas inside.
- Add cardboard between lining.
Optional: Add a Lining
For a professional look:
- Cut fabric same size as box holder.
- Sew into box shape.
- Insert inside crochet holder.
- Hand stitch at top edge.
This improves durability and structure.
Why Three Colors Make It Special
Using three colors:
- Defines base clearly
- Adds body contrast
- Highlights decorative top
- Makes simple stitches look elegant
Color placement creates visual balance without complexity.
Color Placement Ideas
🎨 Base Dark + Body Light + Edge Neutral
🌿 Earth Tone Gradient
🌸 Pastel Ombre Effect
🖤 Black Base + Bright Middle + White Top
🤍 All Neutrals for Minimalist Look
Choose high contrast for bold effect, or soft tones for elegant décor.
Common Beginner Mistakes
Walls Slanting
Fix: Make sure no increases after first round.
Corners Too Rounded
Fix: Only increase in first round.
Box Too Loose
Fix: Use smaller hook and tighter stitches.
Uneven Height
Fix: Count rounds carefully.
How Long Does It Take?
- Beginner: 3–5 hours
- Experienced crocheter: 1.5–3 hours
It’s a relaxing weekend project.
Ways to Use Your Crochet Box Holder
This easy crochet box holder is perfect for:
- Tissue box cover
- Makeup organizer
- Bathroom storage
- Desk organizer
- Gift packaging
- Kitchen napkin holder
- Nursery storage
It’s functional and decorative at the same time.
Make It More Stylish
You can also:
- Add wooden buttons
- Sew small crochet flowers
- Add label tag
- Create matching coaster set
- Add braided cord handles
Small details elevate the look instantly.
Final Thoughts
This very easy crochet box holder with three colors is the perfect combination of simplicity and beauty. It uses only basic stitches, simple shaping, and easy color changes — yet the final result looks neat, structured, and stylish.
Start with one box.
Try different color combinations.
Make matching sets for different rooms.
Gift one to a friend.
Once you make one, you’ll want to create more for every room in your home.
If you’d like, I can also provide:
- A printable PDF pattern
- A step-by-step photo guide outline
- A video tutorial script
- A tissue box–specific pattern
- A version with lid
Happy crocheting! 🧶✨