 by
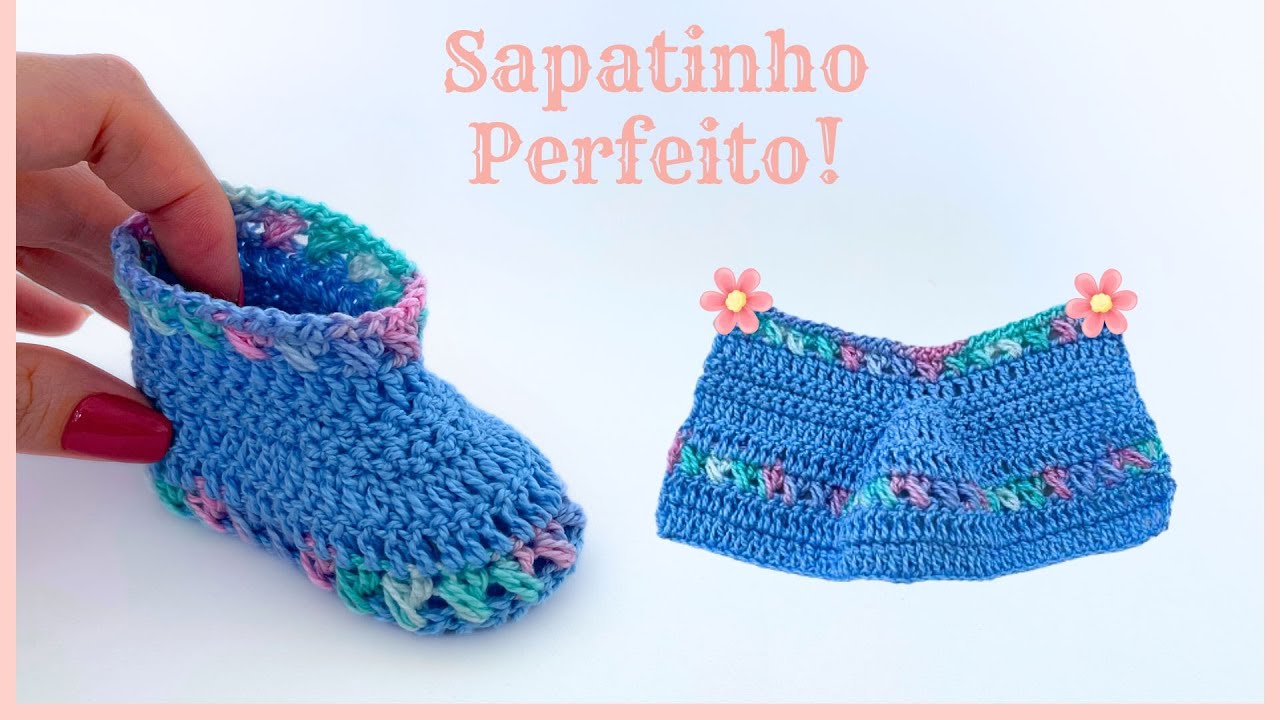
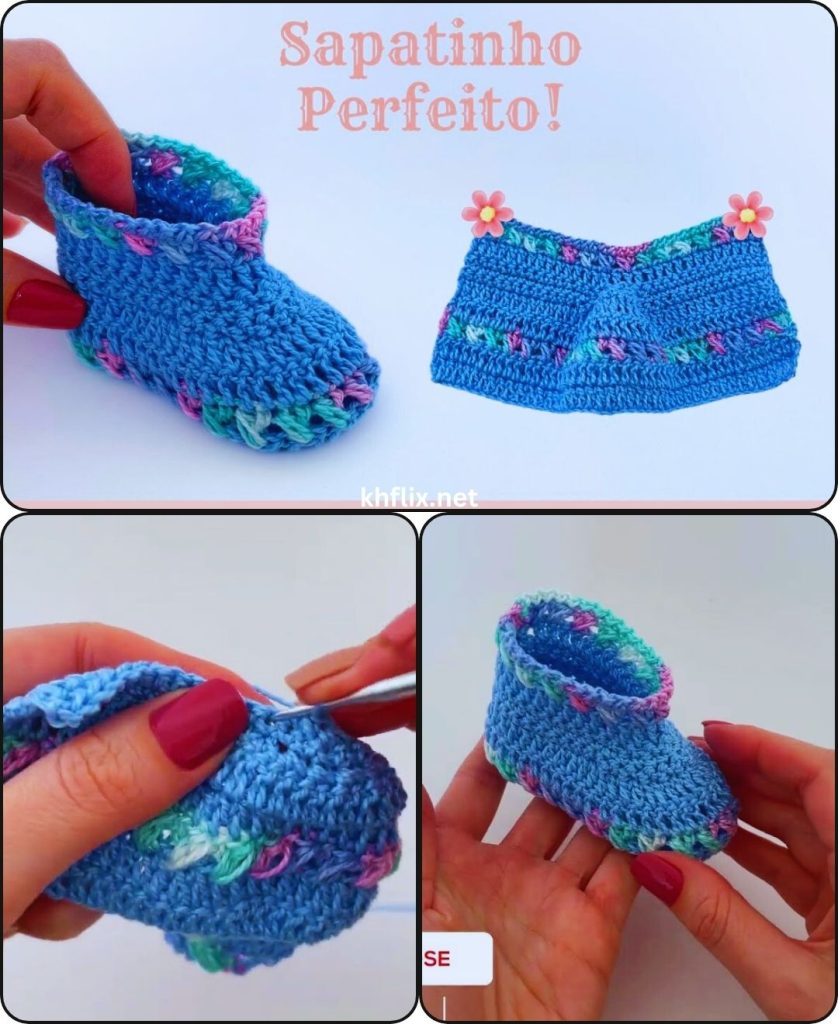
by Crocheting baby shoes is one of the most rewarding and beginner-friendly projects. They are small, quick to finish, and perfect for gifts at baby showers or for your own little one. Using two colors adds a cute contrast and makes the shoes look more stylish without making the pattern complicated.
In this detailed guide, you will learn how to crochet easy and quick two-color baby shoes step by step, including materials, stitches used, sizing tips, and finishing techniques.
1. Why Crochet Baby Shoes?
Crocheted baby shoes are popular among beginners and experienced crocheters because they offer several advantages:
1. Quick to Complete
Most baby shoes take 1–2 hours to finish, making them perfect for a last-minute handmade gift.
2. Minimal Yarn Required
Because the shoes are small, they only require small amounts of yarn—often leftover yarn from other projects.
3. Adorable Designs
Two-color combinations create visually appealing designs such as:
- Contrasting soles and uppers
- Decorative stripes
- Cute trim borders
4. Customizable
You can easily change:
- Colors
- Yarn types
- Shoe size
- Decorative elements (bows, buttons, flowers)
2. Materials You Will Need
Before you start crocheting, gather the following supplies.
Yarn
Choose soft baby yarn that is gentle on delicate skin.
Recommended yarn types:
- Cotton yarn
- Acrylic baby yarn
- Bamboo blend yarn
For this tutorial you will need:
- Color A: Main shoe color
- Color B: Accent color
Approximate amount:
- 30–50 grams total yarn
Crochet Hook
A 3.5 mm – 4 mm hook usually works well for baby shoes.
Choose a hook size recommended for your yarn label.
Other Tools
You will also need:
- Yarn needle
- Scissors
- Stitch markers (optional)
- Measuring tape
3. Basic Crochet Stitches Used
This pattern uses simple stitches, making it suitable for beginners.
Chain (ch)
The chain stitch forms the foundation of most crochet projects.
Slip Stitch (sl st)
Used to join rounds or finish edges.
Single Crochet (sc)
Creates a tight, dense fabric—ideal for soles.
Half Double Crochet (hdc)
Slightly taller than single crochet and works well for shoe uppers.
Double Crochet (dc)
Used occasionally for shaping.
4. Baby Shoe Size Guide
Here is a basic reference chart for baby shoe sizing.
| Age | Sole Length |
|---|---|
| 0–3 months | 9 cm / 3.5 in |
| 3–6 months | 10 cm / 4 in |
| 6–12 months | 11 cm / 4.3 in |
You can adjust size by:
- Using a larger hook
- Adding extra stitches
- Adding additional rounds
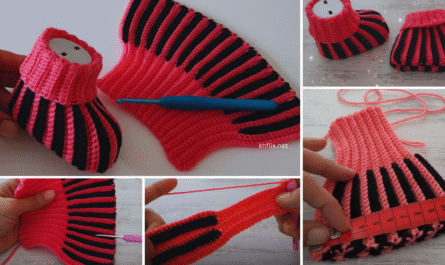
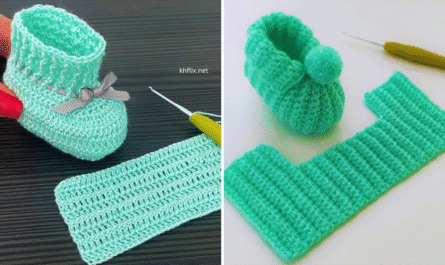
5. Step 1: Crochet the Sole (Color A)
The sole is the base of the baby shoe.
Round 1
- Chain 10 stitches.
- Make 2 single crochet in the second chain from hook.
- Single crochet in the next 7 stitches.
- Make 5 single crochet in the last stitch to turn the corner.
- Work along the other side of the chain:
- Single crochet in the next 7 stitches.
- Make 3 single crochet in the last stitch.
- Join with a slip stitch.
You now have an oval shape forming the sole.
Round 2
- Chain 1.
- Make 2 single crochet in each of the next 2 stitches.
- Single crochet in the next 7 stitches.
- Make 2 single crochet in each of the next 5 stitches.
- Single crochet in the next 7 stitches.
- Make 2 single crochet in the last 3 stitches.
- Join with slip stitch.
The sole will start widening.
Round 3
- Chain 1.
- Work 1 single crochet in each stitch around.
- Join with slip stitch.
Your sole should now look smooth and slightly curved.
6. Step 2: Create the Shoe Sides
Now we begin building the sides of the shoe.
Round 4
Still using Color A:
- Chain 1.
- Work single crochet in the back loop only of each stitch.
- Continue around.
- Join with slip stitch.
This round creates a ridge that separates the sole from the upper shoe.
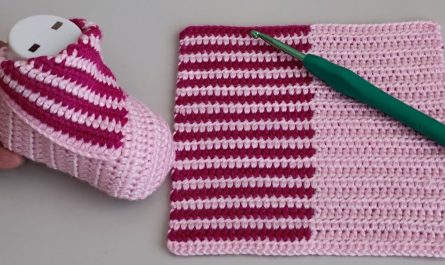
7. Step 3: Switch to Second Color
Now introduce Color B for contrast.
Round 5
- Attach Color B.
- Chain 1.
- Work half double crochet in each stitch around.
- Join with slip stitch.
The shoe walls will start to grow.
Round 6
- Chain 1.
- Half double crochet around again.
- Join with slip stitch.
8. Step 4: Shape the Toe Area
The toe section requires decreases to shape the front of the shoe.
Round 7
- Chain 1.
- Half double crochet in the first 10 stitches.
- Work hdc2tog (half double crochet two together) across the next 8 stitches.
- Half double crochet in the remaining stitches.
- Join with slip stitch.
Round 8
- Chain 1.
- Half double crochet in the first 8 stitches.
- Work hdc2tog across the next 6 stitches.
- Half double crochet in the remaining stitches.
- Join with slip stitch.
Now the toe should look nicely rounded.
9. Step 5: Decorative Top Edge
Switch back to Color A for the finishing edge.
Round 9
- Attach Color A.
- Chain 1.
- Work single crochet around the top edge.
For decoration you can also do:
- Crab stitch
- Picot edge
- Shell stitch
Finish with slip stitch.
10. Step 6: Fasten Off and Weave Ends
After completing the final round:
- Cut yarn leaving a 10–12 cm tail.
- Pull yarn through the loop to secure.
- Use a yarn needle to weave in loose ends inside the shoe.
Make sure no yarn tails are exposed.
11. Optional Decorations
You can personalize the baby shoes with cute details.
Bows
Small crocheted bows sewn onto the top.
Buttons
Add decorative buttons on the side.
Flowers
Crochet tiny flowers and attach to the front.
Straps
Add a Mary-Jane style strap with a button.
12. Best Color Combinations
Two-color shoes look best with gentle contrasts.
Popular combinations include:
- White + Baby Pink
- Cream + Light Blue
- Gray + Yellow
- Mint + White
- Beige + Brown
Using neutral soles with colorful tops is also very trendy.
13. Tips for Beginners
Keep Stitches Tight
Loose stitches can make the shoes lose their shape.
Count Your Stitches
Always count stitches at the end of each round.
Use Stitch Markers
This helps track the start of each round.
Practice the Sole First
The sole shape determines the final look.
14. Common Mistakes to Avoid
Skipping Stitches
Missing stitches causes uneven edges.
Using Rough Yarn
Baby skin is sensitive, so always use soft yarn.
Incorrect Hook Size
Too large hooks produce loose shoes.
15. Washing and Care
Baby shoes need regular cleaning.
Recommended care:
- Hand wash in cold water
- Use mild detergent
- Lay flat to dry
- Avoid machine drying
This helps maintain shape and softness.
16. Why Handmade Baby Shoes Are Special
Handmade baby shoes carry emotional value that store-bought items cannot match. Each pair is crafted with time, attention, and care.
They are perfect for:
- Baby shower gifts
- Newborn photography
- Keepsakes
- First wardrobe items
Many families keep crocheted baby shoes as treasured memories for years.
17. Final Thoughts
Crocheting easy and quick two-color baby shoes is a wonderful project for beginners and experienced crocheters alike. The pattern is simple, customizable, and can be completed quickly.
With just basic stitches, two colors of yarn, and a little creativity, you can create adorable baby shoes that are both functional and beautiful.
Once you master the basic technique, you can experiment with:
- Different color patterns
- Textured stitches
- Decorative accessories
- Various baby sizes
Before long, you may find yourself crocheting entire collections of baby footwear for gifts, markets, or personal use.