by
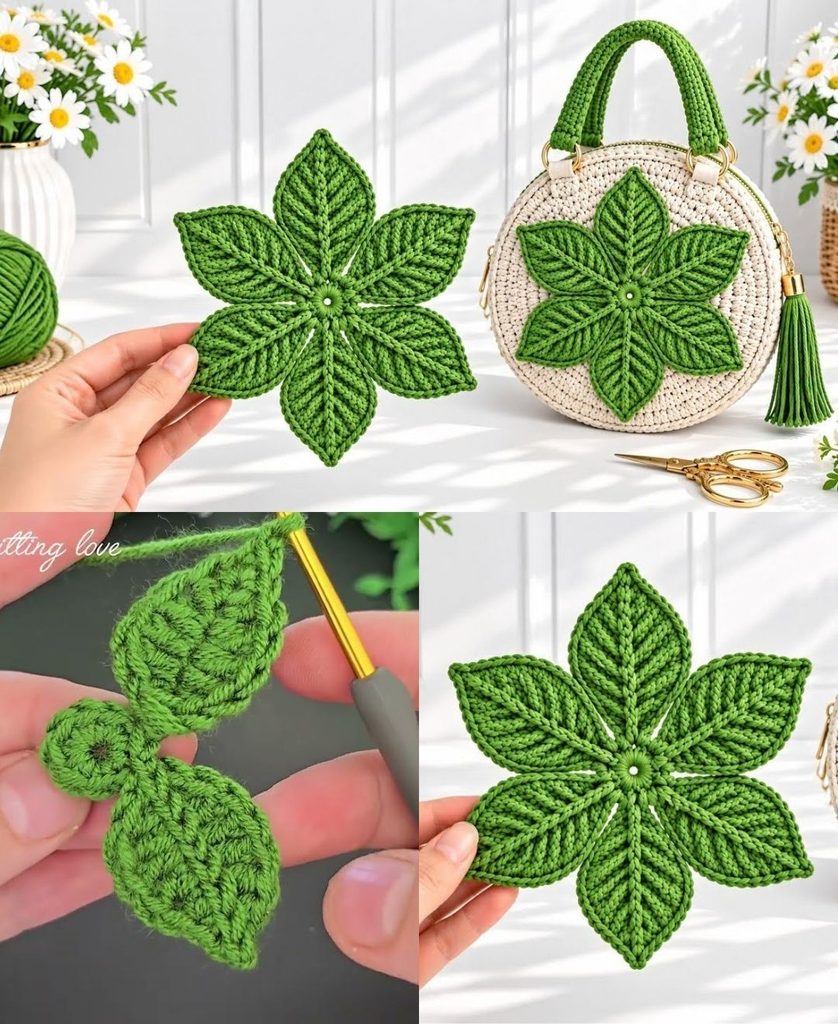
by Creating a Stunning Leaf Flower is one of the most delightful and ingenious techniques in crochet. Instead of making separate flowers and leaves and sewing them together later, this method allows you to crochet lush, organic leaves that seamlessly transition into or cradle a blooming flower all in one continuous flow.
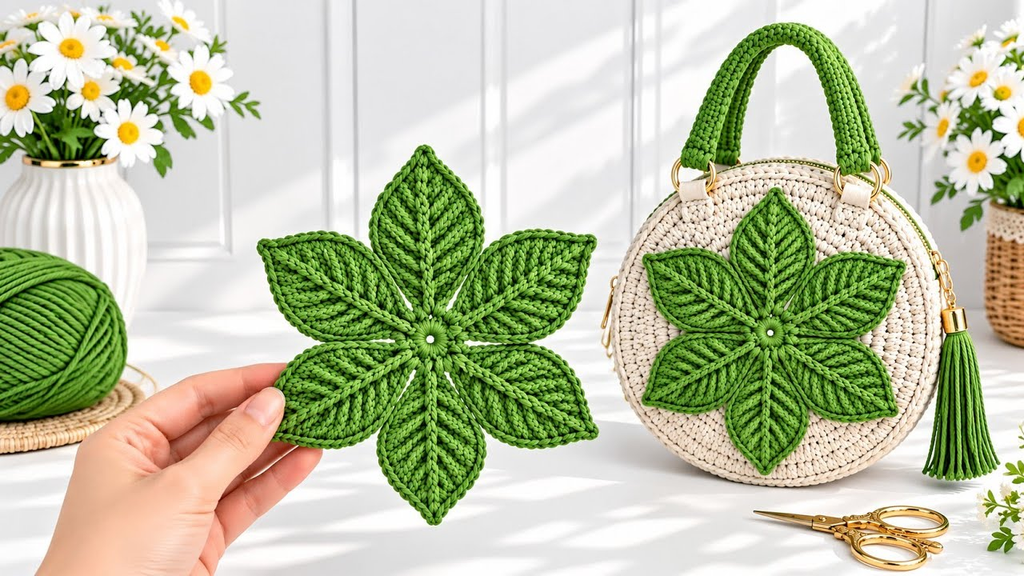
Whether you want to use it as a standalone appliqué for garments, turn it into a delicate coaster, or string multiple pieces together for a stunning table runner, here is your detailed, step-by-step masterclass on how to crochet a beautiful leaf flower with an ultra-easy approach.
🧶 The Leaf Flower Toolkit
- Yarn:Sport weight or DK 100% cotton yarn. Cotton is ideal for botanical motifs because it yields crisp stitch definition, ensuring the leaf points and petal edges stay sharp and structured.
- Palette: A vibrant floral color (such as soft pink, buttery yellow, or lavender) for the center blossom, paired with a rich botanical green for the surrounding leaves.
- Hook: 3.0 mm or 3.5 mm. A snug hook keeps your tension neat and gives the botanical shapes clean architectural form.
- Extra Supplies: Tapestry needle for weaving in ends, and blocking pins.
🌿 Step 1: Crafting the Central Blossom
We will start by creating a compact, vibrant flower center that sits snugly inside the leaf base.
- The Center Ring:
- With your flower color (e.g., pink or yellow),
ch 4and join with asl stto form a tiny ring.
- With your flower color (e.g., pink or yellow),
- Round 1 (The Petals):
ch 1, work 8 sc (single crochet) directly into the ring. Join with asl stto the first sc. Fasten off your flower color.

🍃 Step 2: Crocheting the Seamless Leaf Base Around the Flower
Now, we will introduce the green yarn directly behind or around the flower center to bloom into organic, pointed leaves.
- Attaching the Green Yarn:
- Join your Botanical Green yarn into any back loop or space directly behind the flower center petals.
- Building the First Leaf Foundation:
ch 8.- Working back down the chain: work
1 scin the 2nd chain from the hook,1 hdcin the next,1 dcin the next 3 chains,1 hdc, and1 sc. - You have just created one half of a sharply tapered leaf!
- The Leaf Tip & Second Side:
- At the tip of the leaf, work
ch 1(to create a sharp point), and work down the opposite side of the chain mirroring your stitches:1 sc,1 hdc,3 dc,1 hdc,1 sc. - Anchor the leaf securely to the base flower with a
sl stinto the next stitch of the central ring.
- At the tip of the leaf, work
- Repeating for Multi-Leaf Symmetry:
- Repeat this exact chain-and-stitch sequence 3 or 4 more times evenly spaced around the center flower to create a gorgeous frame of 4 to 5 lush, pointed leaves cradling your blossom. Fasten off and weave in your ends.

✨ Step 3: Shaping and Adapting Your Leaf Flower
1. The Steam-Blocking Magic
Because botanical motifs rely heavily on symmetry, pin your finished leaf flower flat to a blocking board. Mist it heavily with water or steam, gently pulling the leaf tips outward so they form crisp, pointed angles. Let it dry completely.
2. Project Ideas for Your Leaf Flower
- As an Appliqué: Sew your leaf flower onto a plain straw sun hat, a crochet cardigan, or a canvas tote bag for an instant boutique upgrade.
- As a Coaster: Scale up your yarn to a thicker cotton or work a slightly wider foundation chain for your leaves to create an exquisite, functional botanical coaster.
- As a Table Runner: Crochet a dozen of these leaf flowers and join them edge-to-edge with a flat slip-stitch seam to create a stunning, organic table runner that brings an eternal spring garden straight to your dining room.
Video tutorial: