 by
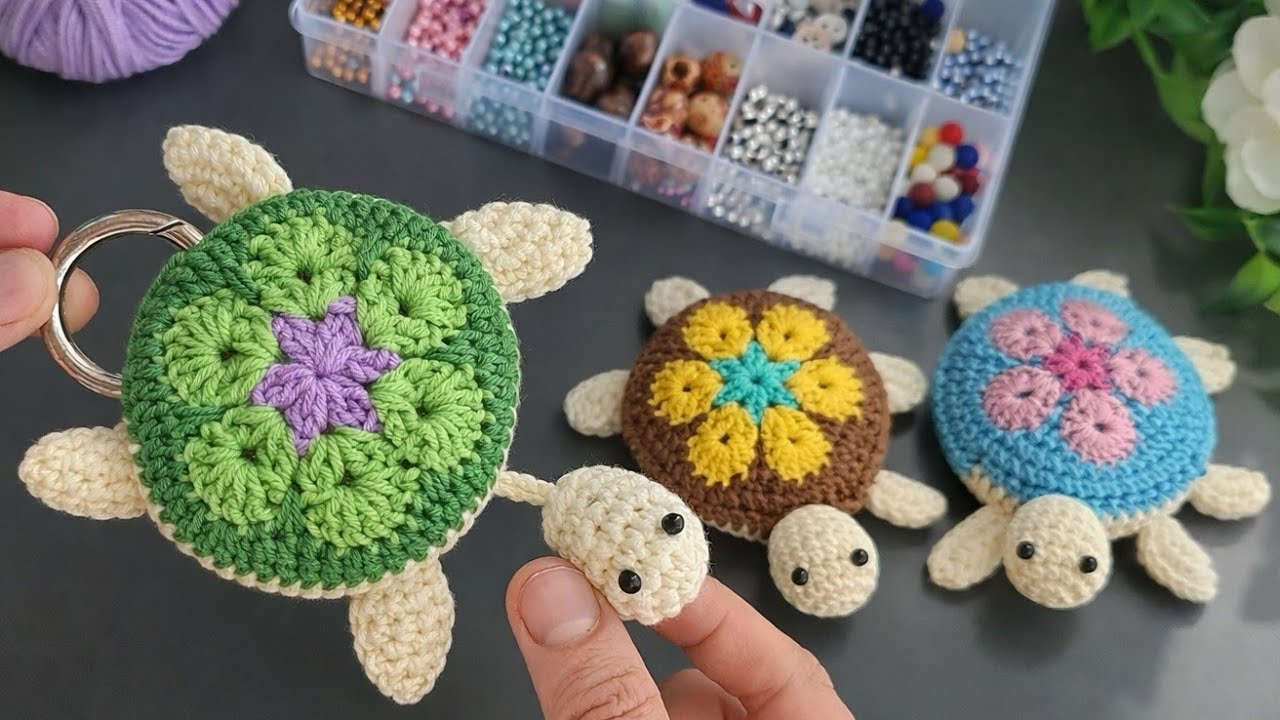
by Creating a Mini Crochet Turtle Keychain is one of the most popular, adorable, and addictive amigurumi projects in the fiber arts world. With its domed shell, tiny flippers, and sweet little head, this pocket-sized creation works up in under an hour and makes a delightful backpack charm, bag tag, or handmade gift.
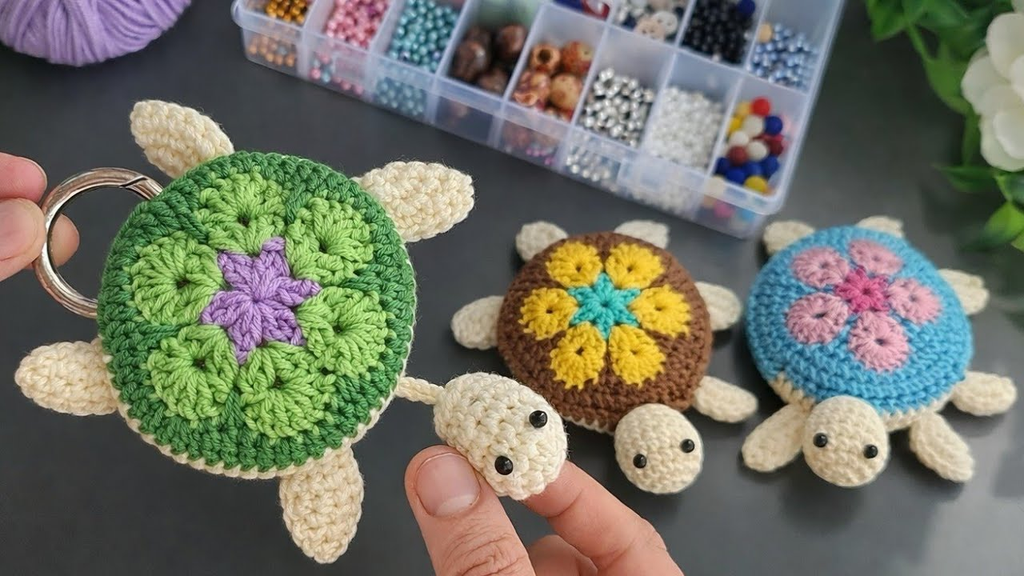
Here is your detailed, step-by-step masterclass on how to crochet a charming mini turtle keychain from scratch.
🧶 The Mini Turtle Keychain Toolkit
- Yarn:100% Mercerized Cotton Yarn or Lightweight Chenille/Velvet Yarn (Sport weight or DK / Weight 3 or 4).
- Palette: A vibrant or earthy color for the turtle shell (such as sage green, ocean teal, dusty rose, or mustard yellow), and a soft contrasting neutral for the body/head (such as cream, beige, or soft sage).
- Hook: 2.5 mm or 3.0 mm (for standard cotton yarn) or a 3.5 mm (if using plush chenille yarn). A snug hook ensures your stitches are tight so the stuffing won’t poke through.
- Extra Supplies:
- Polyfill fiber stuffing.
- Tapestry needle and sharp scissors.
- A pair of 6mm safety eyes (or black embroidery floss if you prefer to embroider sleepy closed eyes).
- A mini keyring with a jump ring or lobster claw clasp.
🐢 Step 1: Crocheting the Turtle Body (Head & Flippers)
We begin by creating the inner body piece, which includes the tiny head, two front flippers, and two back flippers all worked into a compact base.
- Start with your Body Color (e.g., cream). Make a Magic Ring.
- Round 1: Work 6 single crochets (sc) into the magic ring. Pull closed and join with a slip stitch (
sl st) (or continue working in continuous spirals if preferred). - Forming the Head and Flippers (Working outward):
- The Head:
ch 3, work1 scin the 2nd chain from the hook,1 scin the next chain, and slip stitch right back into the base ring. - The Front Flippers:
ch 4, work1 scin each chain down, and slip stitch back into the base ring. Repeat this to create the second front flipper. - The Back Flippers:
ch 3, work1 scin each chain down, and slip stitch back into the base ring. Repeat for the second back flipper.
- The Head:
- Fasten off your body yarn, leaving a short tail. (Your flat little star-like body piece is complete!)

🛡️ Step 2: Crocheting the Domed Shell (Top and Bottom)
The signature feature of the turtle is its puffed, hexagonal or circular shell.
- Start with your Shell Color (e.g., sage green). Make a Magic Ring.
- Round 1: Work 6 sc into the magic ring. Join with a
sl st(or work in a spiral). - Round 2: Work 2 sc in every stitch around (12 stitches total).
- Round 3:
Work 1 sc in next stitch, 2 sc in next stitchrepeat around (18 stitches total). - Round 4:
Work 1 sc in next 2 stitches, 2 sc in next stitchrepeat around (24 stitches total). - Fasten off the top shell piece, leaving a 10-inch yarn tail for sewing.
- (Optional for a cleaner look): Crochet a flat under-belly circle by repeating Rounds 1 through 3 in your body color, fastening off flat.

🪡 Step 3: Assembly and Stuffing
- Attaching Eyes: If using safety eyes, insert them into the head of your turtle body piece between the rows, securing the backs firmly. (Alternatively, embroider cute little closed eyelashes with black thread).
- Stacking the Shell: Place your turtle body piece flat on top of your flat under-belly (or directly onto the bottom of the domed shell). Sandwich the head and flippers so they poke out neatly between the top shell and bottom edge.
- Stuffing: Take your domed top shell and place it directly over the body. Before you close it completely, insert a tiny pinch of polyfill fiber stuffing inside the shell to give your turtle a plump, adorable 3D puff.
- Seaming: Using your tapestry needle and the long yarn tail from the shell, whip-stitch or mattress-stitch the top shell securely to the bottom base, trapping the body, head, and flippers firmly in place. Weave in all loose ends.

🔑 Step 4: Adding the Keychain Hardware
- Take your mini metal jump ring or lobster claw keychain clasp.
- Securely attach it by sliding it through a few sturdy stitches right at the top center of the turtle’s shell (making sure it hangs balanced and upright).
- Pinch your jump ring closed with pliers. Your mini turtle keychain is officially ready to clip onto your keys or backpack!
✨ Pro-Tips for Success
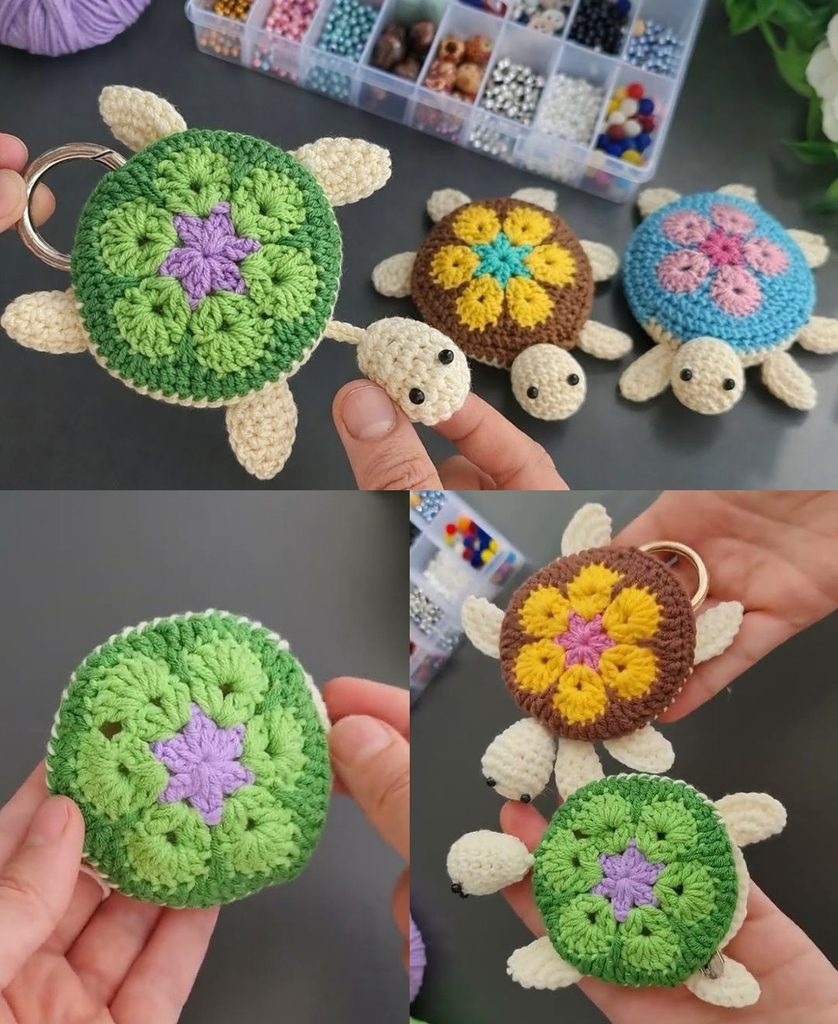
- Play with Colors: Make a whole family of pastel turtles using variegated yarn for the shells to create a gorgeous, multicolored collection!
- No-Sew Variation: If you prefer amigurumi that requires zero sewing, you can crochet the top shell and bottom belly directly together by inserting your hook through both pieces simultaneously while stuffing, crocheting a single crochet border all the way around the rim.