 by
by Making a multicolor baby blanket from crochet squares is a wonderful and rewarding project! It’s perfect for beginners, allows for endless color combinations, and is great for using up yarn scraps. The modular nature means you can work on small, portable pieces before joining them all together.
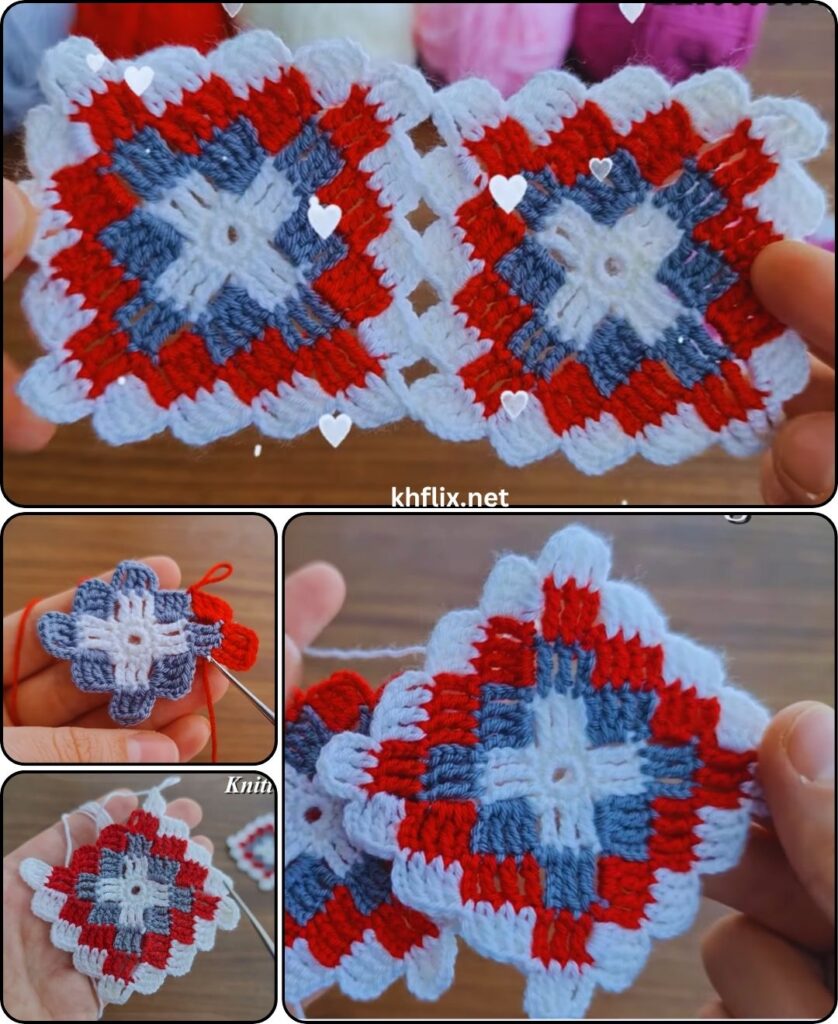
This tutorial will focus on creating a classic Granny Square, which is a popular and versatile choice for multicolor blankets, and then guide you through assembling them into a beautiful baby blanket.

How to Make a Baby Blanket: Crochet Squares Multicolor Tutorial
Project Overview: This tutorial will teach you how to crochet individual granny squares in various colors and then join them to create a soft, vibrant, and cuddly baby blanket. The blanket will be finished with a simple border.
Skill Level: Beginner-Intermediate (Requires knowledge of chain, slip stitch, double crochet, and working in the round. Joining squares adds an intermediate step).
Finished Blanket Dimensions (Approximate):
- Using 6-inch (15 cm) squares and a 5×5 grid: Approximately 30 x 30 inches (76 x 76 cm) – a great size for a car seat, stroller, or tummy time.
- You can easily adjust the size by making more squares.
Materials You’ll Need:
- Yarn:
- DK Weight (#3 Light Worsted) or Worsted Weight (#4 Medium) Baby-Friendly Yarn: Acrylic, cotton blend, or superwash merino wool are excellent choices. Choose a variety of colors (4-8 different colors are great for a multicolor look).
- Total Yarn Needed: Approximately 1000-1500 yards (915-1370 meters), depending on square size and final blanket dimensions. Each 6-inch square uses about 20-30 yards.
- Why these yarns? Softness, washability, and durability are key for baby blankets.
- Crochet Hook:
- Size G/4.0mm (for DK weight yarn) or H/5.0mm (for worsted weight yarn), or the hook size recommended on your yarn label to achieve a soft, flexible fabric with good drape.
- Yarn Needle (Tapestry Needle): Essential for weaving in loose yarn ends and joining squares.
- Scissors
- Stitch Markers (Optional): Can be helpful for marking corners or the beginning of rounds.
Gauge (Crucial for Consistent Square Size!):
Achieving consistent square size is important for easy joining.
- For a 6×6 inch (15×15 cm) Granny Square: Your square should measure 6 inches after 4 rounds of the pattern below (excluding the initial chain). This will vary slightly based on yarn and hook. Adjust your hook size if your squares are too big (go down a hook size) or too small (go up a hook size).
Abbreviations Used:
- ch: chain
- sl st: slip stitch
- sc: single crochet
- dc: double crochet
- sp: space
- ch-sp: chain space
- FO: fasten off
- MR: Magic Ring (also known as Magic Circle or Adjustable Ring)
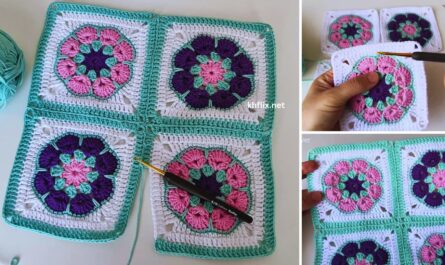
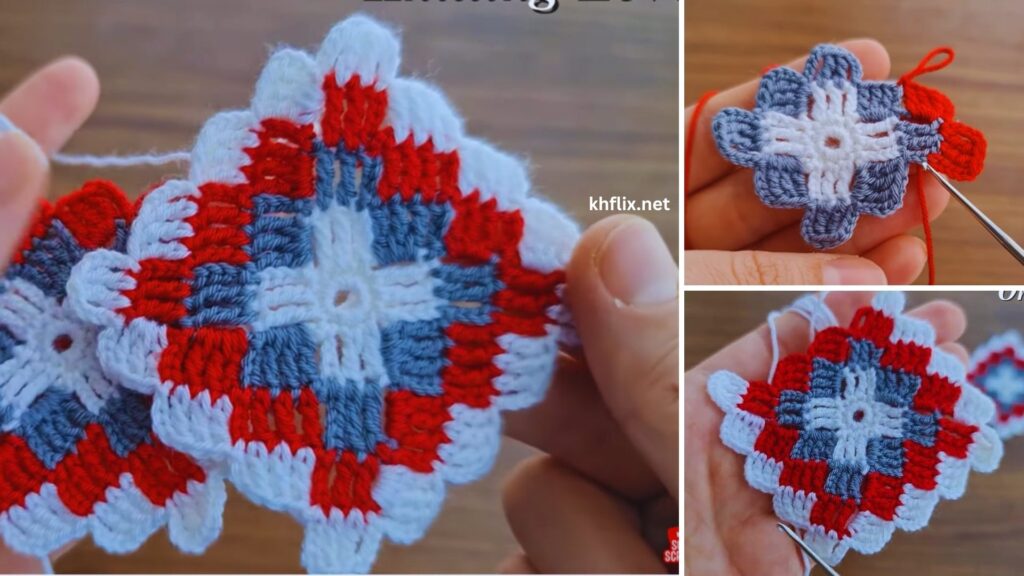
Understanding Granny Square Construction & Multicolor:
A classic granny square is built in rounds from the center out. It uses groups of 3 double crochet (dc) stitches to form “clusters,” separated by chain spaces. The corners are typically formed by a cluster, a chain space, another cluster, and another chain space (or just a larger chain space like ch 2 or ch 3).
For a multicolor blanket, you can:
- Change color after each round of a square (as detailed below).
- Make entire squares in a single color, then arrange them for a patchwork effect.
- Combine both methods!
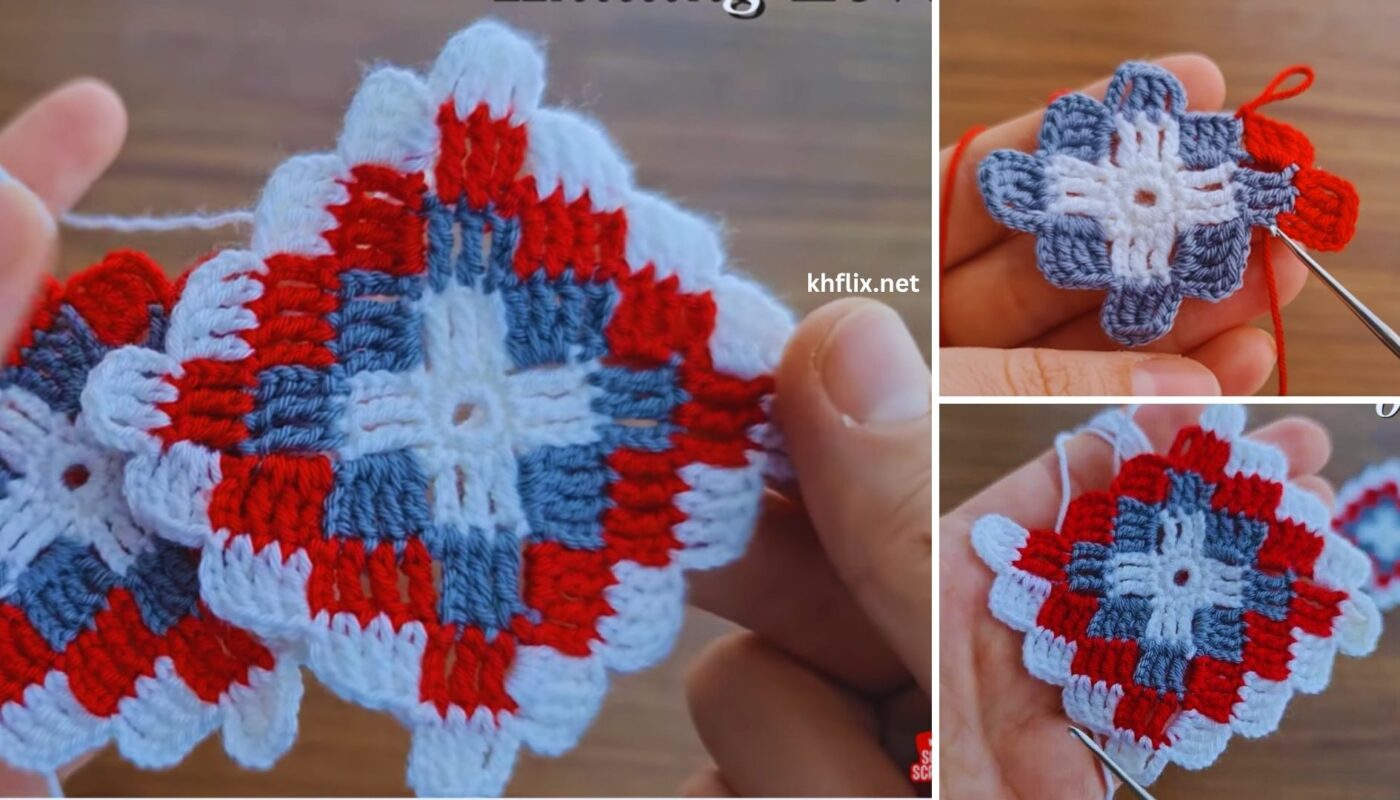
How to make neat Color Changes at the end of a round:
- When you are making the very last dc of the round with the current color, stop when you have 2 loops left on your hook.
- Drop the current color.
- Pick up the new color, yarn over with the new color, and pull it through the remaining 2 loops on your hook to complete the dc.
- Then, proceed with the sl st to join the round, and start the next round with the new color.
- Cut the old color yarn, leaving a tail (about 4-6 inches) to weave in securely later.
Part 1: The Basic Crochet Granny Square Pattern (Make Many!)
We’ll use a 4-round granny square for a 6-inch finished square.
Starting (Choose Option A or B):
Option A: Starting with a Magic Ring (Recommended for a tight center)
- With Color 1, make a Magic Ring (MR).
- Round 1: Ch 3 (counts as 1st dc). Work 2 dc into the MR. (Ch 3, 3 dc into the MR). Repeat from * to * 2 more times (total of 4 clusters). Ch 3, sl st to the top of the initial ch-3 to join. Pull the MR tail tight to close the center. (Total: 4 clusters of 3 dc, 4 ch-3 corner spaces).
- Change to Color 2 on the last pull-through of the final sl st.
Option B: Starting with Chain 4 Method (Alternative)
- With Color 1, Ch 4. Sl st into the first ch to form a ring.
- Round 1: Ch 3 (counts as 1st dc). Work 2 dc into the ring. (Ch 3, 3 dc into the ring). Repeat from * to * 2 more times. Ch 3, sl st to the top of the initial ch-3 to join. (Total: 4 clusters of 3 dc, 4 ch-3 corner spaces).
- Change to Color 2 on the last pull-through of the final sl st.
Continuing Granny Square Rounds (for both options):
Round 2: (With Color 2)
- Ch 3 (counts as 1st dc).
- Work 2 dc into the same ch-3 sp where you joined. (This is your first cluster).
- (3 dc, ch 3, 3 dc) into the next ch-3 corner sp. (This creates a corner).
- Repeat from * to * 2 more times for the remaining corners.
- Work 3 dc into the very first ch-3 sp (where you started).
- Ch 3, sl st to the top of the initial ch-3 to join. (Total: 8 clusters of 3 dc, 4 ch-3 corner spaces).
- Change to Color 3 on the last pull-through of the final sl st.
Round 3: (With Color 3)
- Ch 3 (counts as 1st dc). Work 2 dc into the same ch-3 sp where you joined.
- Work 3 dc into the next side space (the space between the 3-dc clusters from the previous round, NOT a corner).
- (3 dc, ch 3, 3 dc) into the next ch-3 corner space.
- Work 3 dc into the next side space.
- Repeat from * to * 2 more times, completing the remaining sides and corners.
- Work 3 dc into the very first ch-3 sp (where you started).
- Ch 3, sl st to the top of the initial ch-3 to join. (Total: 12 clusters of 3 dc, 4 ch-3 corner spaces).
- Change to Color 4 on the last pull-through of the final sl st.
Round 4: (With Color 4)
- Ch 3 (counts as 1st dc). Work 2 dc into the same ch-3 sp where you joined.
- Work 3 dc into the next side space.
- Work 3 dc into the next side space.
- (3 dc, ch 3, 3 dc) into the next ch-3 corner space.
- Work 3 dc into the next side space.
- Work 3 dc into the next side space.
- Repeat from * to * 2 more times, completing the remaining sides and corners.
- Work 3 dc into the very first ch-3 sp (where you started).
- Ch 3, sl st to the top of the initial ch-3 to join. (Total: 16 clusters of 3 dc, 4 ch-3 corner spaces).
- FO, leaving a tail for weaving in.
Congratulations! You’ve made one granny square!
- It should measure approximately 6 inches (15 cm) from side to side.
Part 2: Calculating Blanket Size & Making Many Squares
- Determine Your Desired Blanket Size:
- Receiving/Stroller Blanket: ~30 x 30 inches (76 x 76 cm) to 36 x 36 inches (91 x 91 cm)
- Crib Blanket: ~36 x 50 inches (91 x 127 cm)
- Calculate Number of Squares:
- If your squares are 6 inches, for a 30×30 inch blanket, you’ll need 5 squares across by 5 squares down = 25 squares total.
- For a 36×36 inch blanket (6×6 grid) = 36 squares total.
- Make Your Squares: Crochet the required number of squares in your chosen multicolor scheme. Try to distribute your colors evenly for a balanced look. Don’t worry about weaving in all ends yet – you can do this after joining or as you go.
Part 3: Arranging and Joining the Squares
Once you have all your squares made, it’s time to assemble them!
- Arrange Your Squares: Lay out all your finished squares on a flat surface (floor or large table) in the desired pattern. Experiment with color placement until you are happy with the layout. Take a photo of your arrangement for reference.
- Blocking (Optional but Recommended): Lightly steam block each square or wet block them and pin them to size. This makes them perfectly uniform and easier to join.
- Joining Method (Slip Stitch Join – Beginner-Friendly): This creates a slightly raised, neat seam.
- Prepare: Put two squares right sides facing each other, aligning the stitches along the edge you want to join.
- Join Yarn: Join your joining yarn (you can use one of your blanket colors or a neutral color) with a sl st through both loops of the first stitch on both squares.
- Slip Stitch: Sl st through both loops of the next corresponding stitch on both squares.
- Repeat from * to * all the way across the edge.
- Working into Corners: When you reach a corner ch-sp, work a sl st into the ch-sp through both squares, then continue into the next stitch.
- Join Rows/Columns First: It’s often easiest to join all squares in vertical columns first, then join those columns together horizontally.
- Weave in Ends: Weave in the joining yarn tails as you finish each seam.
- Other Joining Methods:
- Single Crochet Join: Similar to slip stitch, but use sc for a more pronounced seam.
- Whip Stitch (Sewing Method): Thread yarn onto a yarn needle. Hold squares right sides facing, and use the needle to sew through both loops of each corresponding stitch along the edge. This creates a flatter seam.
- Join-as-you-go: An advanced technique where you join squares as you crochet the final round of each square. Not recommended for absolute beginners.
Part 4: Adding a Border
A border gives your blanket a polished, finished look. A simple single crochet border is perfect for beginners.
- Join Yarn: Join your chosen border color yarn (Color A or a new color) with a sl st anywhere along the edge of your assembled blanket. It’s often easiest to start in a corner.
- Round 1 (Single Crochet Border):
- Ch 1 (does NOT count as a stitch).
- Work sc stitches evenly around the entire perimeter of the blanket.
- Along the sides of squares: Work approximately 1 sc for each sc/hdc/dc stitch along the side of the clusters, and 1 sc into any sl st joins. Aim for consistency to prevent puckering or rippling.
- In the corners of the blanket: Work (sc, ch 1, sc) all into the corner ch-sp.
- Where squares meet: When you come to where two squares are joined, work 1 sc into the joining stitch/space to bridge the gap neatly.
- Continue sc around the entire blanket. Sl st to the first sc to join.
- Round 2 (Optional – for a thicker border): Ch 1. Sc in each sc around. Work (sc, ch 1, sc) in each corner ch-1 sp. Sl st to the first sc to join.
- You can repeat Round 2 for as many rounds as you like to create a wider border.
- Fasten Off: Cut yarn, leaving a tail. Weave in the tail securely.
Part 5: Final Finishing
- Weave in All Remaining Ends: This is the most crucial (and often least favorite!) part. Take your time to weave in all yarn tails securely. A well-woven-in end will prevent your blanket from unraveling.
- Final Blocking (Optional but Recommended): Once the blanket is fully assembled and all ends are woven in, you can give it a final block. Lightly steam it, or gently wash it and lay it flat to dry, shaping it to the correct dimensions. This will even out stitches and seams, giving your blanket a beautiful drape and professional finish.
Your beautiful multicolor crochet baby blanket is now complete and ready to be loved!